Installation
Base Platform - Configure file size limit and file extensions
To install Maptaskr for Dynamics 365 & Power Apps, you will need to configure the file size limit and files extensions on the base platform.
An overview of these settings can be found at the following Microsoft Learn page - Enable file attachments1.
Configure file size limit
- Classic Style Settings
- Power Platform Admin Settings
The file size limit is configured from the classic D365 style System Settings page. This page can be accessed from the classic style settings.
To access the classic style settings from a Model-Driven App
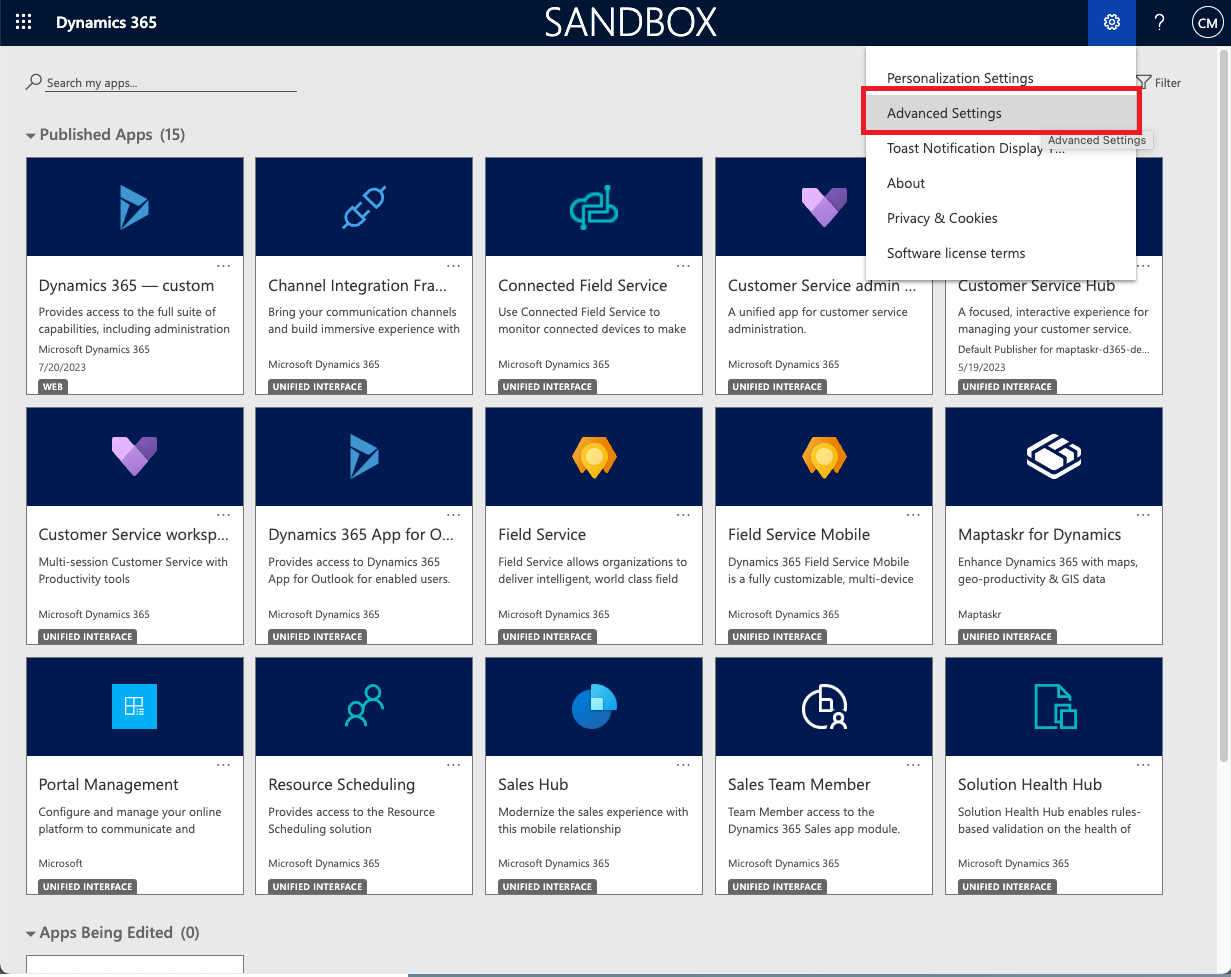
- Click on the cogwheel on the top right corner of the main Dynamics 365 ribbon.
Figure 2: Advanced Settings
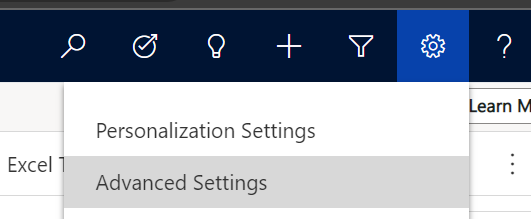
- In the dropdown that appeared select
Advanced Settings. - You should now be in the classic style settings.
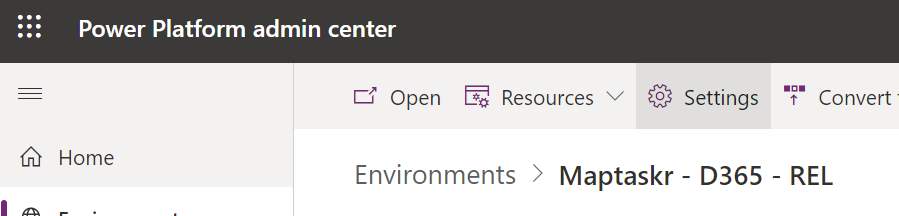
To access the classic style settings from the Power Platform admin center
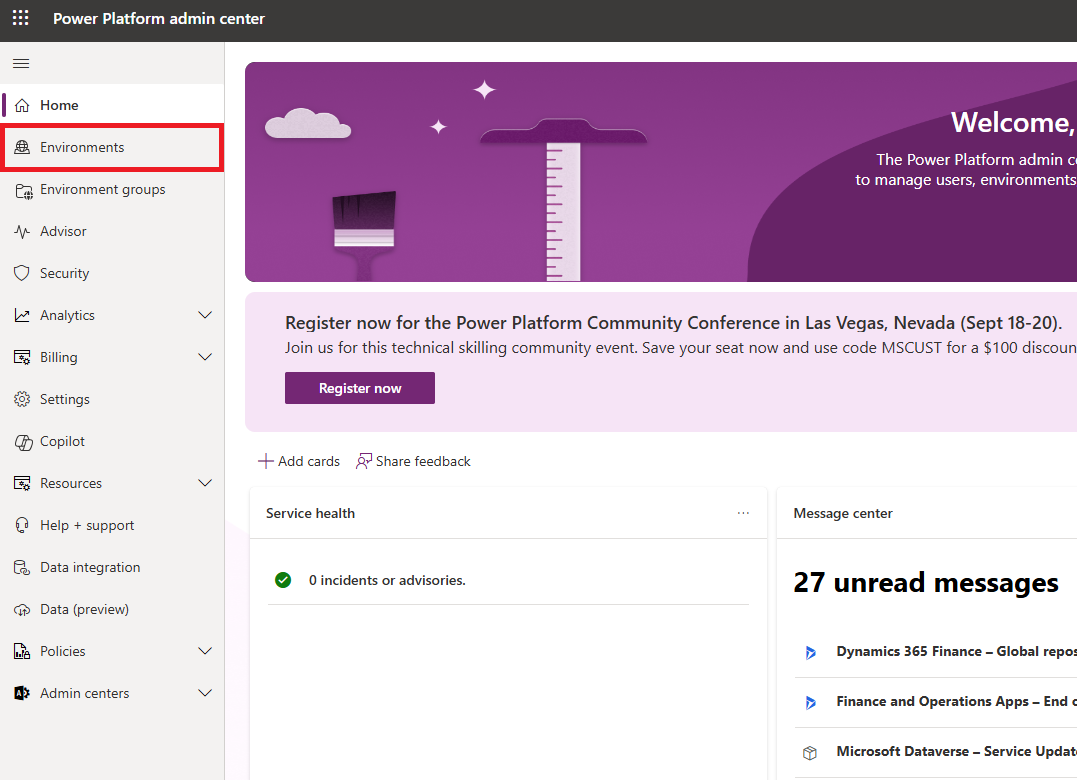
- Select your environment, select "Settings" from the environment ribbon.
Figure 3: Power Platform admin center - Settings
- Select the
Resourcesdrop-down and then selectAll legacy settings.

- You should now be in the classic style settings.
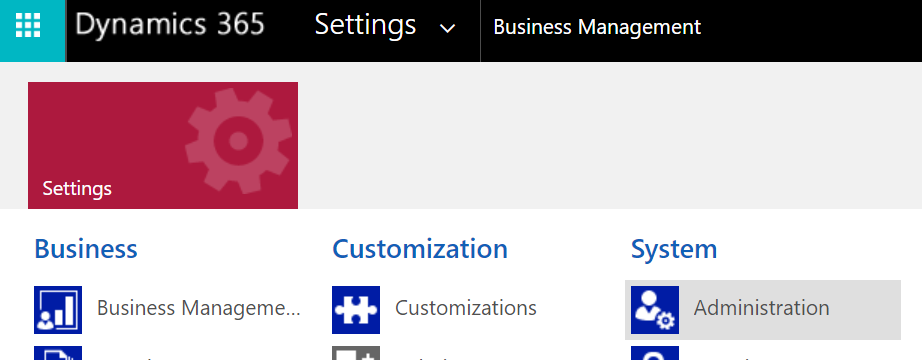
Once you are in the classic style settings Pages
From there click on the Settings chevron on the top ribbon and select Administration located in the System column.
Figure 4: Classic - System Administration
The System Settings are on the top-right of the results displayed.
Figure 5: System Settings

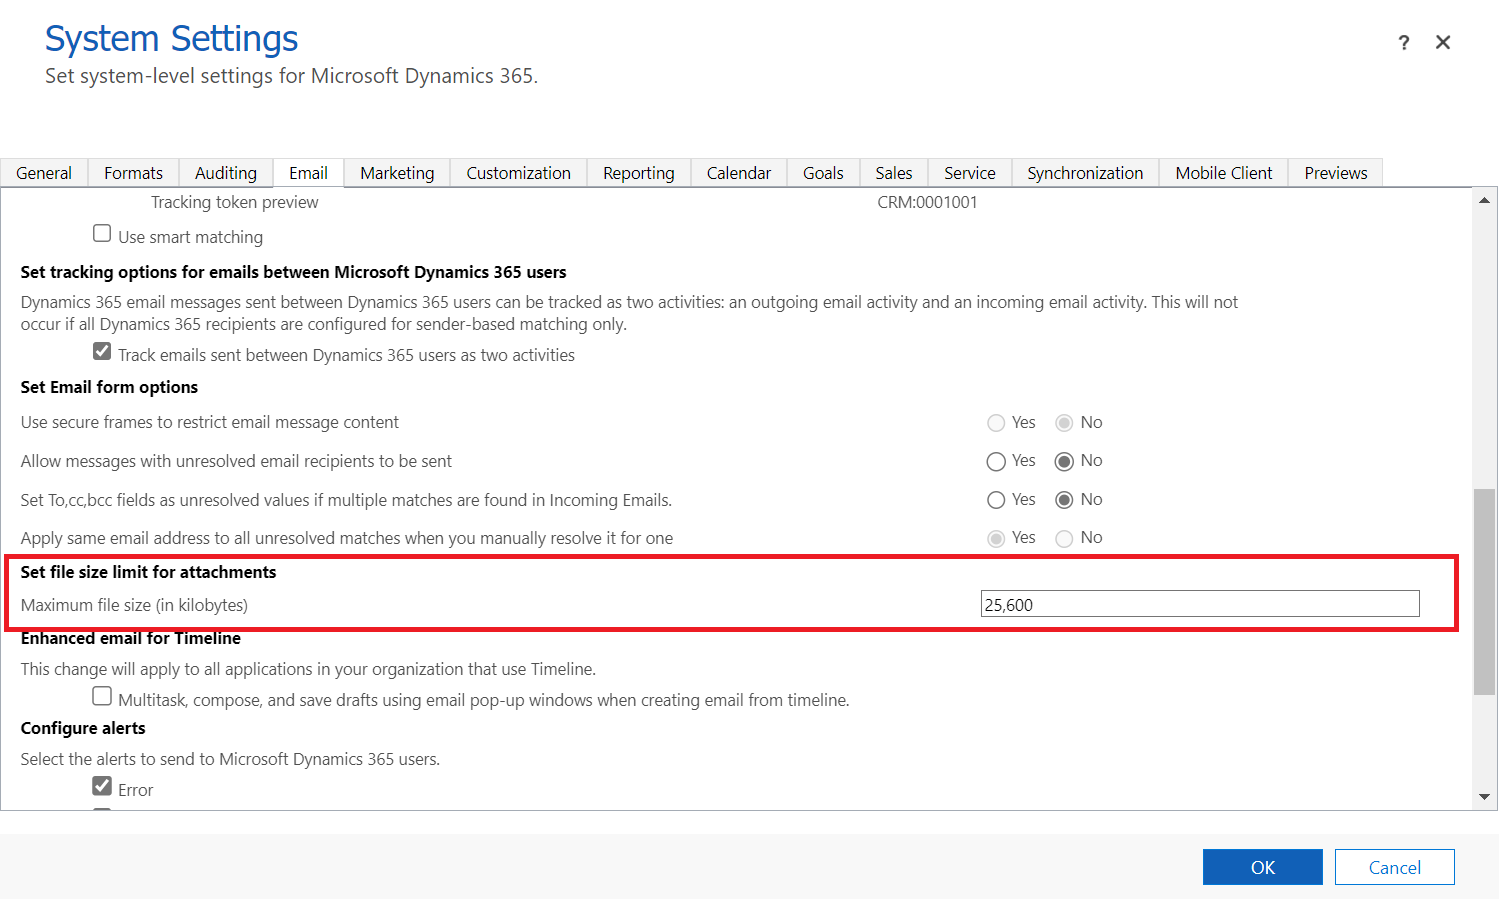
In the System Settings configure the Set file size limit for attachments to 25Mb.
- In the System Settings window, go to the Email tab.
- Go to the Set file size limit for attachments section, and in the Maximum file size (in kilobytes) field, enter the value in kilobytes
25,600.
Figure 6: Configure file size limit.
The file size limit is configured from the Power Platform admin center . This page can be accessed from the Power Platform Admin Portal https://admin.powerplatform.microsoft.com/, navigate to the Environments tab from the left navigation bar.
-
Select your environment (either by clicking on it, or selecting the three-dot menu).
-
Select
Settingsand expand theEmailsettings.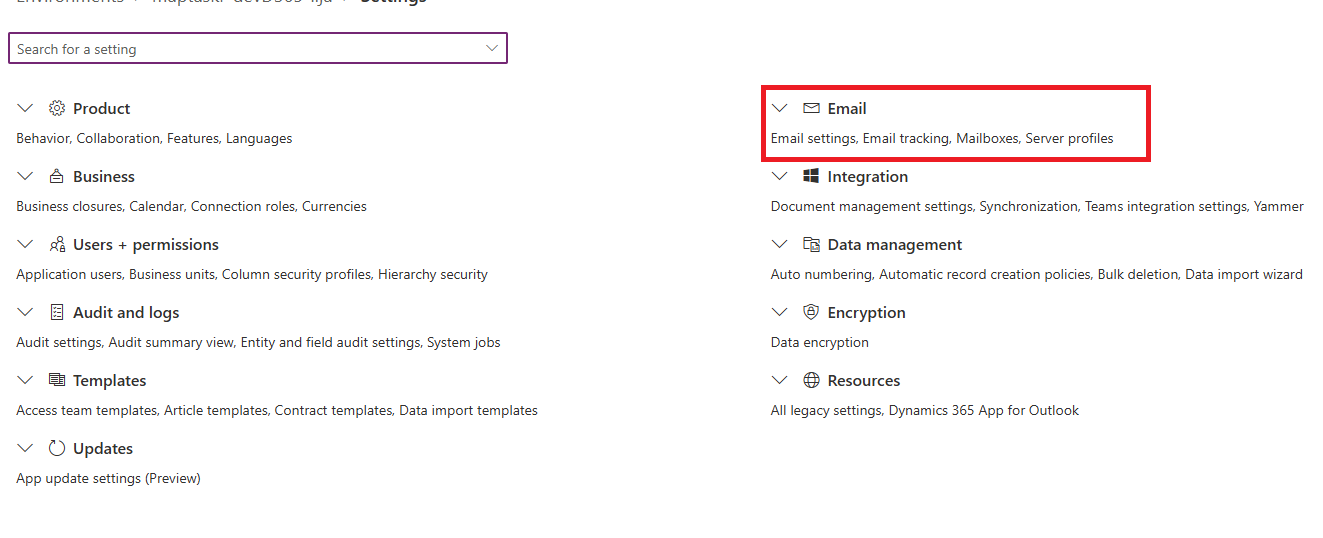
-
Select
Email Settingswhich will open a new page containing all Email related settings. -
At the bottom left, update the
Maximum file size for attachmentsfield to25,600kilobytes and clickSave.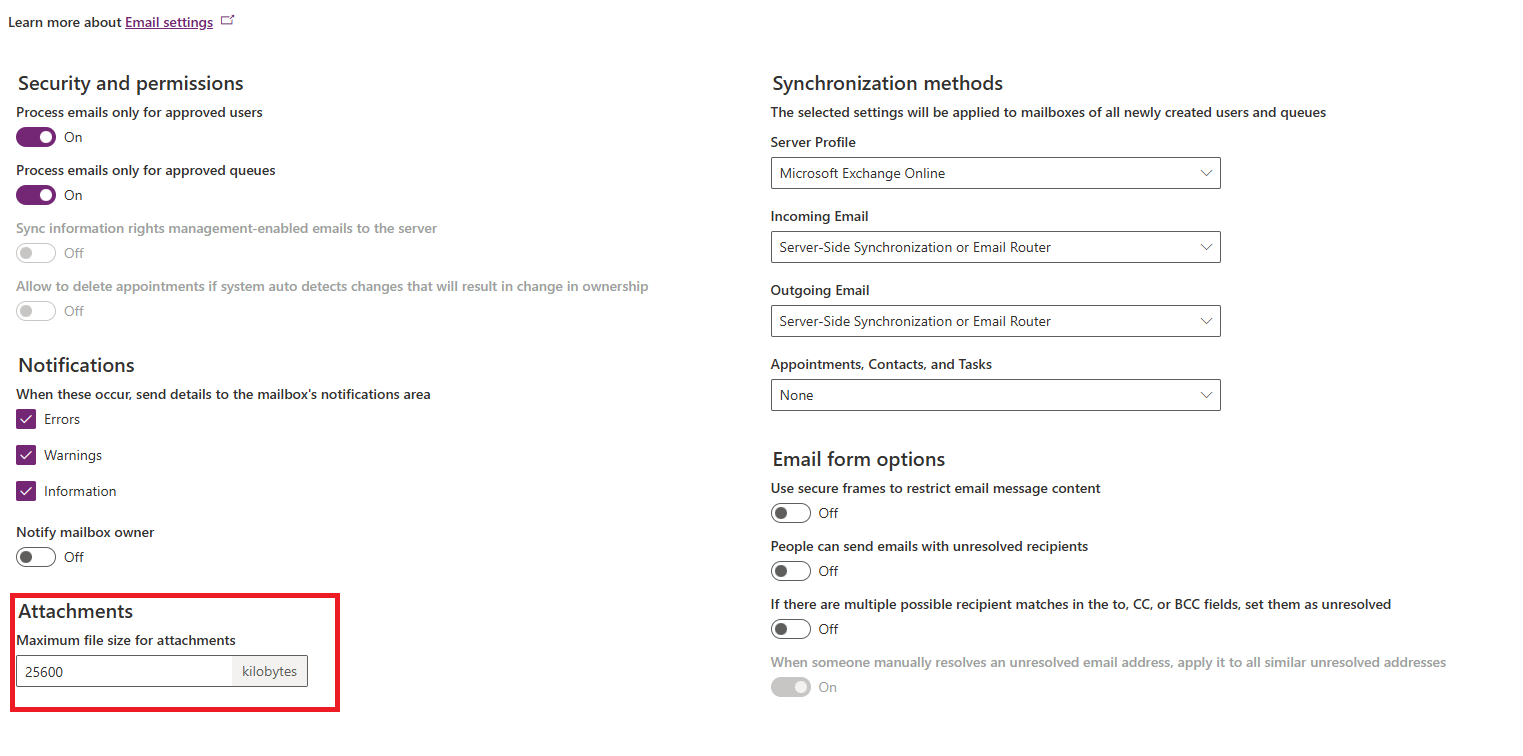
Installation Via AppSource Marketplace
The primary way to install Maptaskr is via the Microsoft Business Application Marketplace - AppSource.
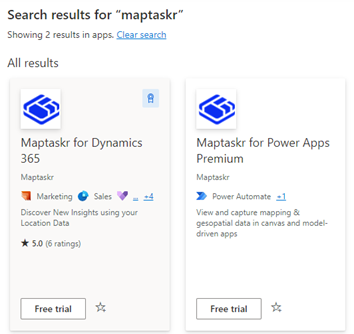
The following versions of Maptaskr can be installed to your environment
Figure 1: Maptaskr versions available via AppSource Marketplace.
Note Installing Maptaskr from AppSource is currently only available for new installations. If you are a current Maptaskr customer or have previously installed Maptaskr into your target environment, you will receive available updates directly from the Maptaskr Team. Alternatively, please reach out to the Maptaskr Team support@maptaskr.com to request access to updates.
For the purposes of this instruction manual, we will be using our Maptaskr for Dynamics 365 offering as the example solution as the installation and configuration of Maptaskr for Power Apps will be identical unless explicitly stated.
To install either of the Maptaskr solutions to your environment -
-
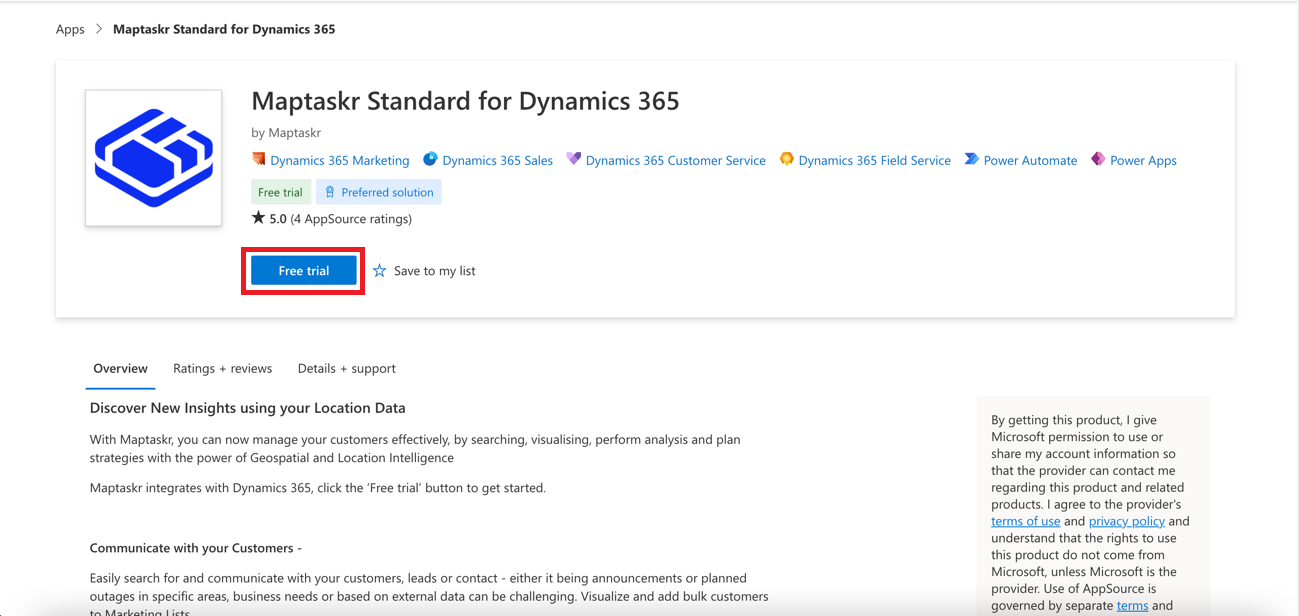
Navigate to the Maptaskr solution offering on AppSource ensuring you are logged in with the appropriate Microsoft account you wish to use for installation purposes. Click on
Free trialto commence with the install if the user is logged in.Figure 2: AppSource Installation.
-
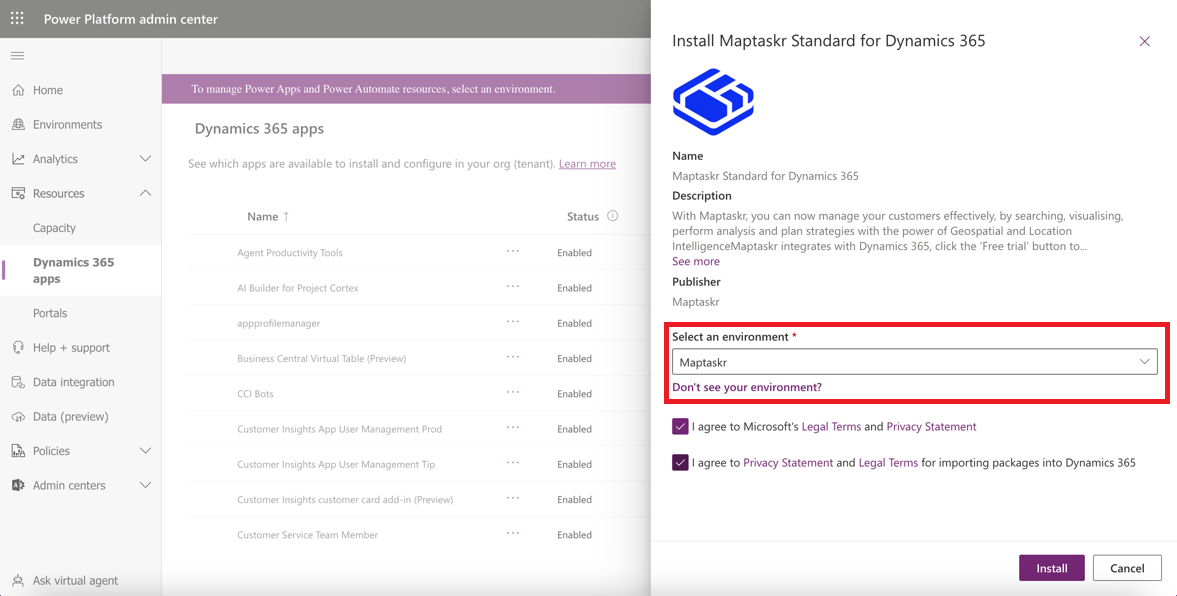
You will be taken to the Power Platform admin center and authenticated with you user account as appropriate. Select the Power Platform or D365 environment where you wish Maptaskr to be installed. Note: You must have an environment already provisioned and ready to select for Maptaskr installation.
Figure 3: Select an environment to install Maptaskr.
-
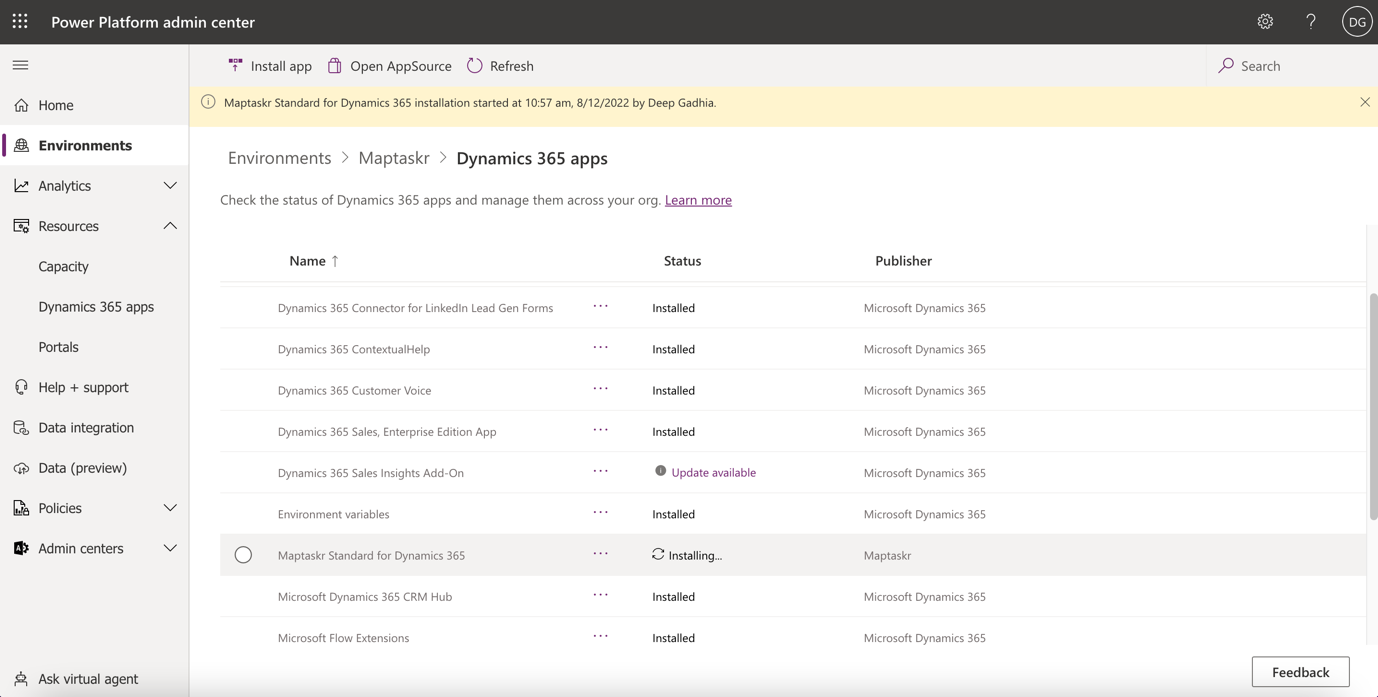
The installation process will take from 20mins – 30mins. Keep this screen open and periodically refresh to check for status updates.
Figure 4: Maptaskr installing.
-
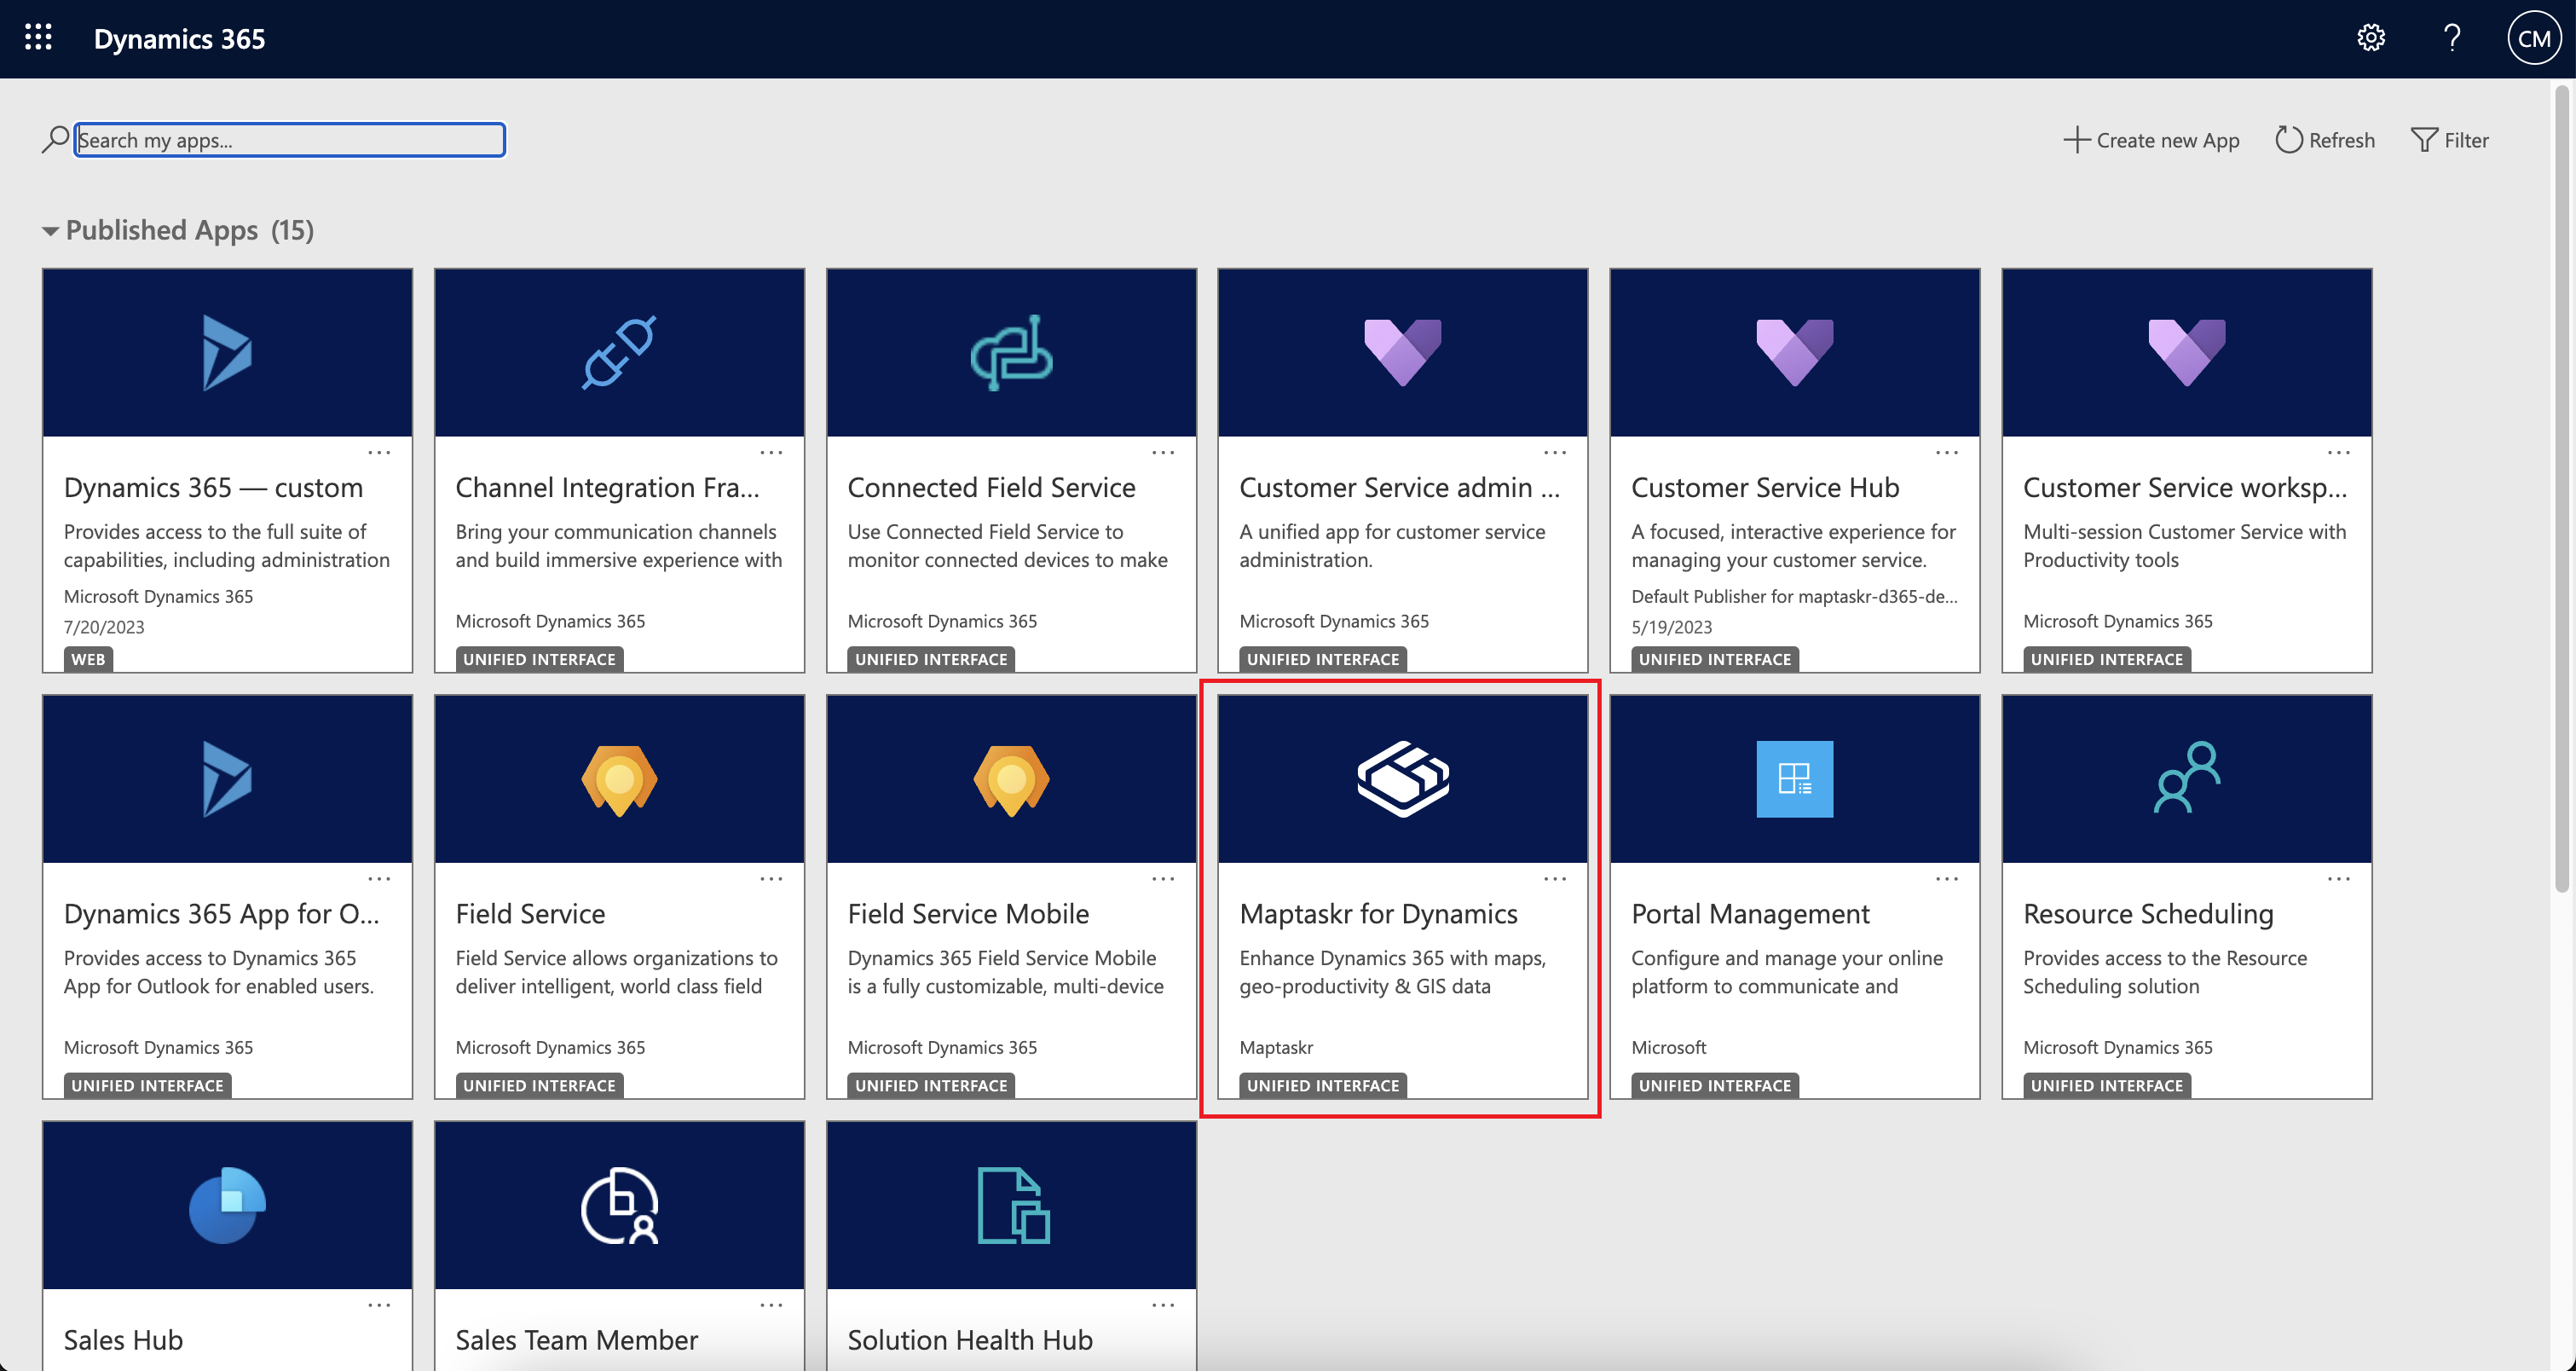
Once the solution has finished installation, the status will update to
Installed. At this stage you can navigate to the environment in which you choose to install Maptaskr, and in the Apps you will now see the Maptaskr app available in thePublished Appssection click onMaptaskr for DynamicsorMaptaskr for Power Appsto use Maptaskr app.Figure 5: Maptaskr is installed and published.
Manual Installation
In the case where you have a Maptaskr solution file which needs to be installed manually, there are two (2) methods for installation –
- Installation via Power Apps Admin Portal
- Installation via Classic Admin Portal
Maptaskr solution files comprise of a .zip package file with the following naming convention – {ProductType}_{ReleaseType}_{Version}_Managed.zip
e.g., D365_RC_2.1.5.39_Managed.zip
{ProductType} – will either be D365 or PA for Dynamics 365 or Power Apps Premium
{ReleaseType} – will be BETA (fresh off the press – no regression testing conducted), RC (release candidate – regression testing underway) or be absent, meaning it is an app source release and has completed regression testing.
{Version} – the version number will take the form W.X.Y.Z where W is the Major build, X is the Minor build, Y is the Patch, and Z is the Build number. The following sections provide an overview of how to manually deploy the Maptaskr solution file via the available methods, you need choose only one (1) method for installation.
Installation Via Power Apps Admin
To install Maptaskr via the Power Apps Admin Portal, navigate to https://make.powerapps.com/ and select the environment you wish to install or upgrade Maptaskr into.
Figure 6: Select Environment for Installation.
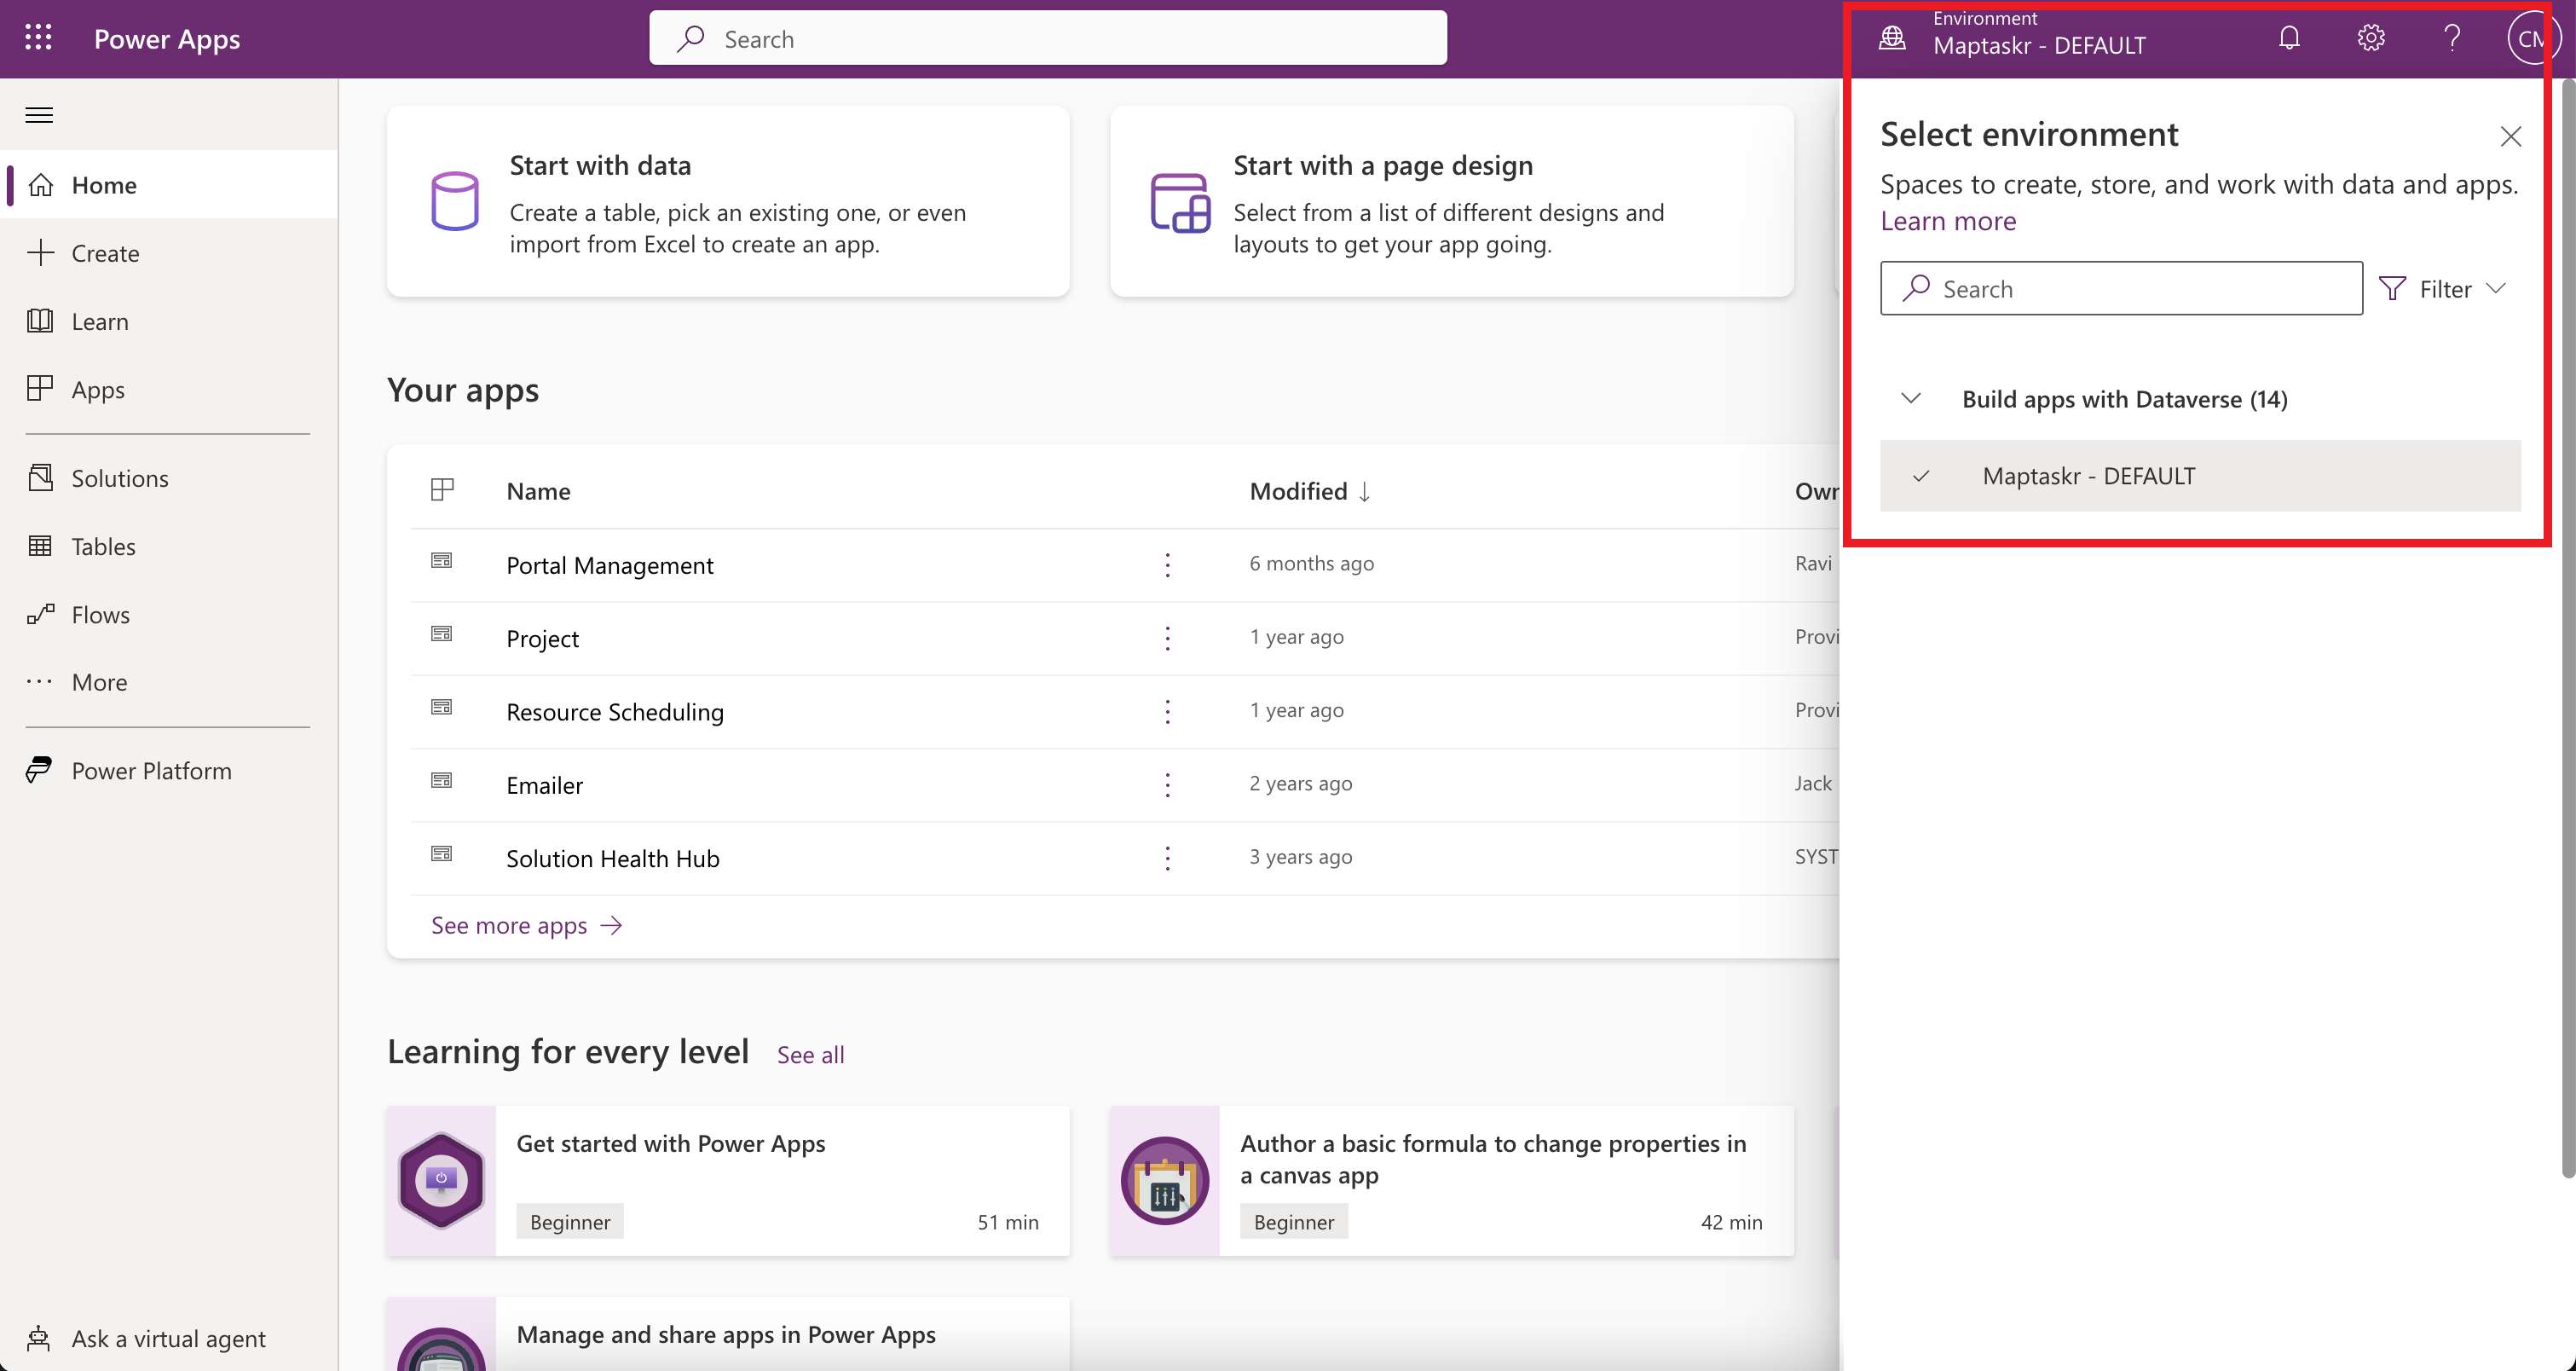
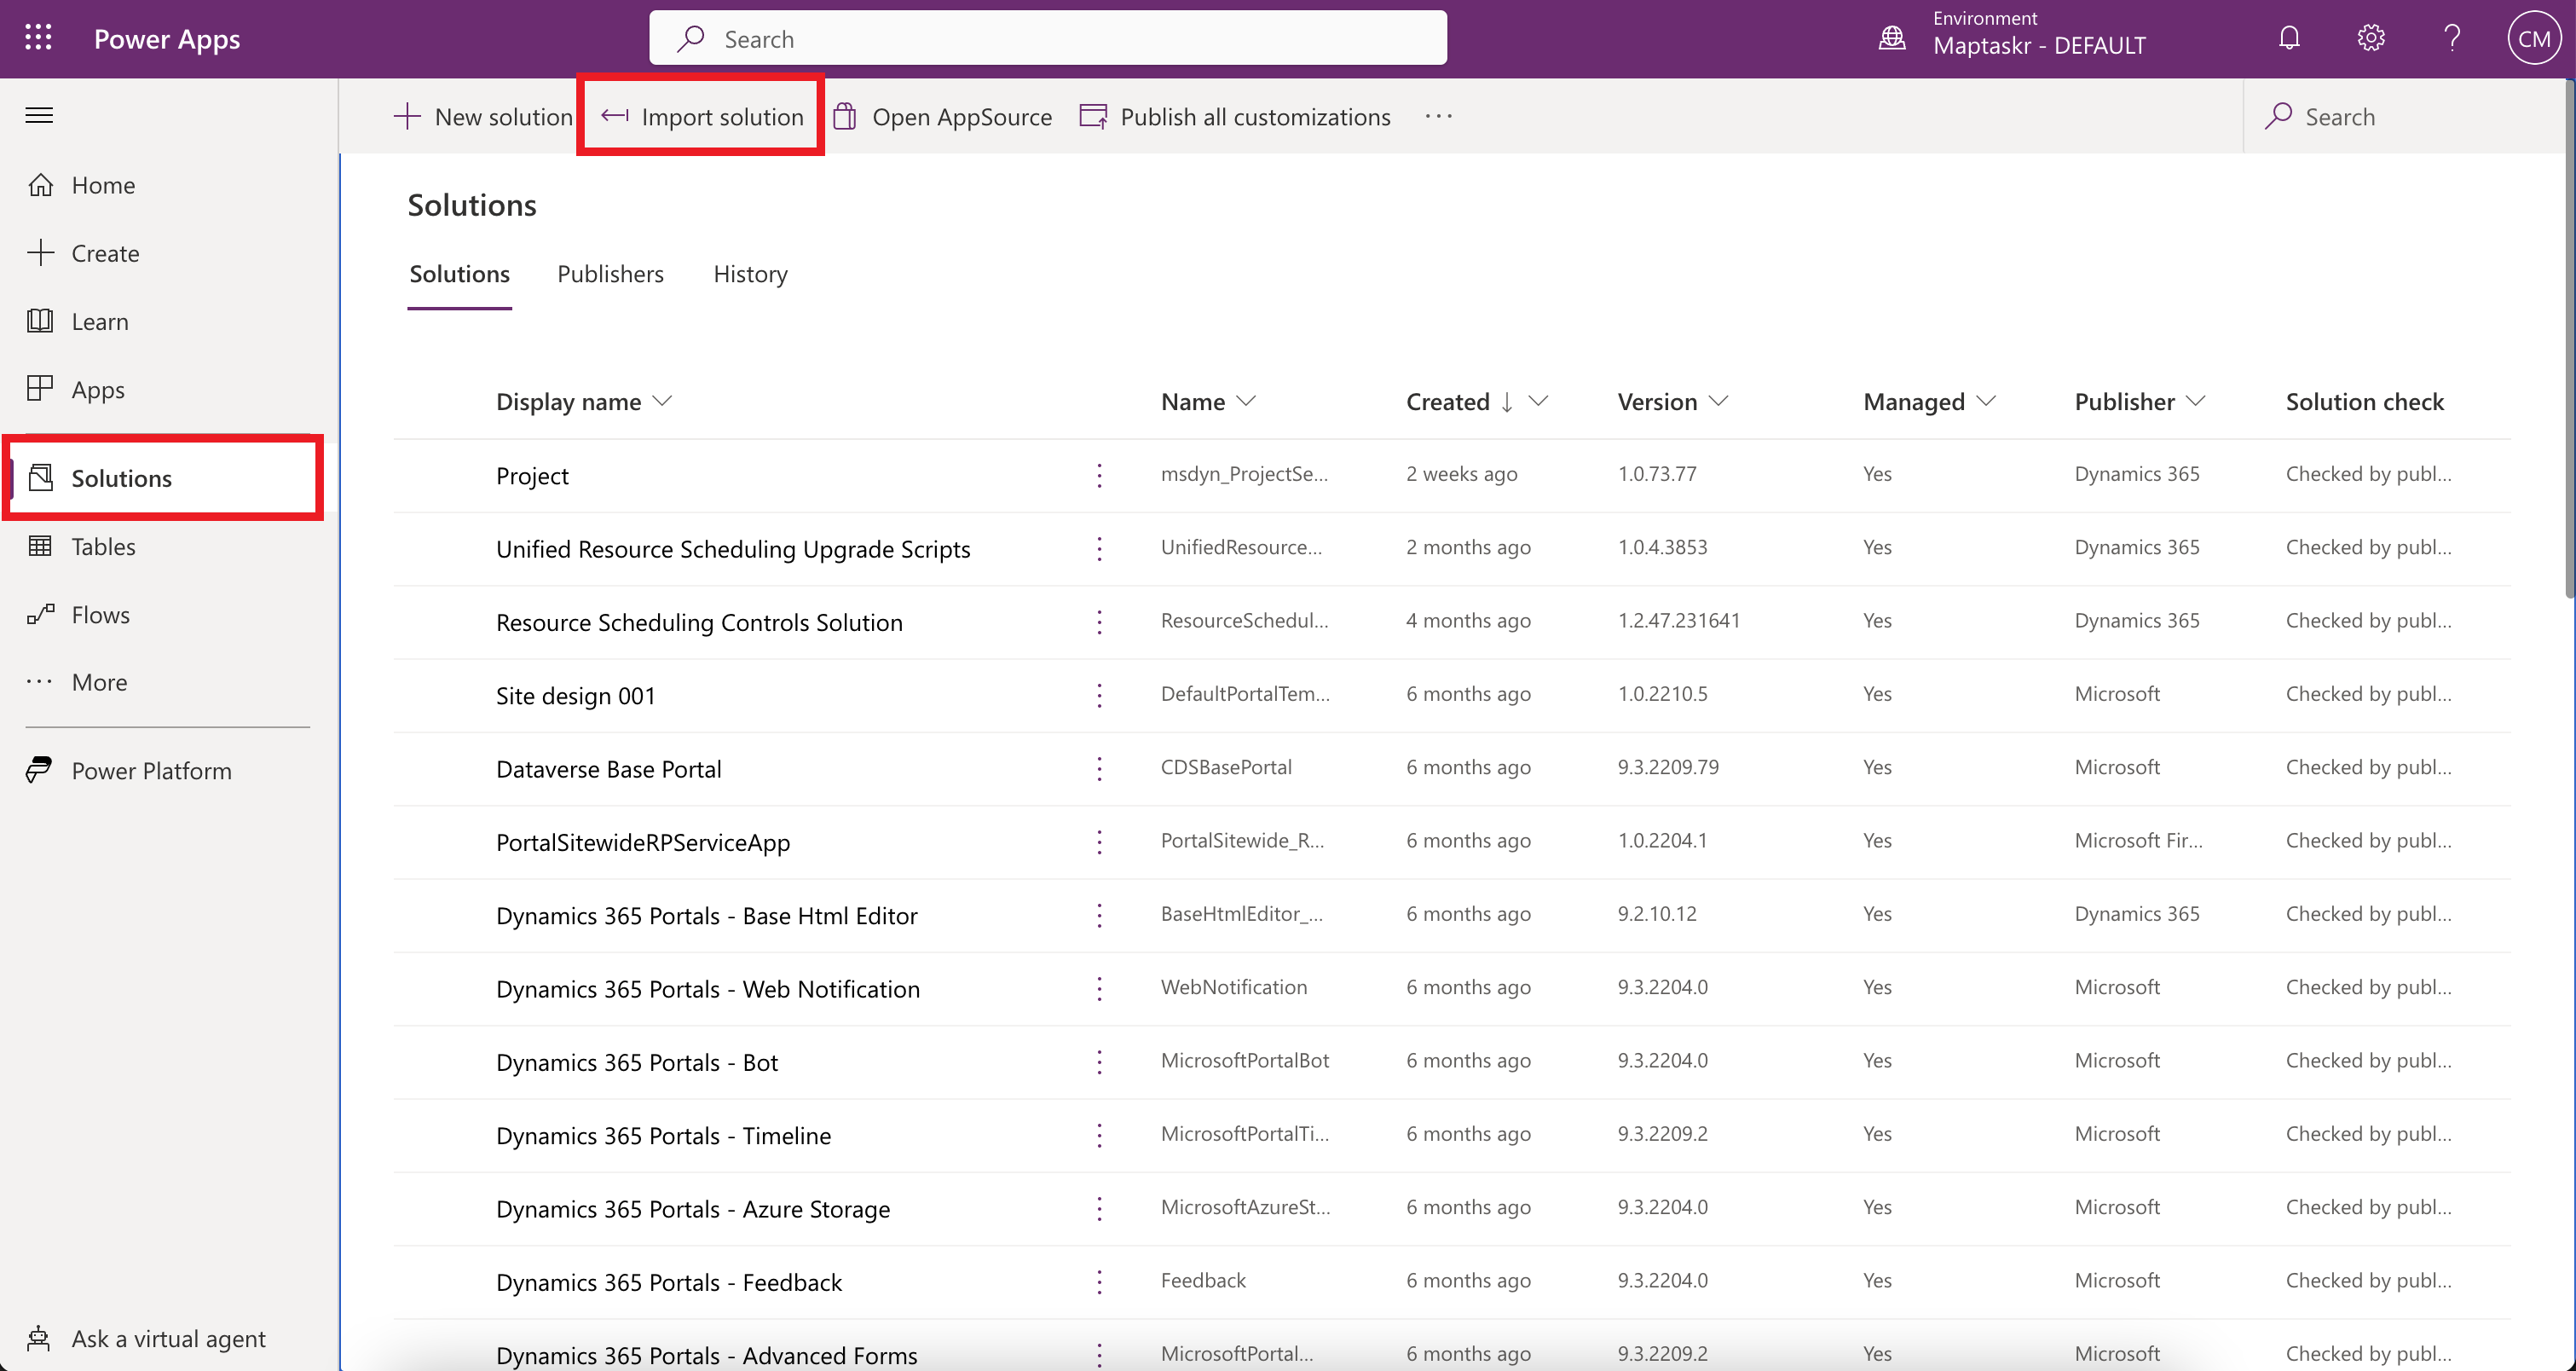
-
Once you have selected the correct environment, navigate to the
Solutionmenu item in the left navigation and click onImport solutionbutton.Figure 7: PowerApps method installation.
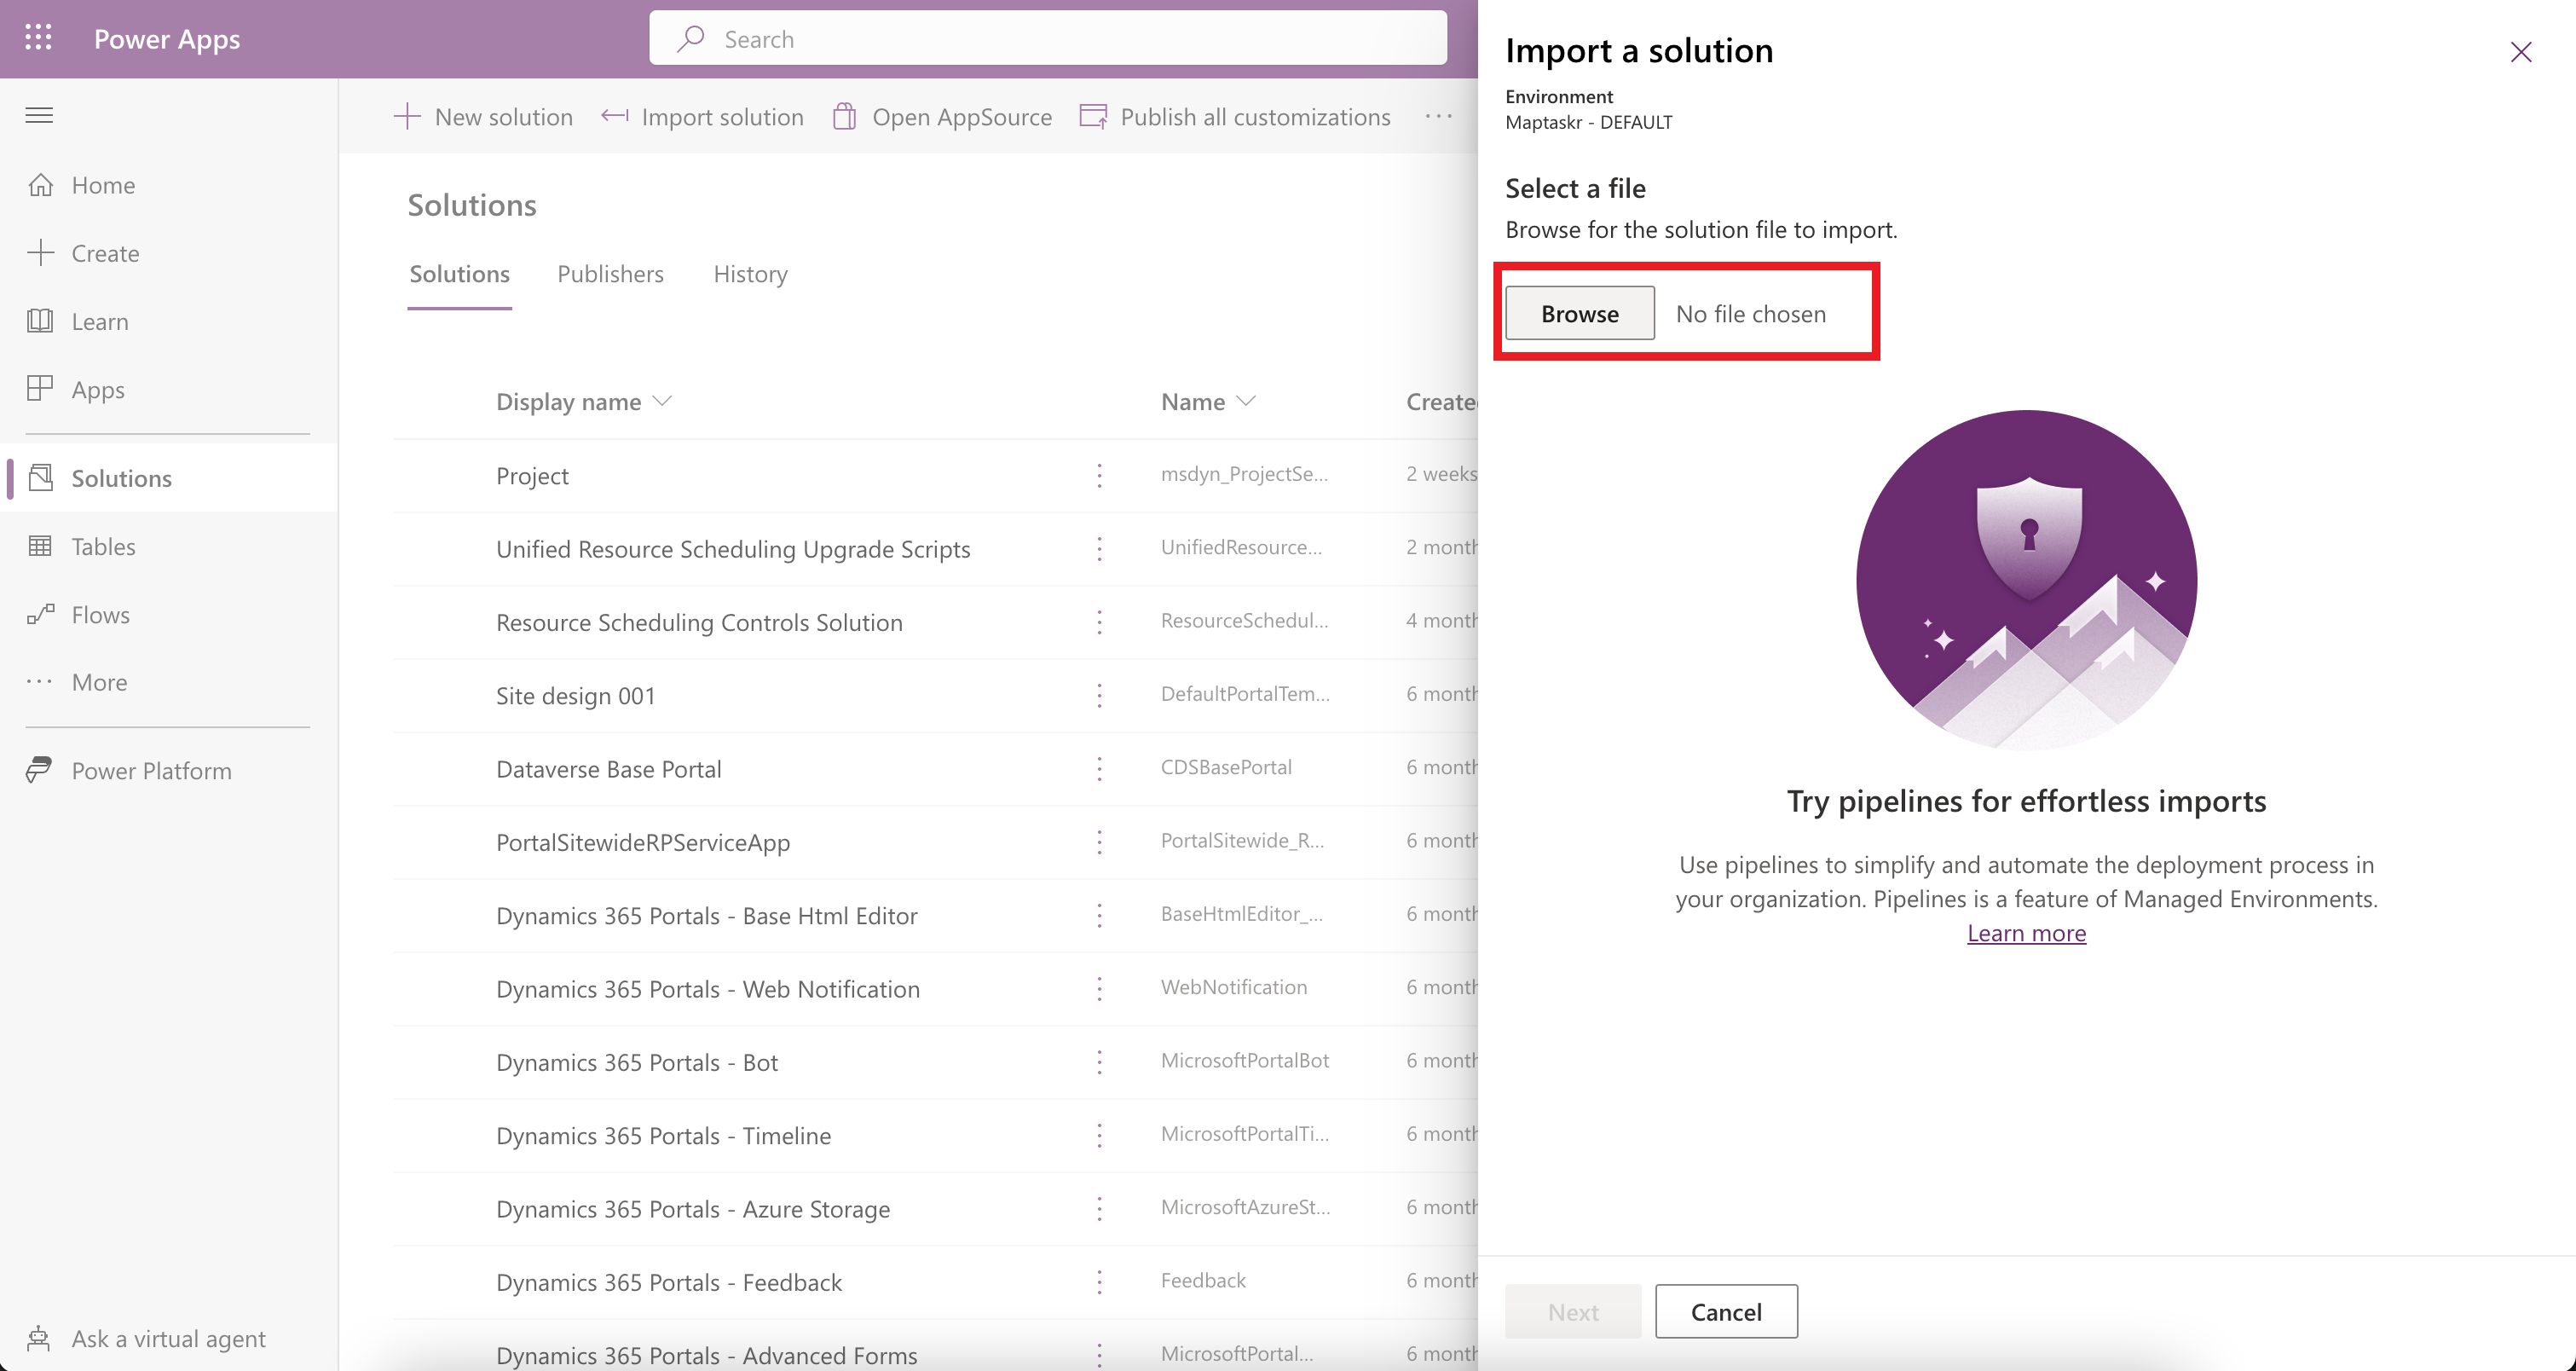
-
Once the
Import a solutionpanel appears, click onBrowseand select solution file you wish to import for installation.Figure 8: Import a solution - select the solution file.
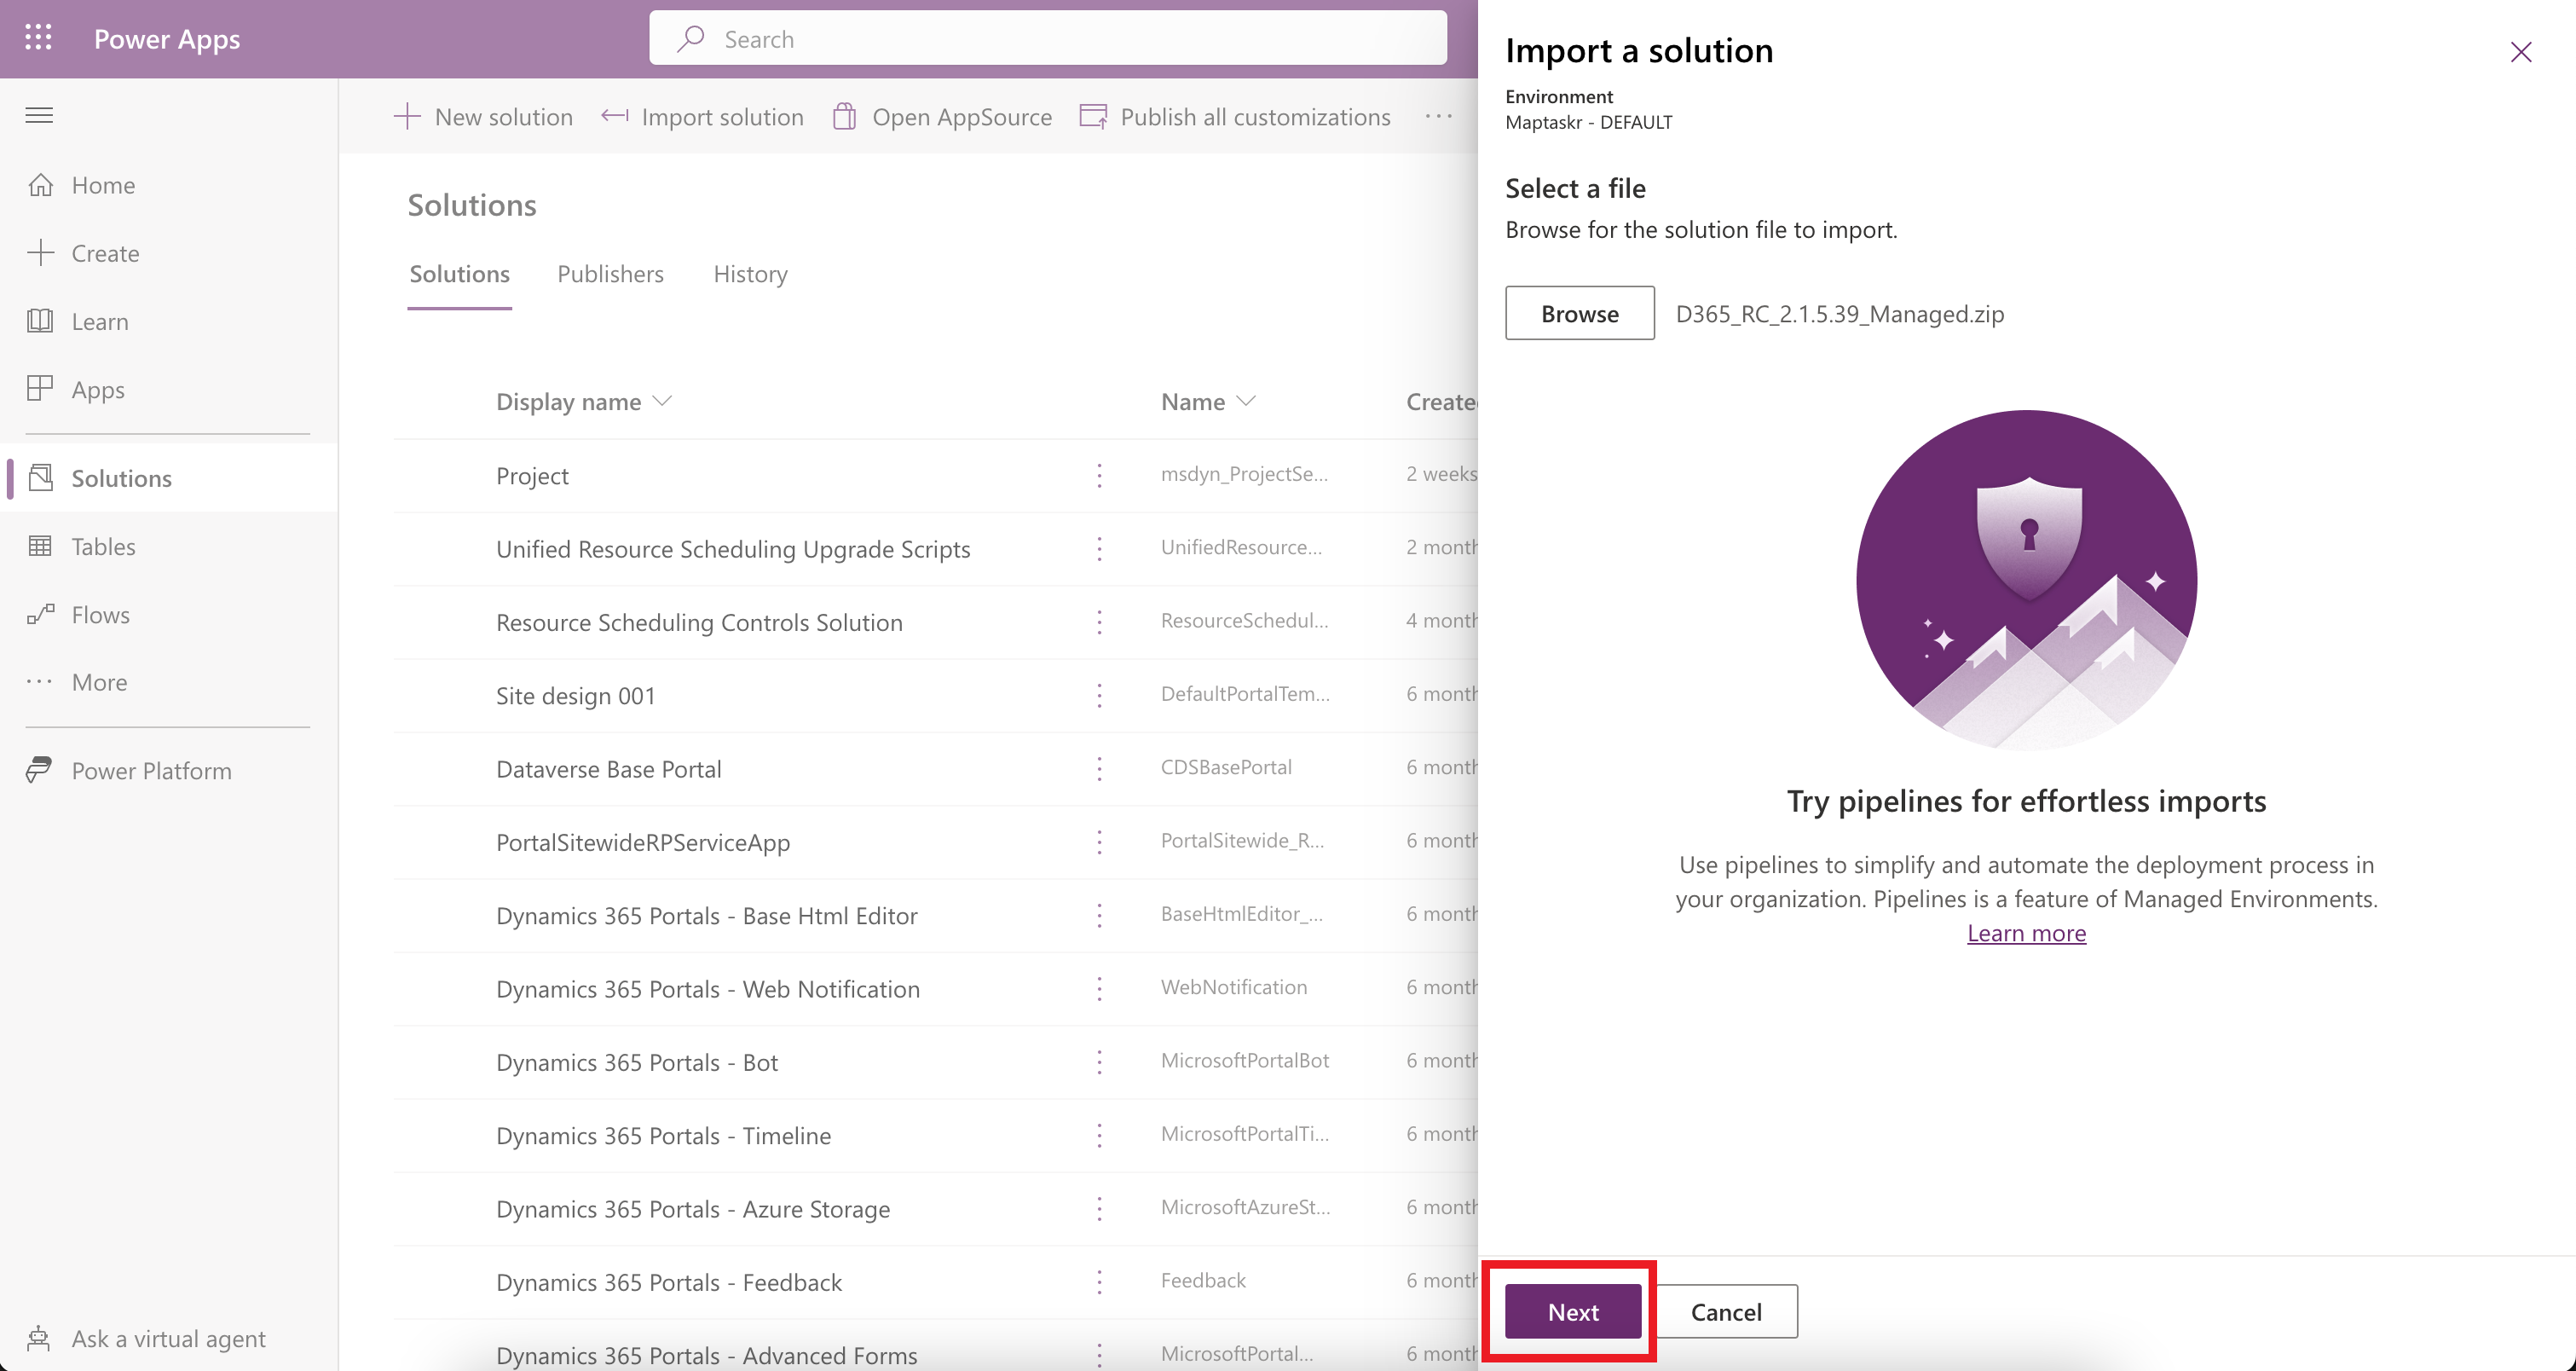
-
Click
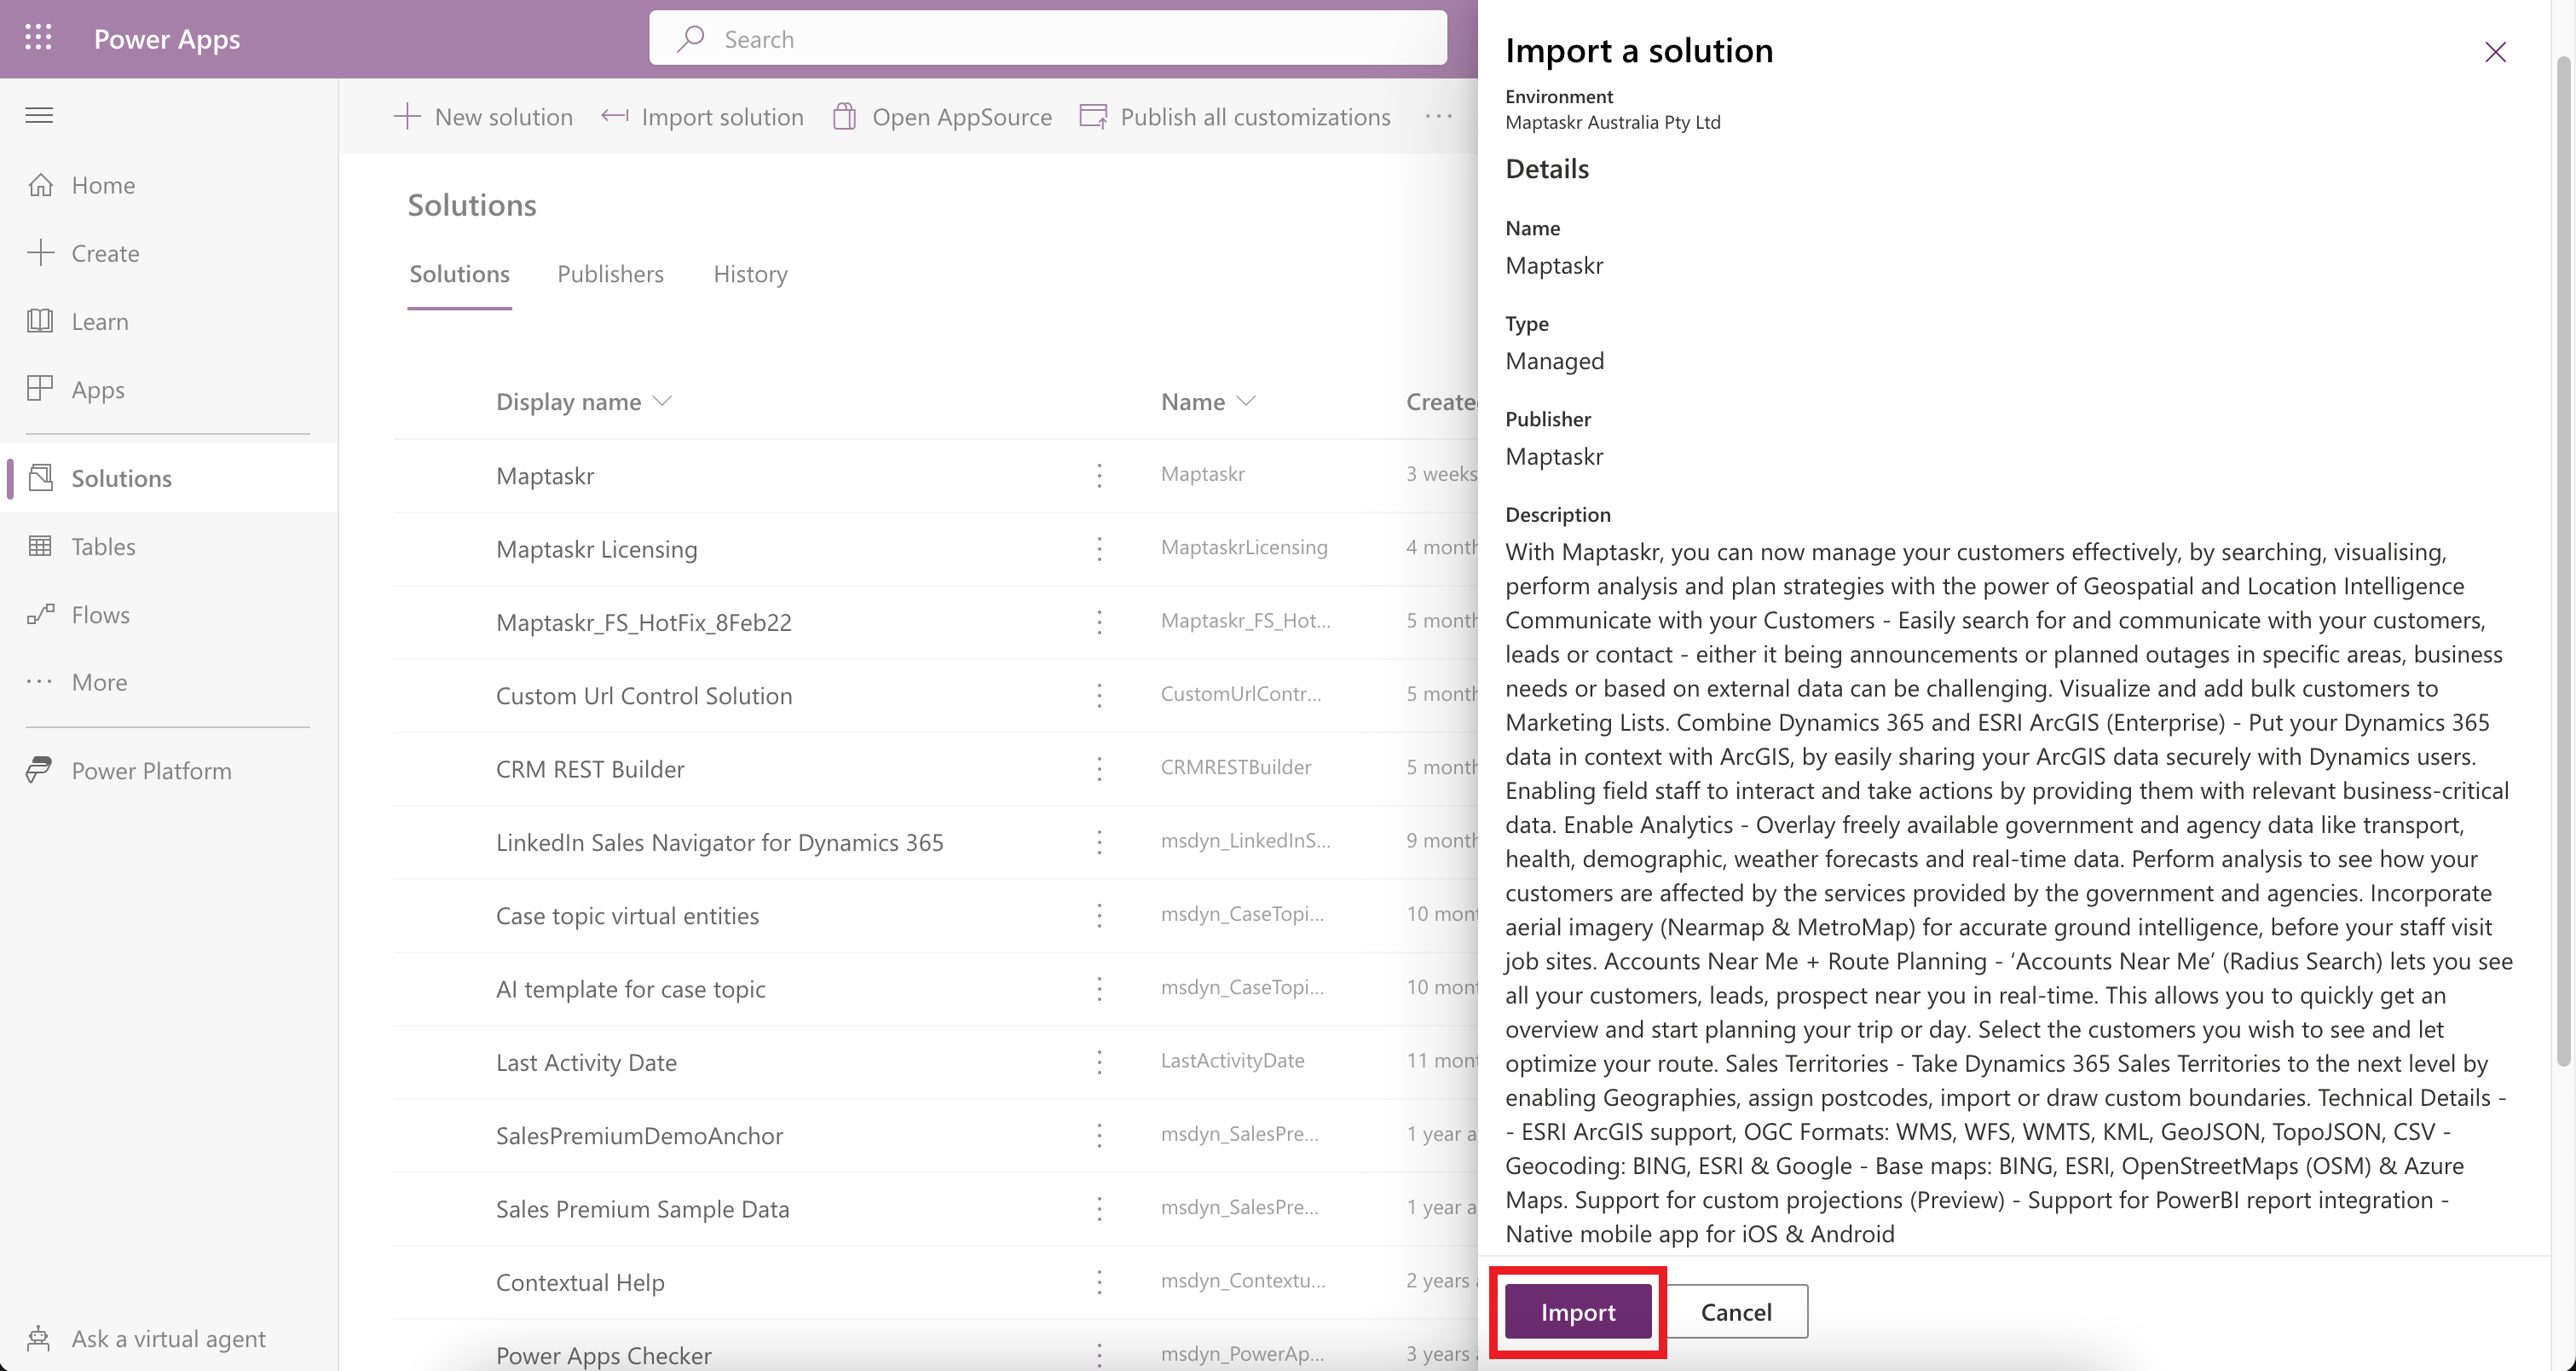
Nextto import the solution.Figure 9: Import a solution - solution file selected.
-
Once the file is processed, click
Importto commence installation of the solution.Figure 10: Import a solution.
-
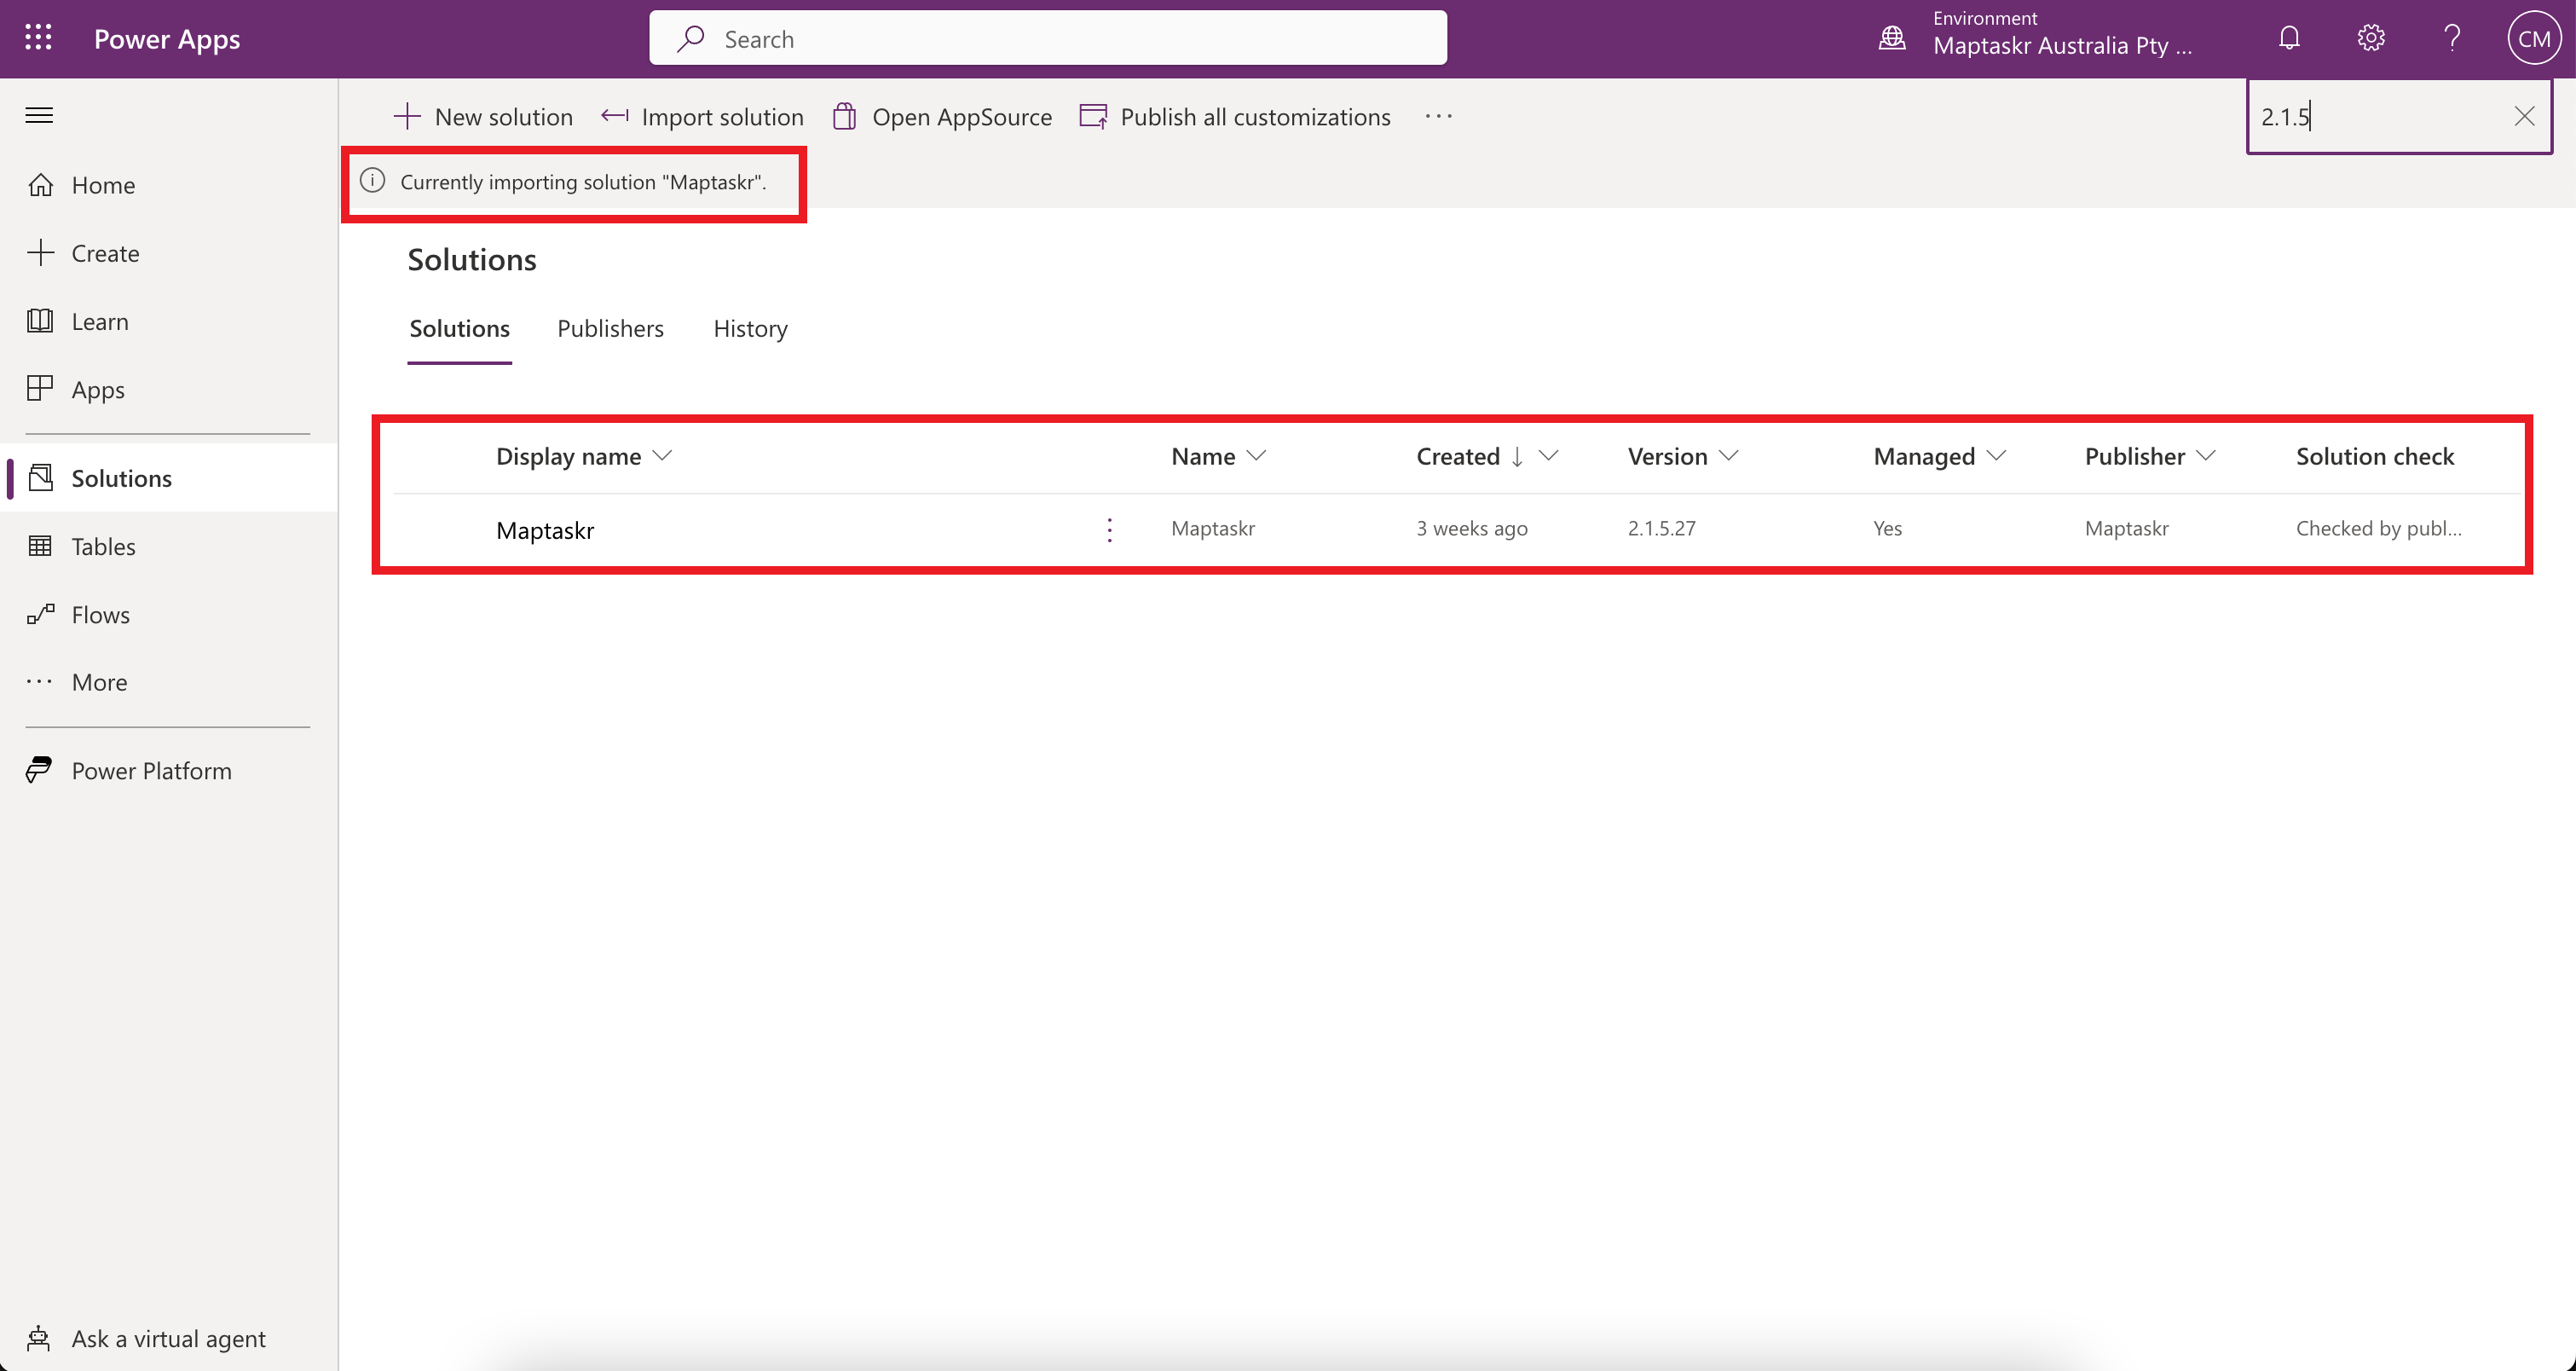
As installation occurs, you will be prompted with a notification to track the import progress.
Figure 11: PowerApps method installation.
-
Once the solution has finished installation, the status will update to
Installed. At this stage you can navigate to the environment in which you choose to install Maptaskr, and in the Apps you will now see the Maptaskr app available in thePublished Appssection click on Maptaskr to use Maptaskr app.Figure 12: Maptaskr is installed and published.

Installation Via Classic Admin Portal
To install Maptaskr via the Classic Admin Portal, navigate to https://admin.powerplatform.microsoft.com/environments, login with an appropriate account and select the environment you wish to install or upgrade Maptaskr into.
-
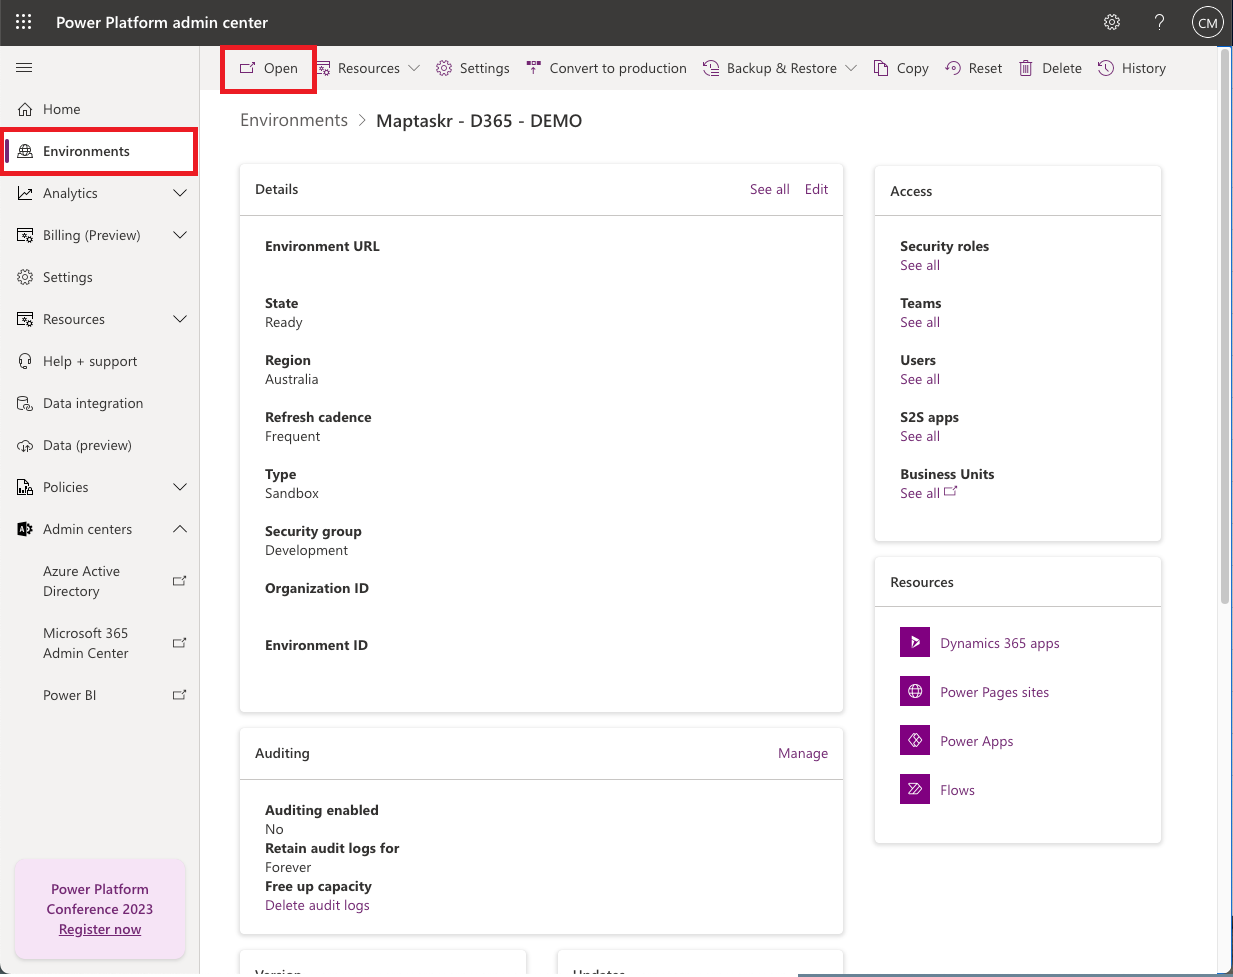
Once in the environment summary page click
Opento navigate to the environments landing page.Figure 13: Launch environment landing page.
-
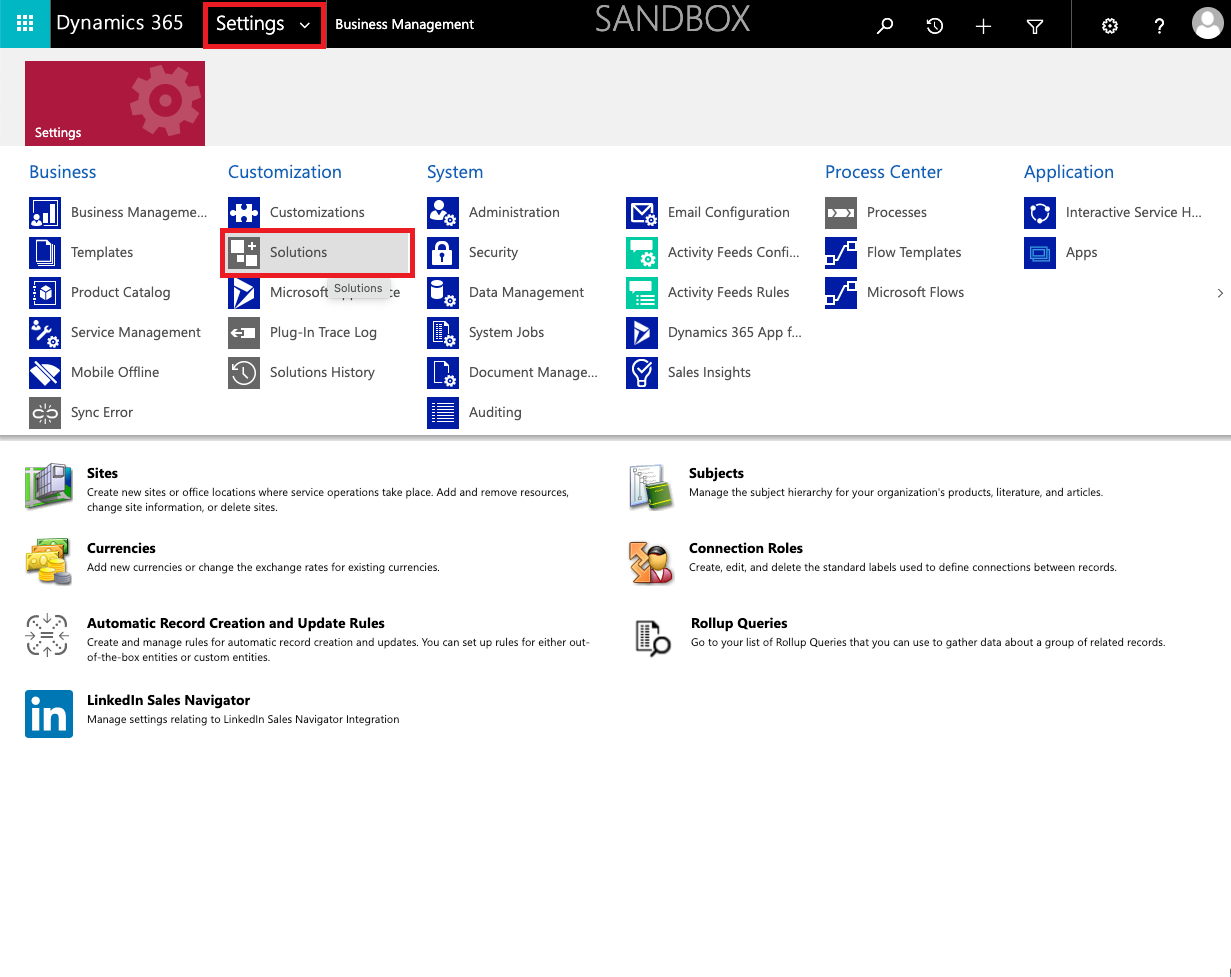
Once there, from the cog main navigation item in the top right, select
Advanced Settings.Figure 14: Select Advanced Settings.
-
From the
Settingstop navigation mega menu, navigate toSolutions.Figure 15: Settings to Solutions.
-
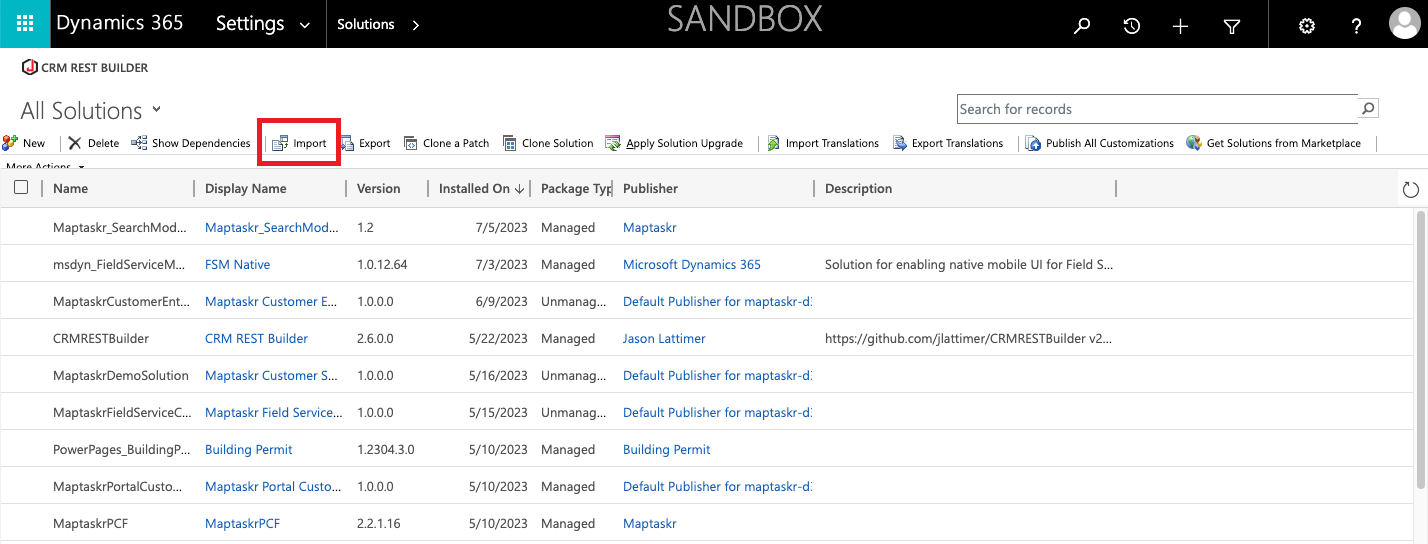
Once at the
Solutionssettings screen, clickImport.Figure 16: Classic method installation.
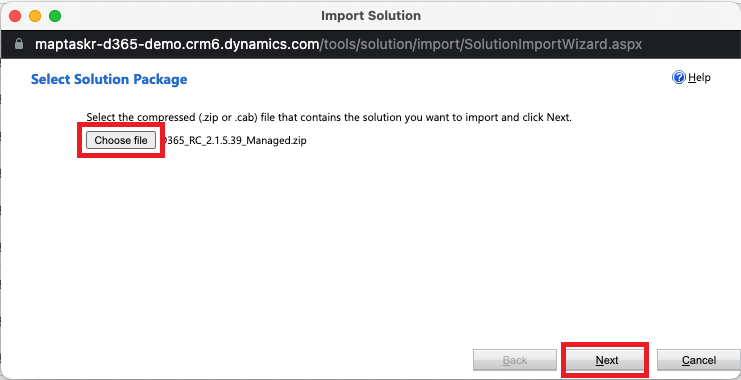
- Choose the solution file you wish to install and then click 'Next` to progress.
Figure 17: Choose solution file.
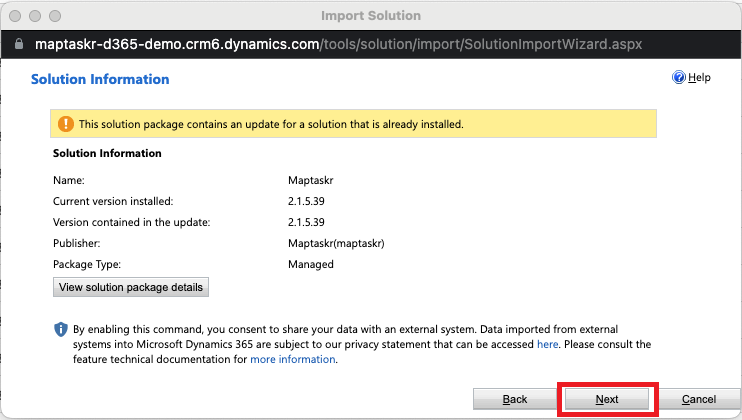
- Validate the solution details. Click
NextFigure 18: Validate solution file.
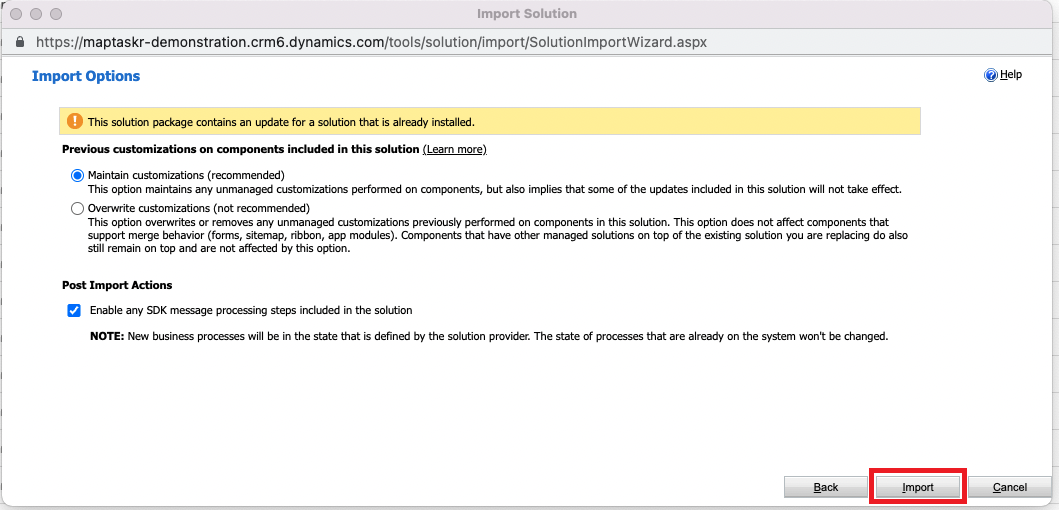
- If you are re-installing (upgrading) in an environment that already has Maptaskr installed, you will be prompted select upgrade method. Ensure
Maintain customizations (recommended)is selected and clickImport.Figure 19: Upgrade method.
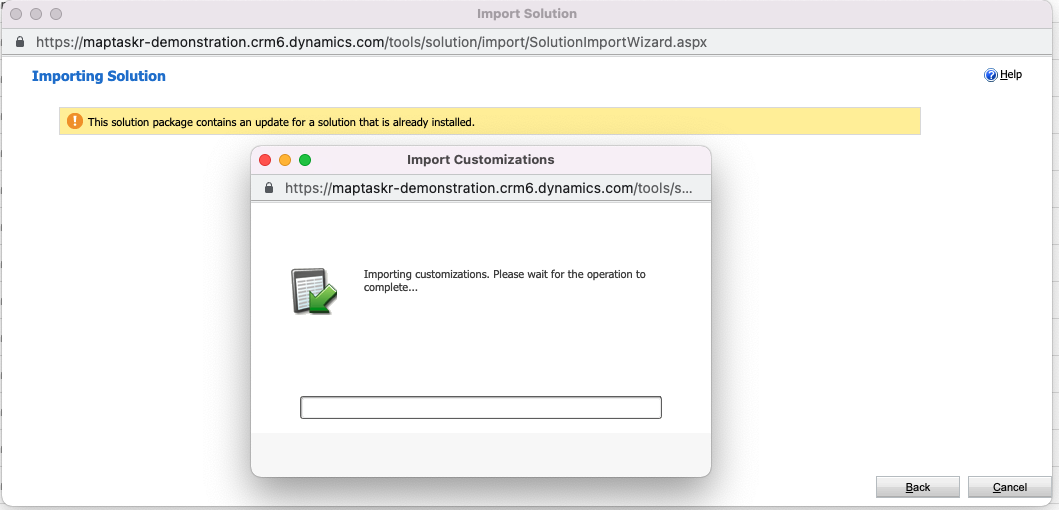
- An Import customizations pop-up page will track the progress of the package installation.
Figure 20: Import progress.
- Once Installation is completed, refresh your page, and Maptaskr will be installed.
Figure 21: Maptaskr installed.

- Choose the solution file you wish to install and then click 'Next` to progress.