Configuration
All Maptaskr solution configuration is accessed via the Maptaskr first party Application as shown below.
Figure 22: Maptaskr Model-Driven App for Administrators.
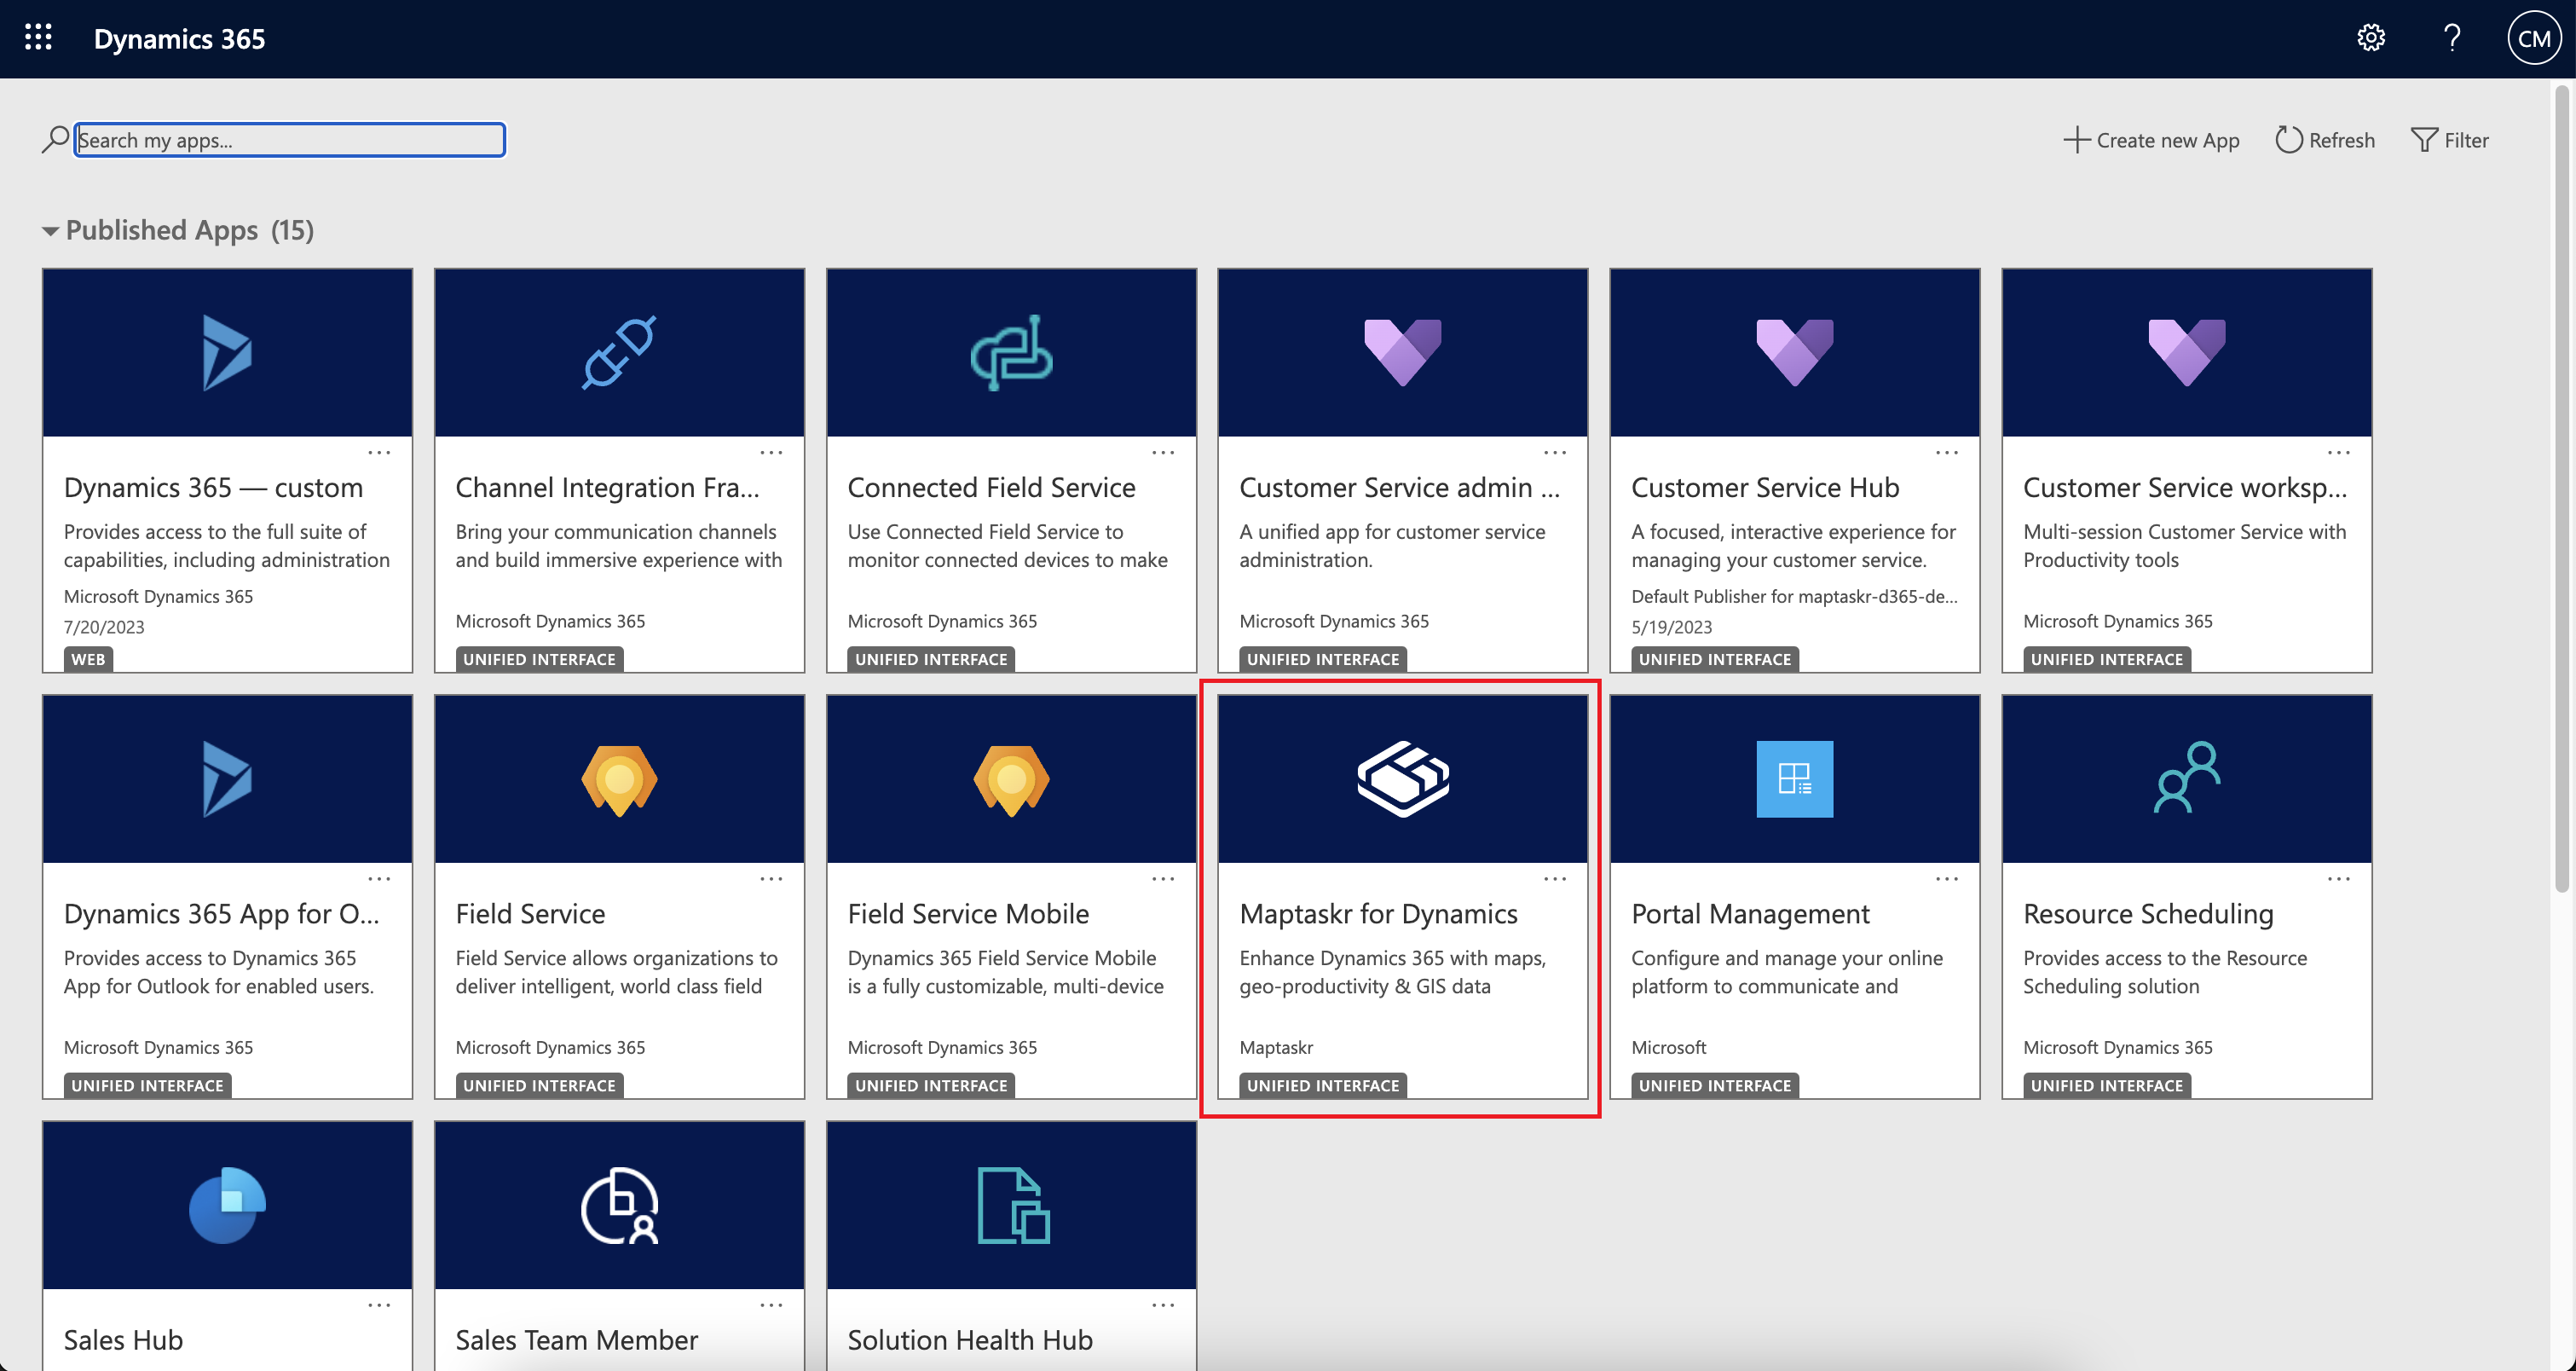
The Maptaskr App allows admin users the ability to configure all aspects of Maptaskr use throughout the instance in which it is installed – from initial registration to configuring GIS layers for users to access when using Maptaskr maps throughout the whole environment.
Click on the App to navigate to the Maptaskr Administration App.
Figure 23: Key Maptaskr Administrator Areas.
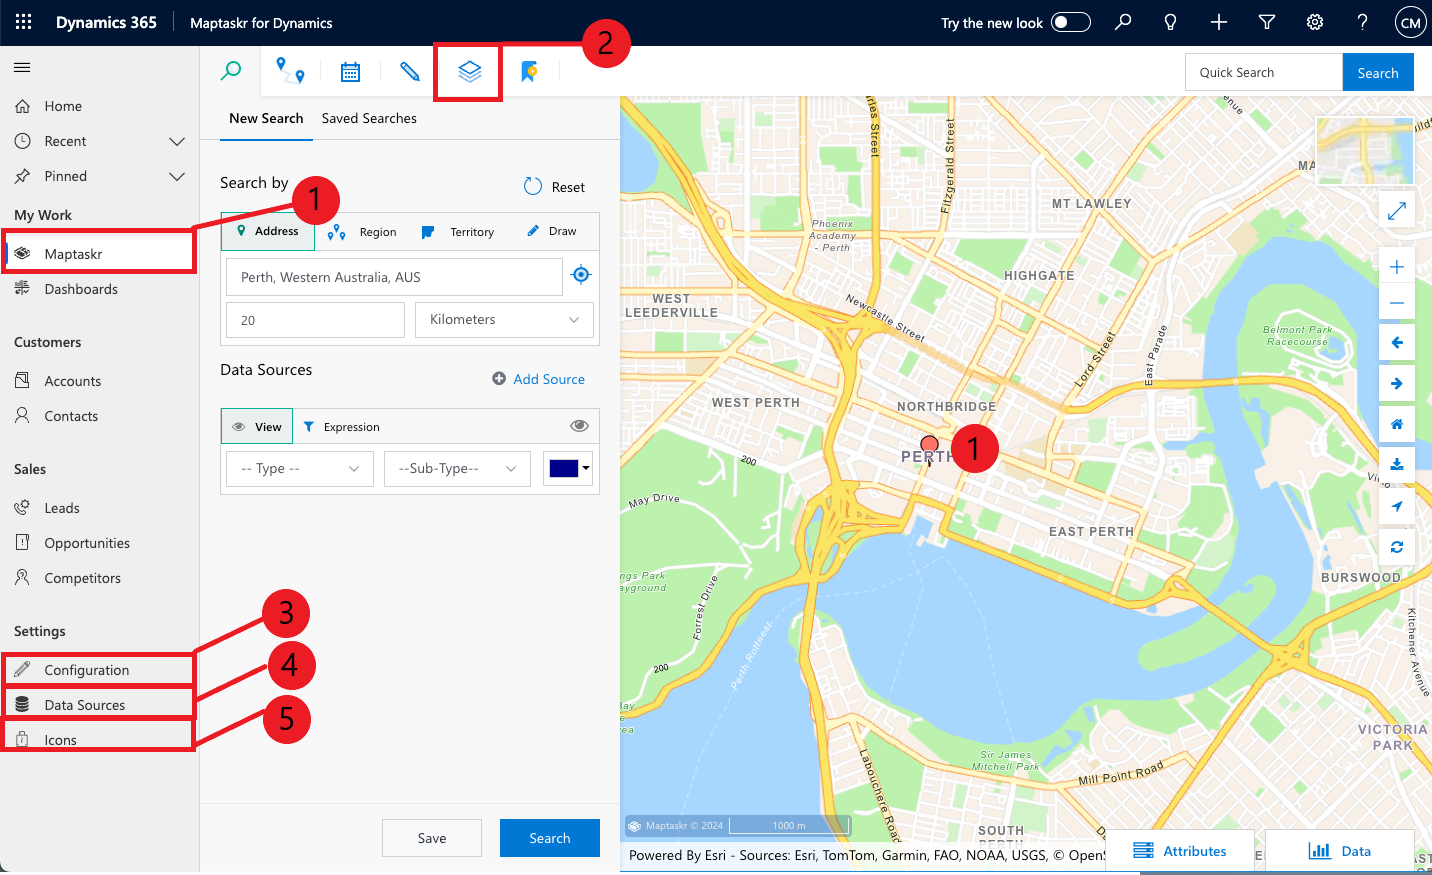
- Maptaskr dashboard level map – Enables users to interact with a Dashboard level map. Also provides admin users access to Layer configuration panel.
- Layers – Layers panel where layers are added and configured for general use.
- Configuration – Configuration areas for all core Maptaskr administration configuration.
- Data Sources – Configuration area for all table (entity) mappings to be used by the Maptaskr solution as well as record level map configuration.
- Icons – Area for uploading custom iconograph that may be used in various places throughout the Maptaskr solution.
All core Maptaskr configuration of is found within the Configuration menu item under the Settings heading.
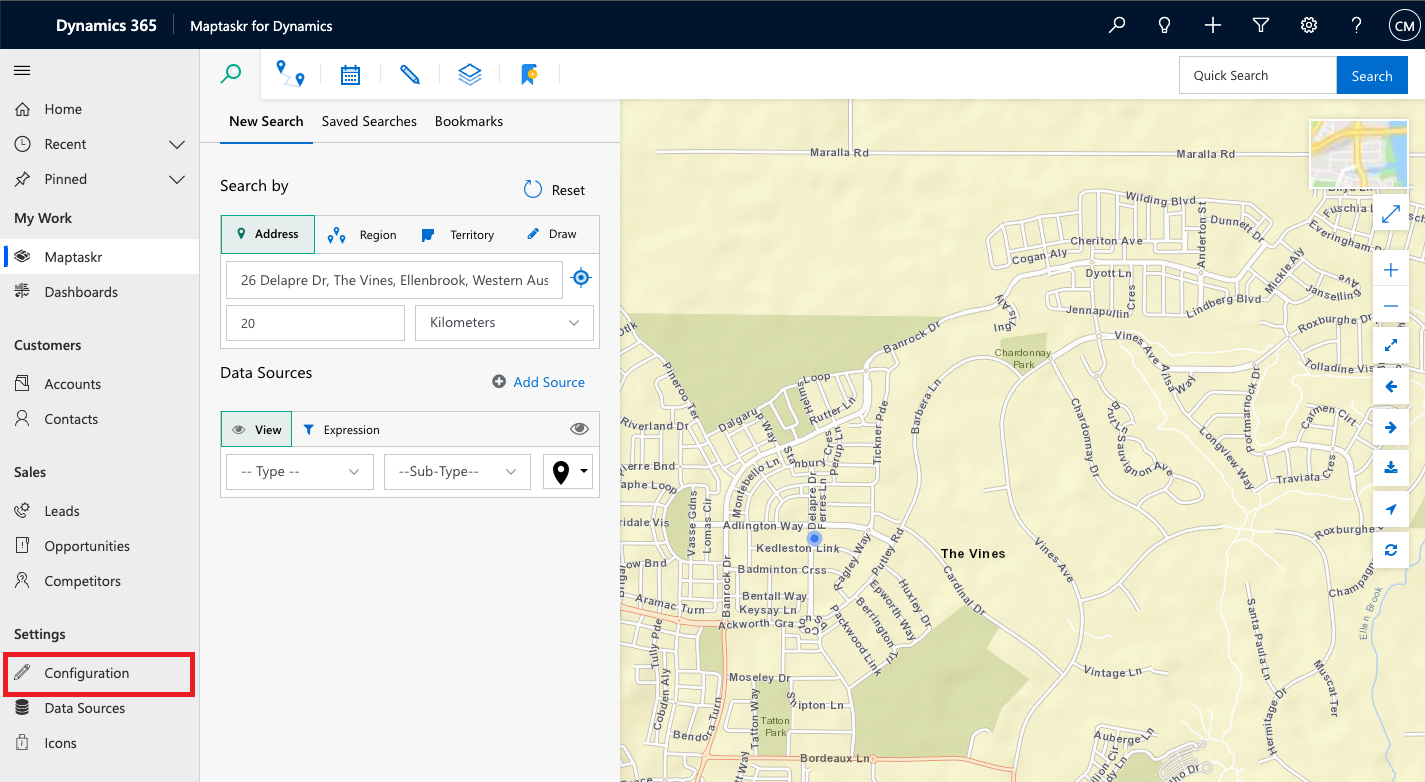
Figure 24: Maptaskr Administration App.
Registration
If your environment is a new installation of Maptaskr, the solution must be activated. To do so, you will need to go through a simple registration process.
-
After opening the Maptaskr App, Navigate to the 'Configuration` tab under Settings from the left navigation bar.
Figure 25: Configuration.

-
Fill in the Registration details, read and accept the
Terms of Serviceand click theRegister Trialbutton. You will receive an email which contains the license key for your installation of Maptaskr along with other useful information.Figure 26: Registration form.
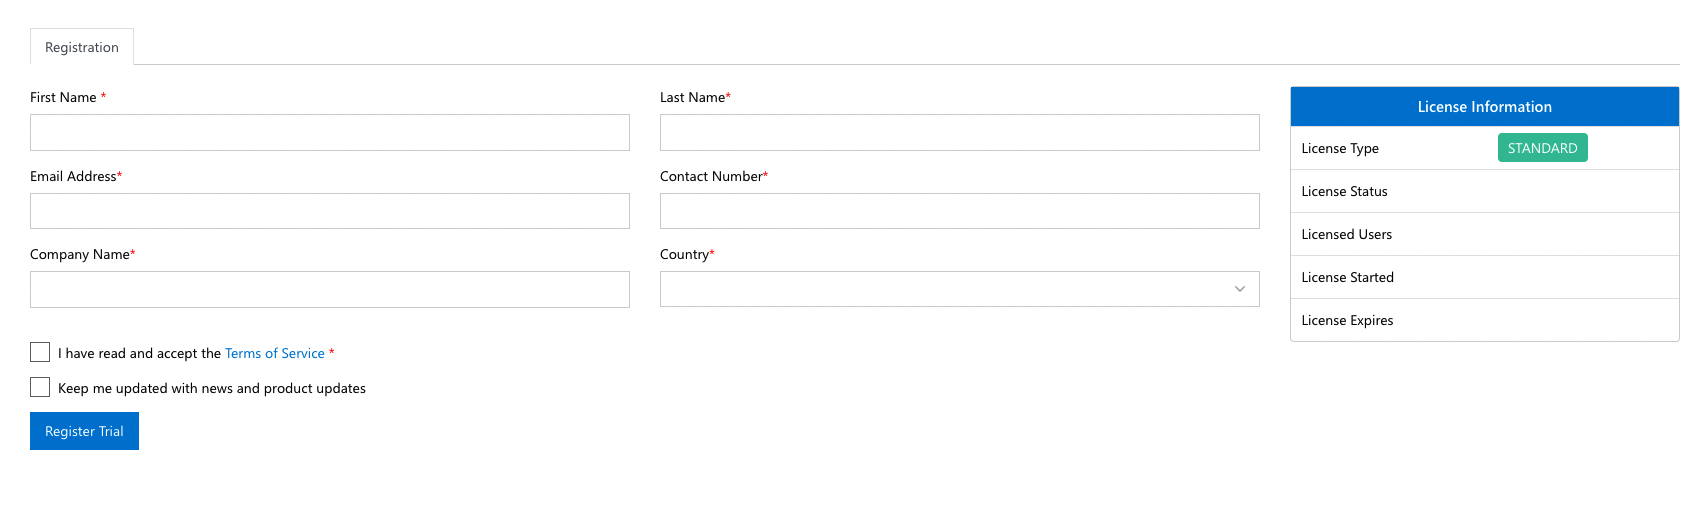
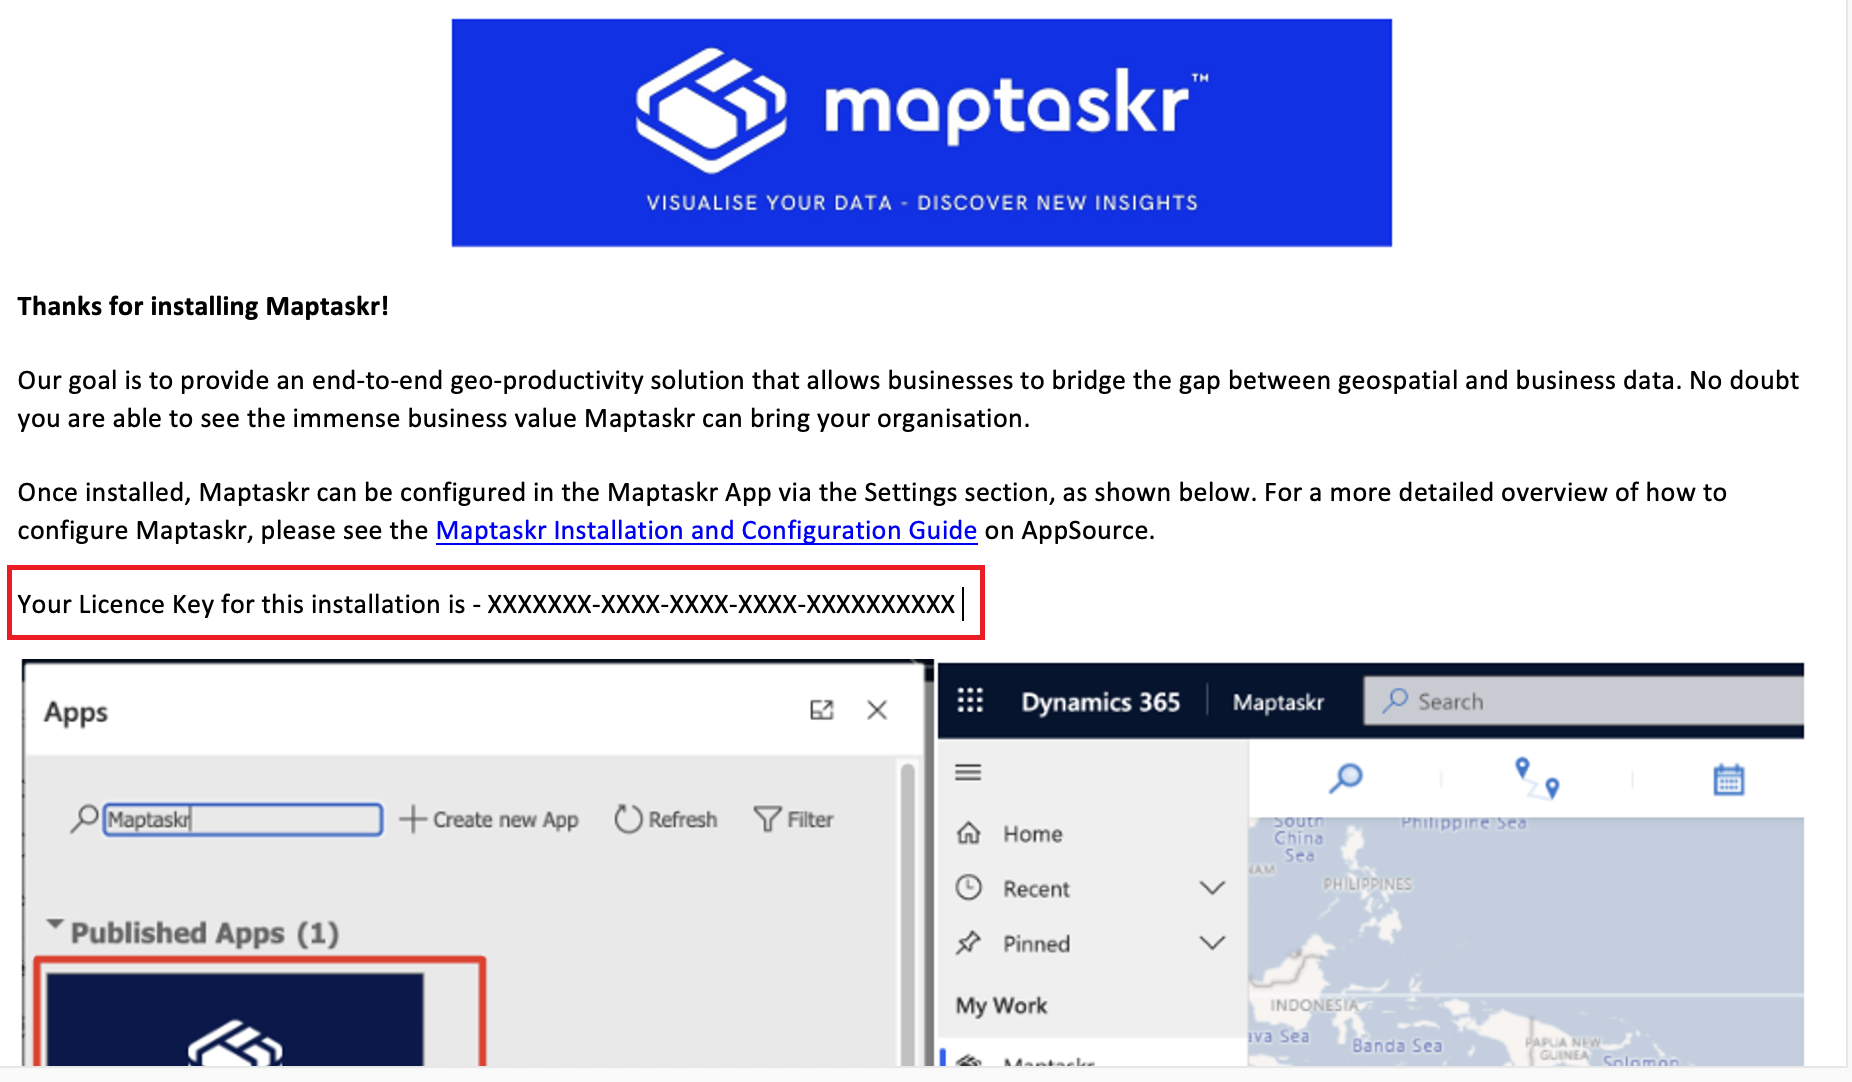
Figure 27: Registration email confirmation with license key (sample).
-
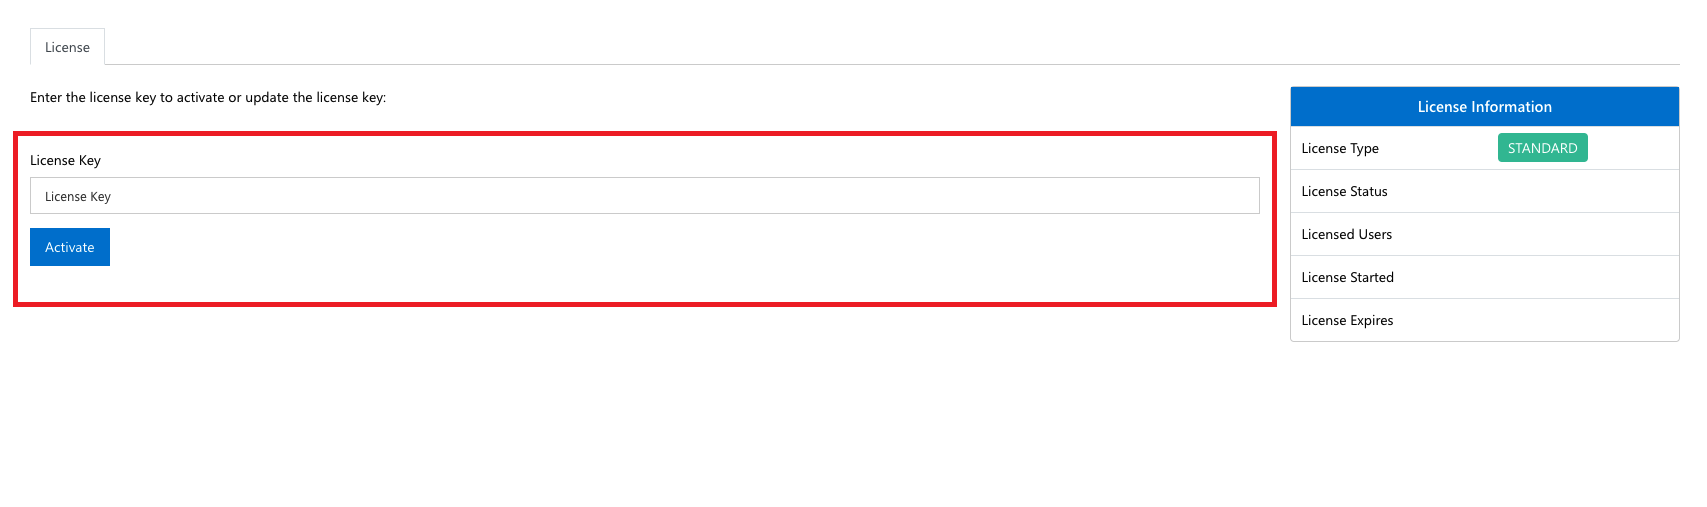
Copy the license key and paste it into the
License Keyfield that appears after registration. ClickActivateto activate your Maptaskr solution.Figure 28: Maptaskr license key activation.
-
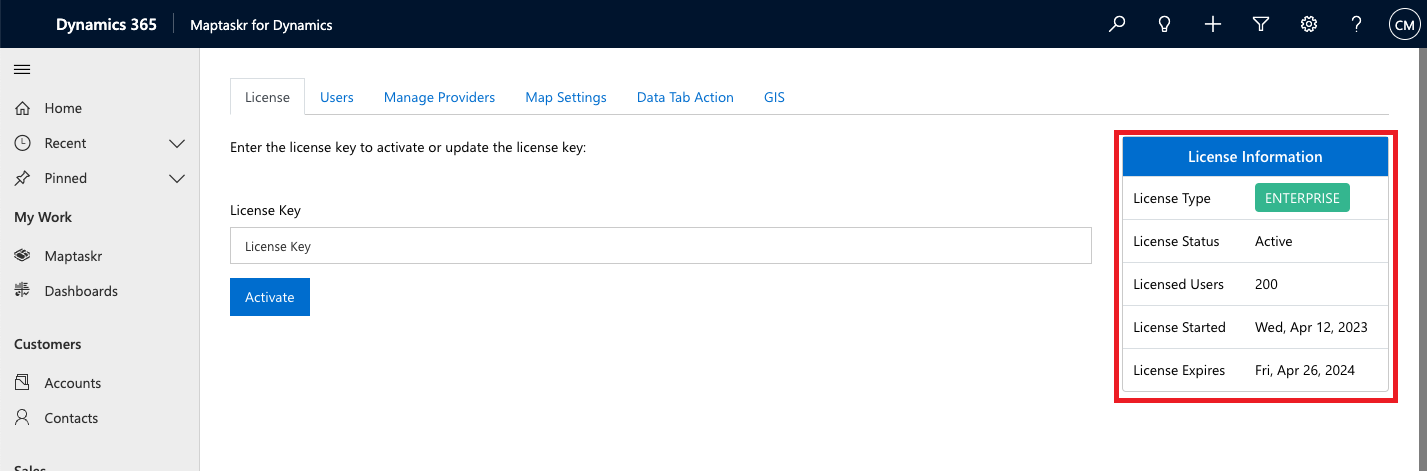
Once the license key is accepted and activated, the registration process has been completed, and the license details will be displayed.
Note: Initial activation will always activate a short-term trial of Maptaskr. Paid licenses will be applied as appropriate by the Maptaskr team.
Figure 29: Activated Maptaskr Solution example.
User Security Roles and Licenses
For users to view and interact with Maptaskr maps, they must firstly be assigned an appropriate license.
Licenses can be assigned at a User or Team level as best suits your needs.
Figure 30: User License management.
Before assigning a license to a user, you must ensure that the user has access to the environment and can access the tables and applications.
Both assigning Security Roles and User Licenses is covered in the following sections.
Adding Maptaskr Security Roles to Users
Adding the Maptaskr Security roles are a pre-requisite for both administration or general users to access and utilise Maptaskr functions. This is achieved using the native platform security roles assignment.
-
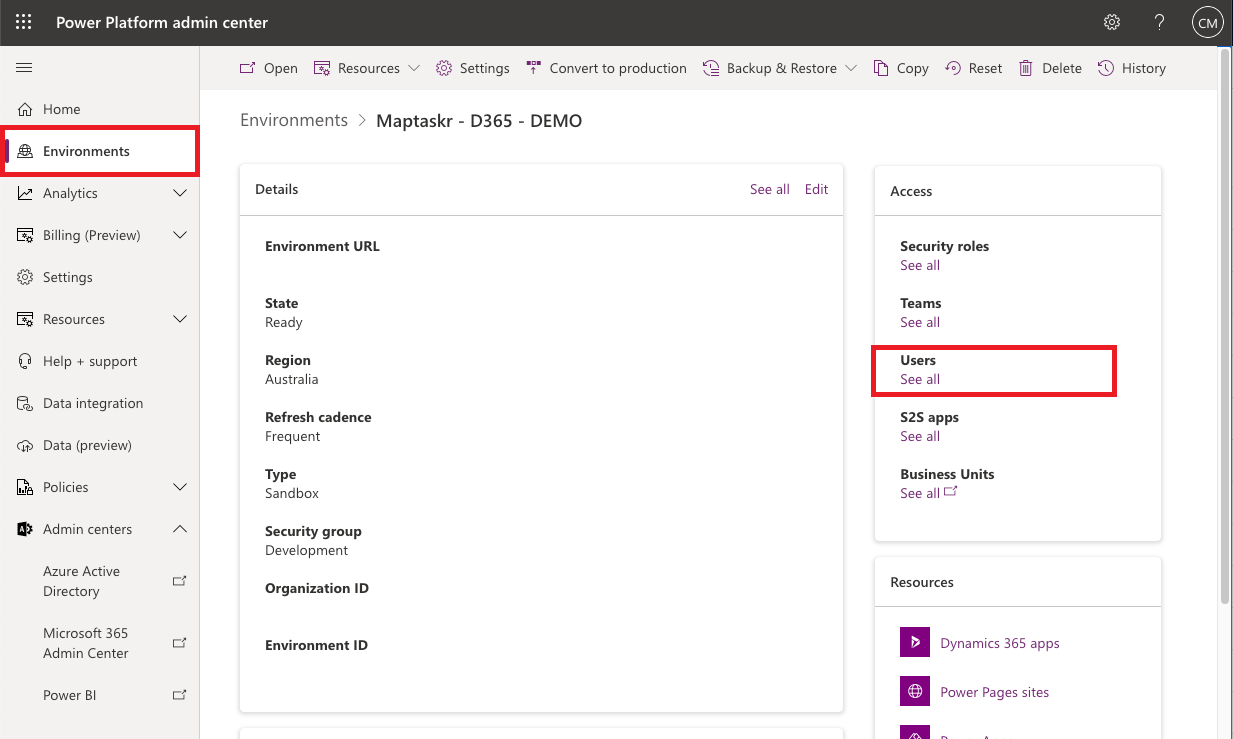
From your Power Platform Admin Portal https://admin.powerplatform.microsoft.com/, navigate to the 'Environments` tab from the left navigation bar.
To the right of the page is an
Accesspanel which contains all the access controls areas which can be used for administrating user roles and security.Figure 31: Launch environment landing page.
-
Click on
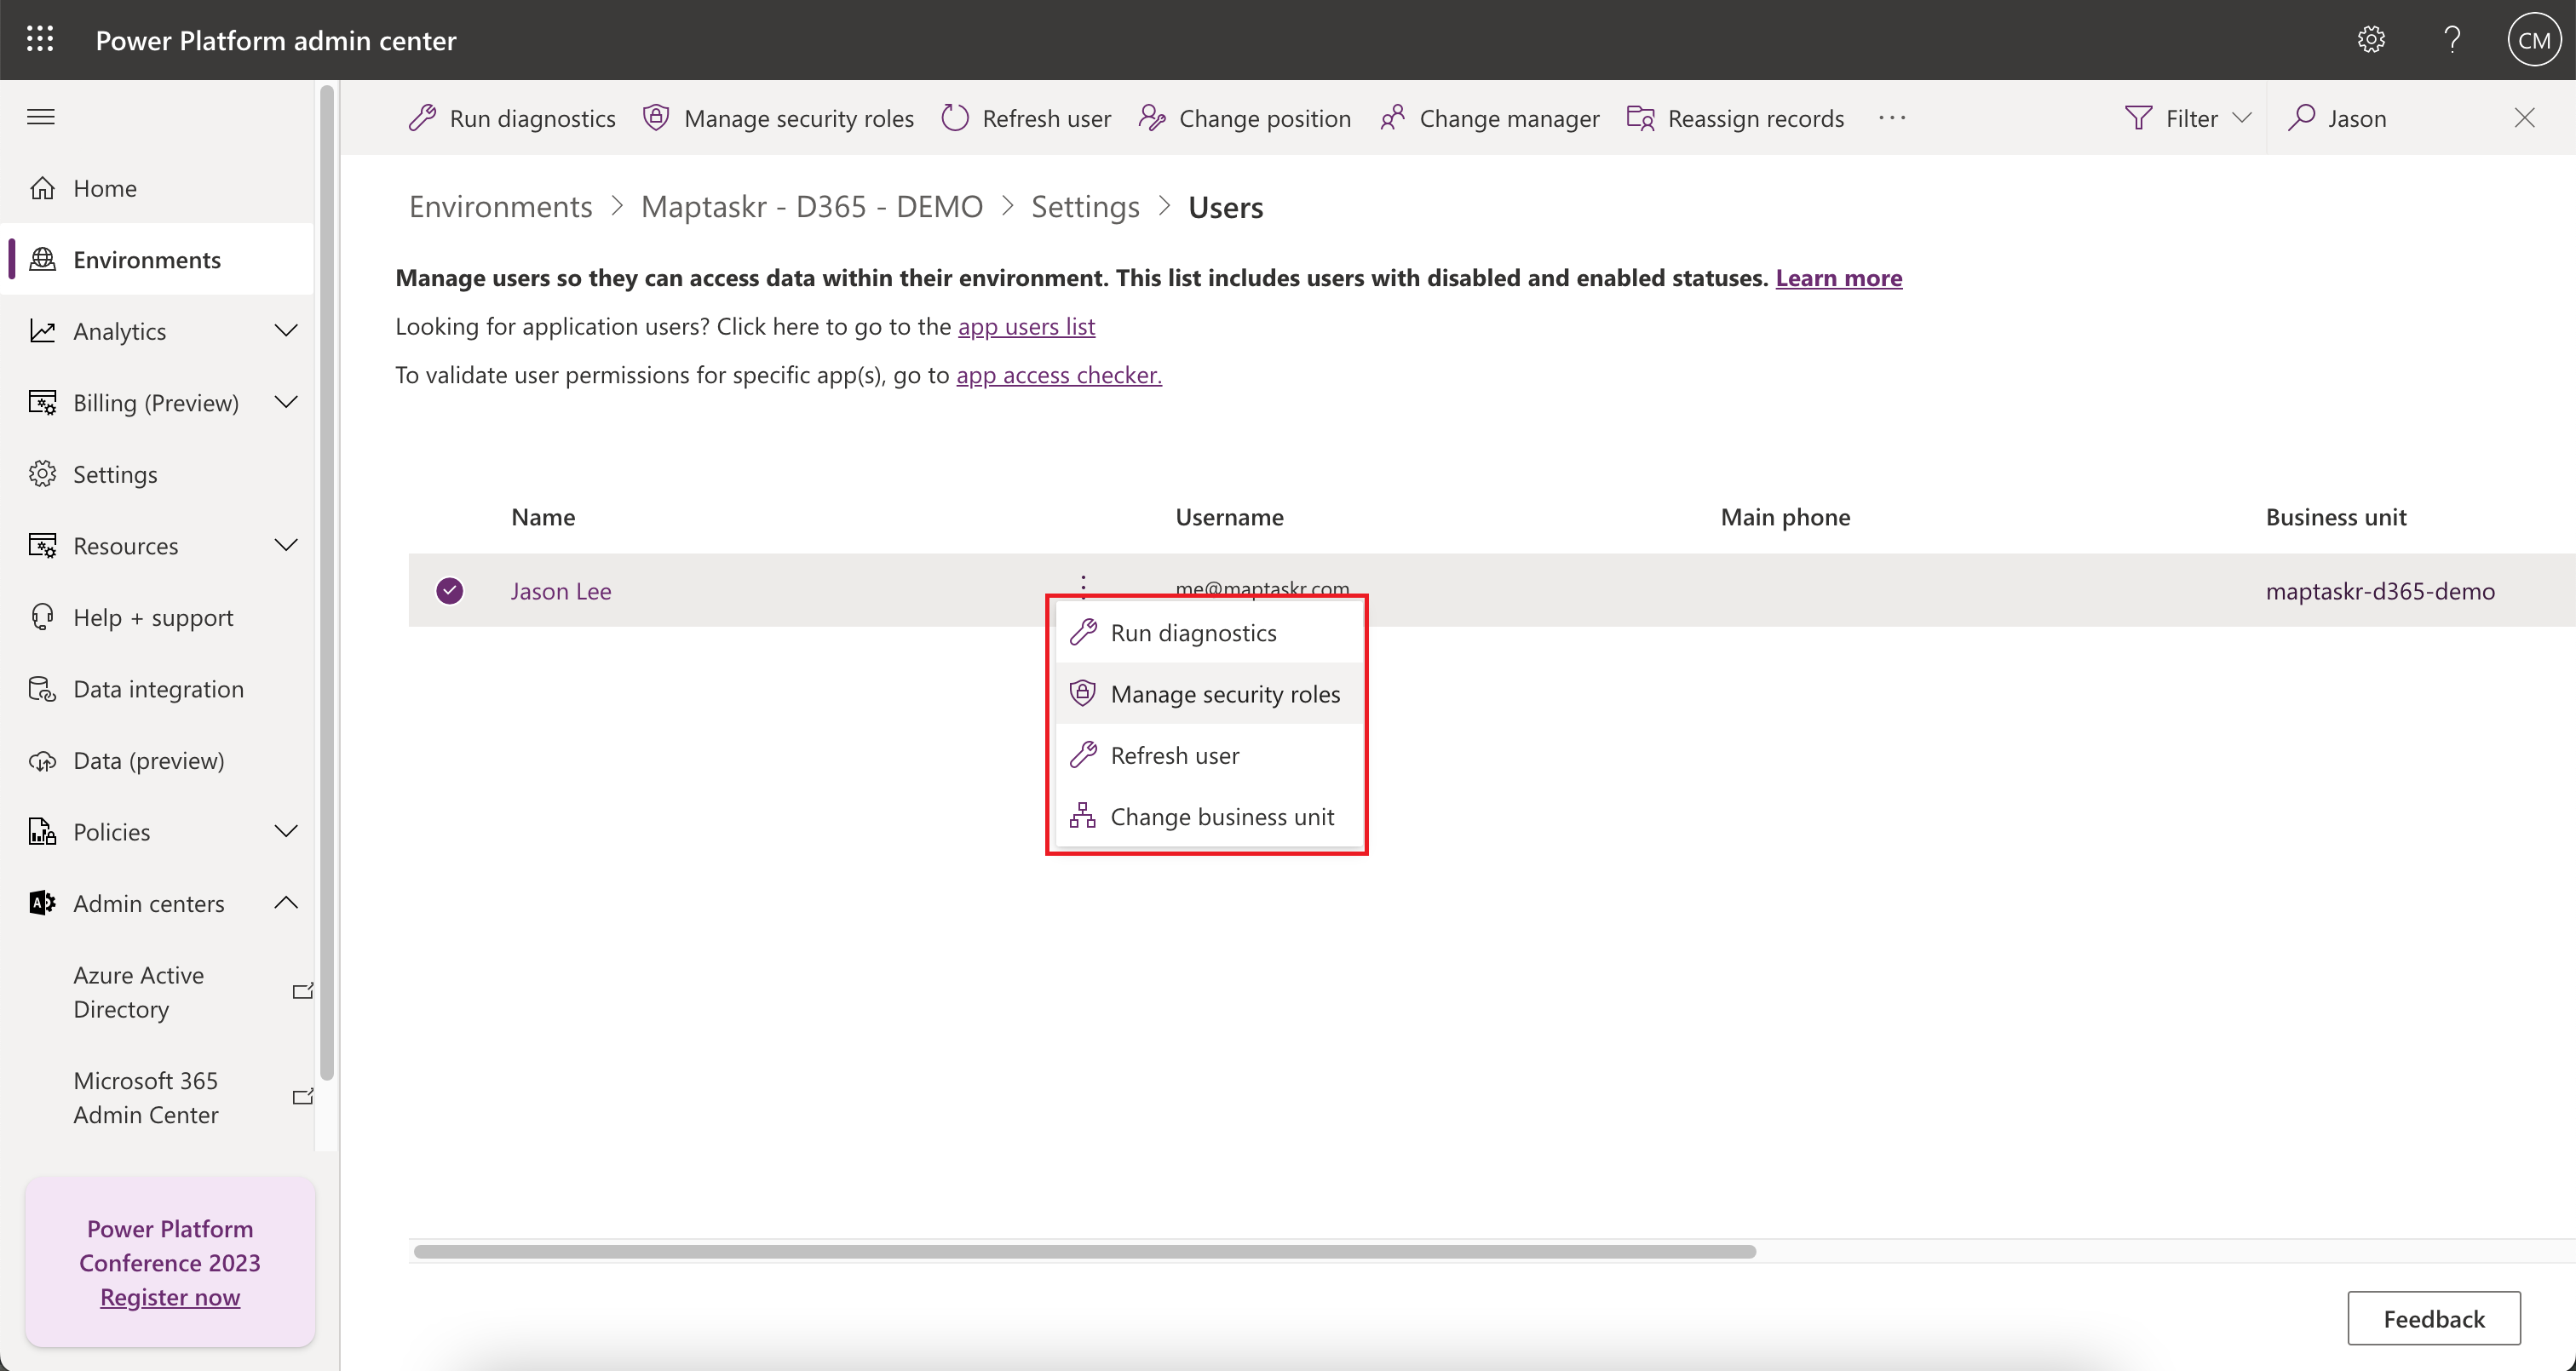
See allunder theUsersheading within the Access panel. You will be navigated to the Manage User screen where you can search for the user(s) you wish to assign Maptaskr security roles to.
Once you have found the user click on the Click the ![]() menu option next to the user's name and select
menu option next to the user's name and select Manage security roles.
Figure 32: Manage security roles.
- Within the panel that appear to the right, your will see a list of all the available security roles that can be assigned to users. Scrolling through the list you will come across the following Maptaskr roles.
Figure 33: Maptaskr Security Roles.
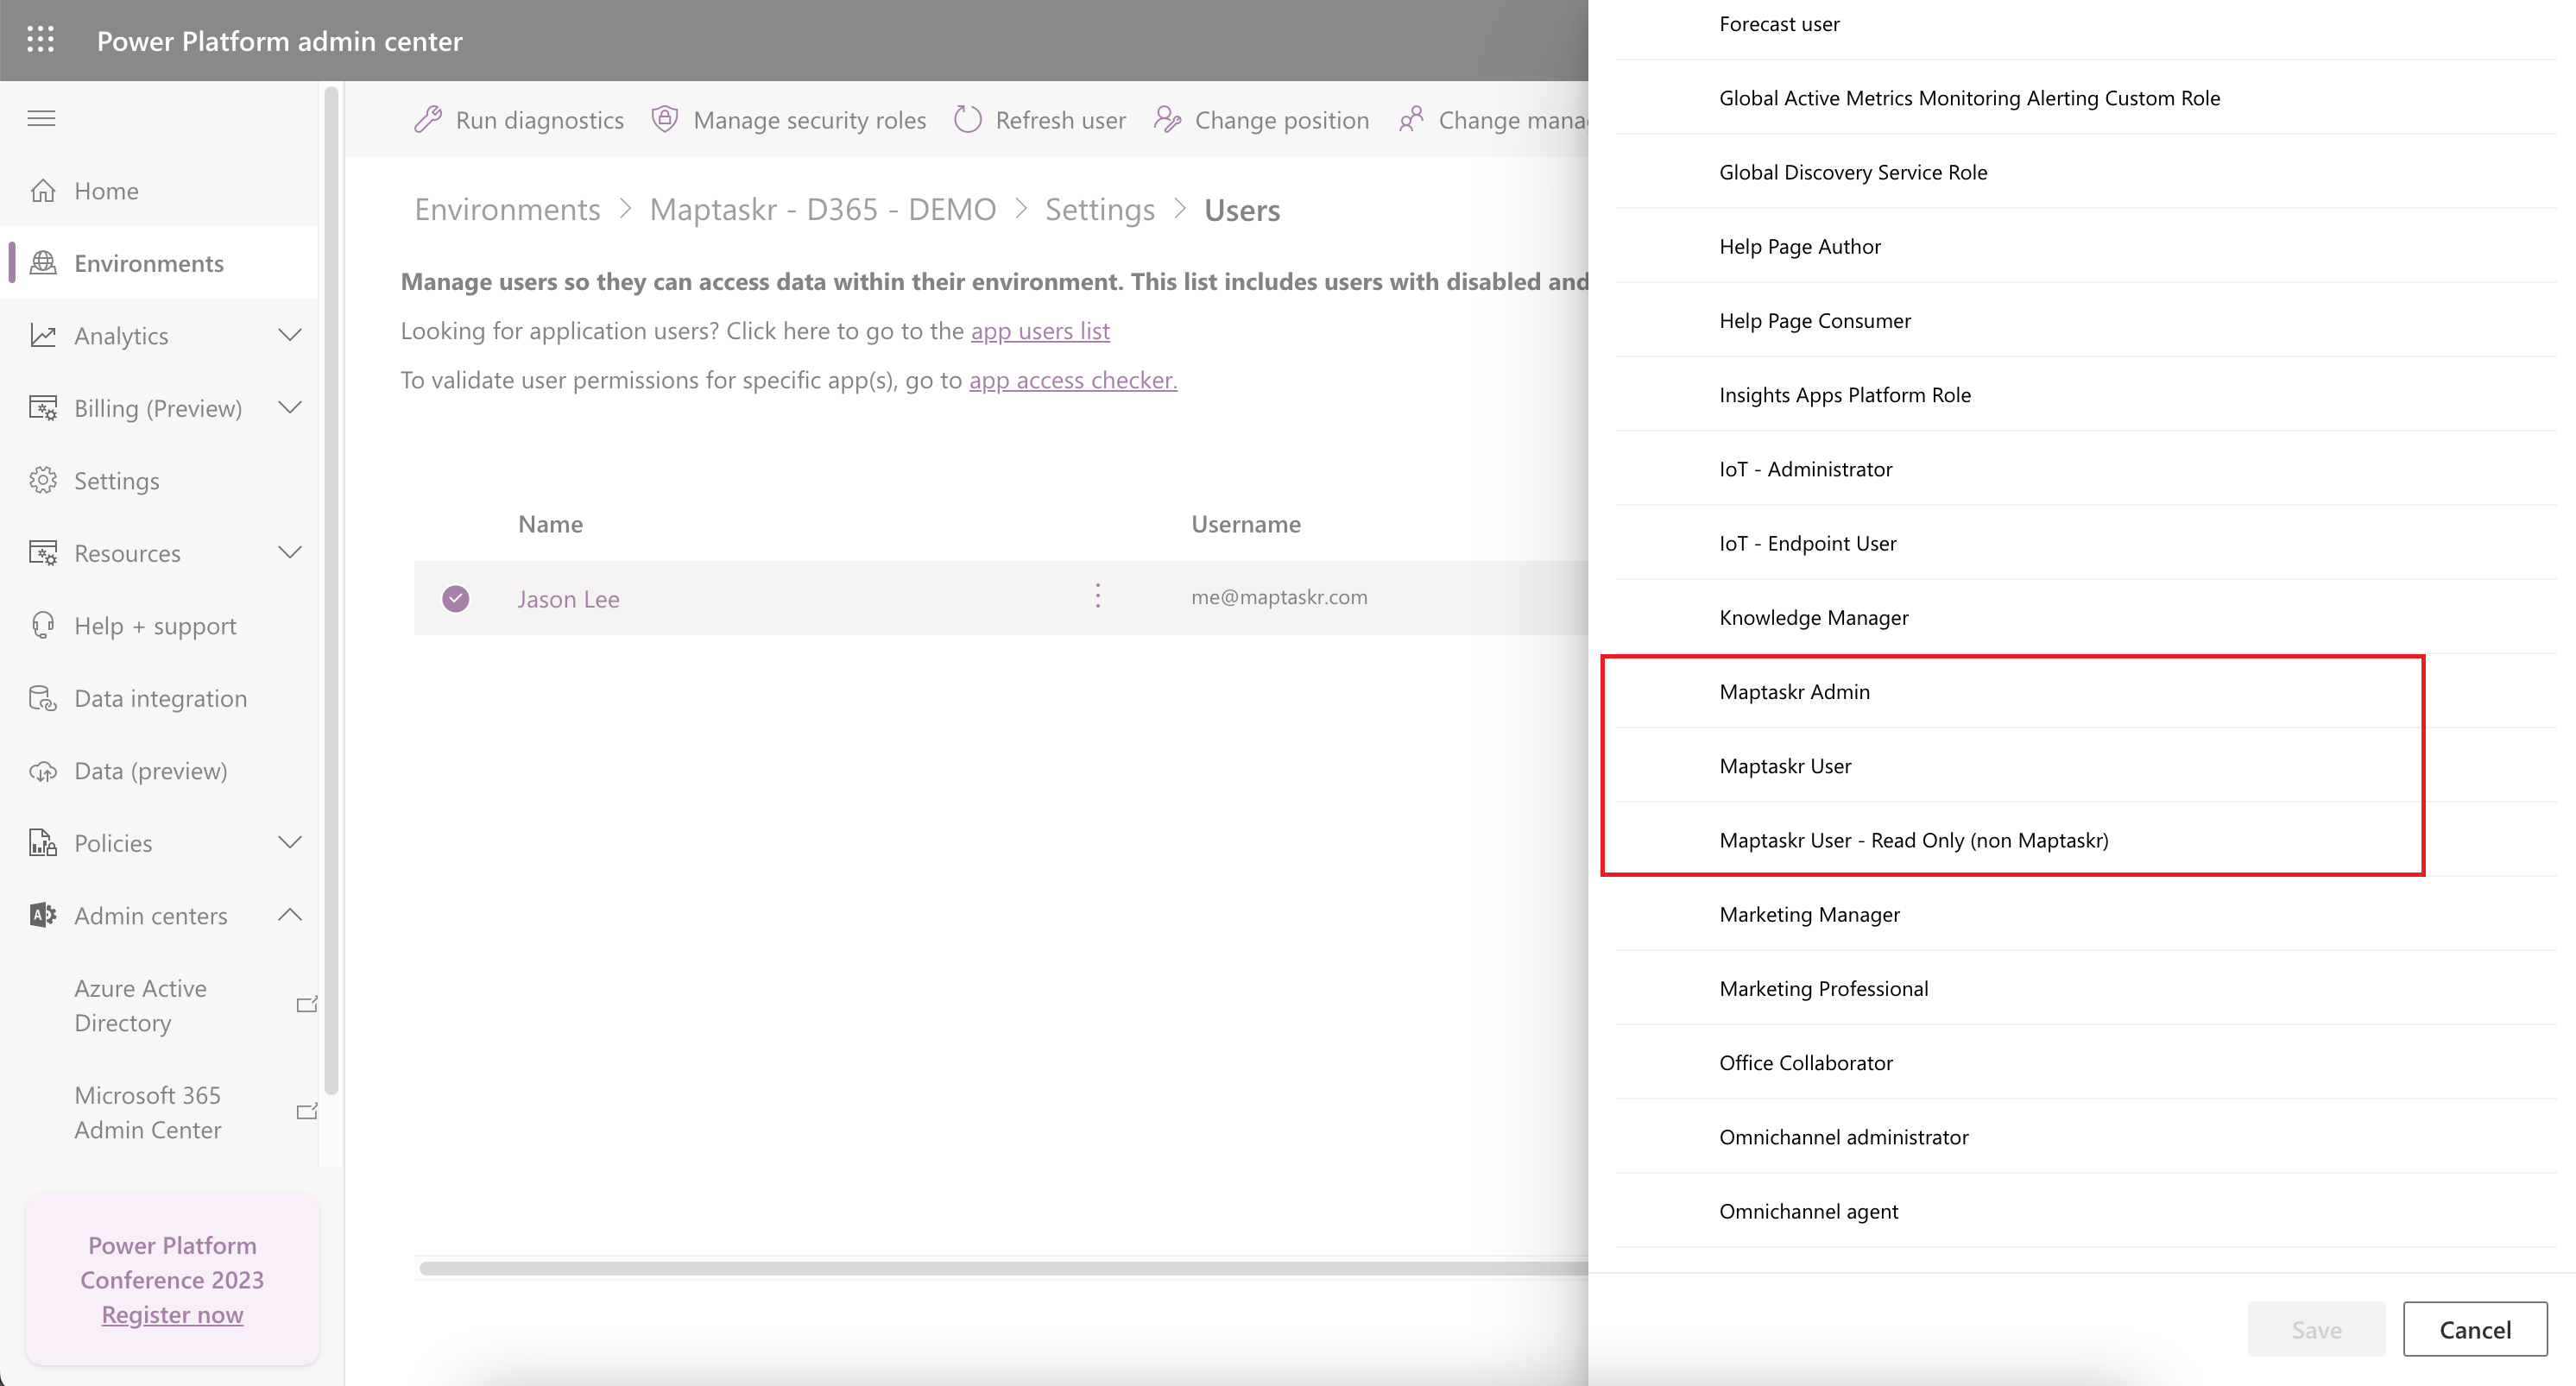
The following table provides a detailed overview of each role and how they should be applied to your user base.
| Security Role | Description |
|---|---|
| Basic User | Out of the box basic user role to provide general access. Required for all general users. |
| Maptaskr Admin | Admin role for users who are tasked with administering Maptaskr for the platform. (Licensed allocation required) Note: Users that need the ability to create global Maptaskr settings, require the Maptaskr Admin role assigned. |
| Maptaskr User | User role for licensed Maptaskr users. (Licensed allocation required) |
| Maptaskr User - Read Only (non Maptaskr) | User role for unlicensed Maptaskr users, recommended permission for supporting the Maptaskr for Power Pages anonymous users. |
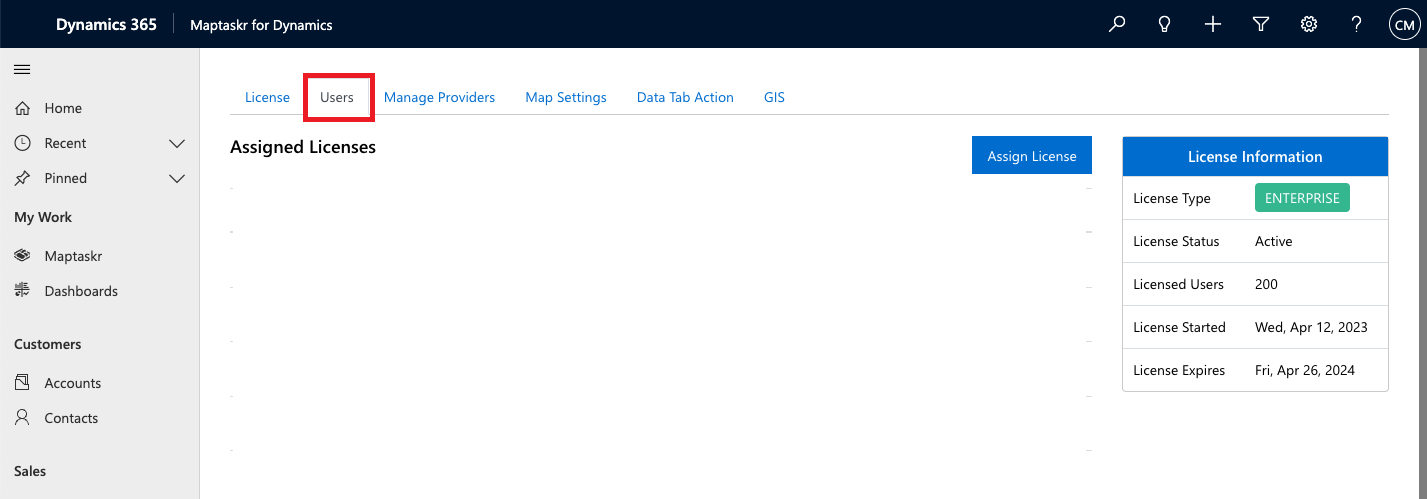
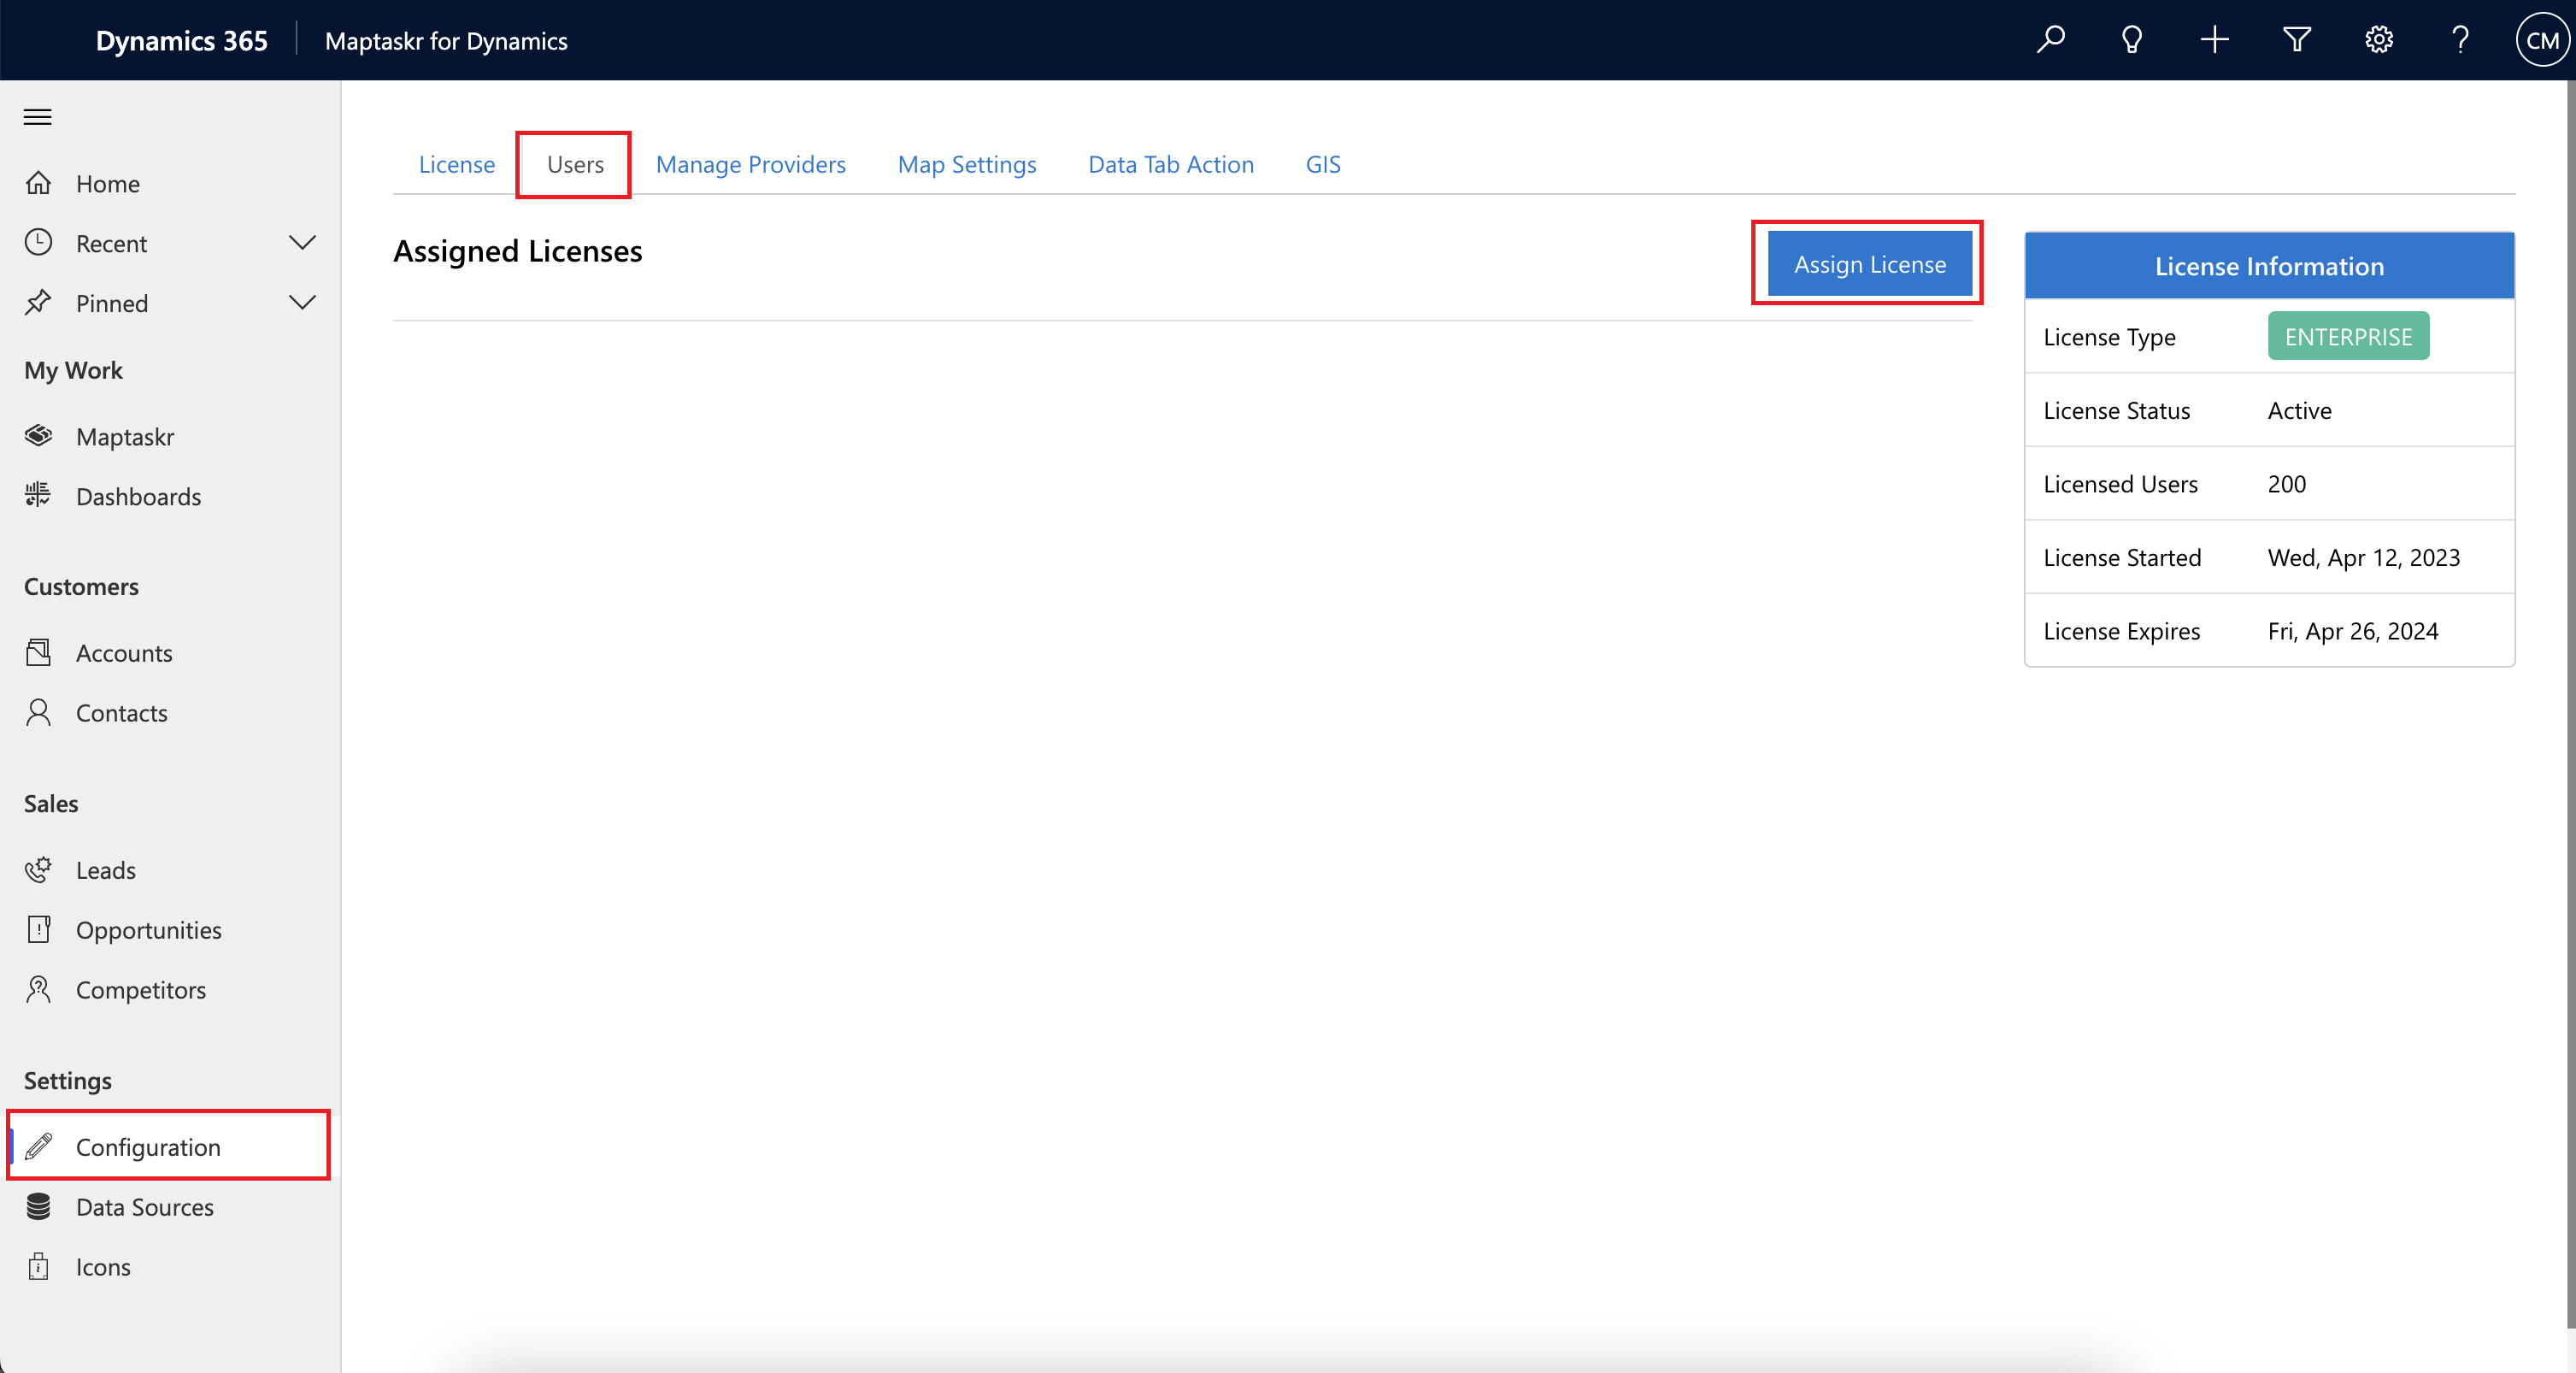
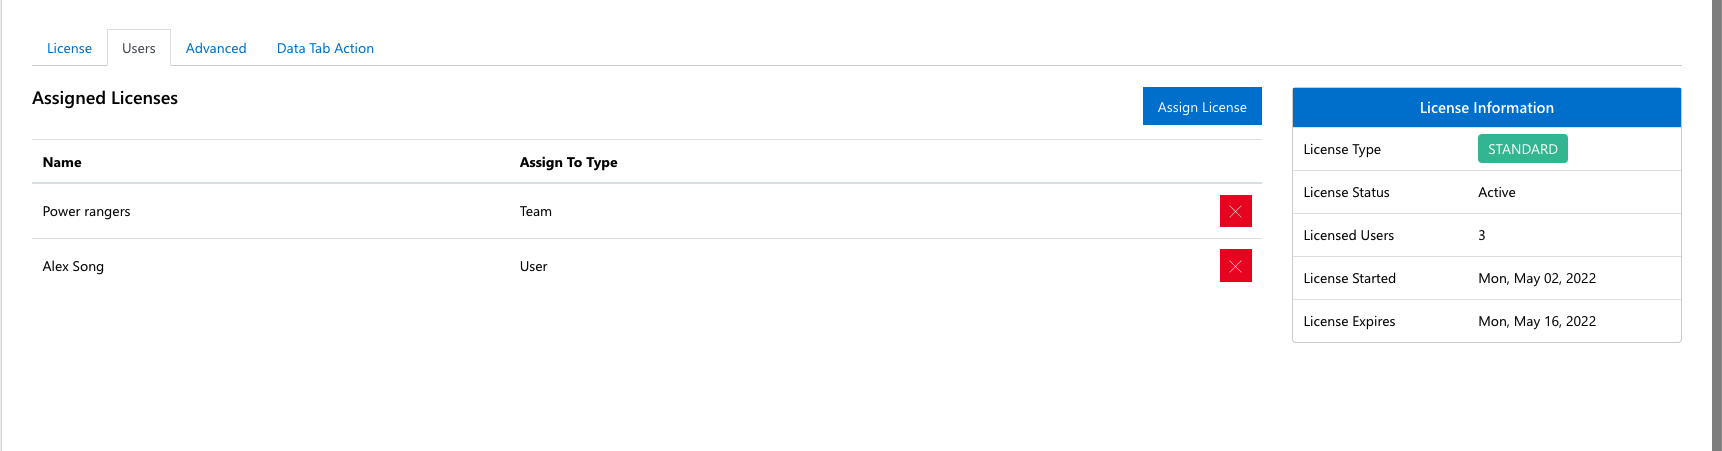
Assigning Licenses to Users
Once users are assigned the appropriate security roles (See 2.2.1 Adding Maptaskr Security Roles to Users) a Maptaskr license can be applied to users who require access Maptaskr maps.
To assign a license head to Users section of the Configuration area within the Maptaskr App. Licenses can be added to an individually named user or to a Team which has been preconfigured within the core platform.
Note: Assignment of licenses to either individual users or teams of users will consume the number of licenses allocated to an environment. If a team has more users than available licenses, only the top alphabetically ordered users in that team will receive licenses, until they are exhausted.
Figure 34: Configuration of Users.
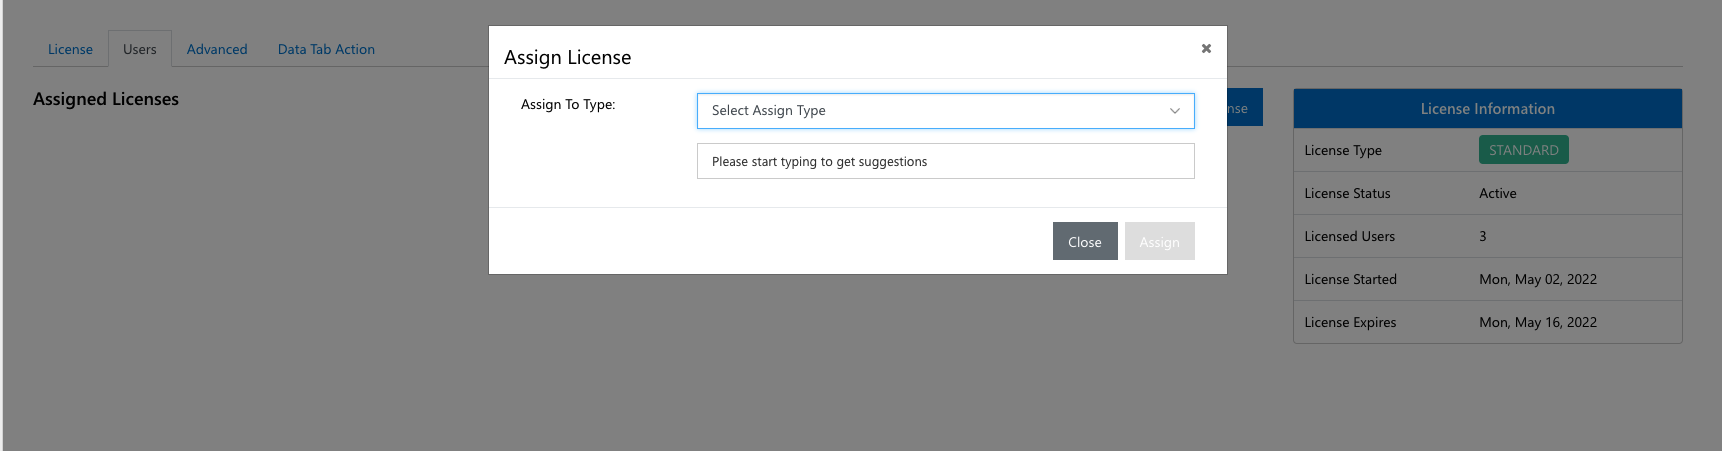
Assigning Individual User Licenses
-
Click on
Assignlicense button to input user/team and search for the name of user/team.Figure 35: Selecting license type as User.
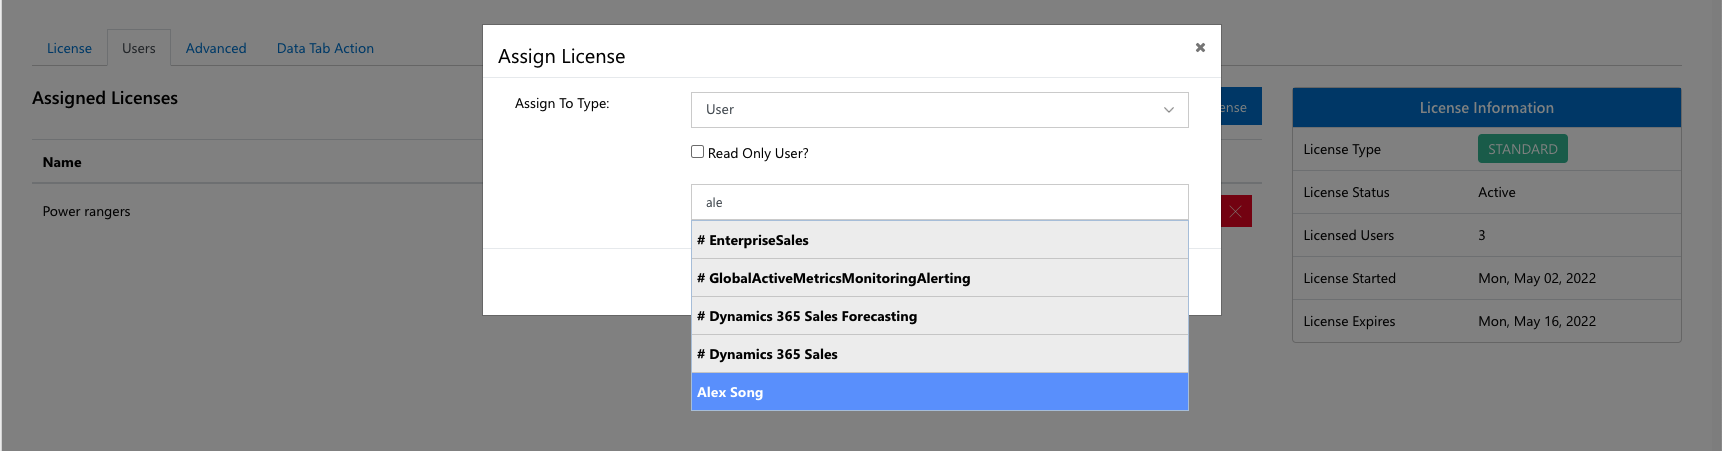
-
When adding a user, you need to select type
User,select permission (optional) and lastly search the name of the user. Once you have found the User, select the users name, and clickAssign` to complete the process of assigning a license to a User.Figure 36: Assigning a user license.
Assigning Team Licenses
- When adding a team, you need to select type
Teamand search the name of the team.
Figure 37: Adding a new team.
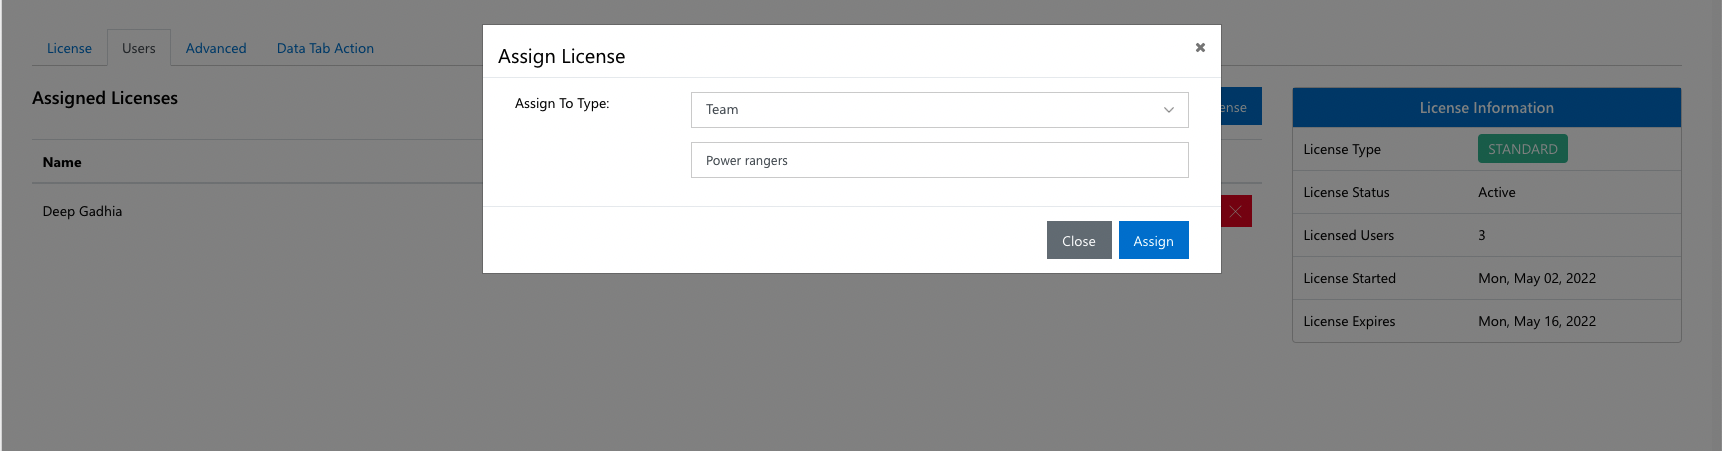
- Once you have found the Team, select the team
s name, and clickAssign` to complete the process of assigning a license to a Team.
Figure 38: Added Users and Teams.
Managing Mapping Service Providers
Maptaskr can be configured to use different map service providers to provide various mapping capabilities depending on your organisation`s requirements.
Figure 39: Managing Mapping Services.
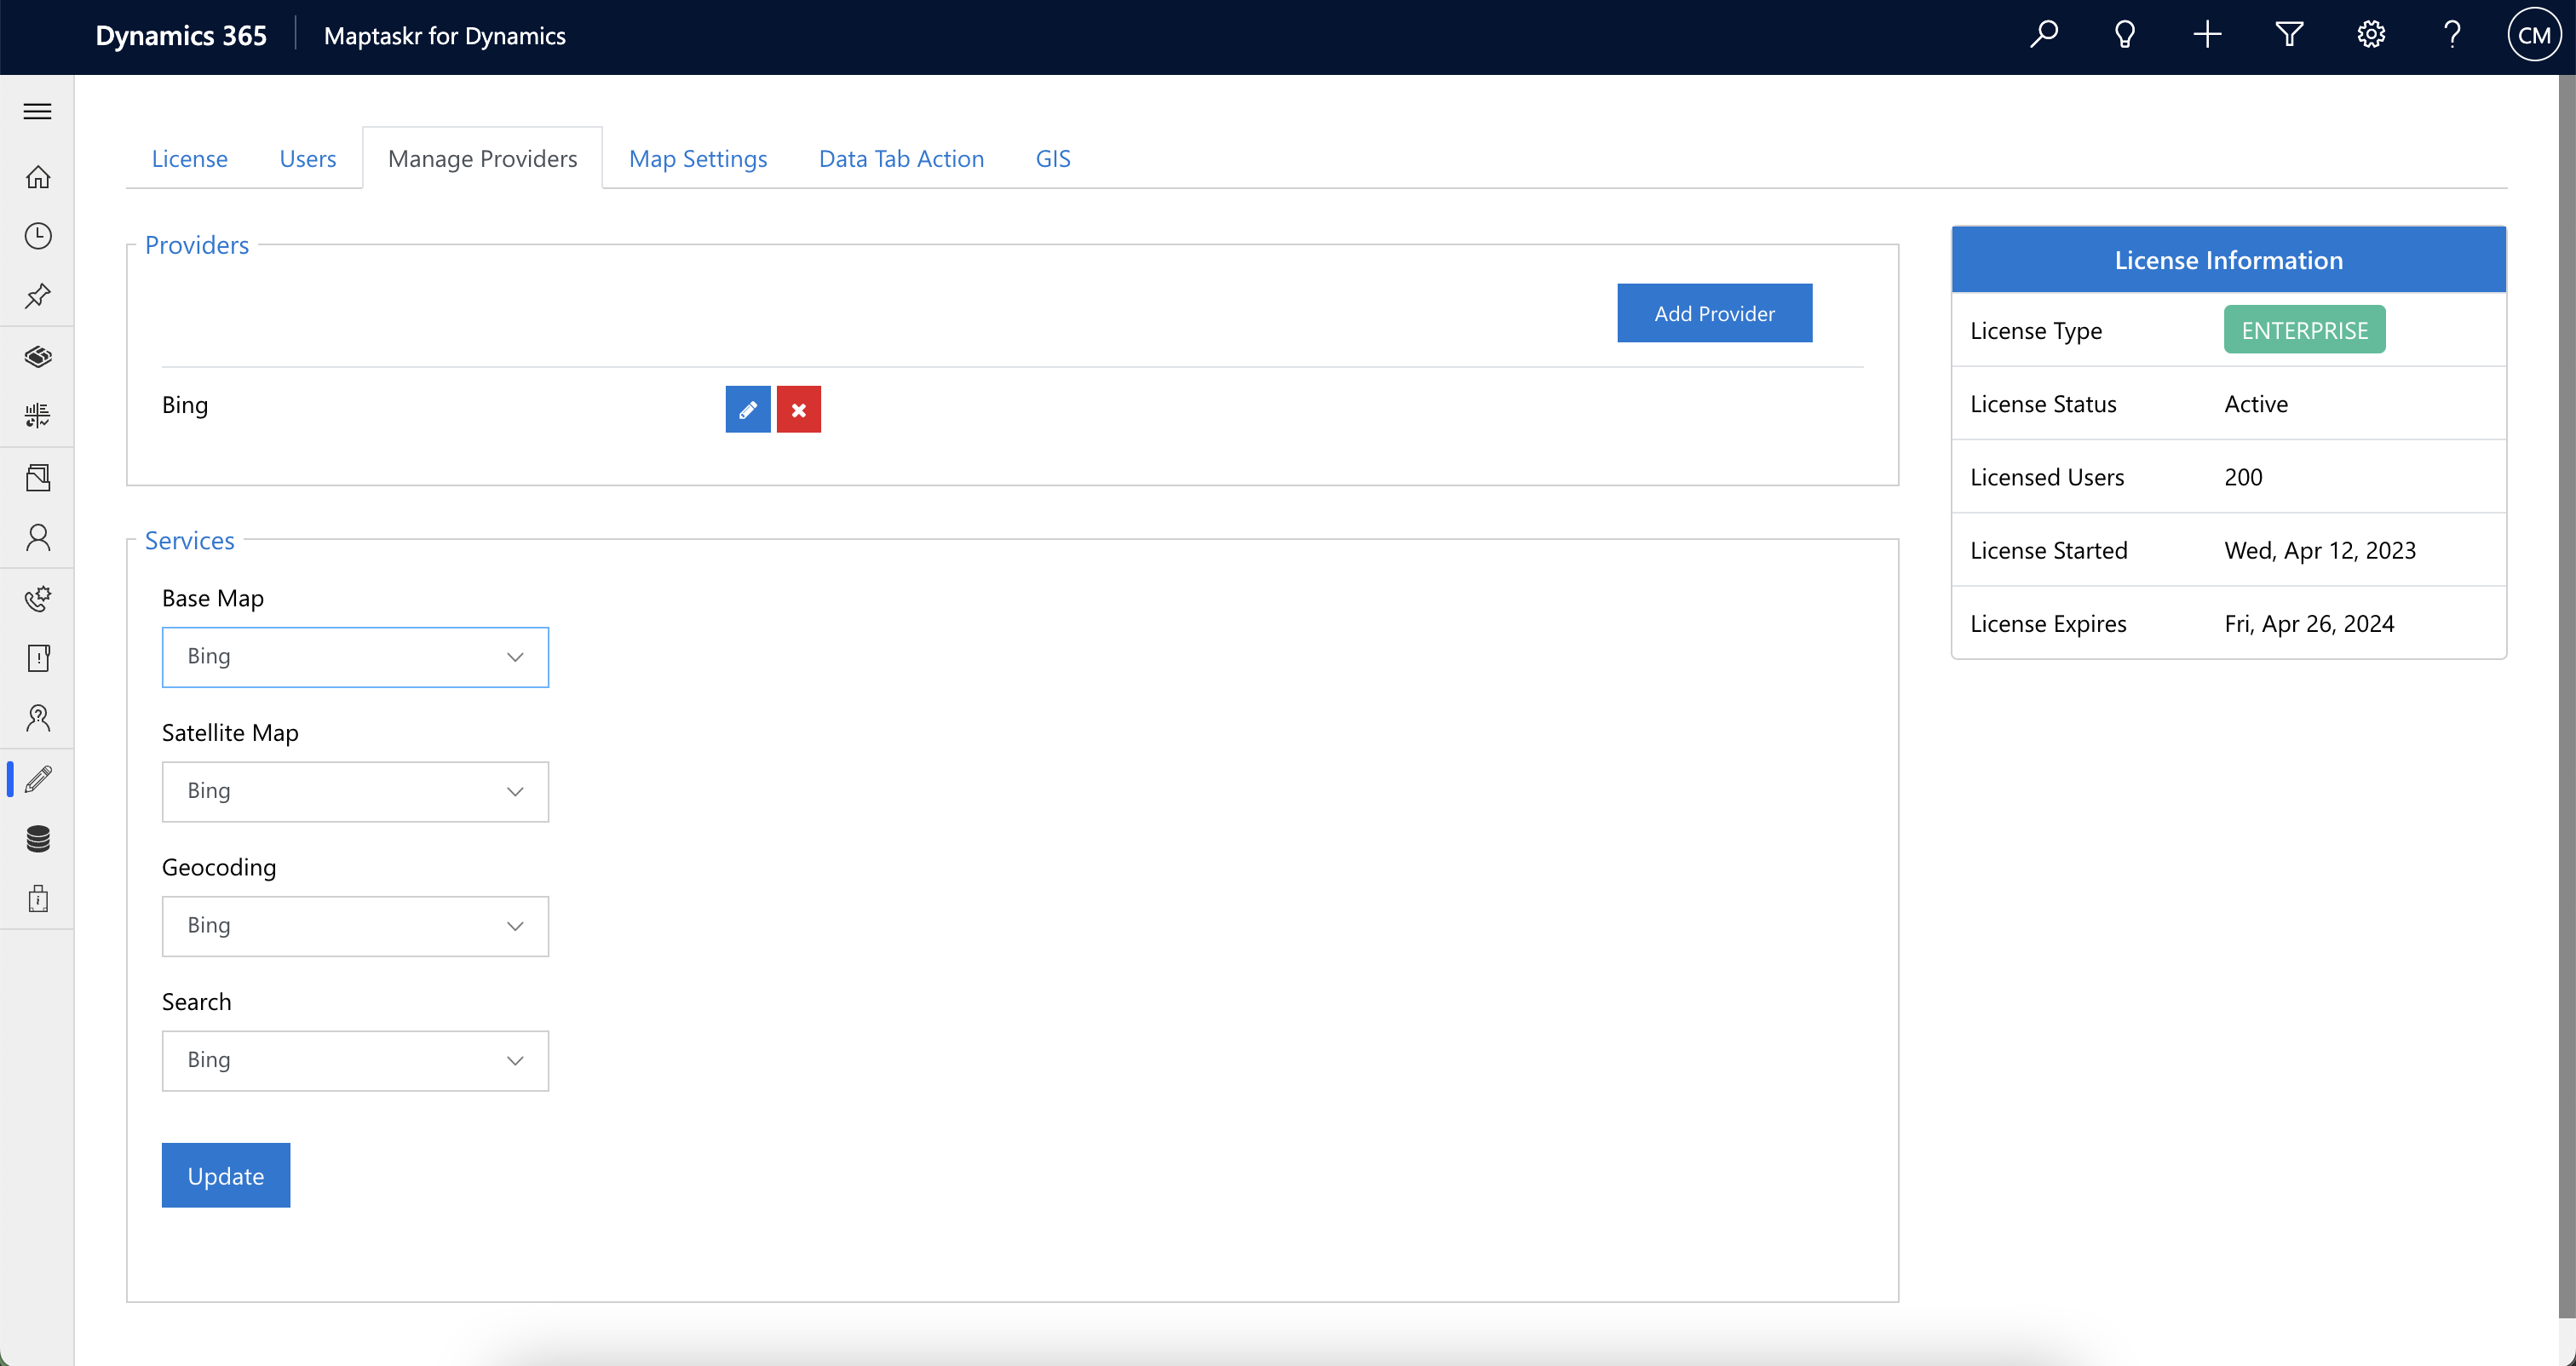
Once a provider has been added and configured with the appropriate API Keys or ClientID and Secrets the provider can be used for the following services.
-
Base Map – Selection of the provider that will be used for the basemap of all Maptaskr maps. This provider is also used for Routing, as well as Points of Interest (POIs).
-
Satellite Map – Selection of the provider that will be used for the satellite base map.
-
Geocoding – Selection of the provider that will be used for geocoding and reverse geocoding addresses (If BING or ARCGIS providers are used for the basemap, it is recommended that the same provider be used for Geocoding as the Routing services provided by these services may not work as expected with an alternative Geocoder).
-
Search – Selection of the provider that will be used for address searching throughout Maptaskr (Similar to Geocoding, it is recommended to use the same provider as the basemap if possible). Additionally a Custom Search provider can be used here. For more information on how to configure Custom Search see Custom Search Providers.
The below table provides an overview of the supported Services and which service Maptaskr currently can be configured to utilise.
Note: To configure Maptaskr to utilise any of the Mapping Service providers listed below, appropriate service plans and are required to be acquired which may incur a cost depending on the service. The details of these service plans are then be used when configuring the providers in Maptaskr.
| Service | Base Map (inc. Routing & POIs) | Satellite Map | Geocoding | Search |
|---|---|---|---|---|
| AzureMaps | ✔️ | ✔️ | ✔️ | ✔️ |
| Bing** | ✔️ | ✔️ | ✔️ | ✔️ |
| Esri ArcGIS | ✔️ | ✔️ | ✔️ | ✔️ |
| HereMaps | ✔️ | ✔️ | ✔️ | ✔️ |
| OpenStreet | ✔️* | ❌ | ❌ | ❌ |
*Excludes Routing & POI's.
**Please note that Bing Maps are due for deprecation in June 2025 and may not work as expected past this date.
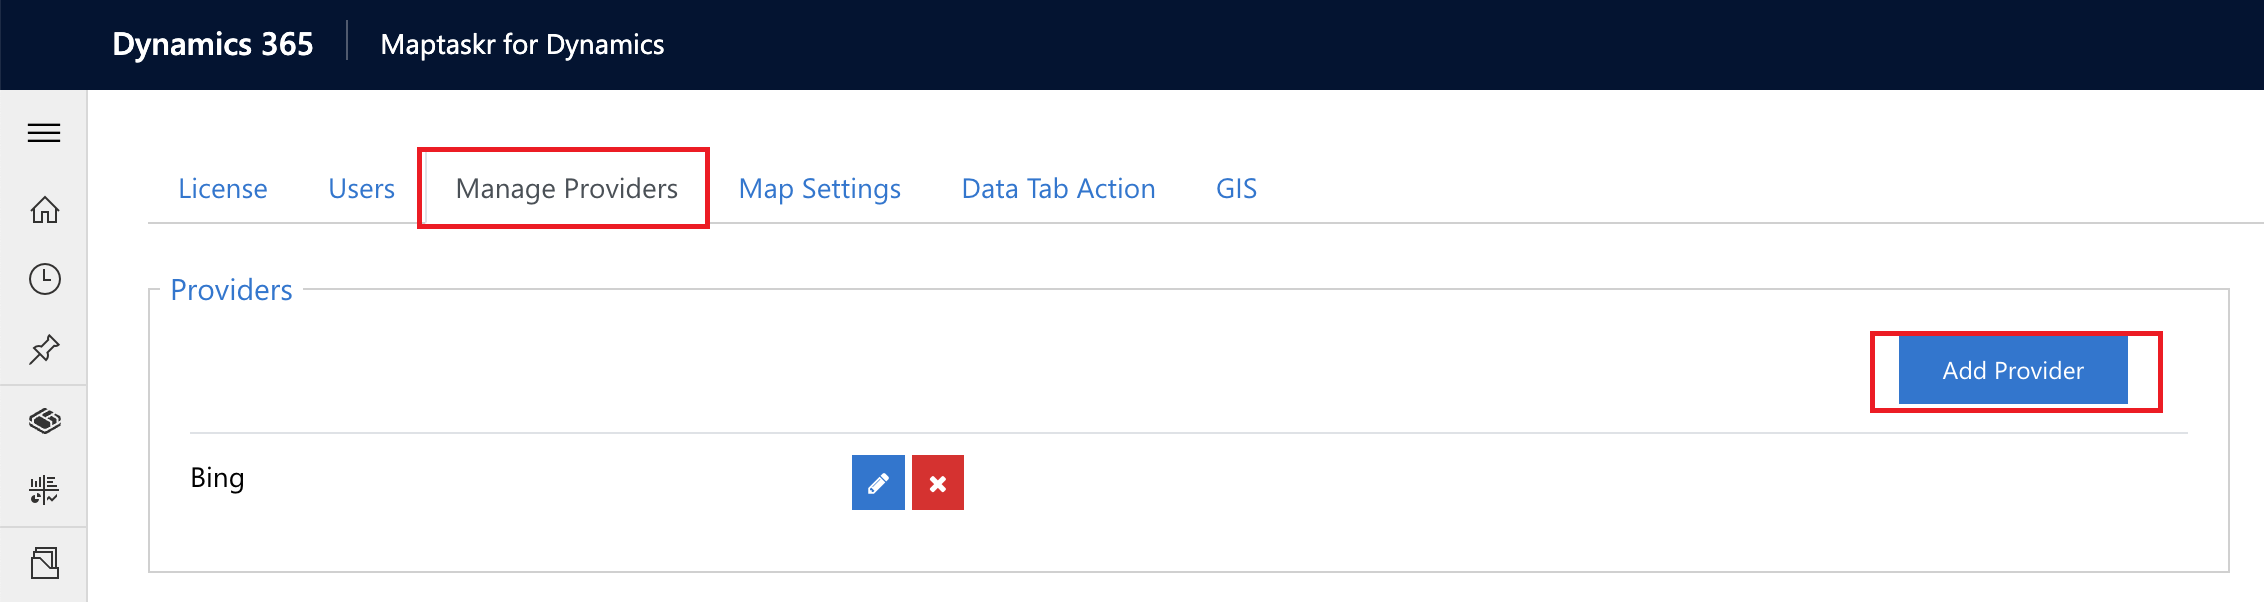
Adding a Service Provider
To configure a new Service Provider:
-
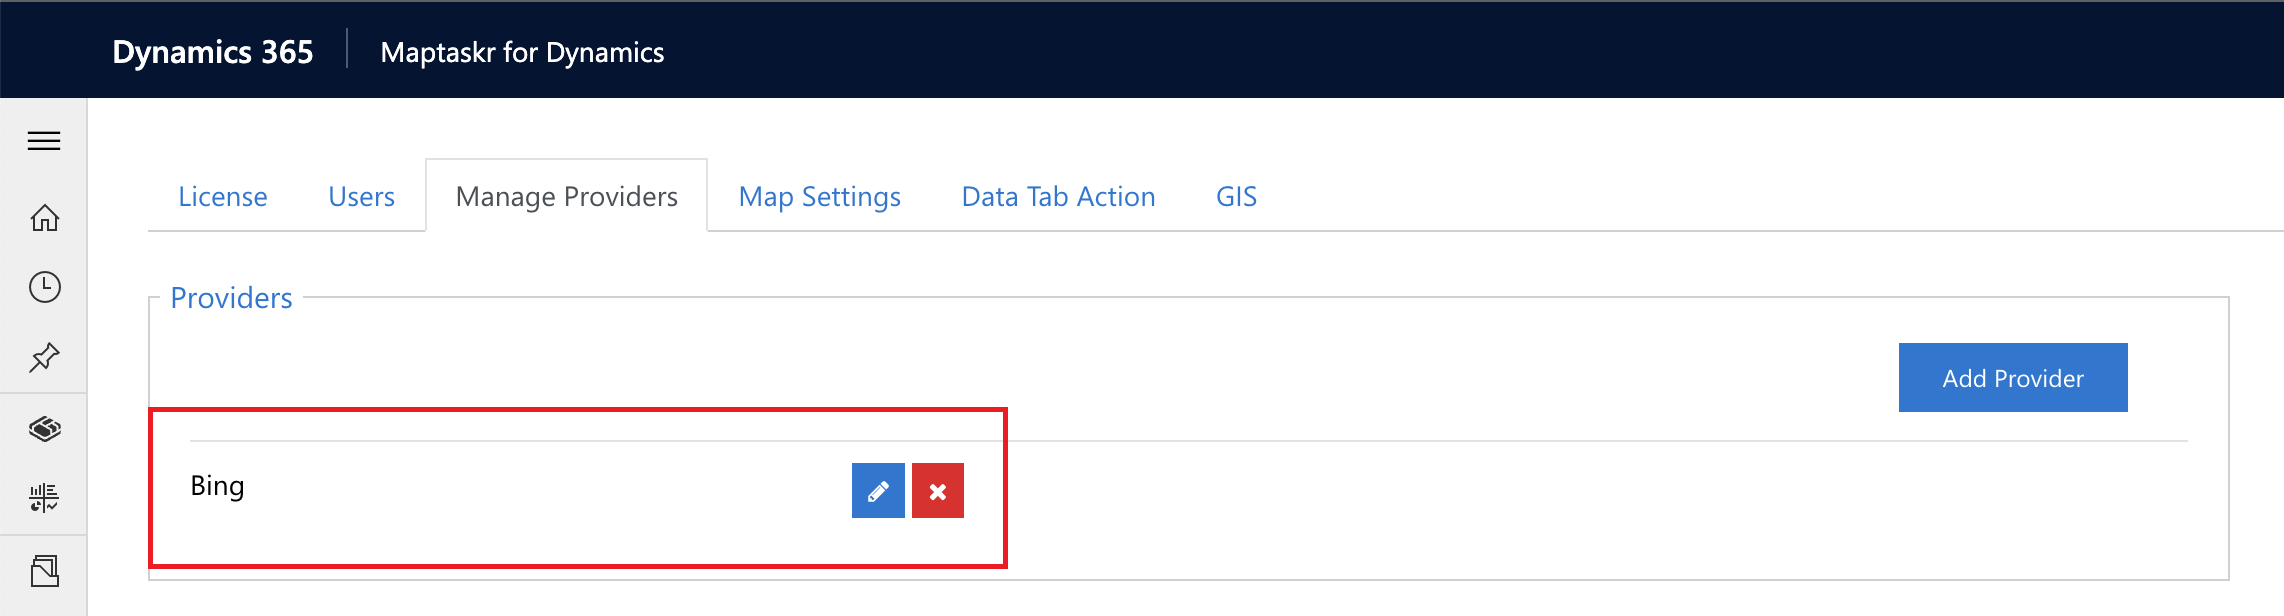
Navigate to
Manage Providerstab from the configuration tab to add or view Map providers the user wishes to view on Maptaskr and clickAdd Provider.Figure 40: Add Provider.
-
A
Create Newmodal will appear in which you can select the Provider type you wish to add. Create new provider of choice from the selection.
Note: Each Service Provider configuration will need to be accompanied by a set of credentials/details which differ from service to service. These are acquired when a service plan is purchased/created from the appropriate provider.
The following examples will show the creating of a Bing and ArcGIS Service provider configurations only.
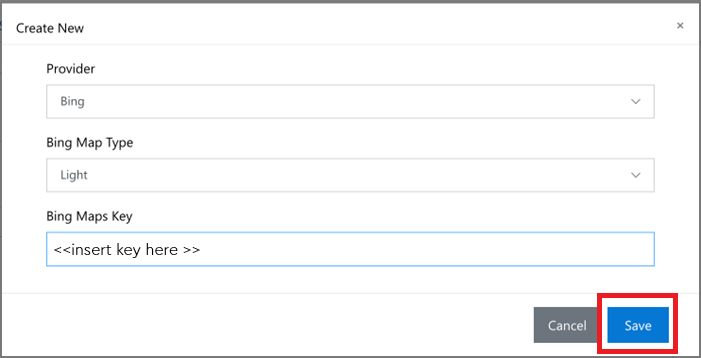
Adding a Bing Service Provider
-
From the
Create Newmodal selectBingas the Provider. Then select the basemap style type you wish to apply and enter in theBing Maps keyassociated with the service plan you wish to use.Figure 41: Create New Bing Provider.
-
Click
Saveand once completed the new service provider will be listed as an available provider to use for configuring the mapping services. You can also edit and delete the configuration from this screen by selecting the options available.Figure 42: Bing Provider Created.
Adding an ArcGIS Service Provider
-
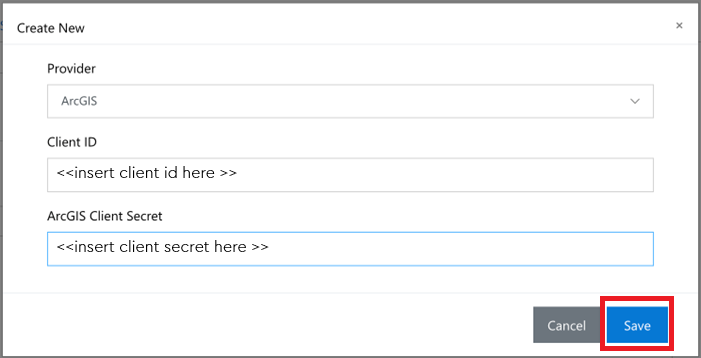
From the
Create Newmodal selectArcGISas the Provider. Then enter in the 'Client IDandArcGIS Client Secret` associated with the service plan you wish to use.Figure 43: Create New ArcGIS Provider.
-
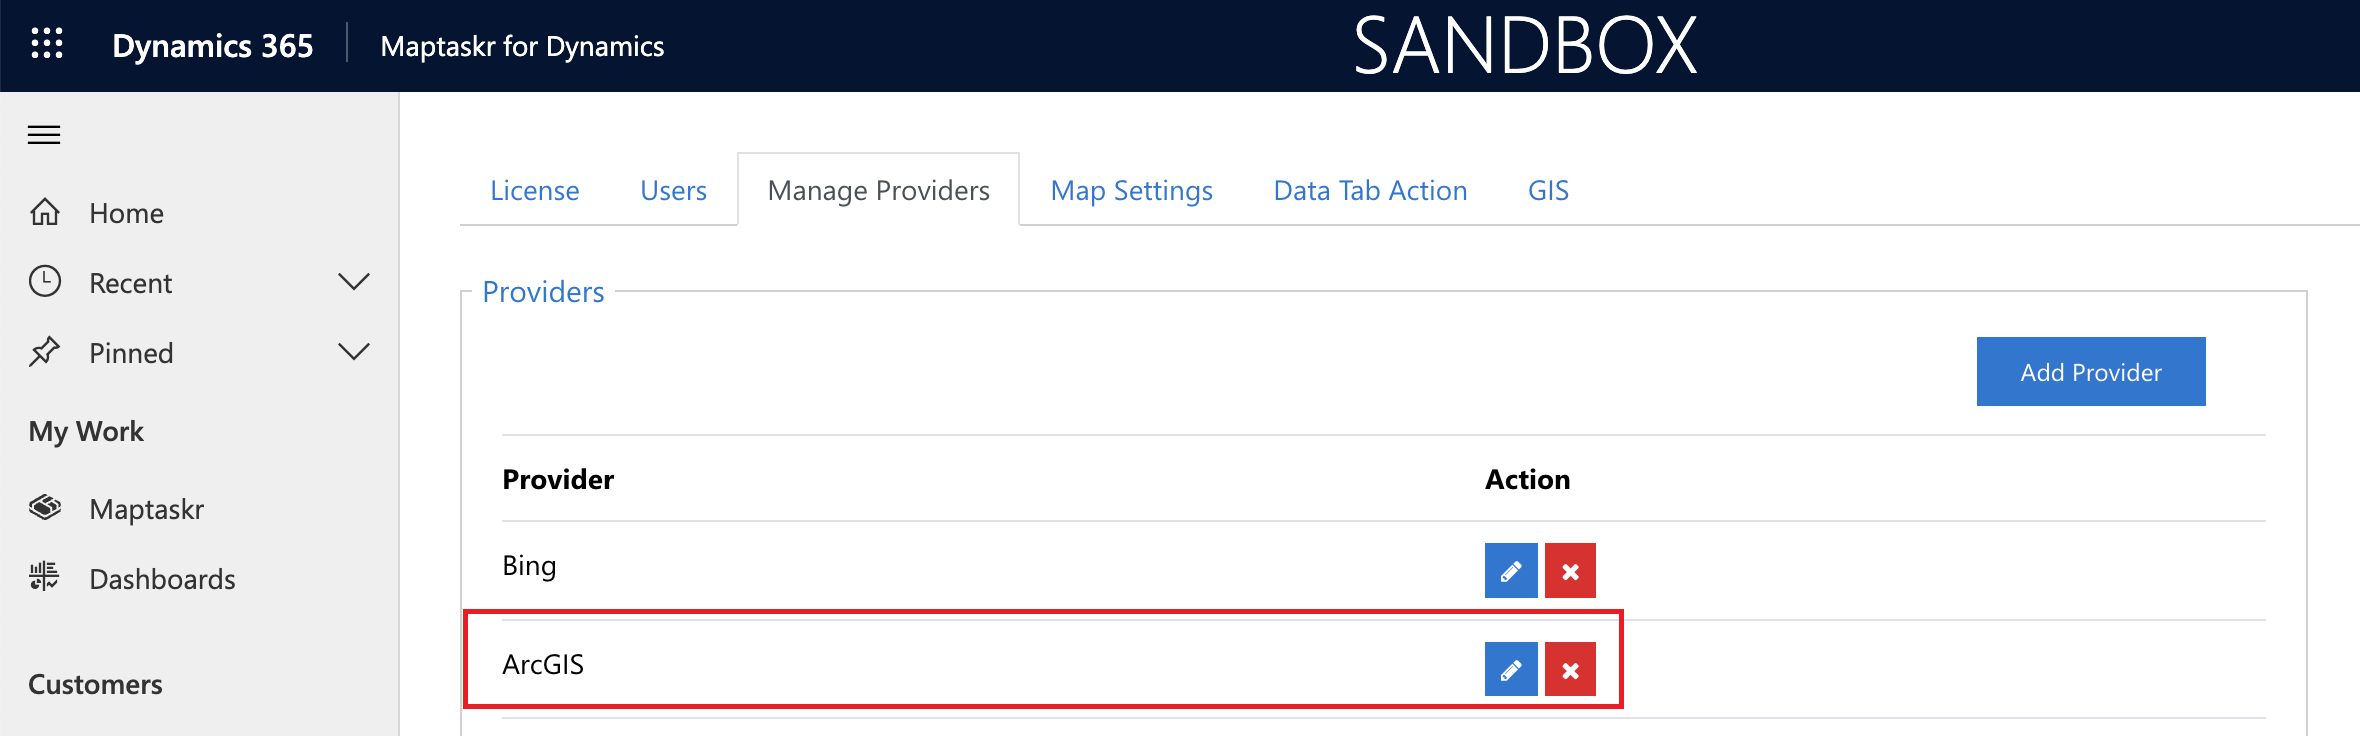
Click
Saveand once completed the new service provider will be listed as an available provider to use for configuring the mapping services. You can also edit and delete the configuration from this screen by selecting the options available.Figure 44: ArcGIS Provider added.
Configuring Services
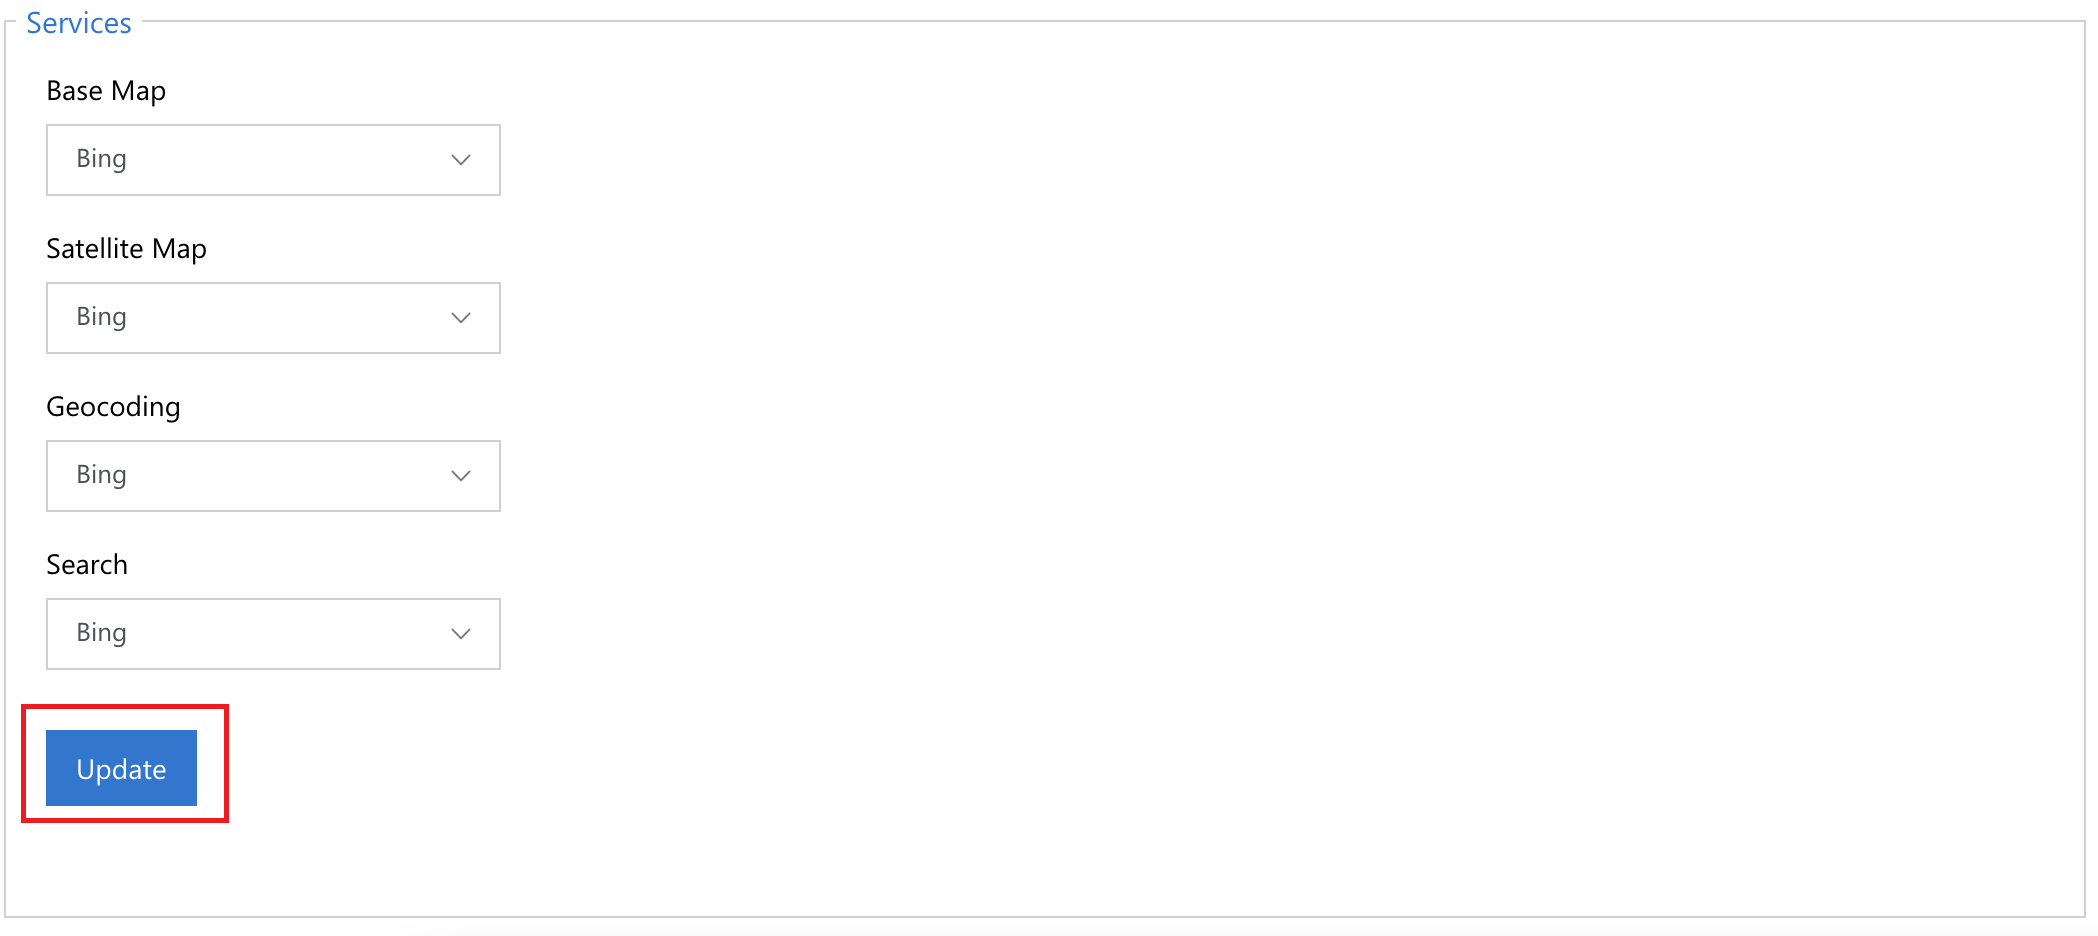
Once a Service Provider has been added, the mapping services utilised by Maptaskr can be configured. To set any of the Service:
- Select the drop down for the respective Service you wish to configure and select the service you wish to set it to use. Make sure you click
Updateto save your configuration choice.
Figure 45: Mapping Services set to Bing.
Custom Search Providers
In addition to the standard Service providers used for address search, an additional search control can be added to the Maptaskr Dashboard to allow for location searching on an ArcGIS feature service layer.
-
On the dashboard map, edit a feature layer you wish to allow searching on.
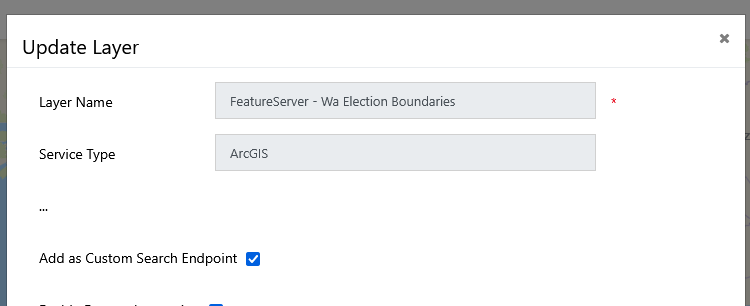
-
Once the
Add as Custom Search Endpointis selected, save and navigate to the configuration tab.
-
Select the Manage Providers tab.

-
Down in the Services section, select the
CustomSearch provider.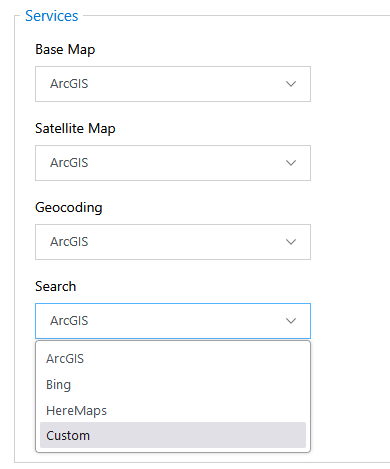
-
Here you can now select the fallback provider to match your original search provider.

-
And you can now add your newly configured layer as a search endpoint.
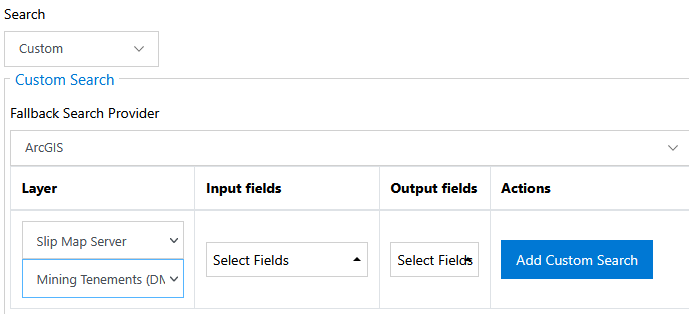
-
Once you have selected the layer and sub layer, you need to select the input and output fields.
Input Fields: are used to search, and will be used to find the keywords provided by the user.
Output Fields: used to display the selected item prior to navigation. Should be a Unique ID, and a Name Field so the user can identify the search result.
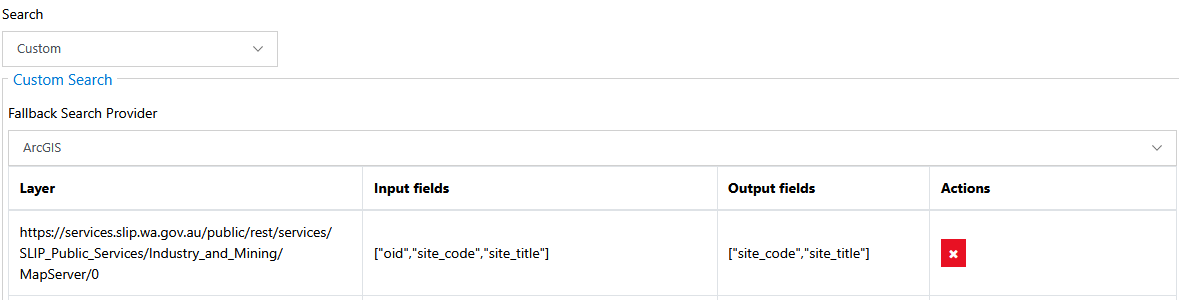
-
Once selected, click the Add button, and the Update button to save.
-
The layer can then be searched using the newly visible
Custom Attributesearch box.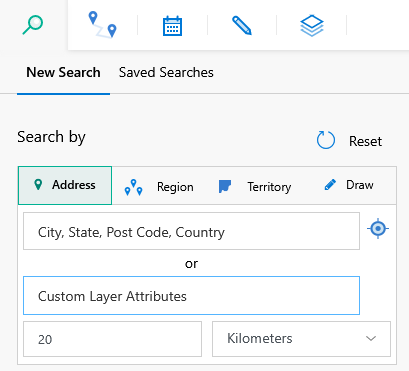
-
Results will be listed, and when clicked, navigated to.
Map Settings
The Map Settings section of the Maptaskr App Configuration area is where admins can configure various global map setting related to map behaviour and available end user features.
Figure 46: Map Settings.
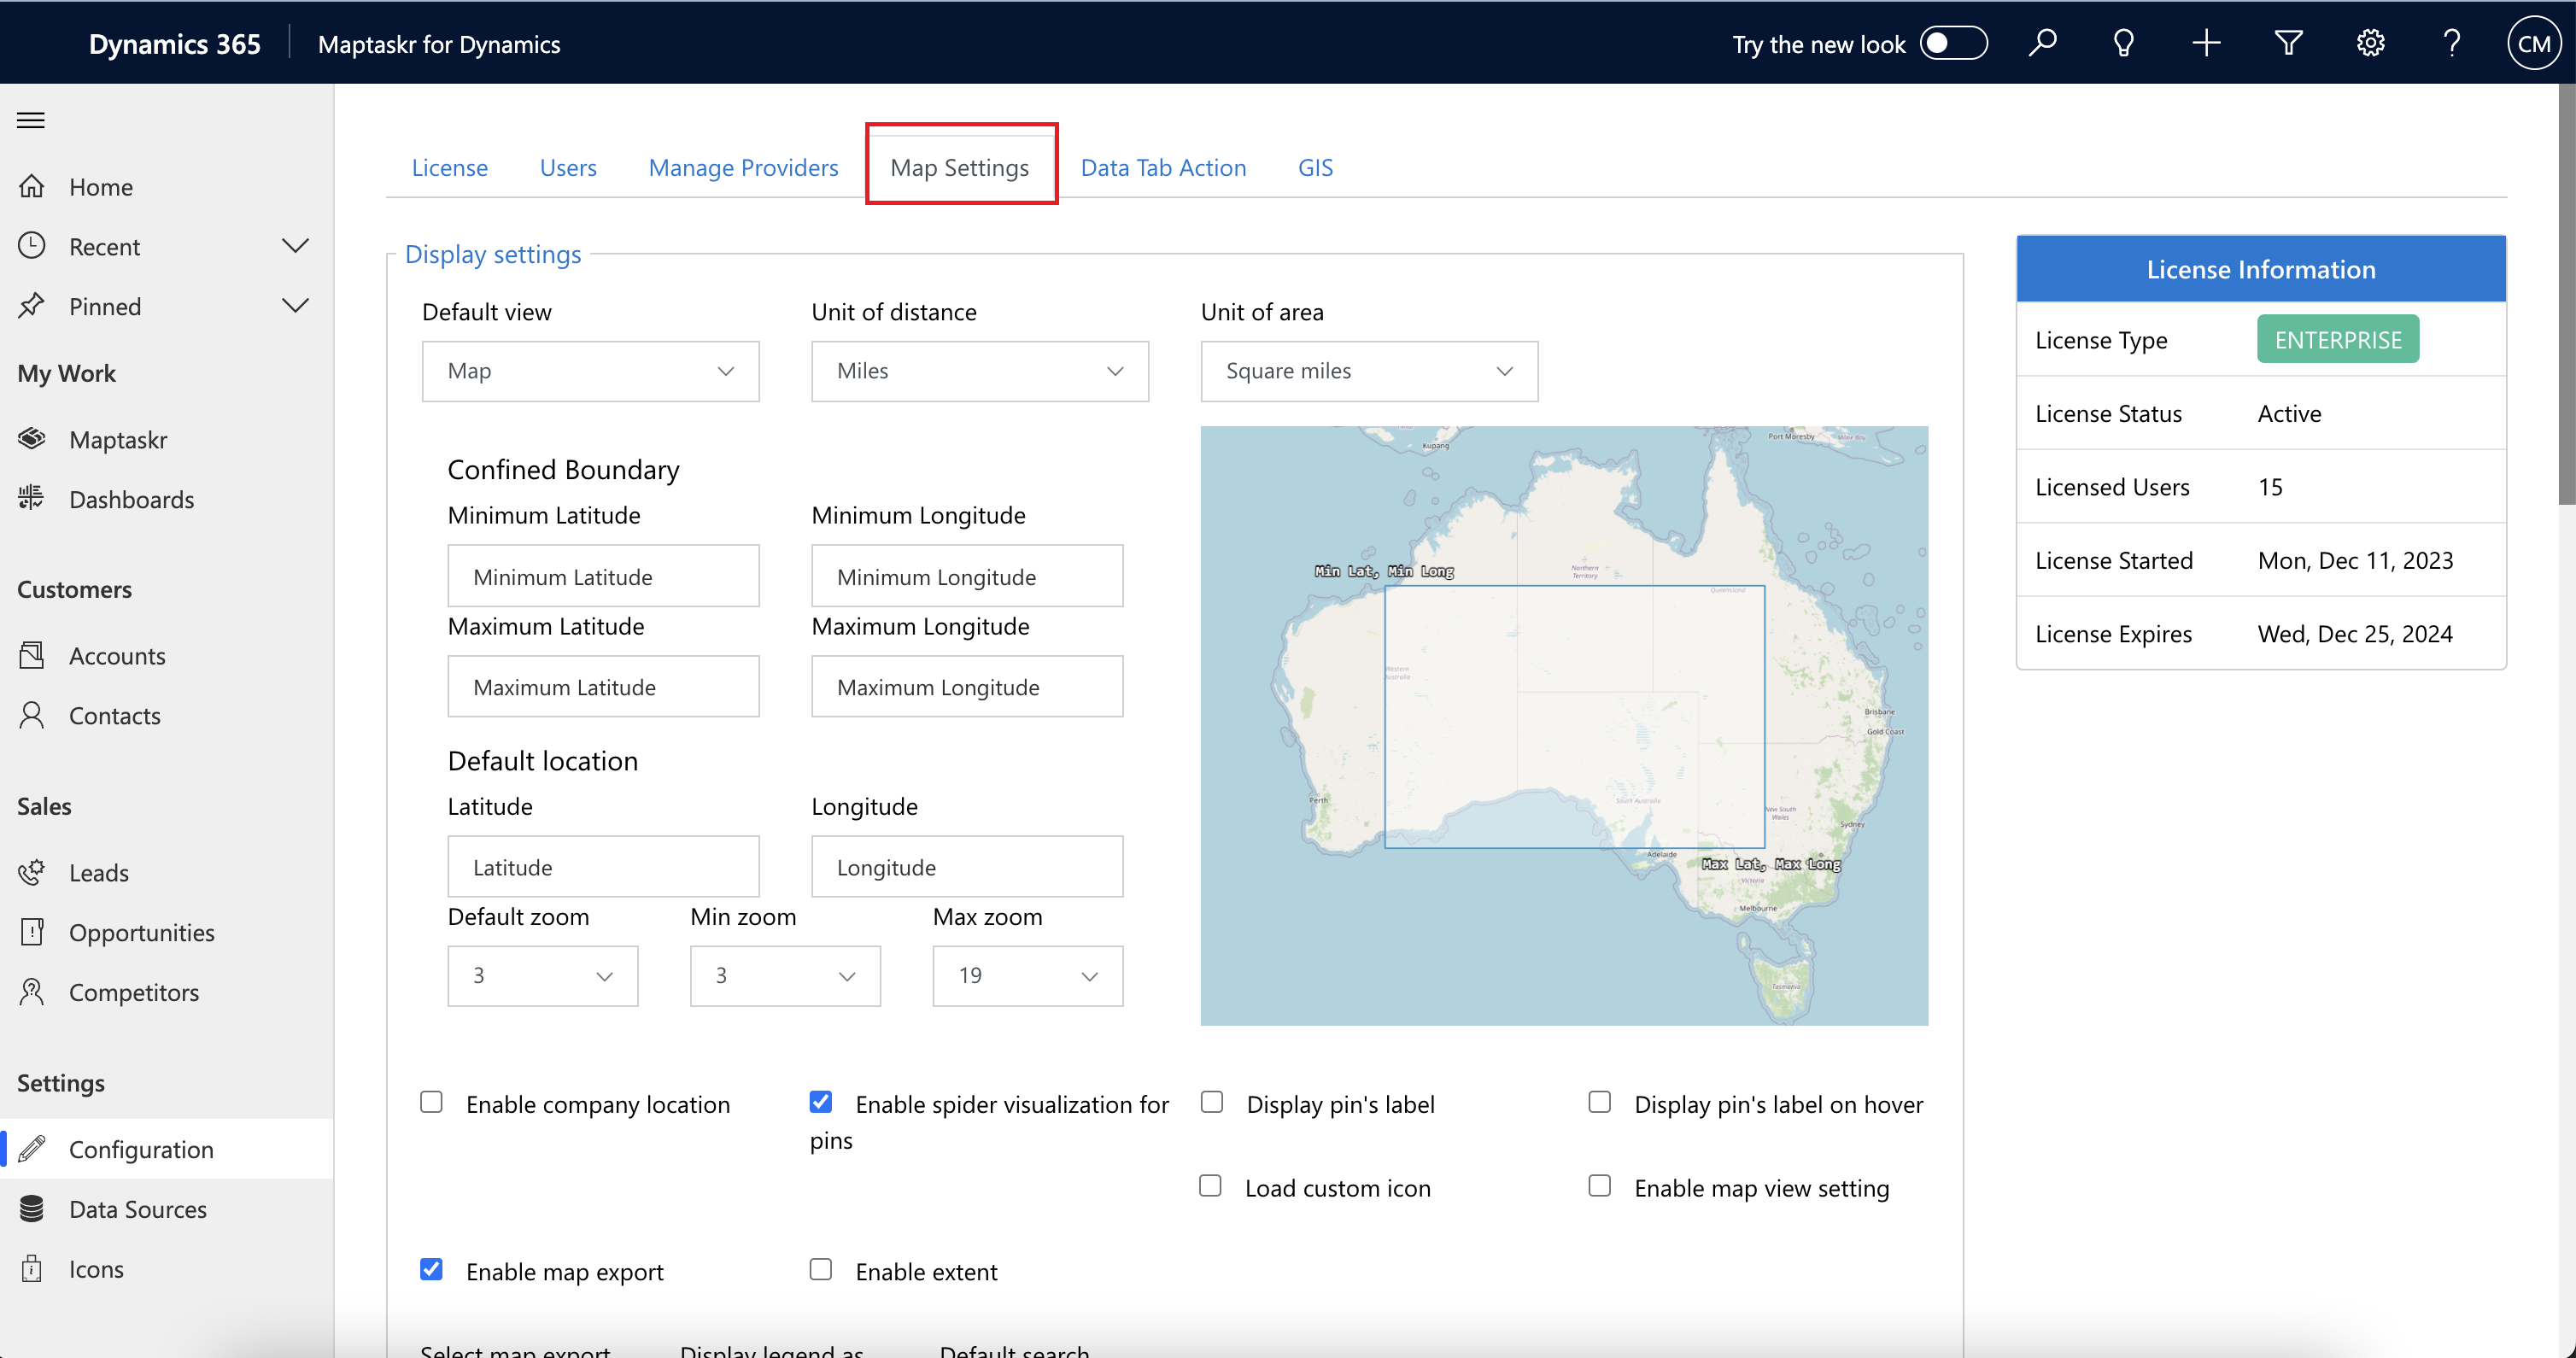
Within this section admins can configure the following areas of Maptaskr.
- Display settings,
- Feature settings,
- Style settings,
- Infobox settings,
- Power BI settings,
- Aerial integration.
Display Settings
Figure 47: Display Settings.
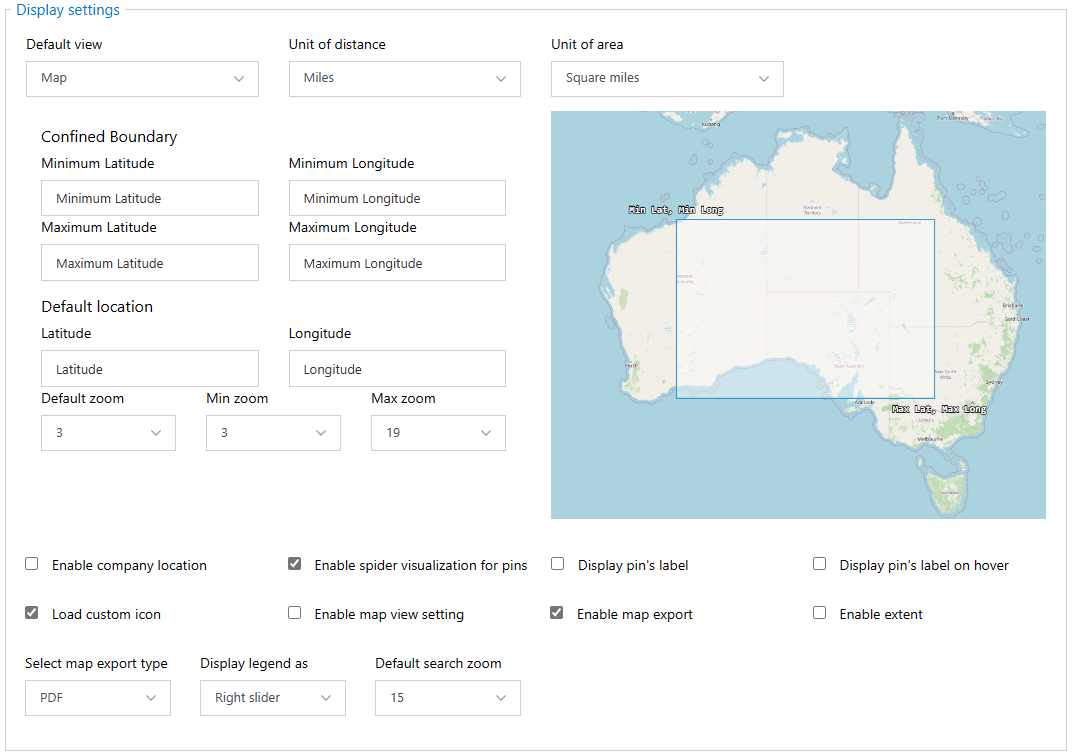 The Display Settings configuration area enables admins to configure which core Maptaskr map displayed to all user globally across the platform. This includes the ability to defaults for when the maps first loads, as well as constraints on what a user can see and interact with visually on the map. The table below provides an overview of each of the options available in this configuration section.
| Setting | Type | Description |
|---|---|---|
| Default view | Dropdown | Select a default view of Map or Satellite when the map is loaded. 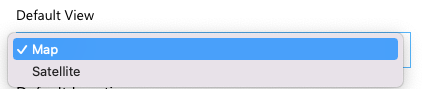 |
| Unit of distance | Dropdown | Select distance type to view when the map is loaded. 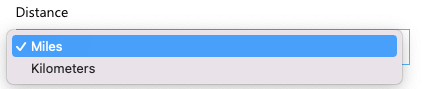 |
| Unit of area | Dropdown | Select distance type to view when the map is loaded. 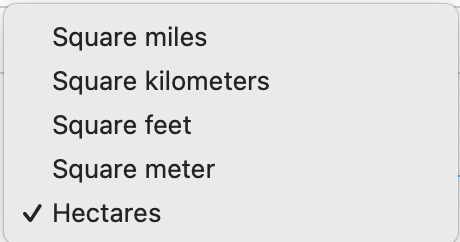 |
| Confined Boundary - Minimum Longitude & Latitude | Textbox | Specifies minimum and maximum coordinate for the confined default location for Maptaskr to centre on at load as per the example image. 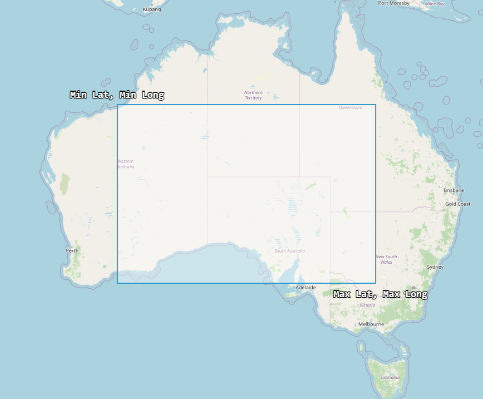 e.g e.g  |
| Default location - Latitude & Longitude | Textbox | Specifies the default location for Maptaskr to centre on at load. 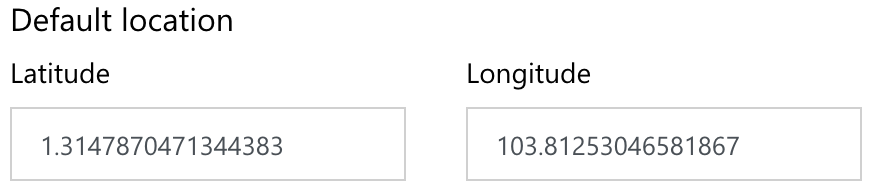 |
| Default zoom | Dropdown | Default zoom level. |
| Min zoom | Dropdown | Minimum zoom level available to end users when zooming out of the map. If set to —select— will be set to the minimum value available. |
| Max zoom | Dropdown | Maximum zoom level available to end users when zooming out of the map. If set to —select— will be set to the maximum value available. |
| Enable company location | Checkbox | Select to enable the default location to load from your site or company on the map (for more information see Field Service Company Locations) |
| Enable spider visualization | Checkbox | Select to enable multiple pins for each record in spider shape on the map (this setting is tied to the Cluster level setting) Note: Spider Visualisations will only appear should a user reach a maximum zoom level, but still have clustered points on the map. 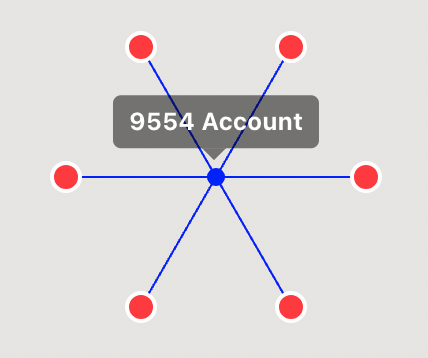 |
| Display pin`s label | Checkbox | Select to enable Pin label is when displayed on the map. 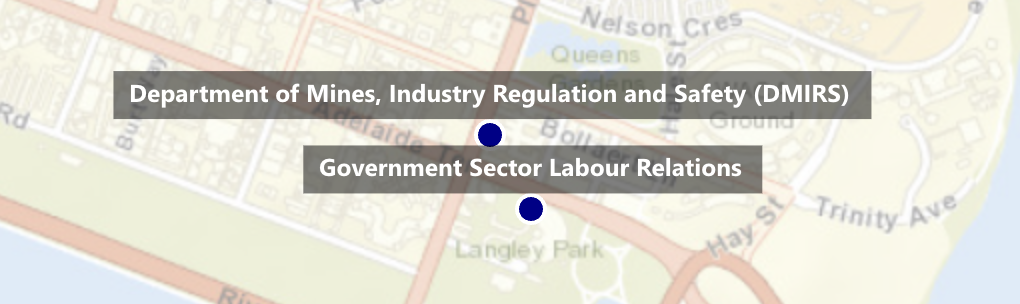 |
| Display pin`s label on hover | Checkbox | Select to enable Pin label when mouse is hovered over the pin (record).  |
| Load custom icon | Checkbox | Select to enable custom icons for pins (Default option is the colour picker) – Refer to the section 5 Icons in this document. e.g. 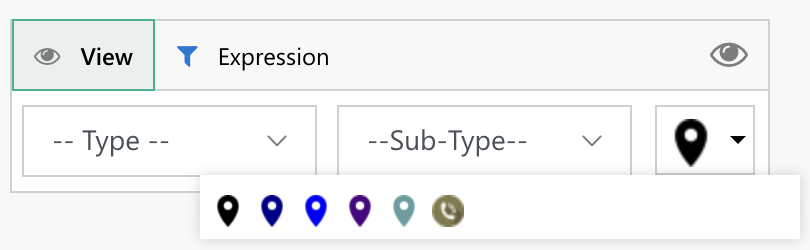 |
| Enable map view settings | Checkbox | Enables the Map View feature at the record level map. |
| Enable map export | Dropdown | Enables the ability for user to download the current viewable map view. |
| Enable extent | Checkbox | Enables the extent controls from the map. 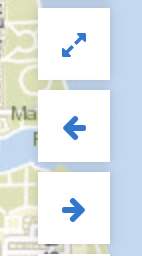 |
| Select map export type | Dropdown | Determines the file type of the download of the map download feature. Can either be PDF or Image (PNG) 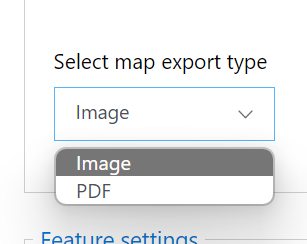 |
| Display legend as | Dropdown | Select the display legend as dropdown to toggle between right slider view or in panel view. 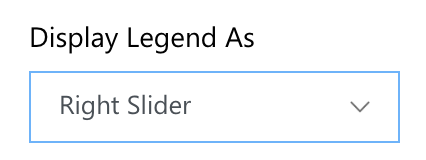 e.g. 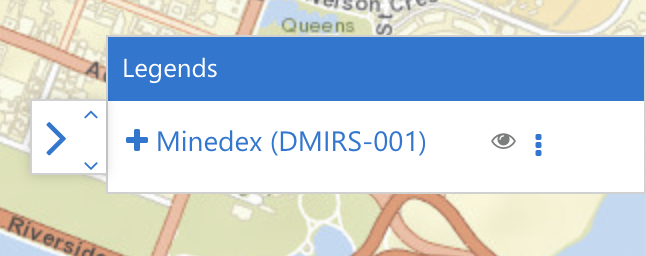 |
| Default search zoom | Dropdown | Sets the default zoom level when a search is performed. |
Feature Settings
Figure 48: Feature Settings.
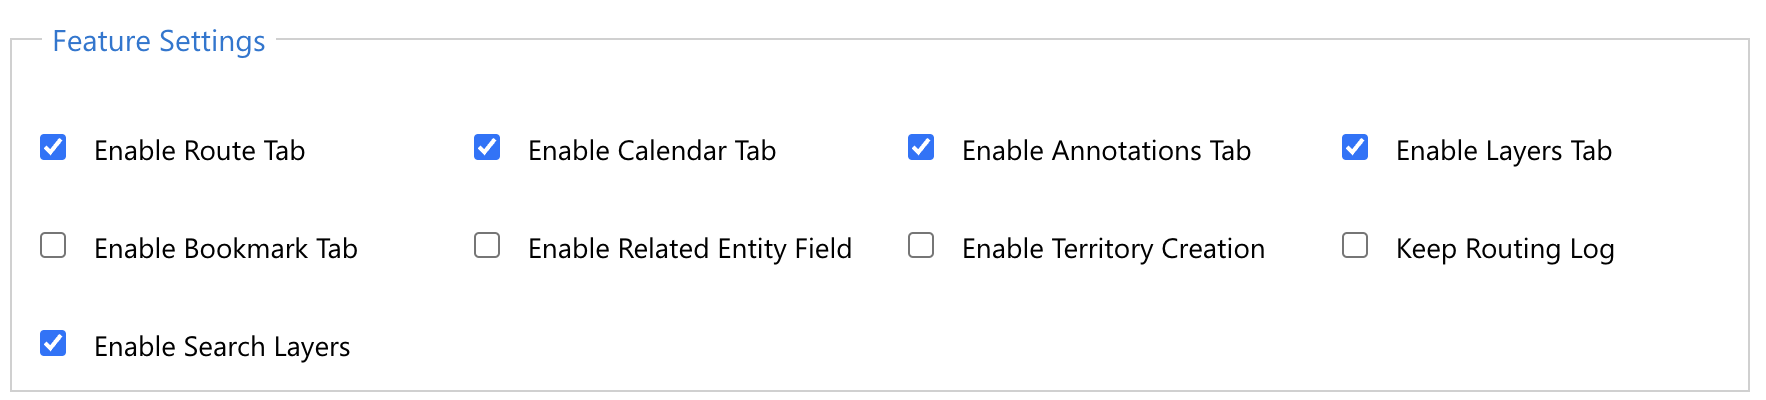
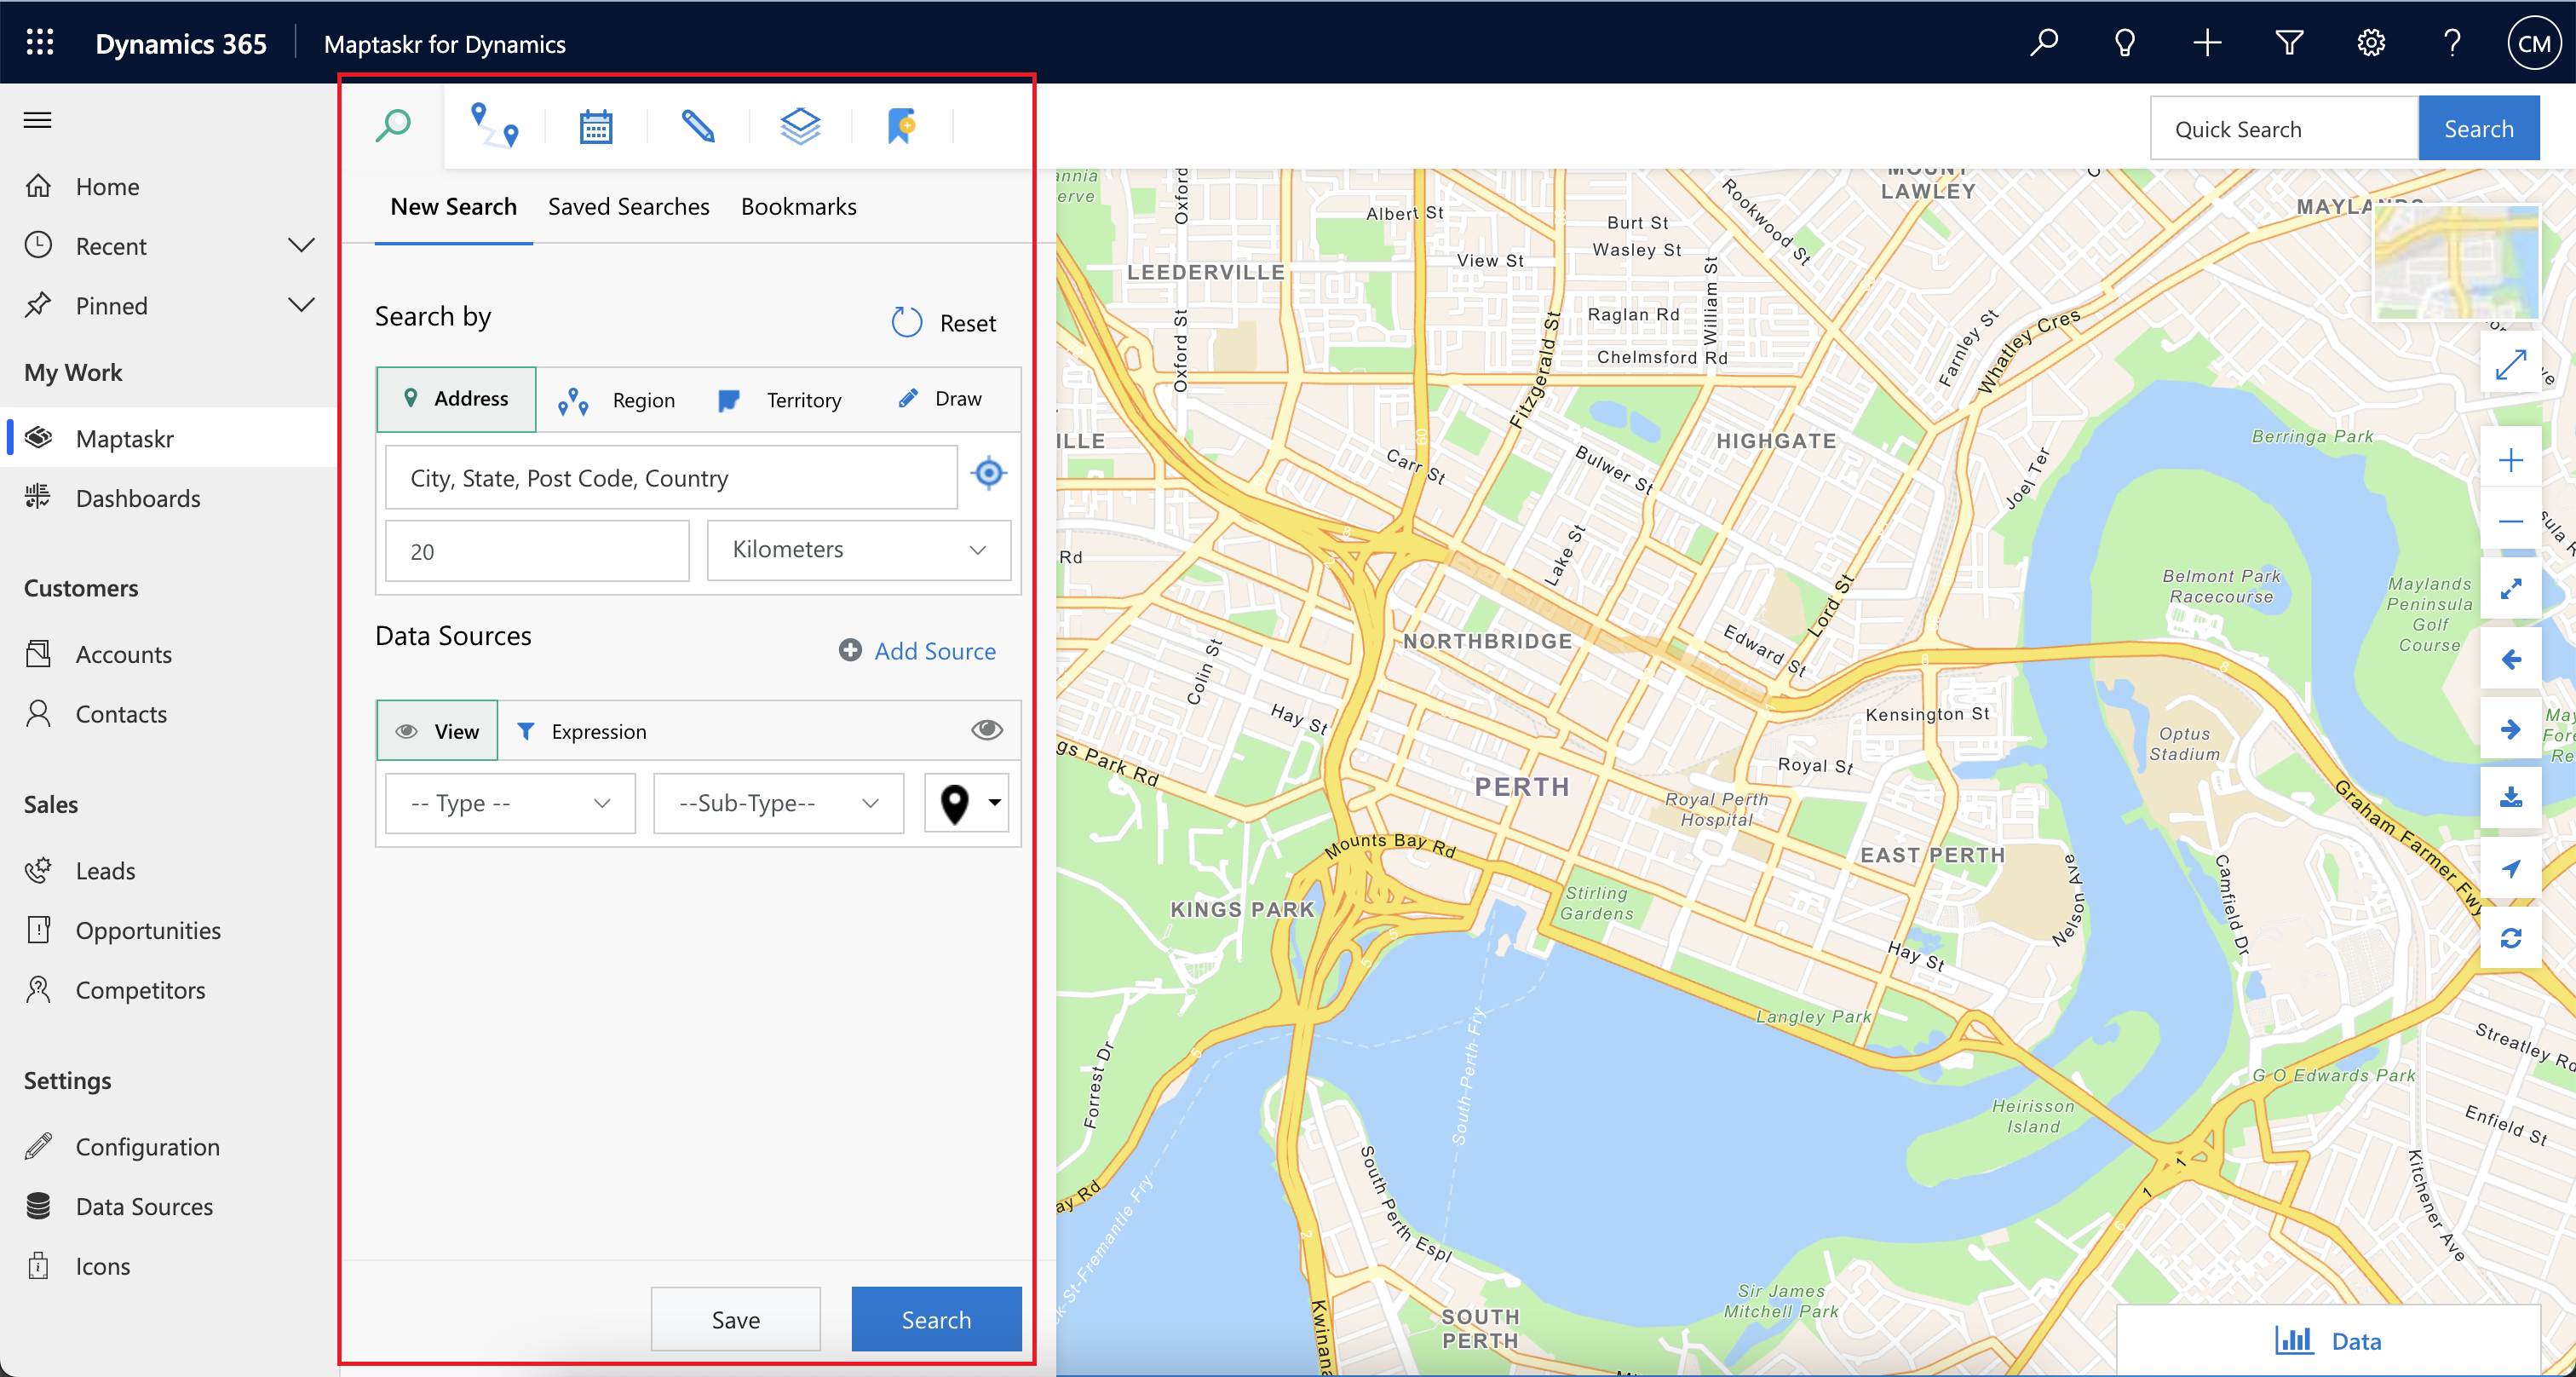
The Feature Settings configuration area enables admins to configure which core Maptaskr features are available to end users at the top dashboard map level as seen in main left side panel as per the figure below.
Figure 49: Main left hand panel features.
The following table gives an overview of the configuration items found in the Feature Settings area.
| Setting | Type | Description |
|---|---|---|
| Enable route tab | Checkbox | Activates/deactivates the routes tab on the main panel navigation. |
| Enable calendar tab | Checkbox | Activates/deactivates the calendar tab on the main panel navigation. |
| Enable annotation tab | Checkbox | Activates/deactivates the annotation tab on the main panel navigation. |
| Enable layers tab | Checkbox | Activates/deactivates the layers tab on the main panel navigation. |
| Enable bookmark tab | Checkbox | Activates/deactivates the bookmark tab on the main panel navigation.  |
| Enable related entity field | Checkbox | Select to enable related entity fields in the data source query builder. This allows you to filter on related data source fields (so long as the related items are also configured in Maptaskr see section Data Source Configuration for more details) |
| Enable territory creation | Checkbox | Enables the Create Territory option within the right click context menu from the map. Users are to convert drawn shapes into territories. 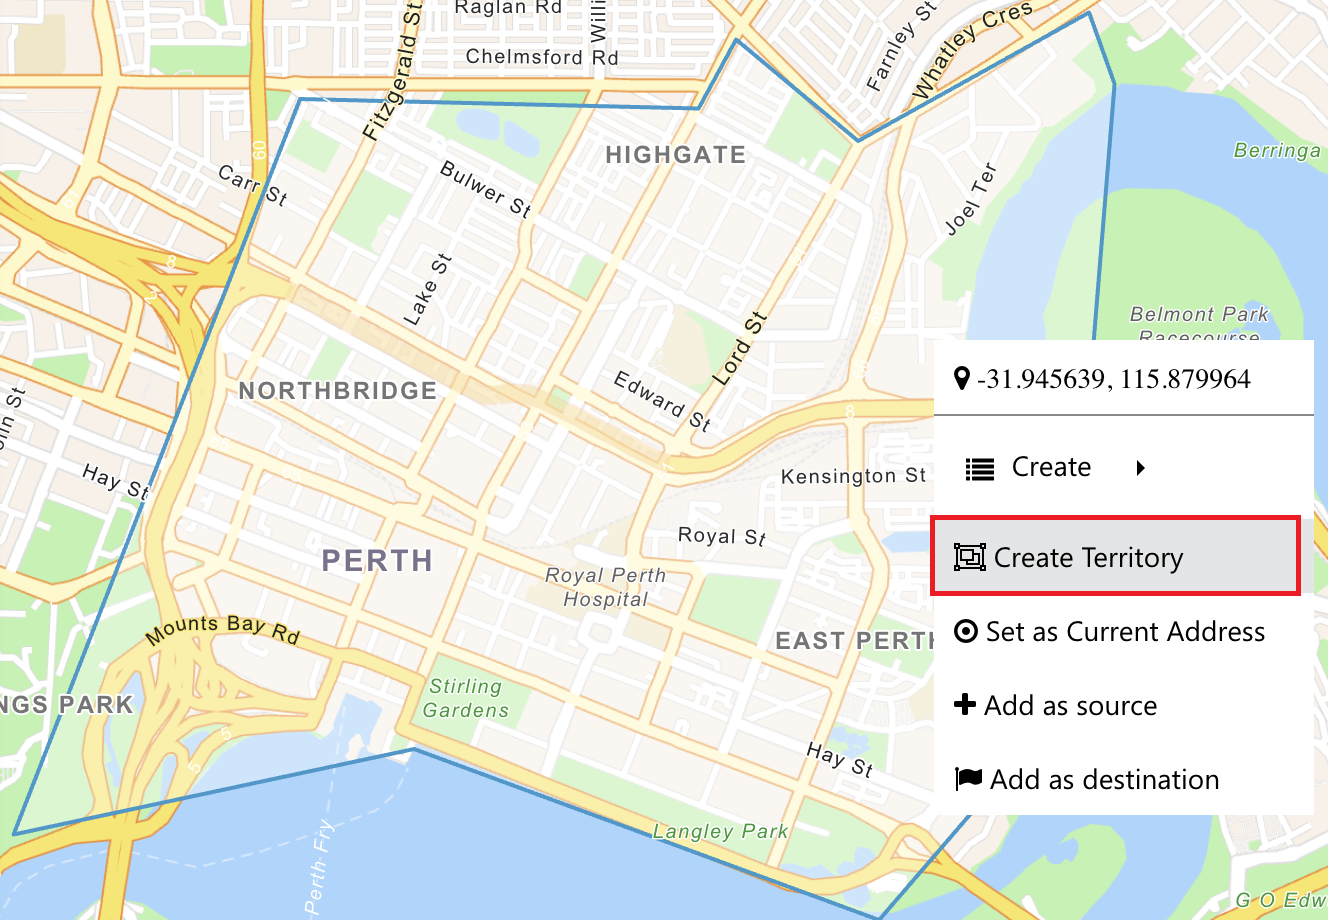 |
| Keep routing log | Checkbox | This option allows user to store routing activity if enabled. |
| Enable search layers | Checkbox | Select enable search layers to view its functionality on the dashboard. 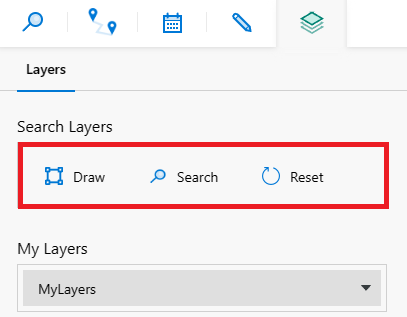 |
Search Settings
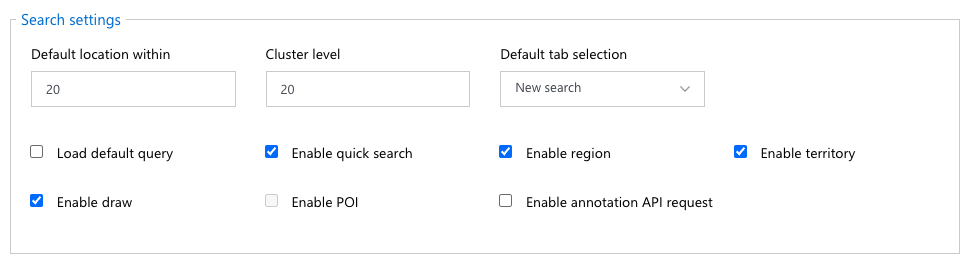
Figure 50: Search settings.
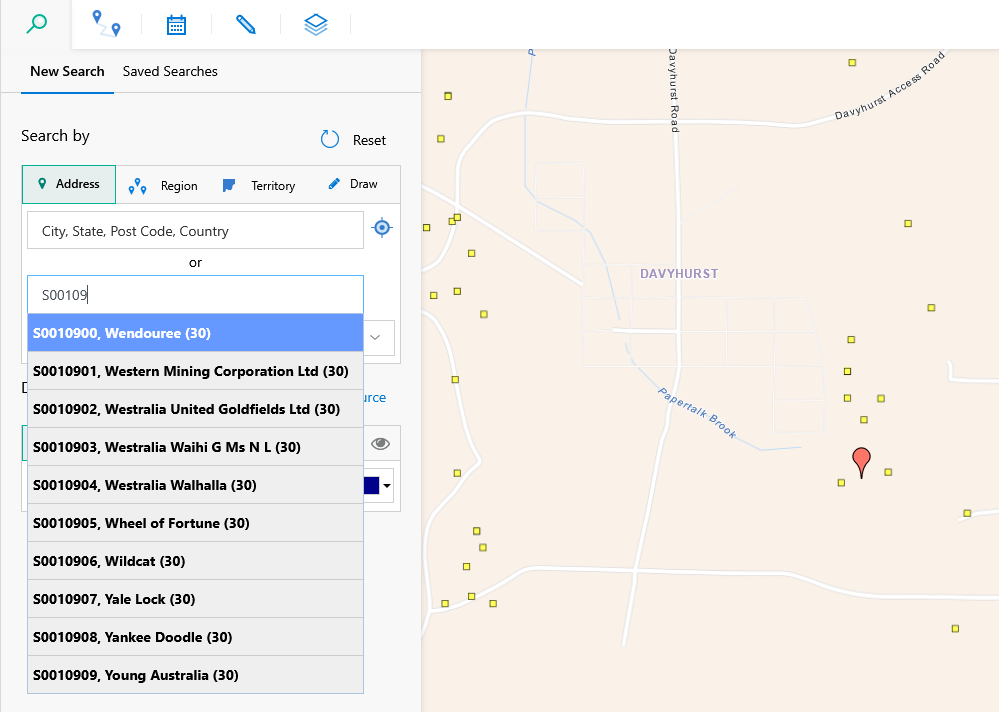
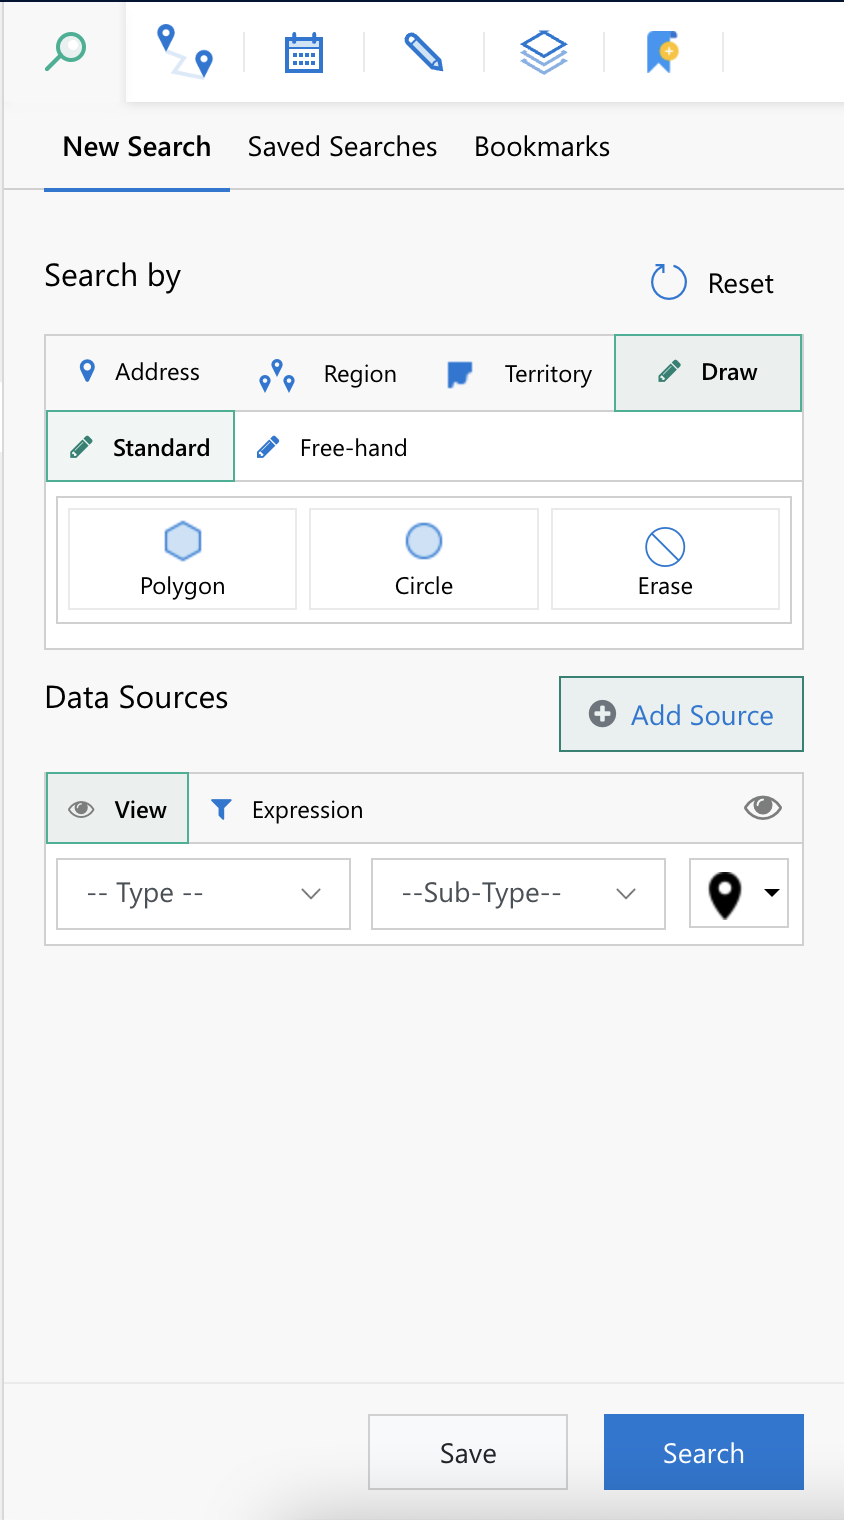
The Search Settings configuration area enables admins to configure the core Maptaskr search features are available to end users at the top dashboard map level as seen in main left side panel as per the figure below.
Figure 51: Search panel.
The following table gives an overview of the configuration items found in the Search Settings area.
| Setting | Type | Description |
|---|---|---|
| Default location within | Checkbox | Used to set a default distance value when searching by Address. 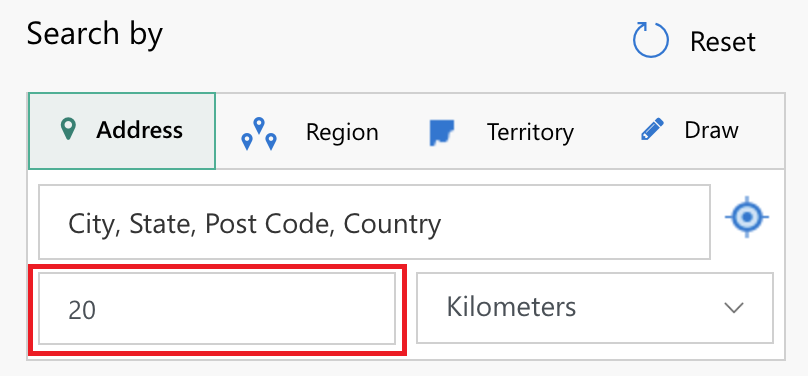 |
| Cluster level | Textbox | Set the size (in number of pixel) on the screen that search results will be clustered. Any point that is cluster level pixels from another point will be merged into a single grouped cluster. The clustered points will be the diameter of the cluster level and clicking on this cluster will zoom into the map displaying the points contained within the cluster. 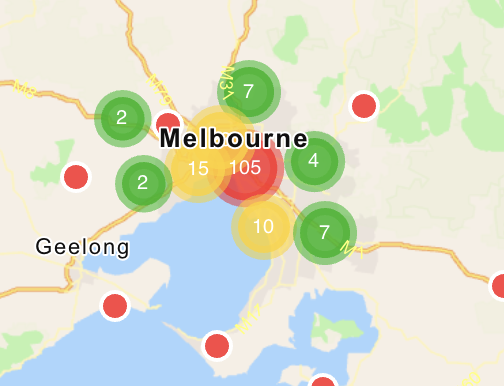 Colors are predefined as per the following ranges – |
| Default tab selection | Dropbox | Set the default tab to be selected when the map loads. 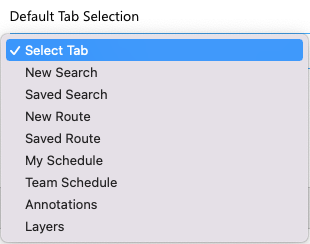 |
| Load default query | Checkbox | Select to enable default query choice for saved global queries. If there is a Search Query that is set as a Default Query, this search will execute on map load. 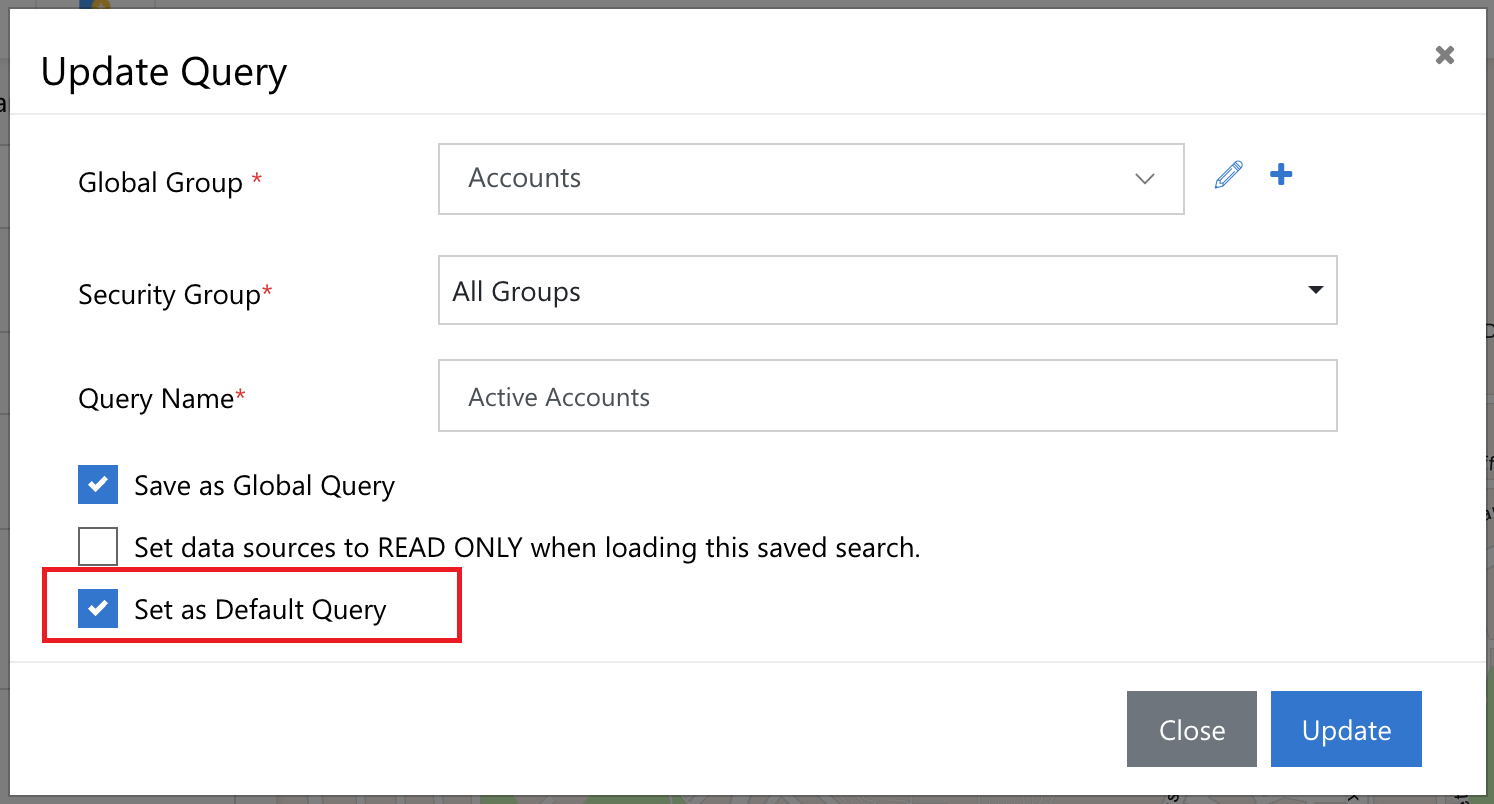 |
| Enable quick search | Checkbox | Enable quick search functionality. 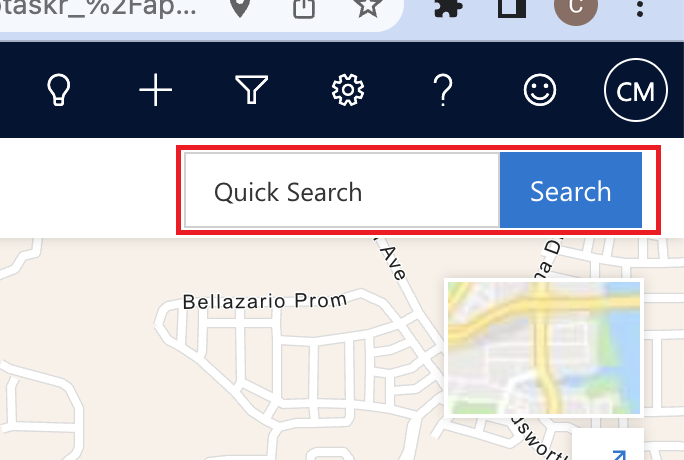 |
| Enable region | Checkbox | Enable to display search by region choice in the search panel on the map.  |
| Enable territory | Checkbox | Enable to display search by Territory option.  Note: This option is only available in the Maptaskr for D365 version. Note: This option is only available in the Maptaskr for D365 version. |
| Enable draw | Checkbox | Enable to display search by Drawing option in the search panel on the map.  |
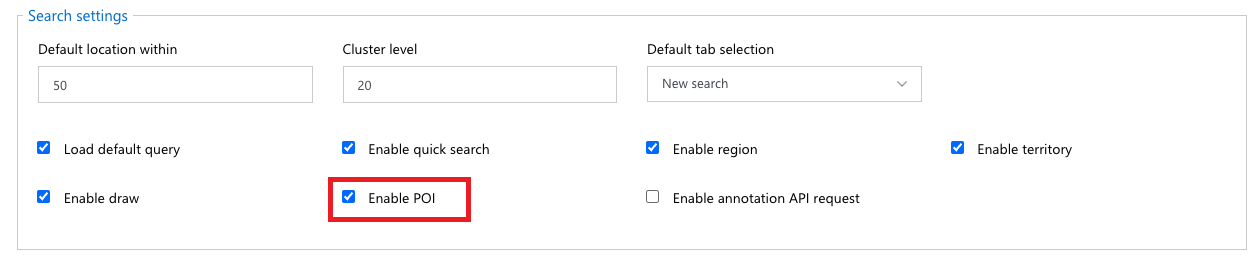
| Enable POI | Select to display POI list on the search panel and POI result on the map. 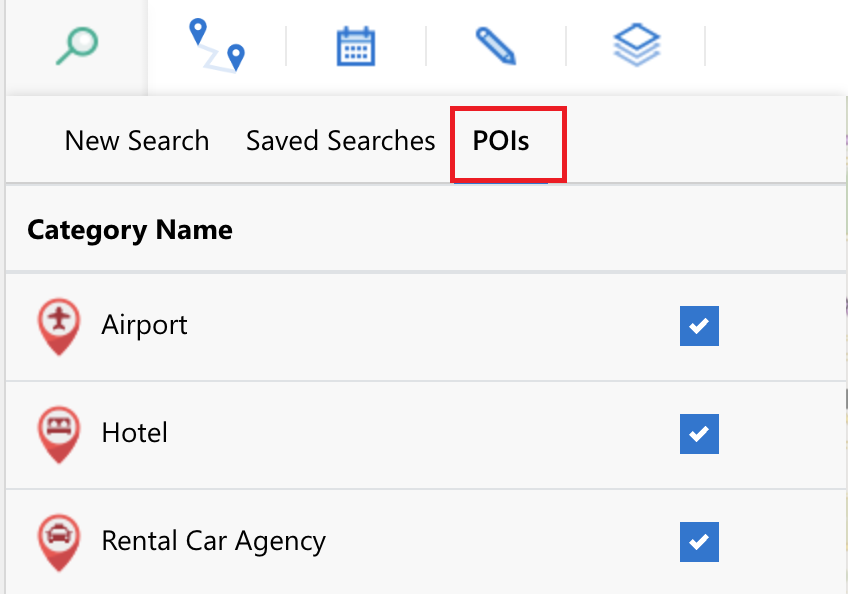 Note: POIs are configured in the POIS configuration areas of Configuration. Note: POIs are configured in the POIS configuration areas of Configuration. | |
| Enable annotation API request | Enable to show associated record annotations on the dashboard level map when records are displayed. 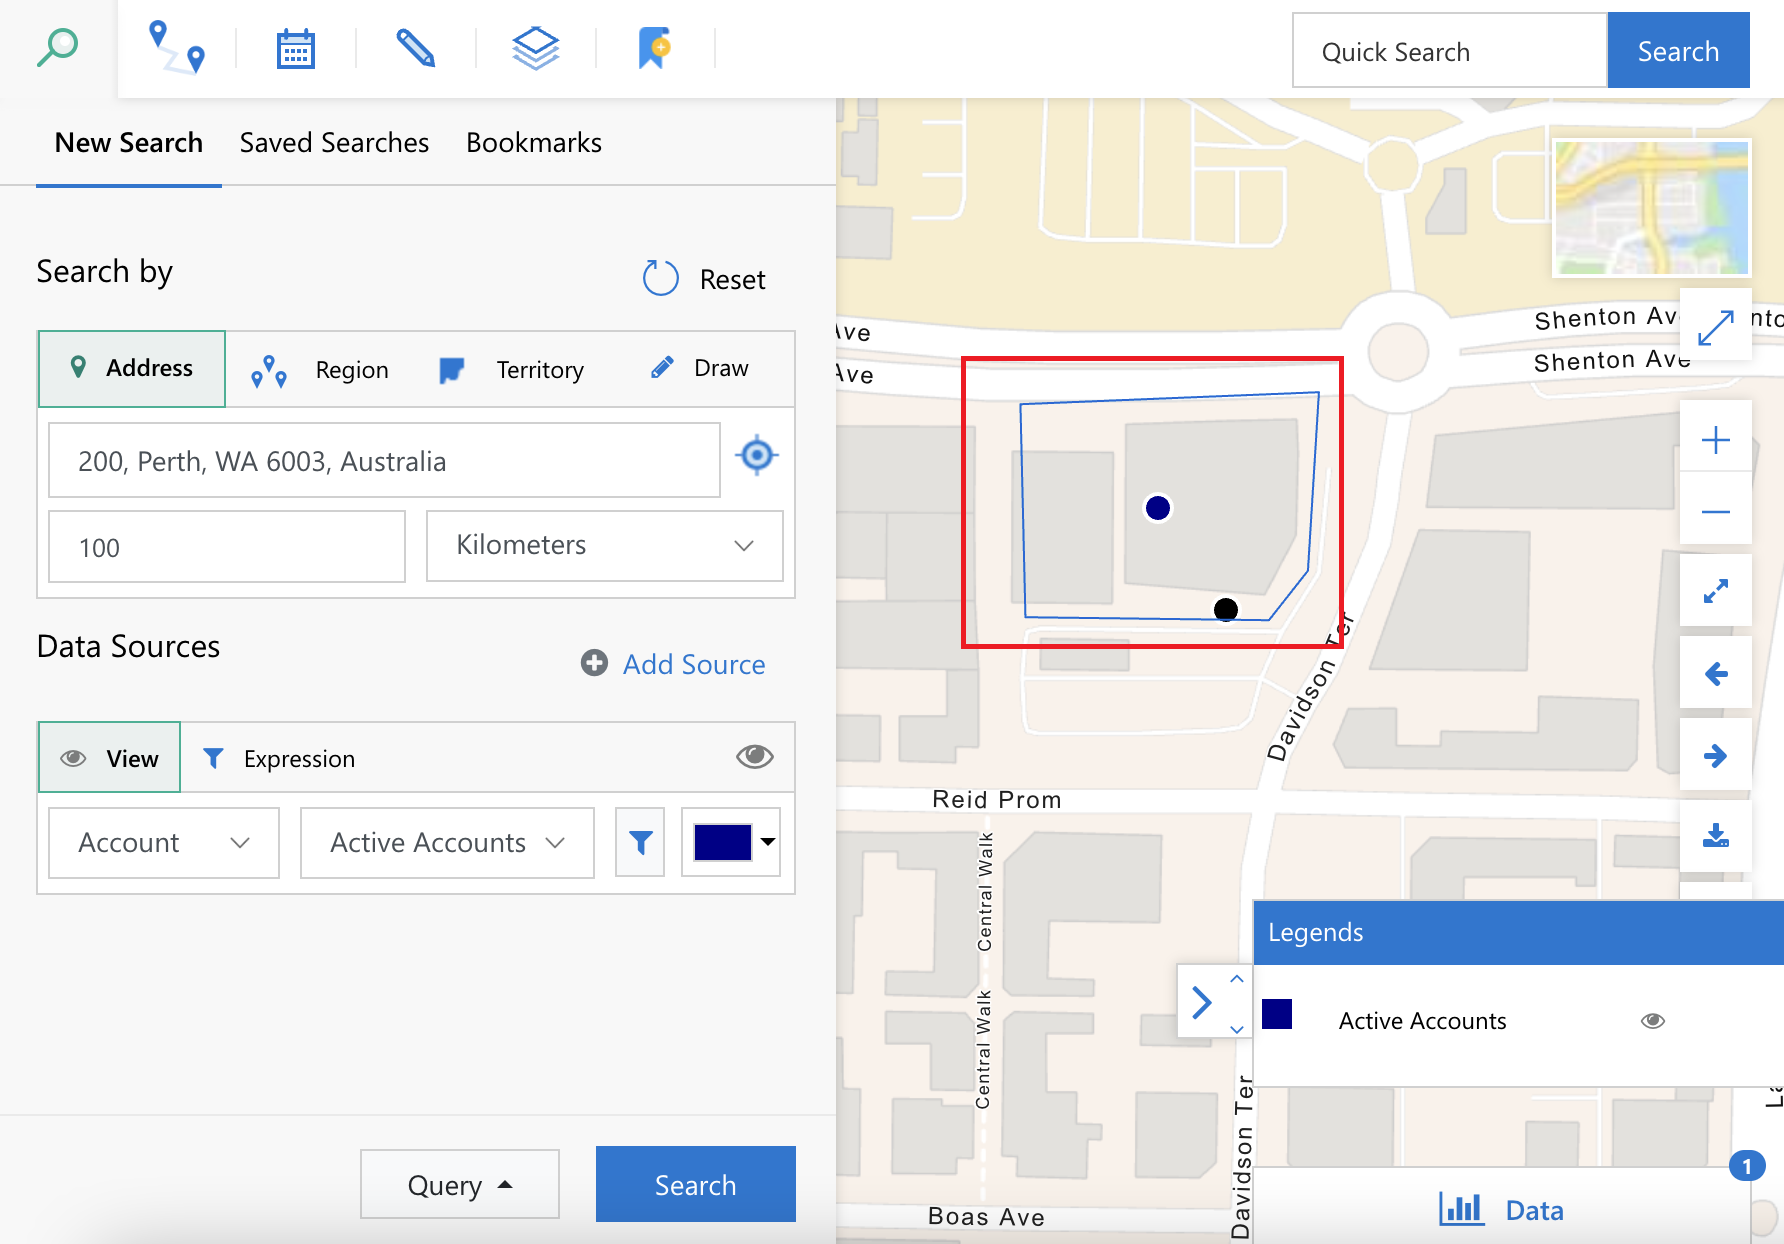 |
Style Settings
The style of some of elements users utilise within Maptaskr can be configure to whatever is found usable for the specific installation. This is a global setting that will apply to all element of the particular nature. By default, the settings produce the outcome as seen in the figure below.
Figure 52: Default Style Settings.
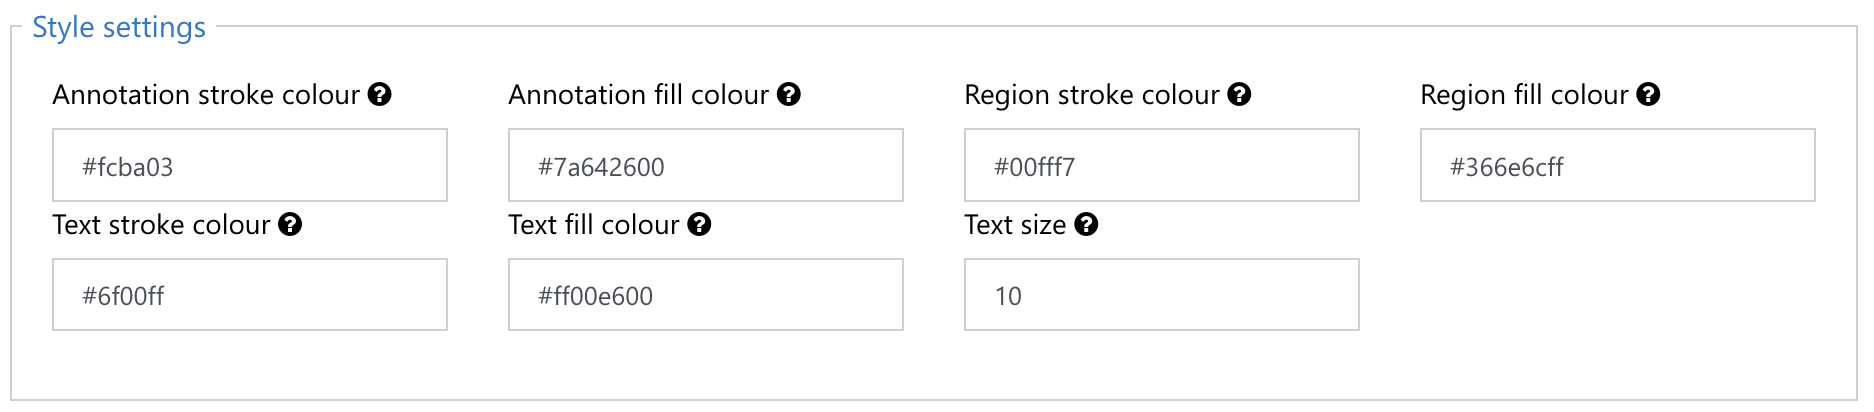
To set other Style Settings simply enter in the HEX colour code value you wish to use for the various options as described in the table below.
| Setting | Description |
|---|---|
| Annotation stroke colour & Annotation fill colour | Sets the respective stroke and fill to be used for annotations – in HEX colour format. Tip**:** For fill, it is advised to add opacity, which can be added by adding an alpha value to the code. E.g., #7ffaa633 will have an opacity of 25%.  |
| Region stroke colour & Region fills colour | Sets the respective stroke and fill to be used for search regions – in HEX colour format. Tip: For fill, it is advised to add opacity, which can be added by adding an alpha value to the code. E.g., #7ffaa633 will have an opacity of 25%.  |
| Text stroke colour & Text fill colour | Sets the respective stroke and fill to be used for textual annotation – in HEX colour format.  |
| Text Size | Sets the size of the annotation text.  |
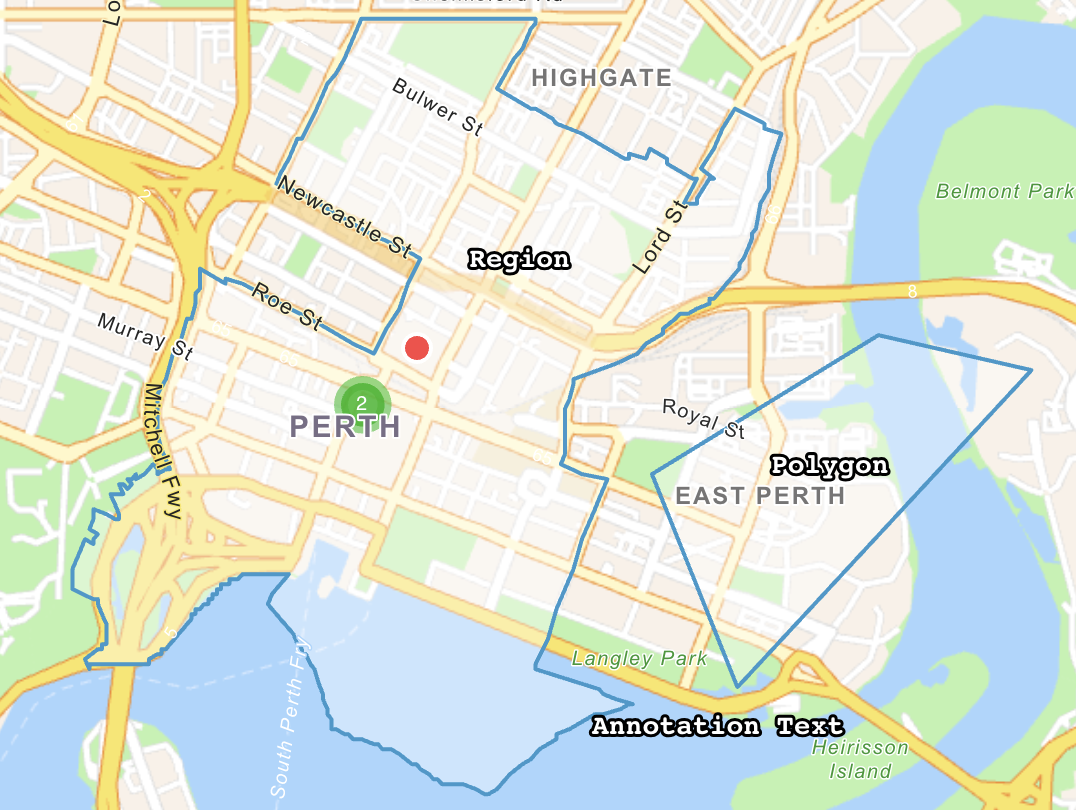
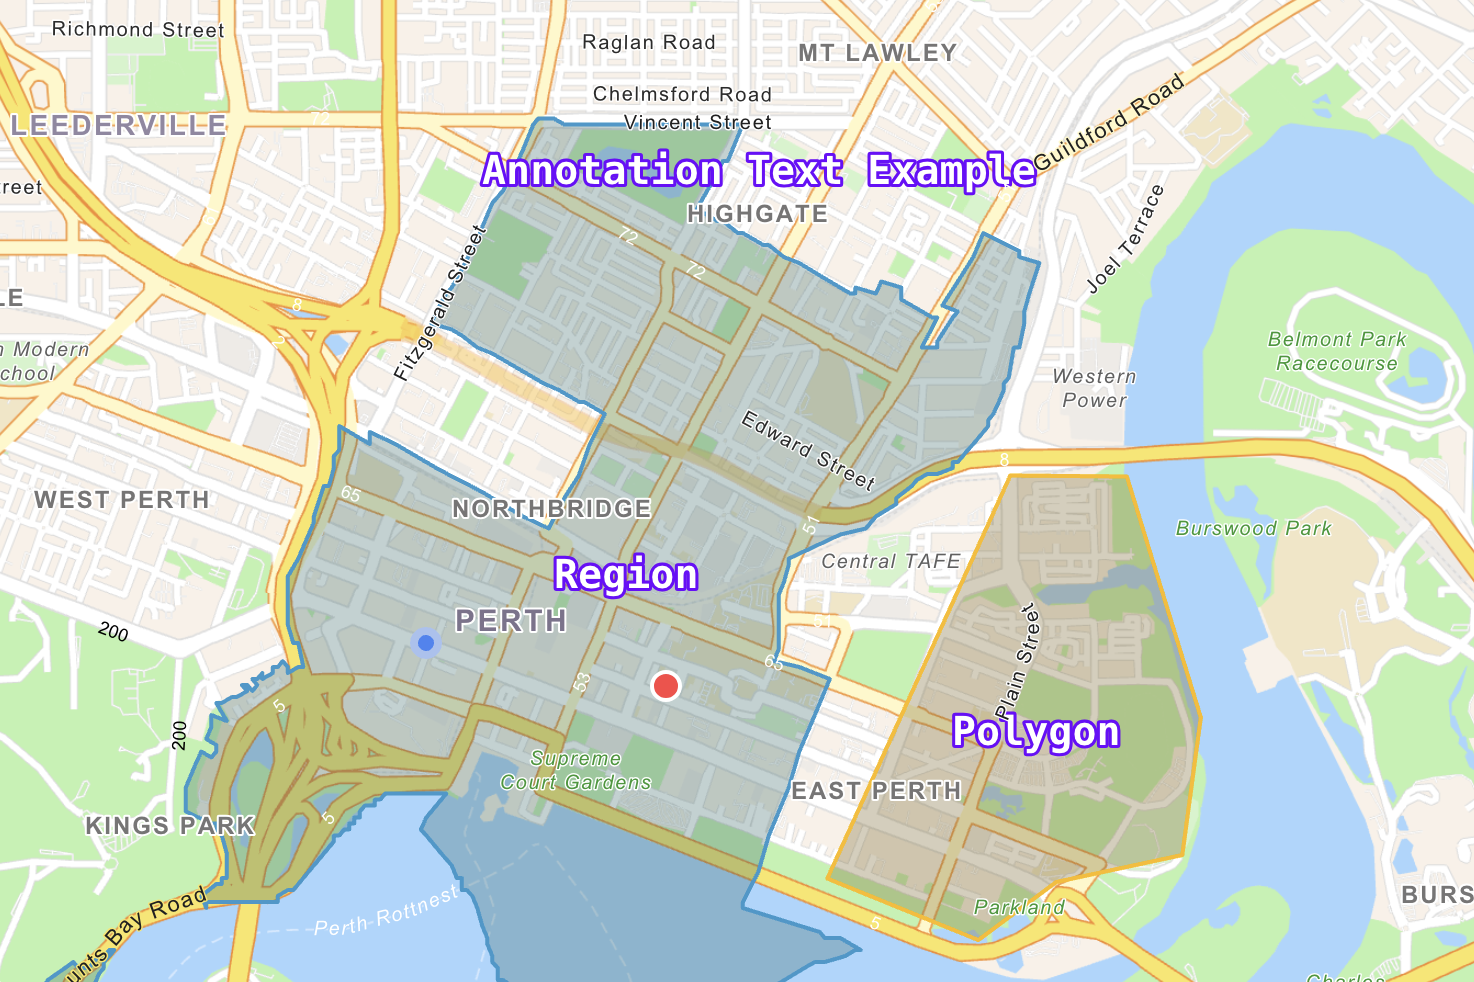
An example of Style Settings and their outcome can be seen in the figure below.
Figure 53: Style Settings example.
As an example, the above settings give the below outcome when seen on the map.
Figure 54: Style Settings examples outcome.
Infobox Settings
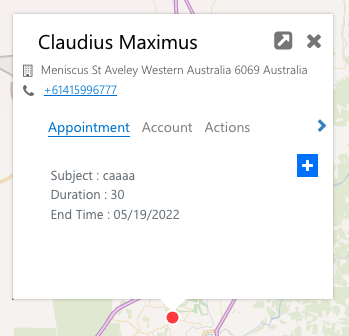
The Infobox settings area provide configuration for to enable the display style for Appointments when displayed. The style includes the ability to include more properties in addition to the title.
Figure 55: Infobox Settings.

When enabled, additional appointment properties are displayed from the Appointment data source. From the Appointment Tab Property Tab, admins can configure the appointment properties displayed in this view.:
Figure 56: Data Source configuration - Appointment Tab Property.
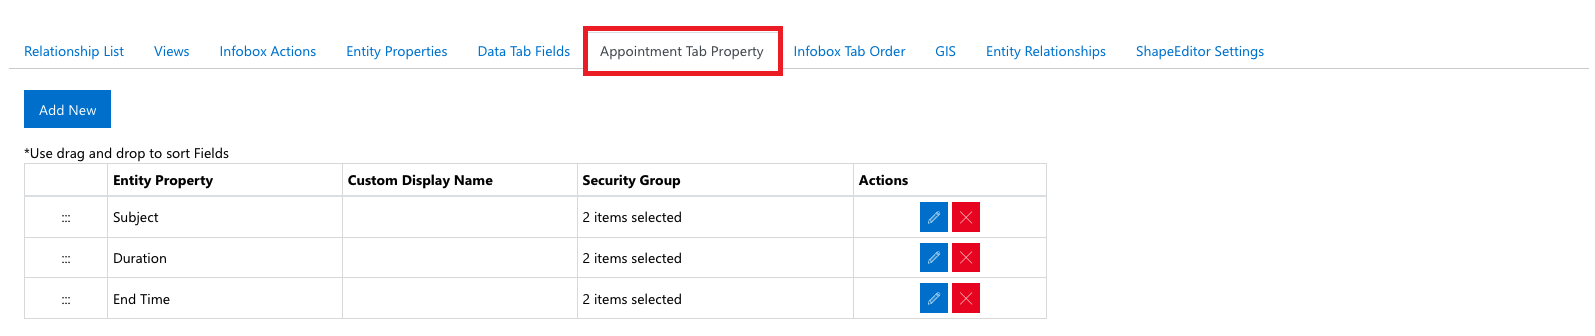
Figure 57: Appointment style and property configuration applied to Infobox.
Power BI Settings
The Power BI settings are a deprecated feature, that has remained to ensure backwards compatibility. This feature is being phased out and is not recommended to be used.
Figure 58: Power BI Settings.

Alternatively, Maptaskr recommends the use of the InfoBox Actions to open the PowerBI Report in a new tab. These actions can be configured via the Datasource Configuration. For more information see Infobox Actions.
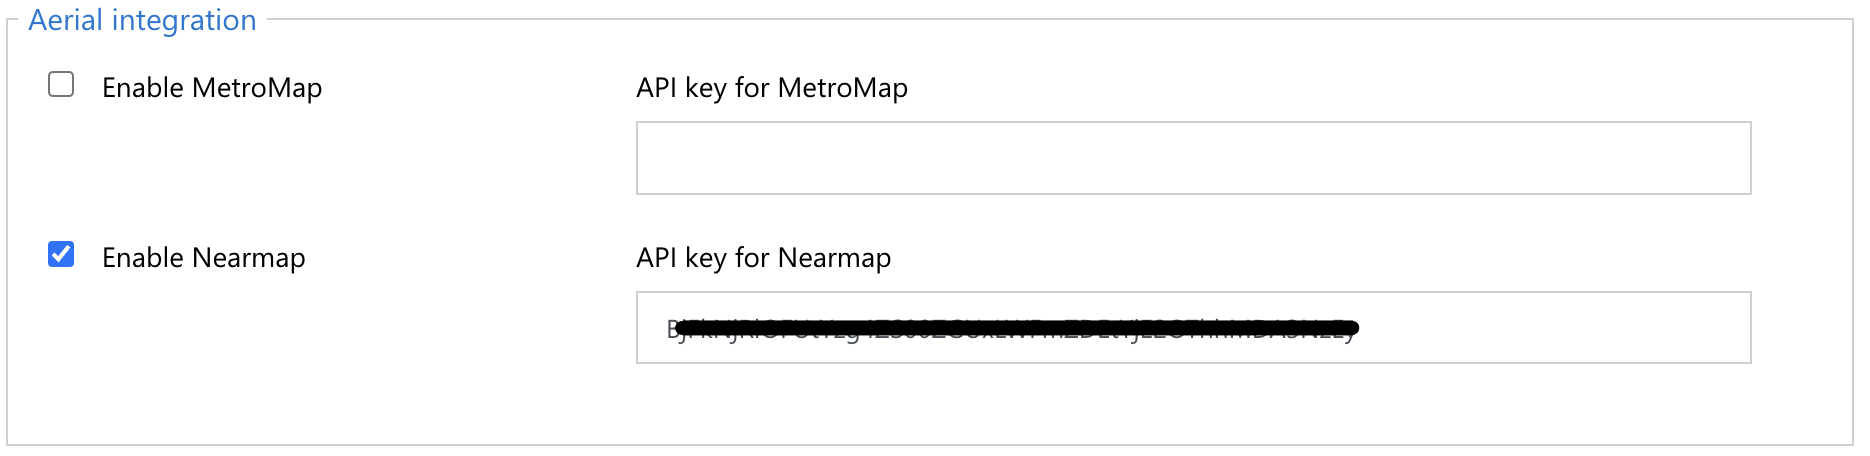
Aerial Integration
If you have a supported aerial imagery provider subscription, this can be configured to be available to end users to access as appropriate. To enable Aerial imagery, simply enable enter an API Key into the corresponding text box.
Figure 59: Aerial Integration example - Nearmaps.
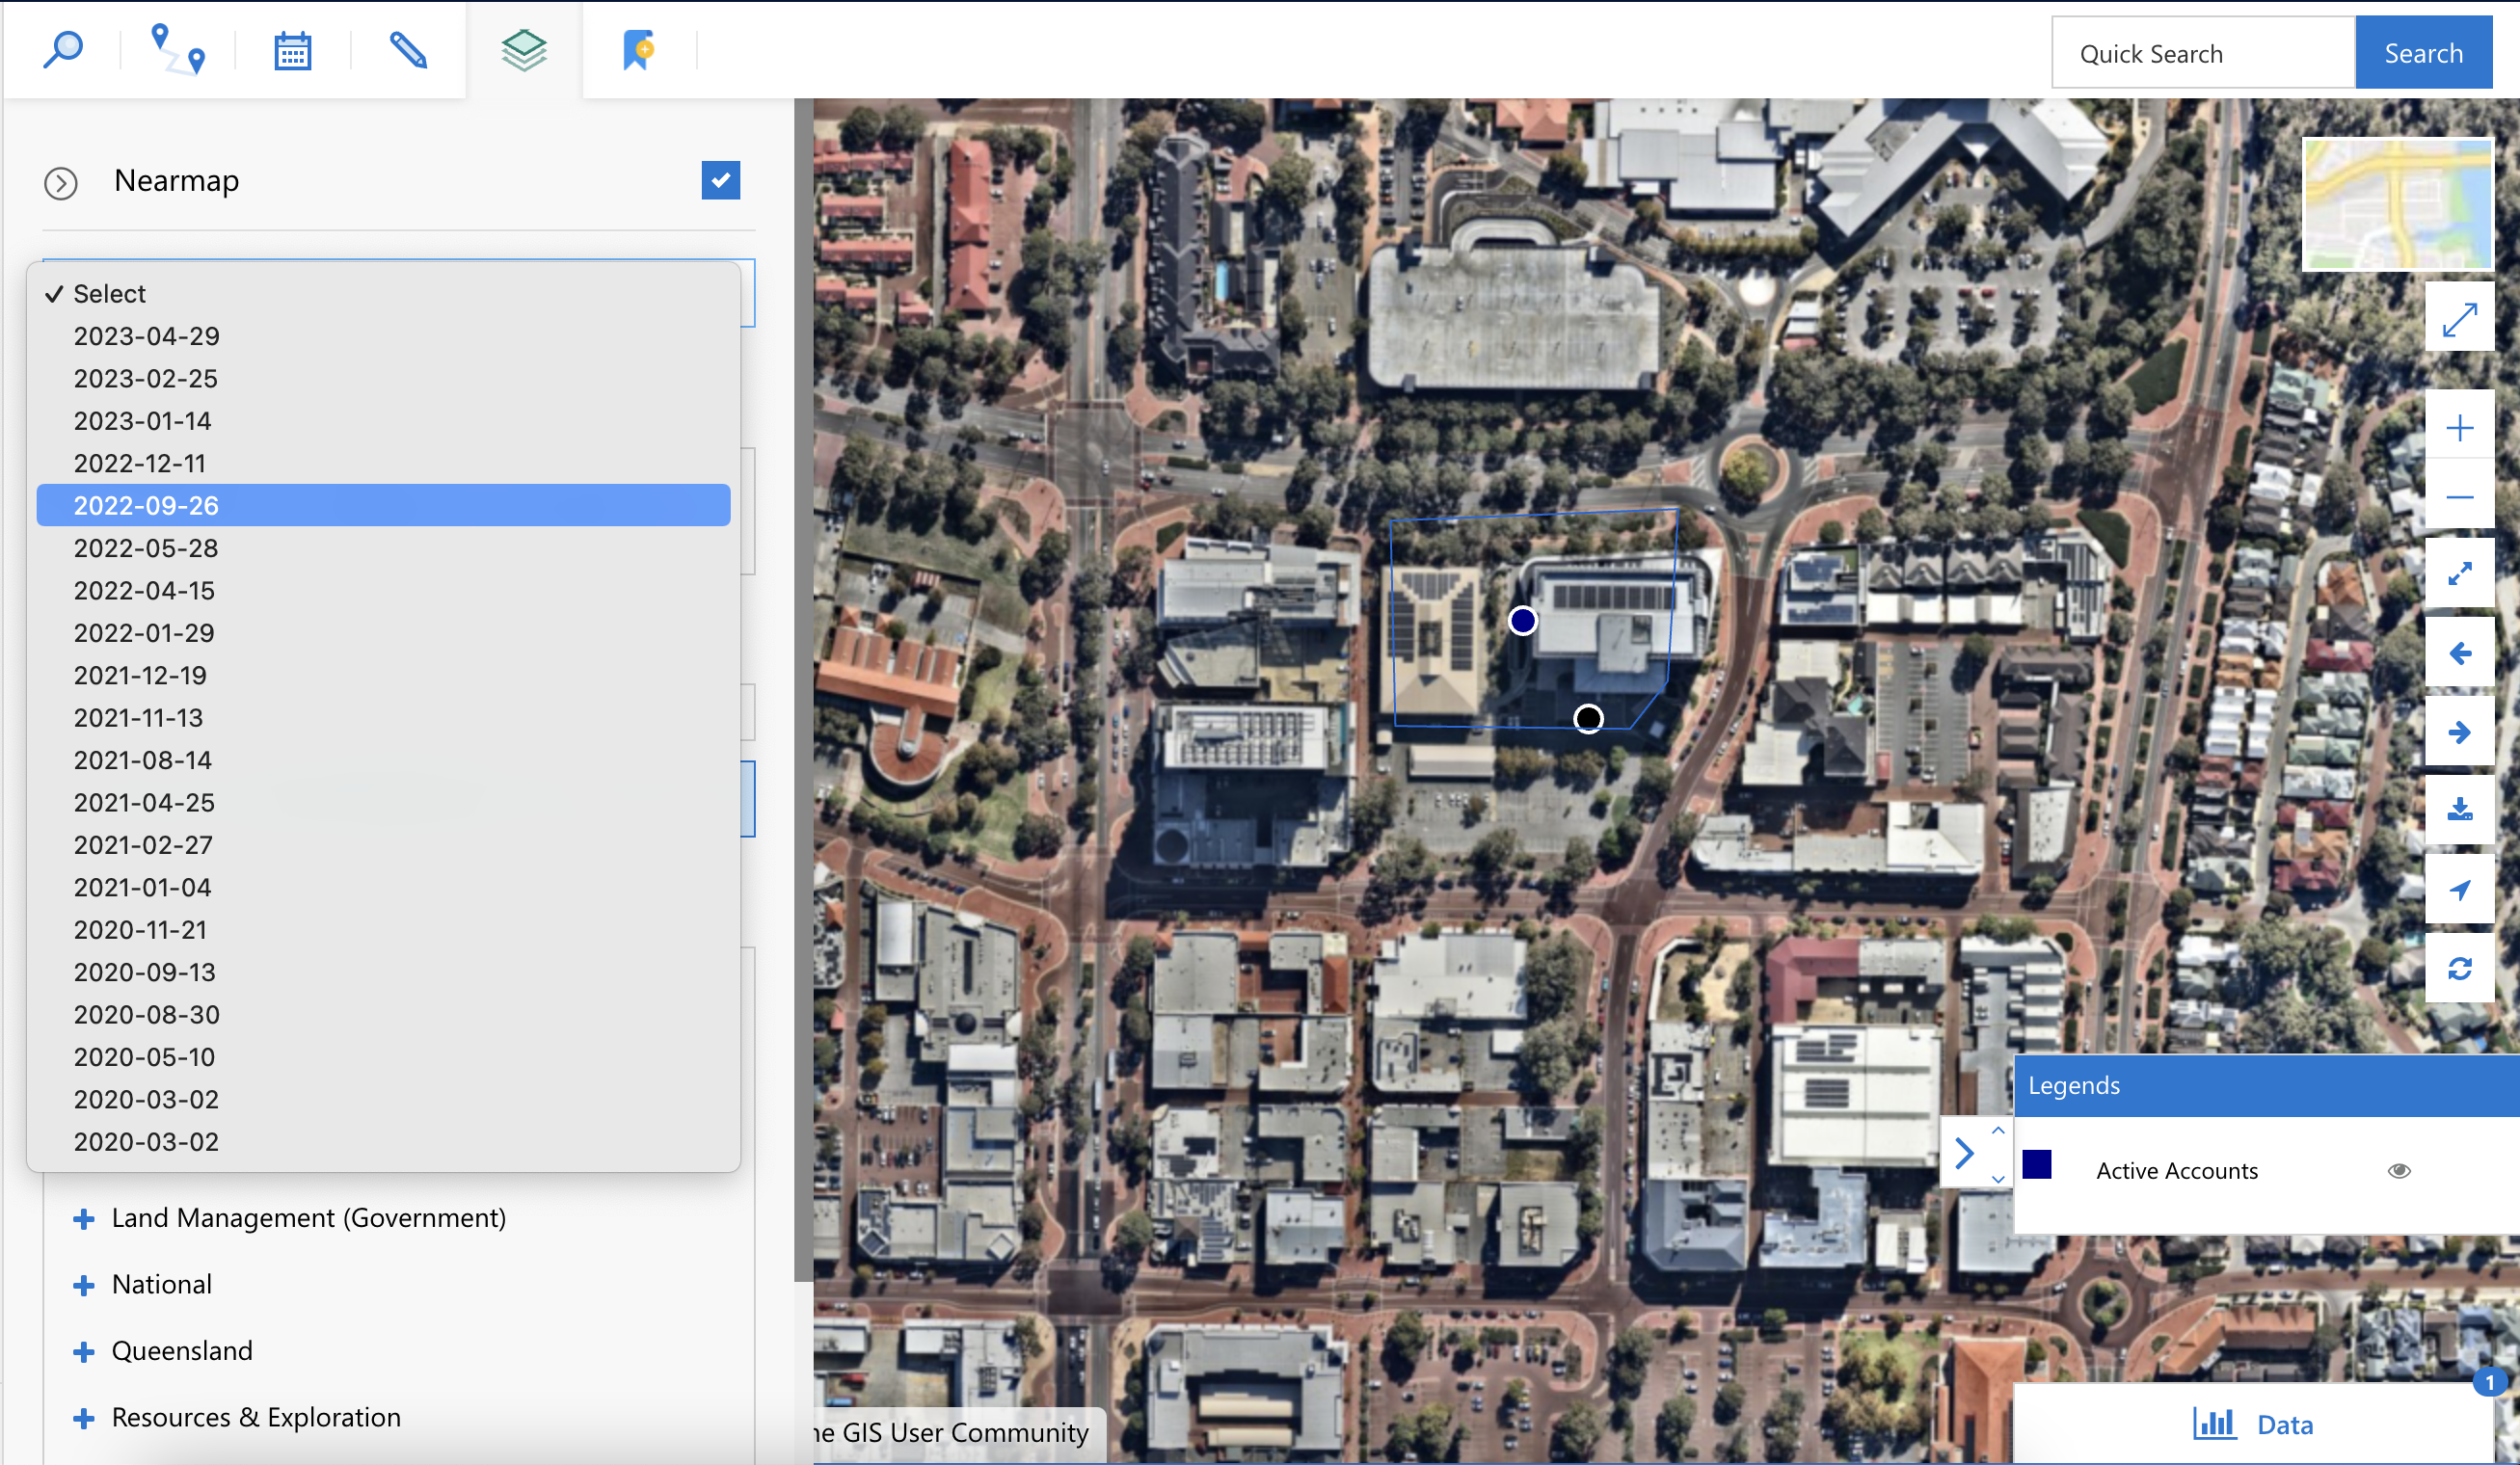
Once configured, the aerial provider will be made available under the Layers panel for activation and end user usage. Users will be able to select the point in time imagery as available by the service provider and location shown on the map.
Figure 60: Nearmaps enabled with historical data available.
Data Tab Action
The Data Tab is the panel that appears at the bottom of the map whenever there are records displayed. This panel provides a list view of the individual records so that users can search, filter and interactive with individual or groups of records.
Figure 61: Data Tab with results.

When items are selected the Choose Action dropdown will become active and user can then select an action to perform on the selected records.
Figure 62: Data Tab actions.
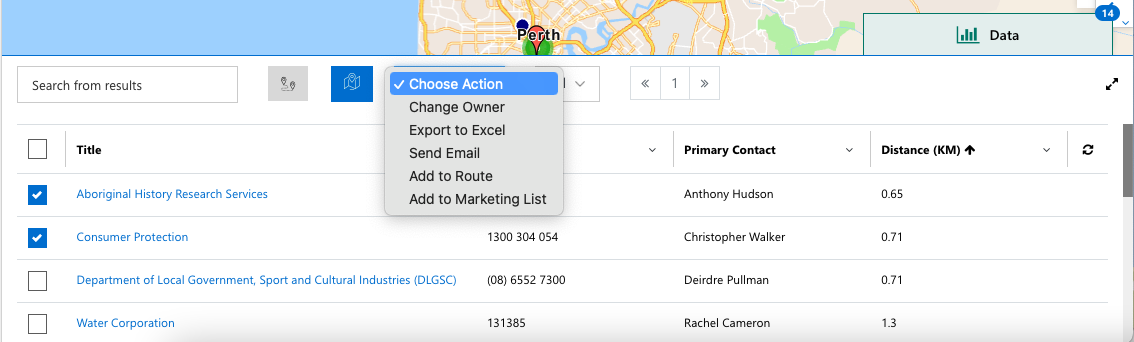
The actions that are available in this dropdown are configured in the Data Tab Action configuration section within the Configuration area.
Figure 63: Data Tab actions configuration.
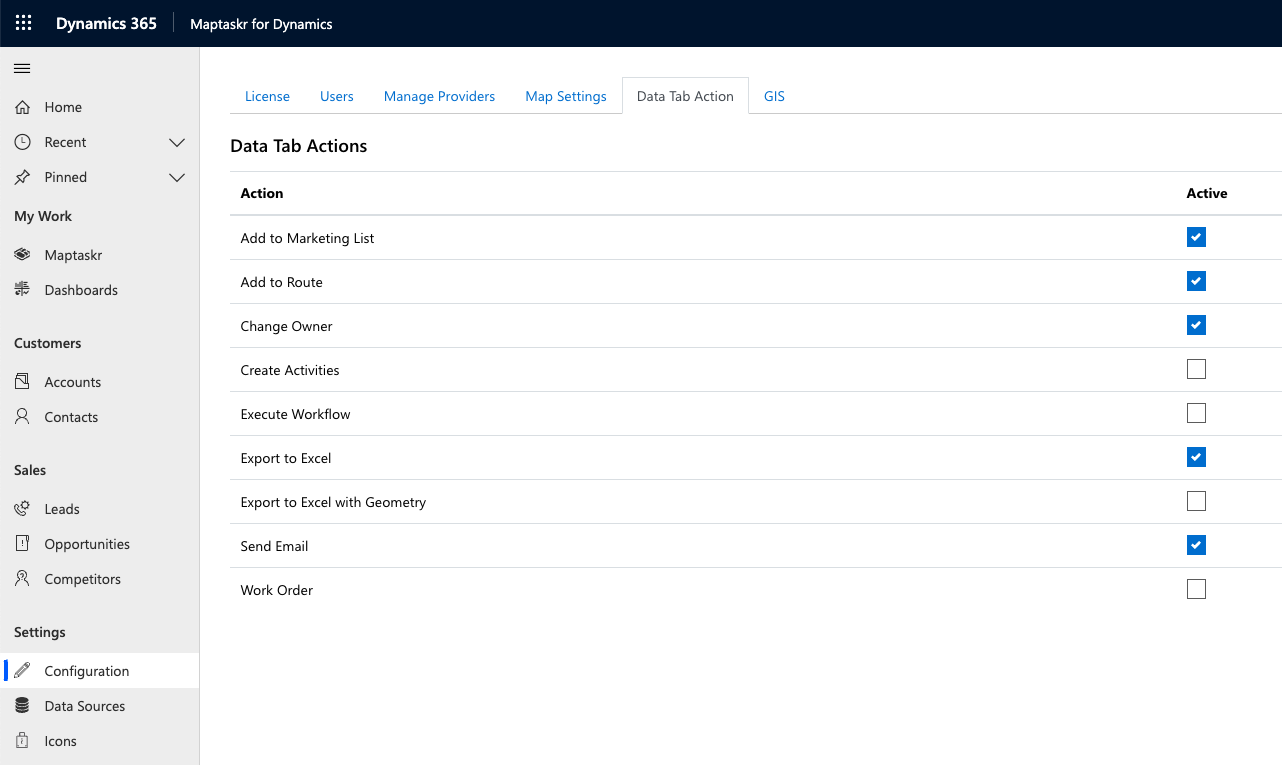 The flowing table provides an overview of each of the actions available.
| Action | DESCRIPTION |
|---|---|
| Add to Marketing List | Adds the selected records to a marketing list for marketing, sales, communications activities. Marketing lists can be created as either static or dynamic depending on the user preference. 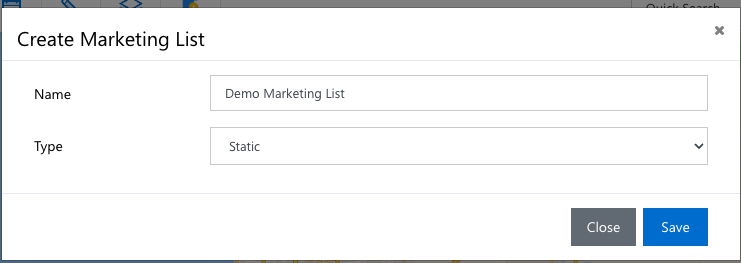 |
| Add to Route | Allow the ability for selected items to be added to a new Enabling this feature will allow adding selected records in the data tab to a new route for navigation and route creation purposes. 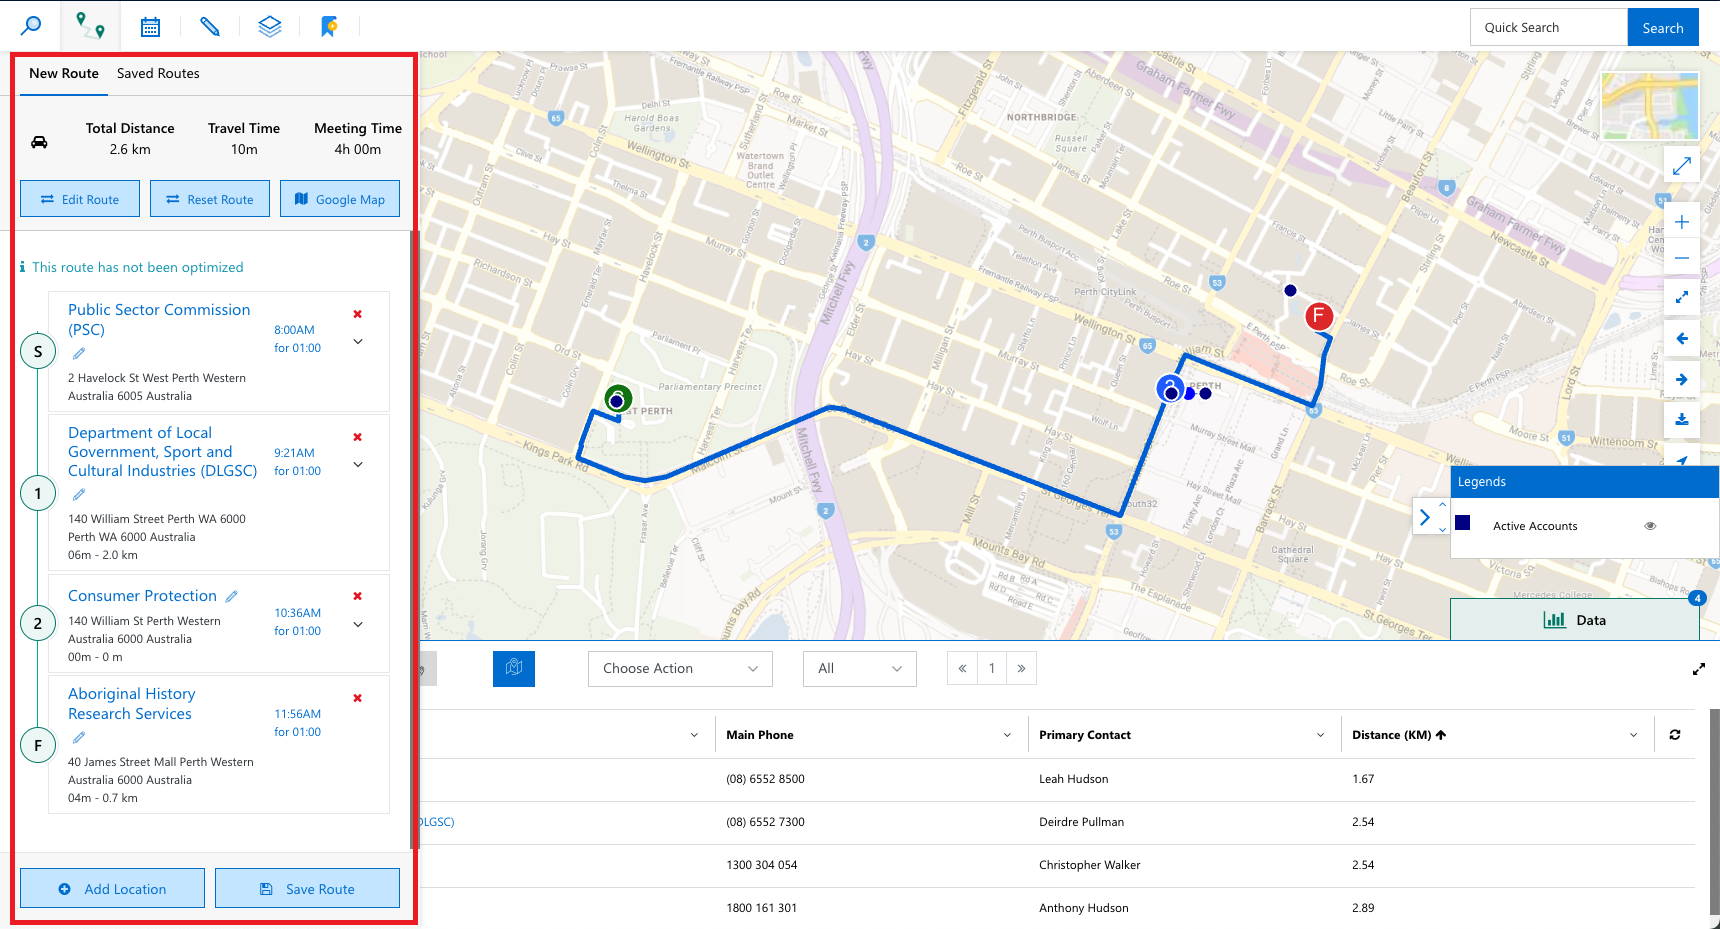 |
| Change Owner | Provides the ability for users to bulk update owners of records selected. Useful when reassigning accounts or work-related records between users. 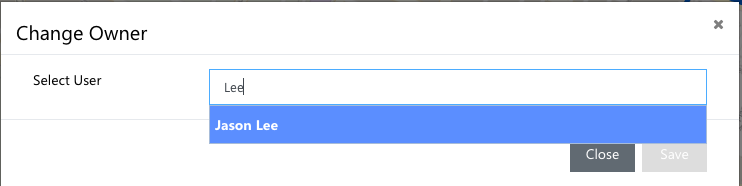 |
| Create Activities | Provides the ability to create an activity related to the selected record(s). Activities can be an appointment of service activity. 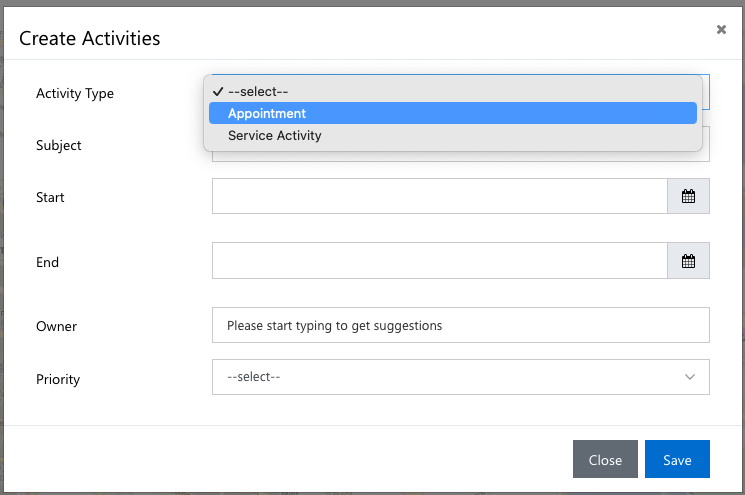 |
| Execute Workflow | Enabling this feature will retrieve a list of all Process Workflows available in the environment. When interacting with the data tab, a user can select one or more records and choose this action to display a list of available Workflows for the given entity and execute them. Note: This will only display Workflows that have been enabled and configured against the given data source entity. 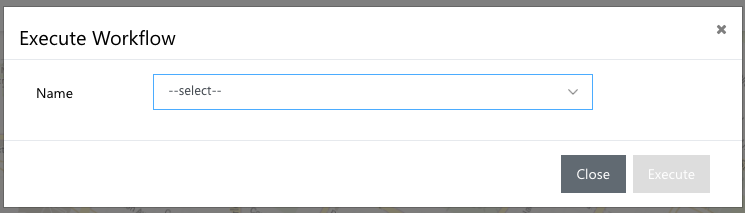 |
| Export to Excel | Enabling this feature will allow a user to select records in the data tab and output the configured data tab fields to a CSV file. For Data tab field configuration please refer to Data Tab Fields. Note: You can only select one Export to Excel action at a time. |
| Export to Excel with Geometry | Enabling this feature will allow a user to select records in the data tab and output the configured data tab fields as well as the geometry (Latitude and Longitude) to an CSV file. For Data tab field configuration please refer to Data Tab Fields. Note: You can only select one Export to Excel action at a time. |
| Send Email | Enabling this feature will allow a user to select records in the data tab and open a new Email modal dialog record with the recipients pre-populated. |
| Work Order | For use with Field Services. If the records listed in the data tab are Field Service assets, a new work order modal dialog record with the assets pre-populated. Note: Action can only be chosen for individual Field Service Asset items in the Data tab list. |
GIS
Maptaskr provides the ability to configure advanced GIS integration via the GIS section of the Configuration area.
Note: The first 2 sections of the GIS screen are available even with the standard edition licensing of Maptaskr. The remaining configuration is only available with the Enterprise version of Maptaskr for D365.
Figure 64: GIS Configuration Screen.
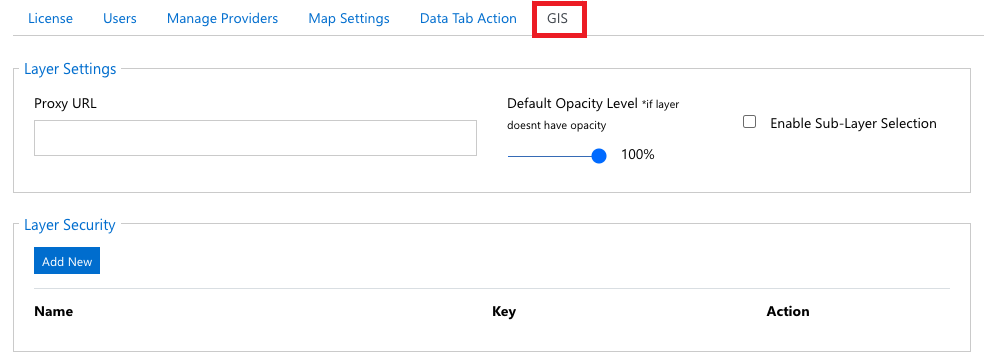
Layer Settings (Proxy)
This proxy layer setting is to be utilised for accessing non Esri ArcGIS layer web services i.e., WMS/WFS/WMTS. A proxy is only required if the services attempted to be accessed require a proxy to route requests to the configured layers.
Add Proxy URL to enable layer communication over a proxy server.
Figure 65: Layer Settings.

| Field | Description |
|---|---|
| Proxy URL | The URL of the proxy to be used by Maptaskr to access the configured layers. |
| Default Opacity Level | Default opacity configuration for the layers |
| Enable Sub-Layer Selection | Turns on all the sub layers upon turning on the layer |
Layer Security
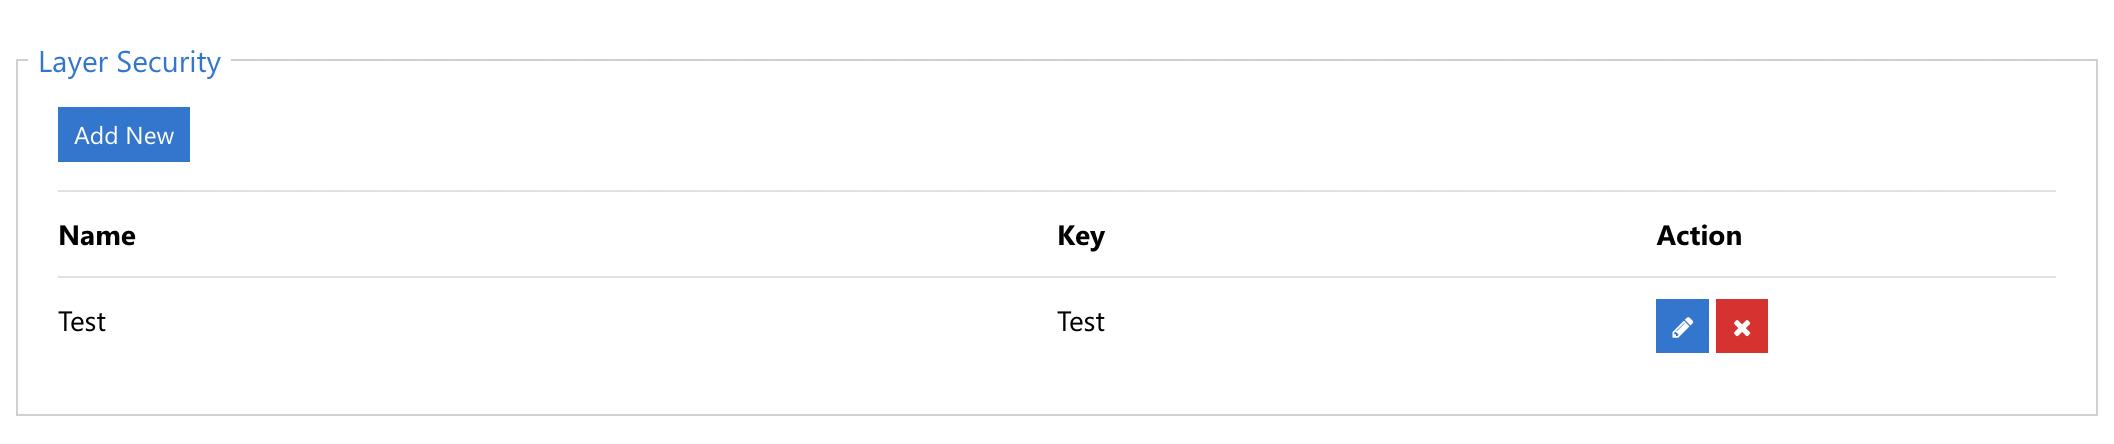
This layer security section is to be utilised for accessing non Esri ArcGIS layer web services i.e., WMS/WFS/WMTS. An entry here is only required if the services attempted to be accessed requires authentication using key value pair credentials.
Figure 66: Layer Security.

To add an authentication entry for WMS/WFS/WMTS layers click Add New, enter the required key value pair, and click Save.
Figure 67: Create new authentication item.
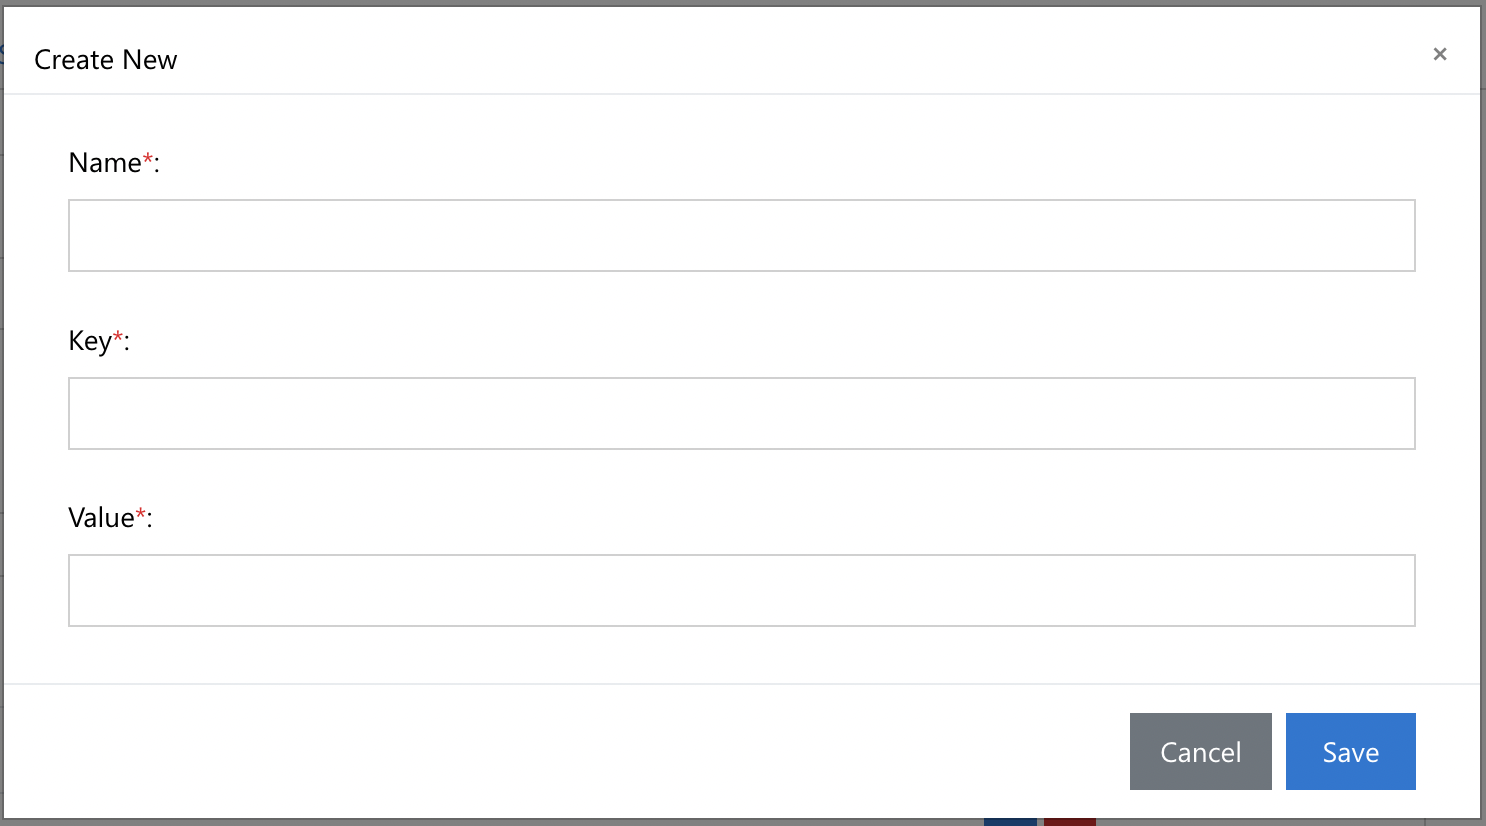
Figure 68: New Layer Security item.
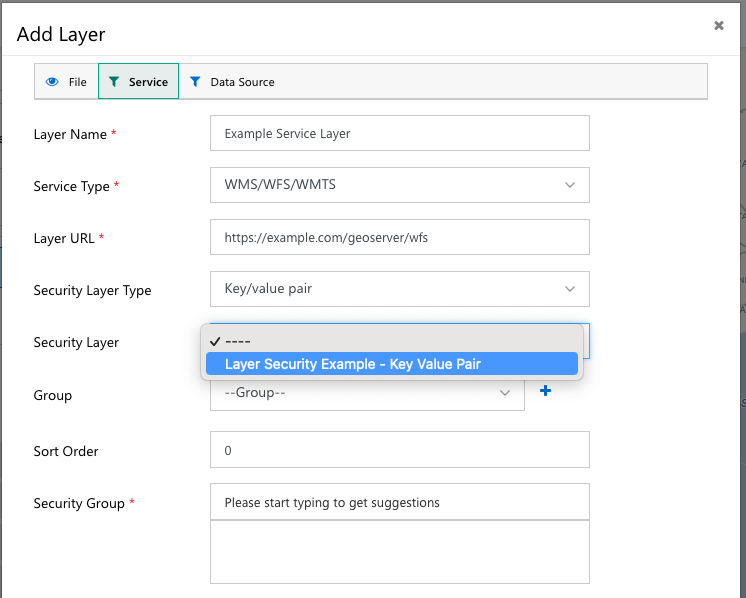
This Layer Security will then be available to users when configuring WMS/WFS/WMTS layers when the Key/value pair Security Layer type is selected.
Figure 69: Layer Security example.
ESRI ArcGIS Configuration
Note: ArcGIS Service integrations are only available with the Enterprise version of Maptaskr for D365.
For details on supported ArcGIS versions, and prerequisites that are required to be in place before Maptaskr configuration can occur please refer to the Maptaskr ArcGIS Configuration Guide or contact Maptaskr Support (support@maptaskr.com).
POI (Points of Interest)
Figure 70: Points of Interest.
Maptaskr can be configured to use Points of Interest (POIs) on the map. POIs are currently available to be activated with the following Base Map Service providers (see section Managing Mapping Service providers for more details) –
- Bing
- Esri ArcGIS
- HereMaps
- Azure Maps
If one of the above providers is configured, then the Enable POI option will be made available as described in section Search settings.
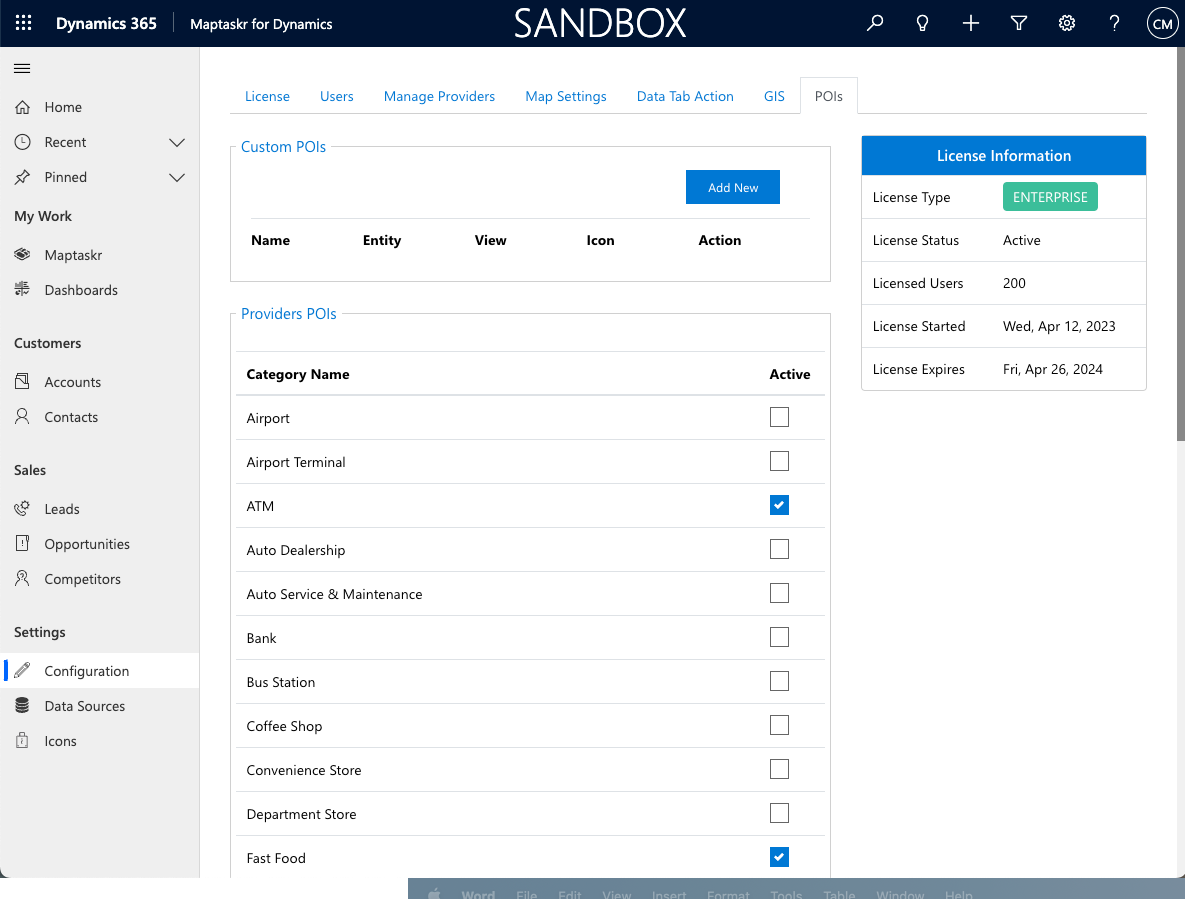
Once the Enable POI is active the POIs section of the Configuration area.
Figure 71: POI's configuration section.
Custom POI's
Figure 72: Custom POI's.
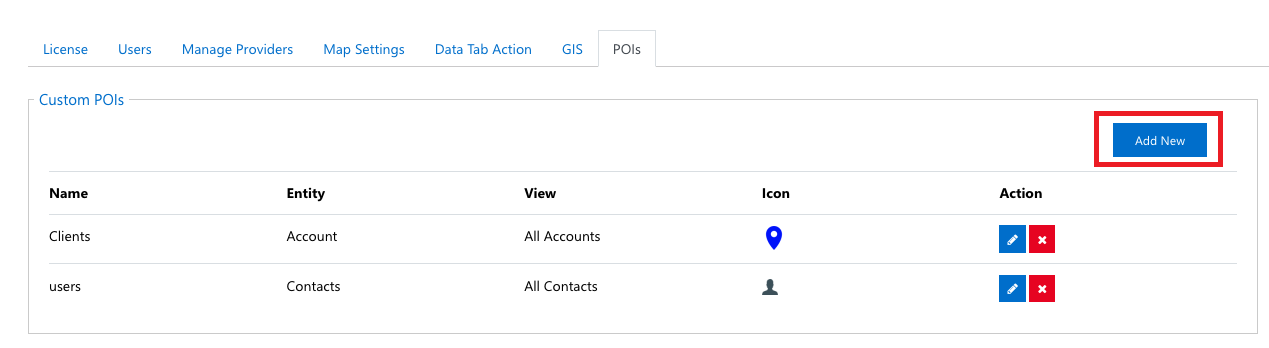
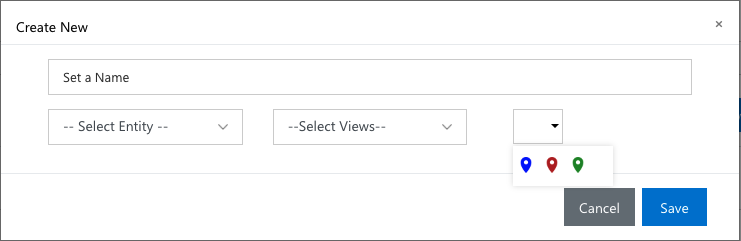
Admins can click on Add New in Custom POI section and a Create New form will appear. Fill in the details (Name, Entity, View and Icon) to load the POI in the list and in the search panel.
Figure 73: Create New Custom POI's.
Once saved, the Custom POI will appear on the search panel and click update for the providers POI to appear on the search panel.
Figure 74: Custom POI list.
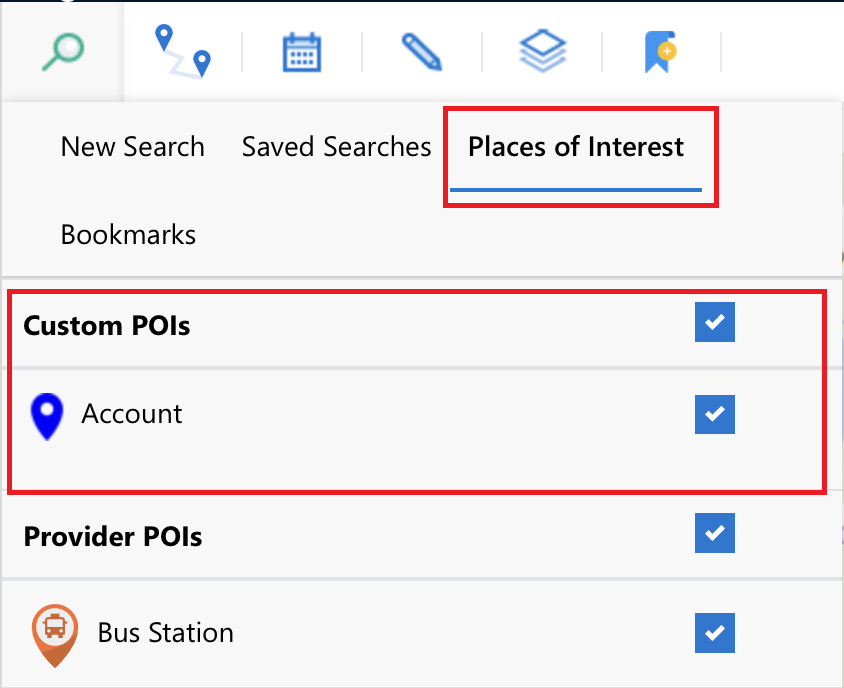
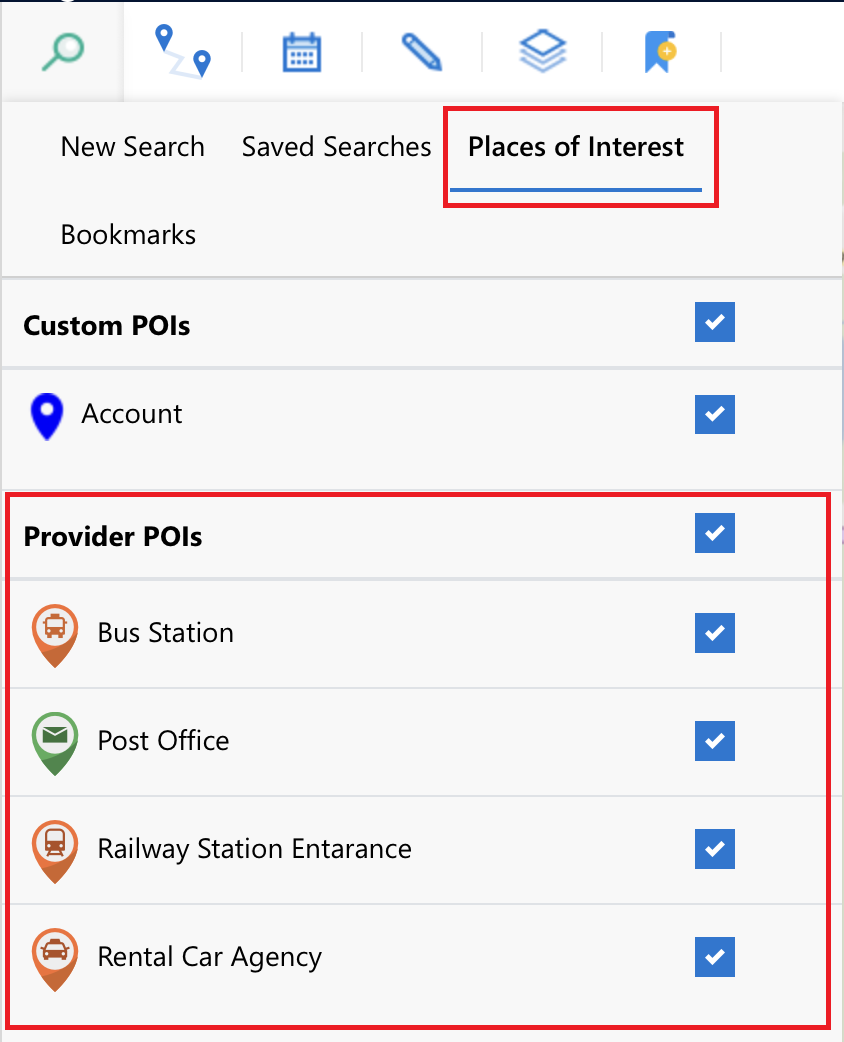
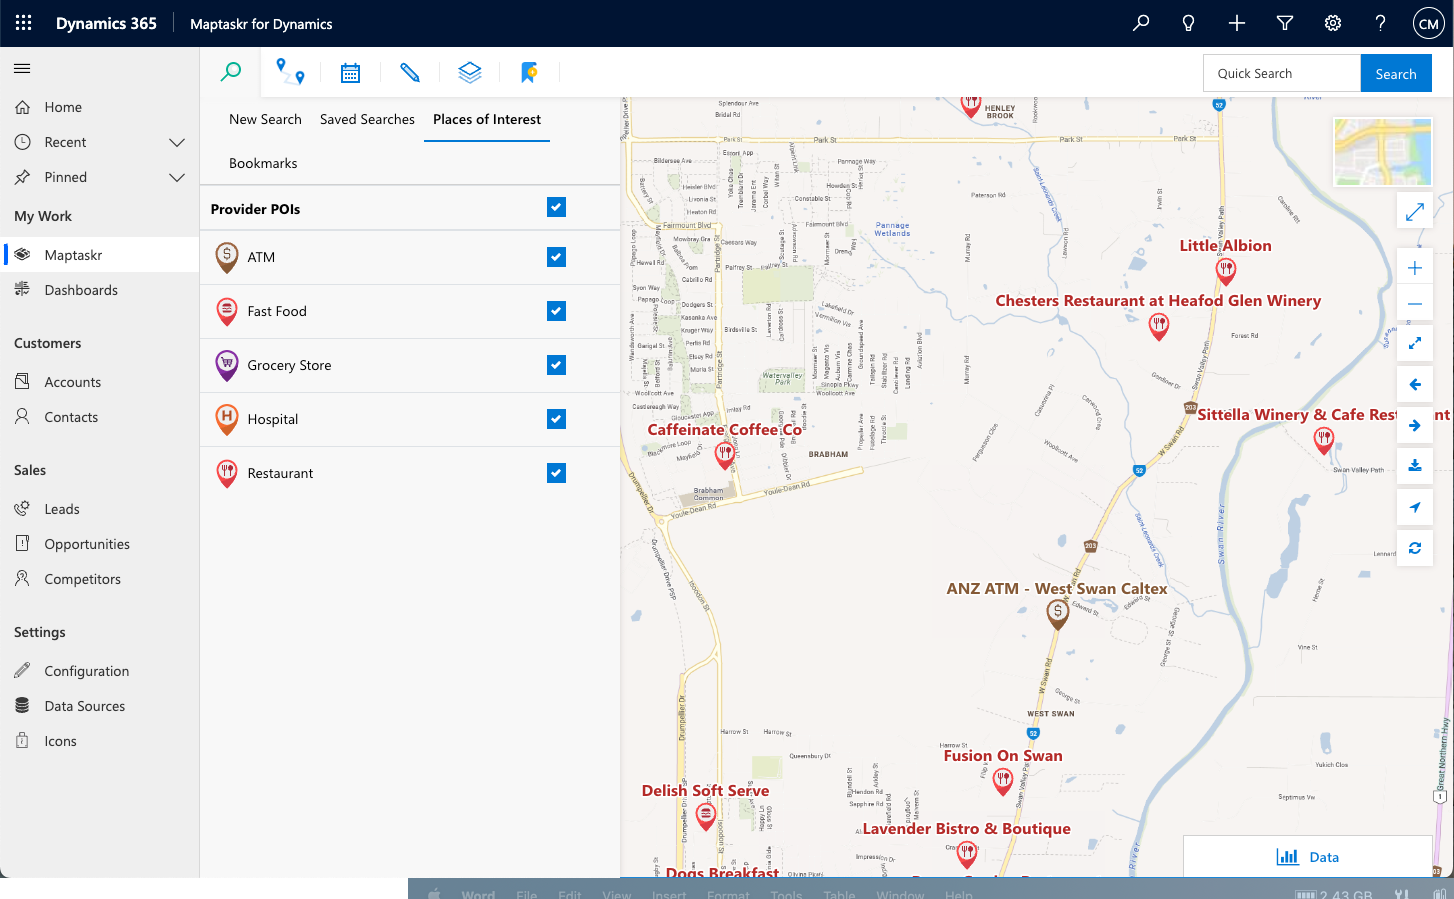
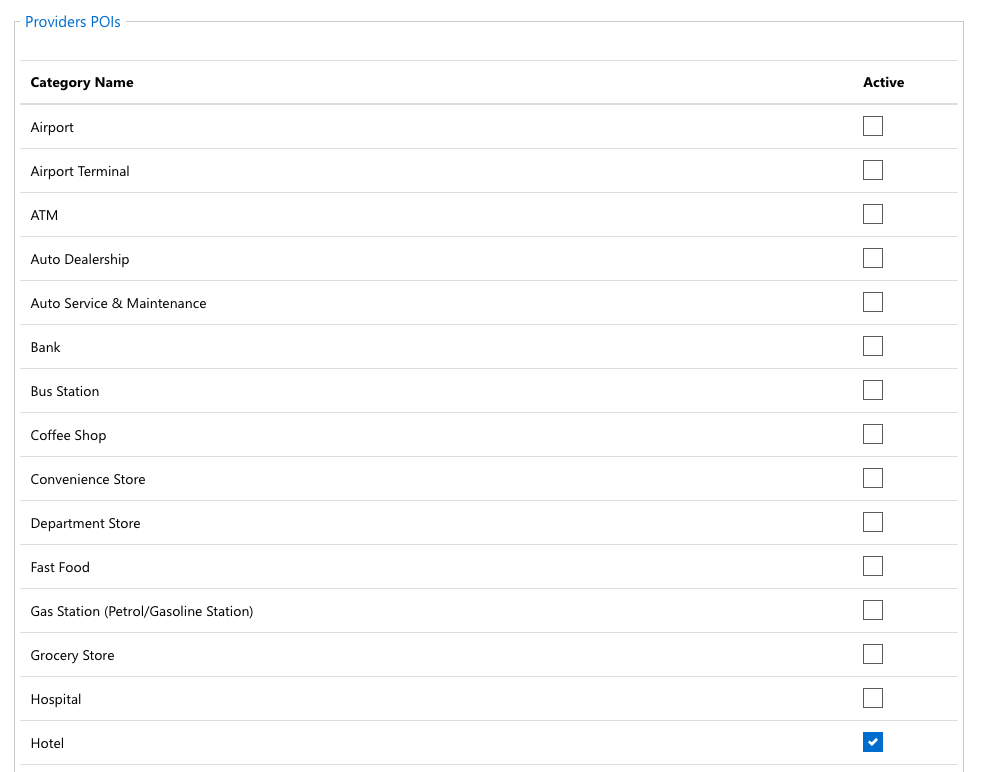
Provider POI's
Provider POIs are available for various categories. Admins can select with category is applicable for their users and toggle on or off any providers POIs from the given list to allow users to utilise them for the map.
Figure 75: Providers POI Categories.
Once categories are enabled by an admin, they will appear available for end user to access via the Search panel as per Figure 74: Custom POI list.
Figure 76: Providers POI list.