Custom Entities Configuration
Maptaskr can be configured to visualise custom entities. This section covers how to configure these entities.
Mapping Custom Entities to Maptaskr
-
Navigate to the data sources tab under Settings from the left navigation bar.
Figure 122: Maptaskr Settings Menu.

-
To add a new entity, click on
+Newin the ribbon to add a custom entity.Figure 123: Ribbon Panel.

-
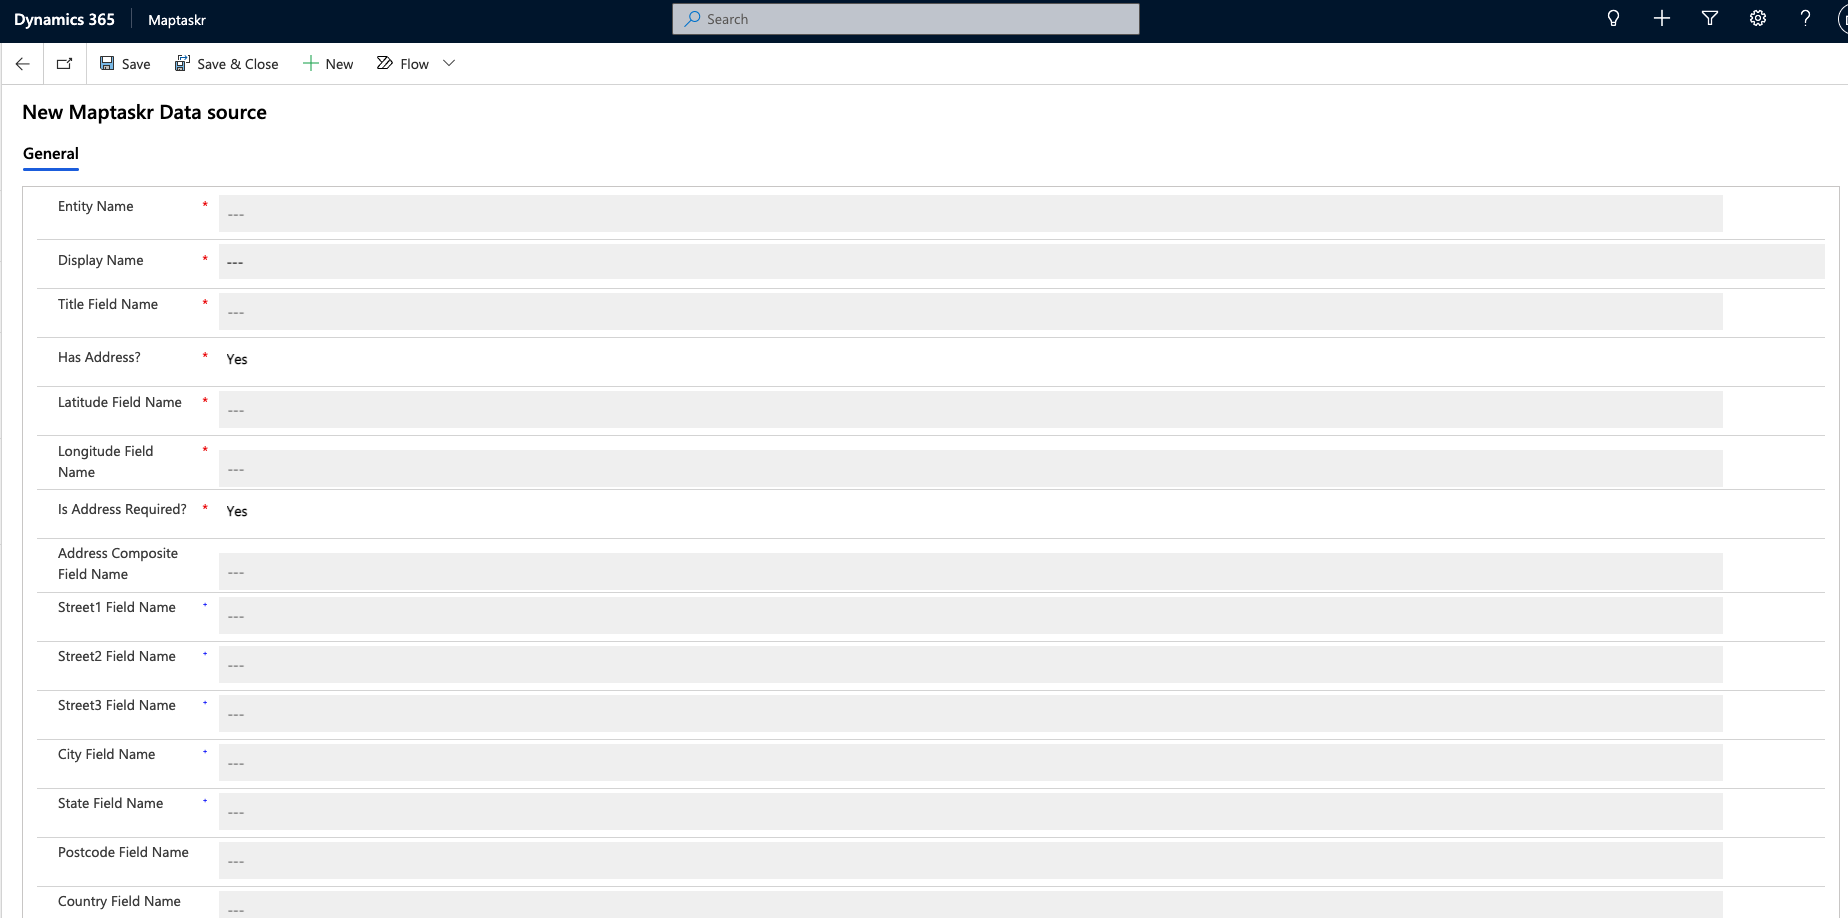
A new Maptaskr data source form will appear.
Figure 124: Data Source Form.
-
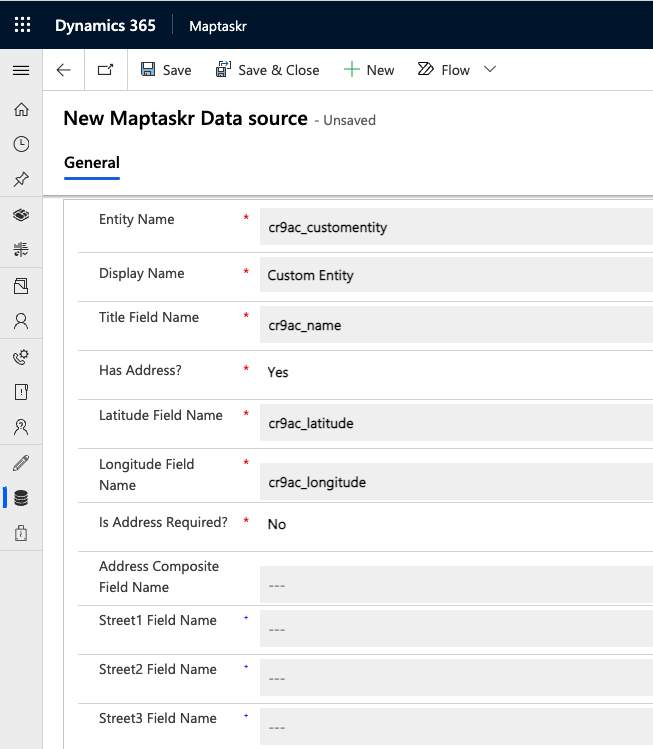
Fill-in the required field mappings.
Figure 125: Data Source Form Filled With Custom Entity Details.

-
Click on Save & Close and the custom entity will be mapped to the data source.
Adding Maptaskr to a Custom Entity Form
-
Navigate to the advanced setting page.
Figure 126: Advanced Settings Page.
-
Click on the drop down and navigate to solutions page.
Figure 127: Solutions in Advanced Settings.

-
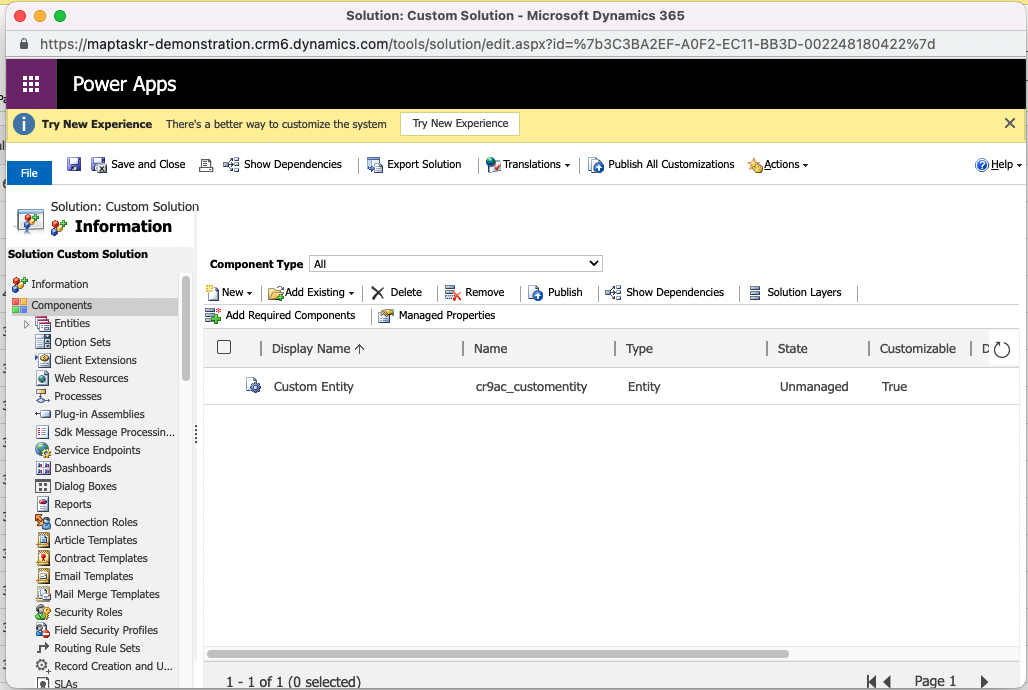
Create a new custom solution and add the custom entity to it.
Figure 128: Add the New Custom Entity.
-
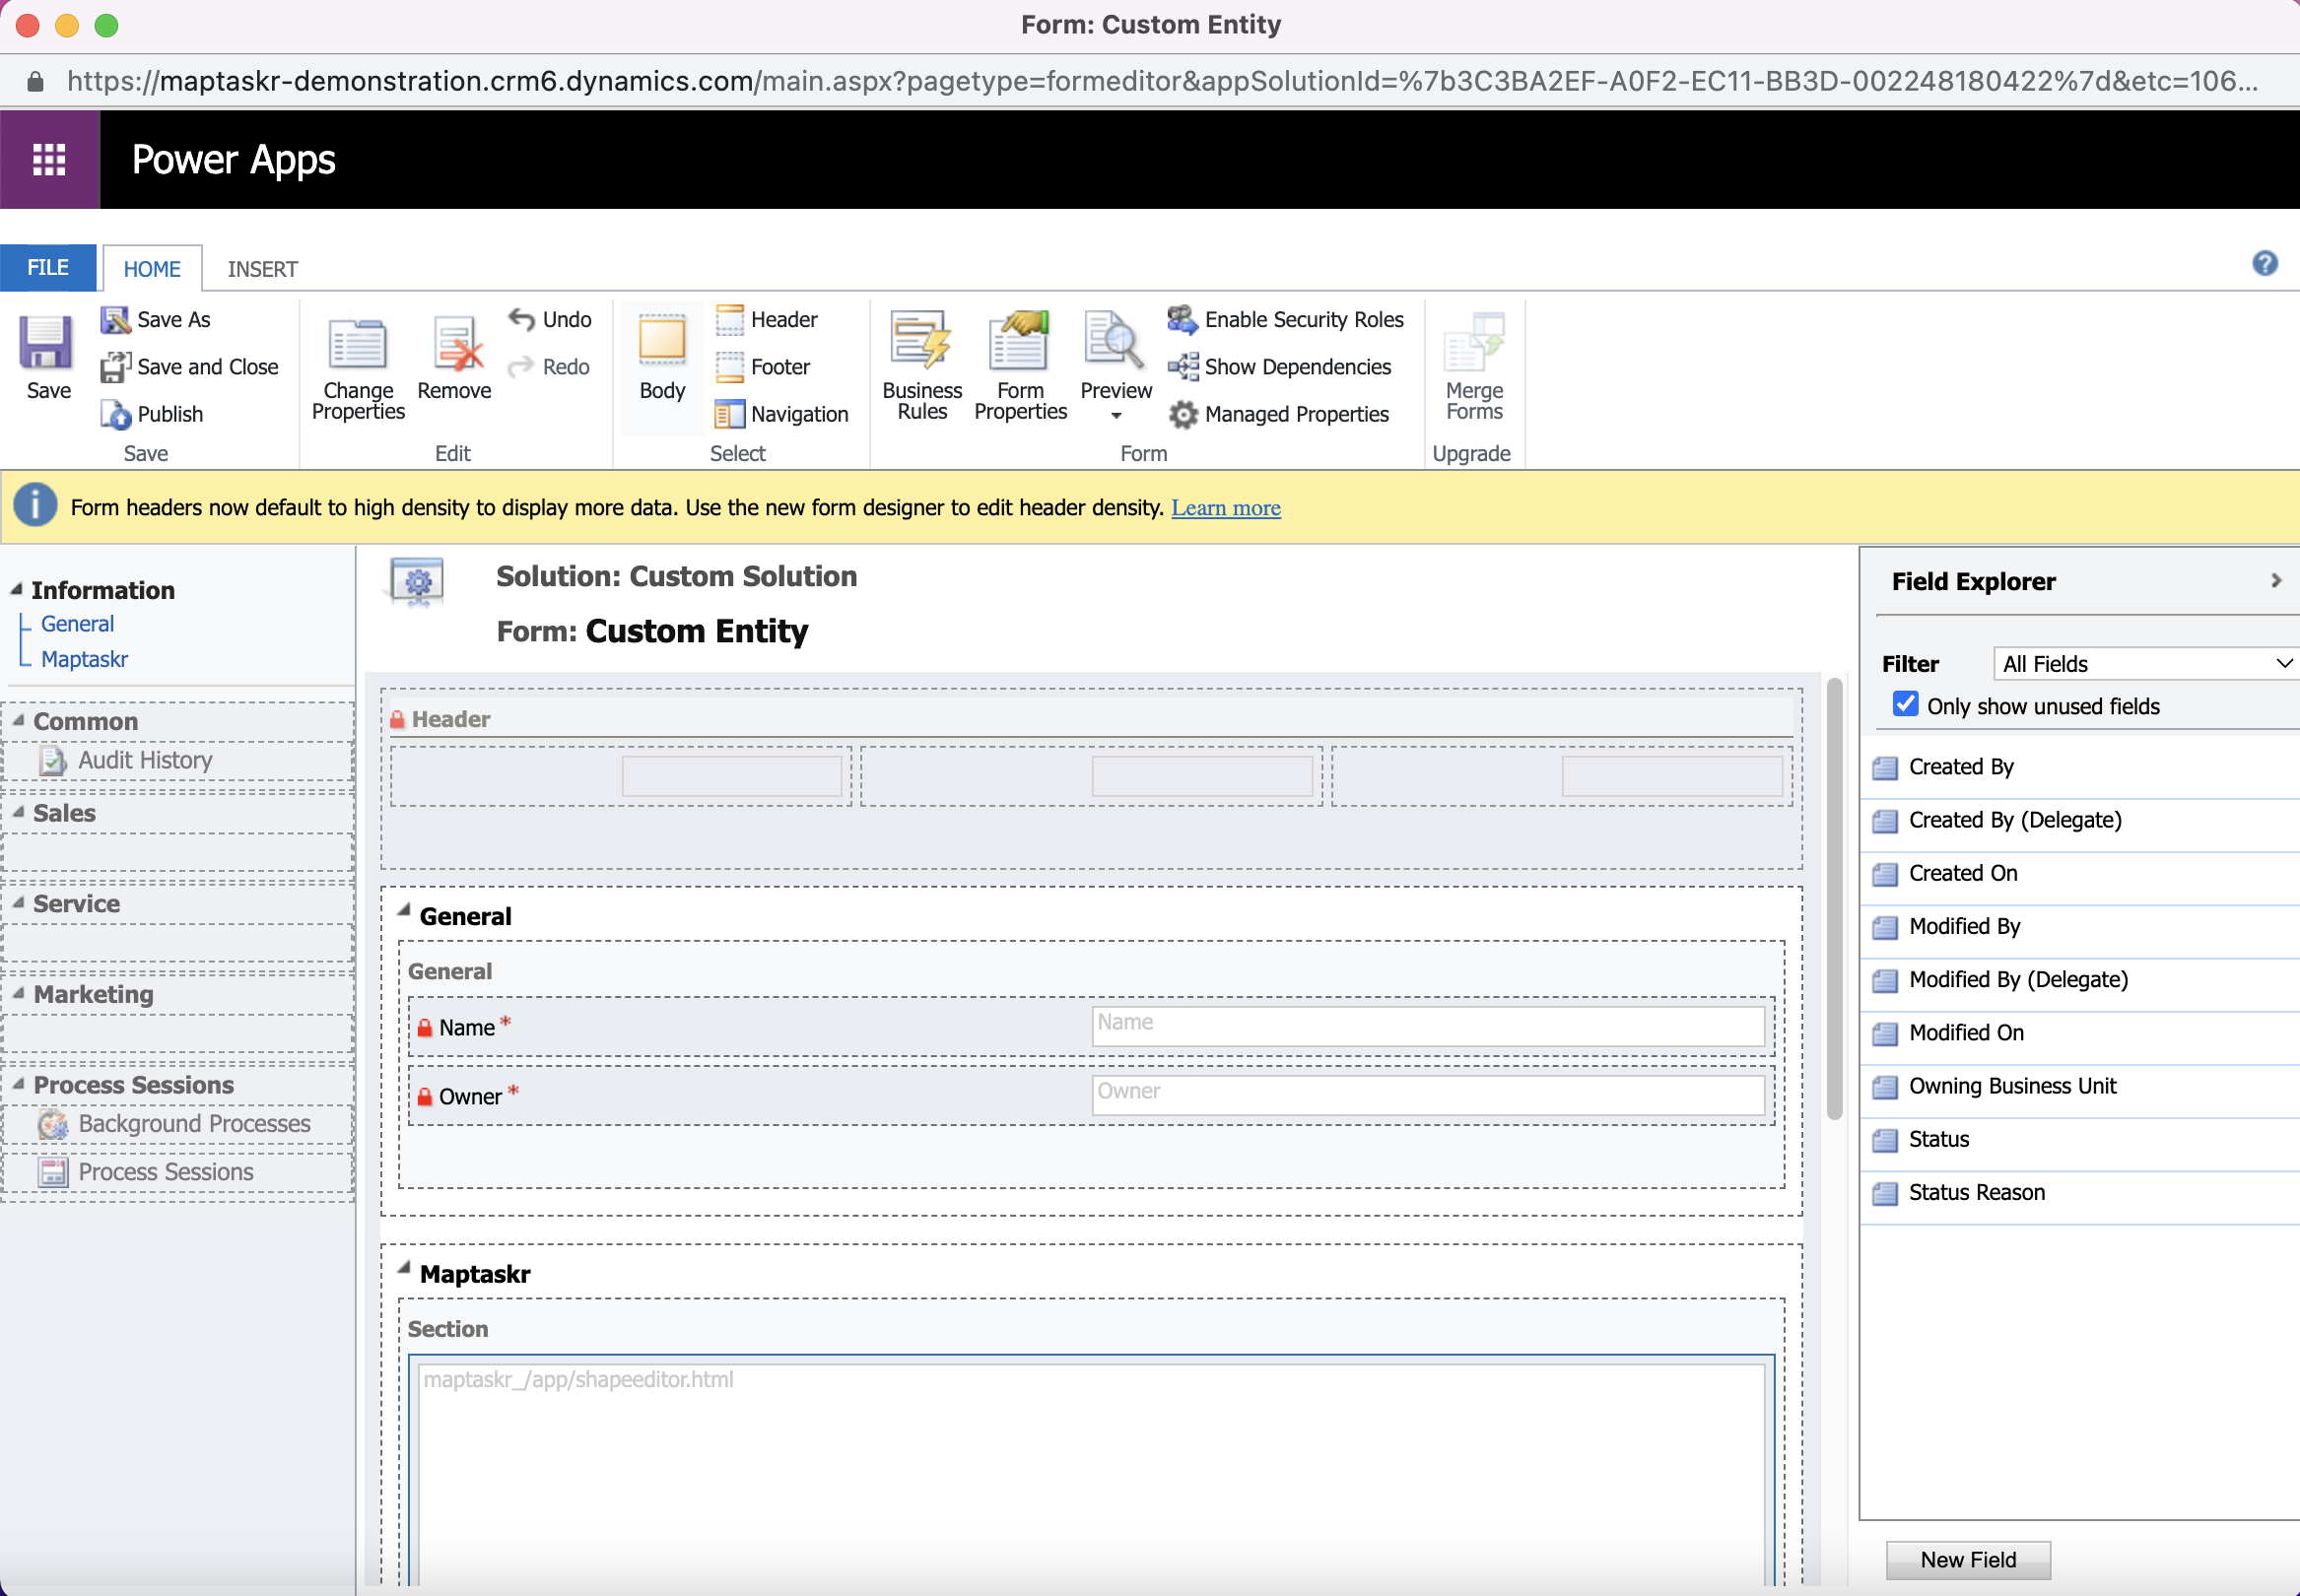
Navigate to main form, from the entity in the left navigation panel and click on the form that has form type set to
Main.Figure 129: Active Forms List.
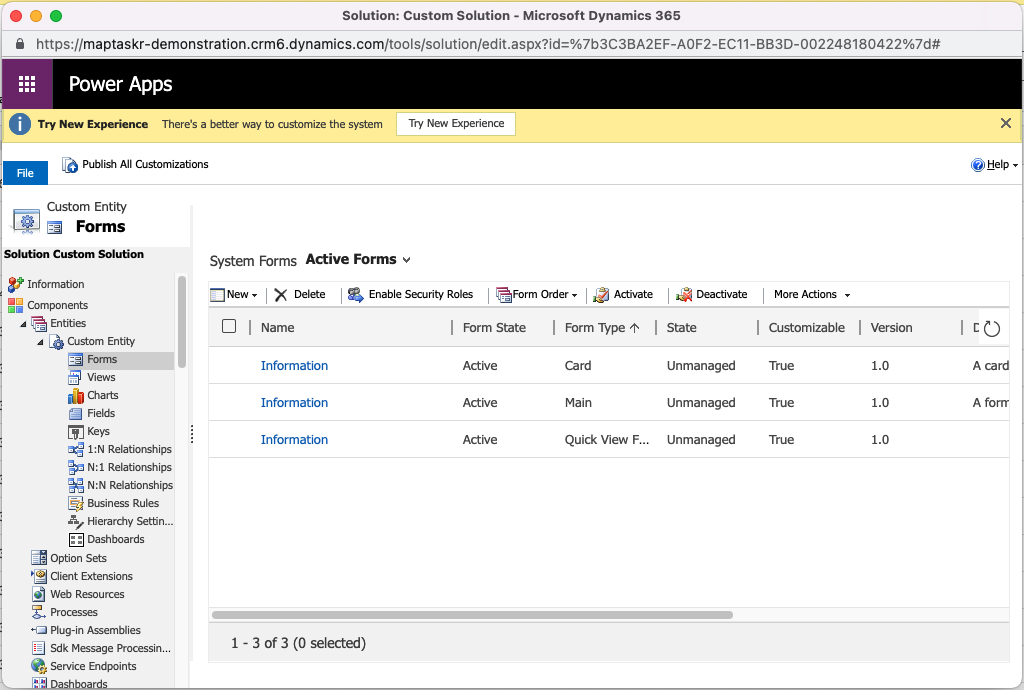
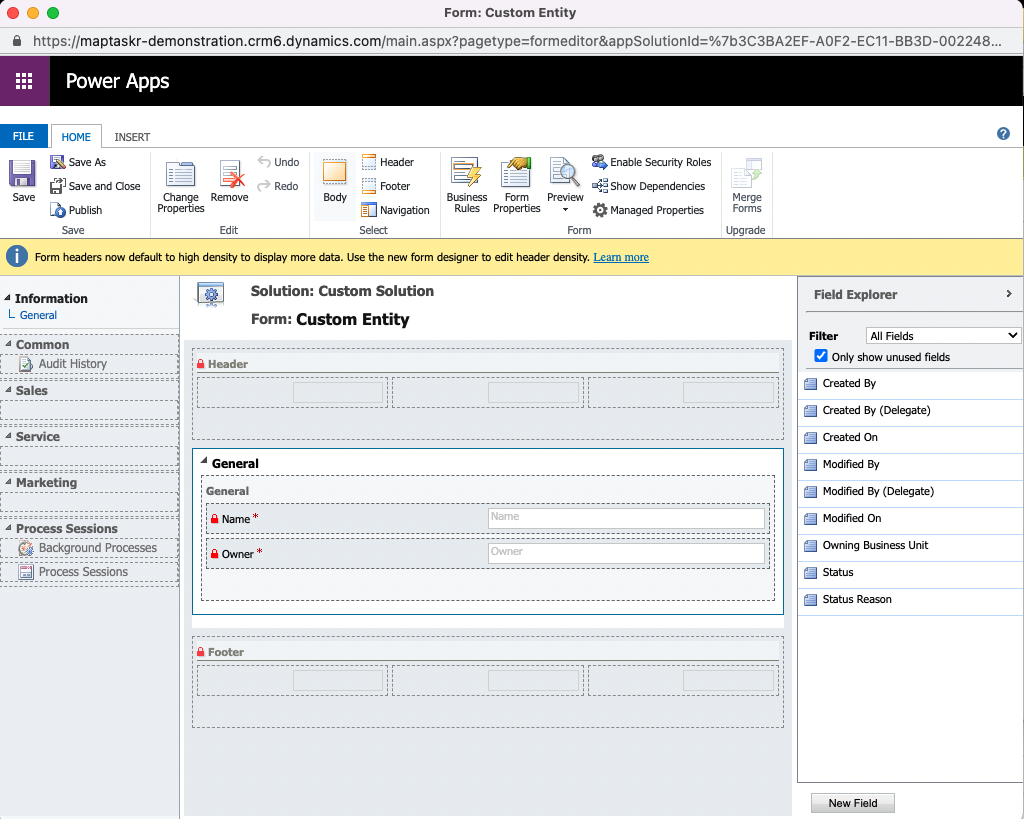
Figure 130: Main Form.
-
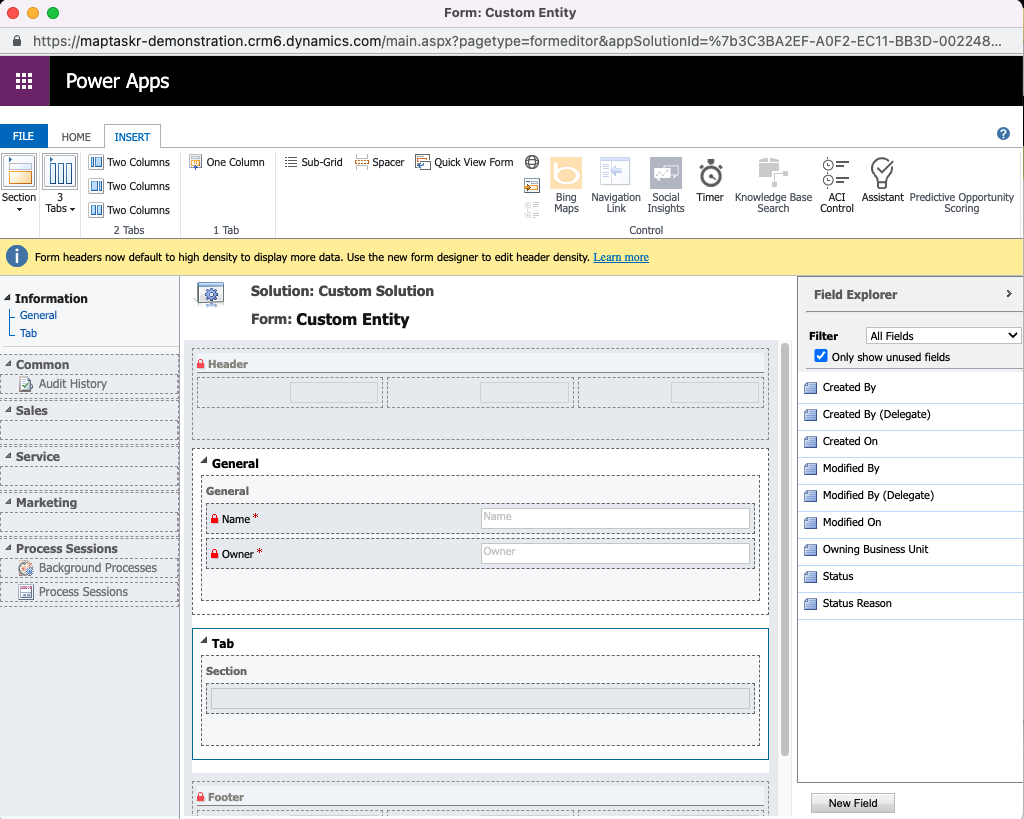
Navigate to Insert tab in the ribbon, click on the
One Columntab to insert it on the form.Figure 131: Insert Column.

Figure 132: Tab Added in Form.
-
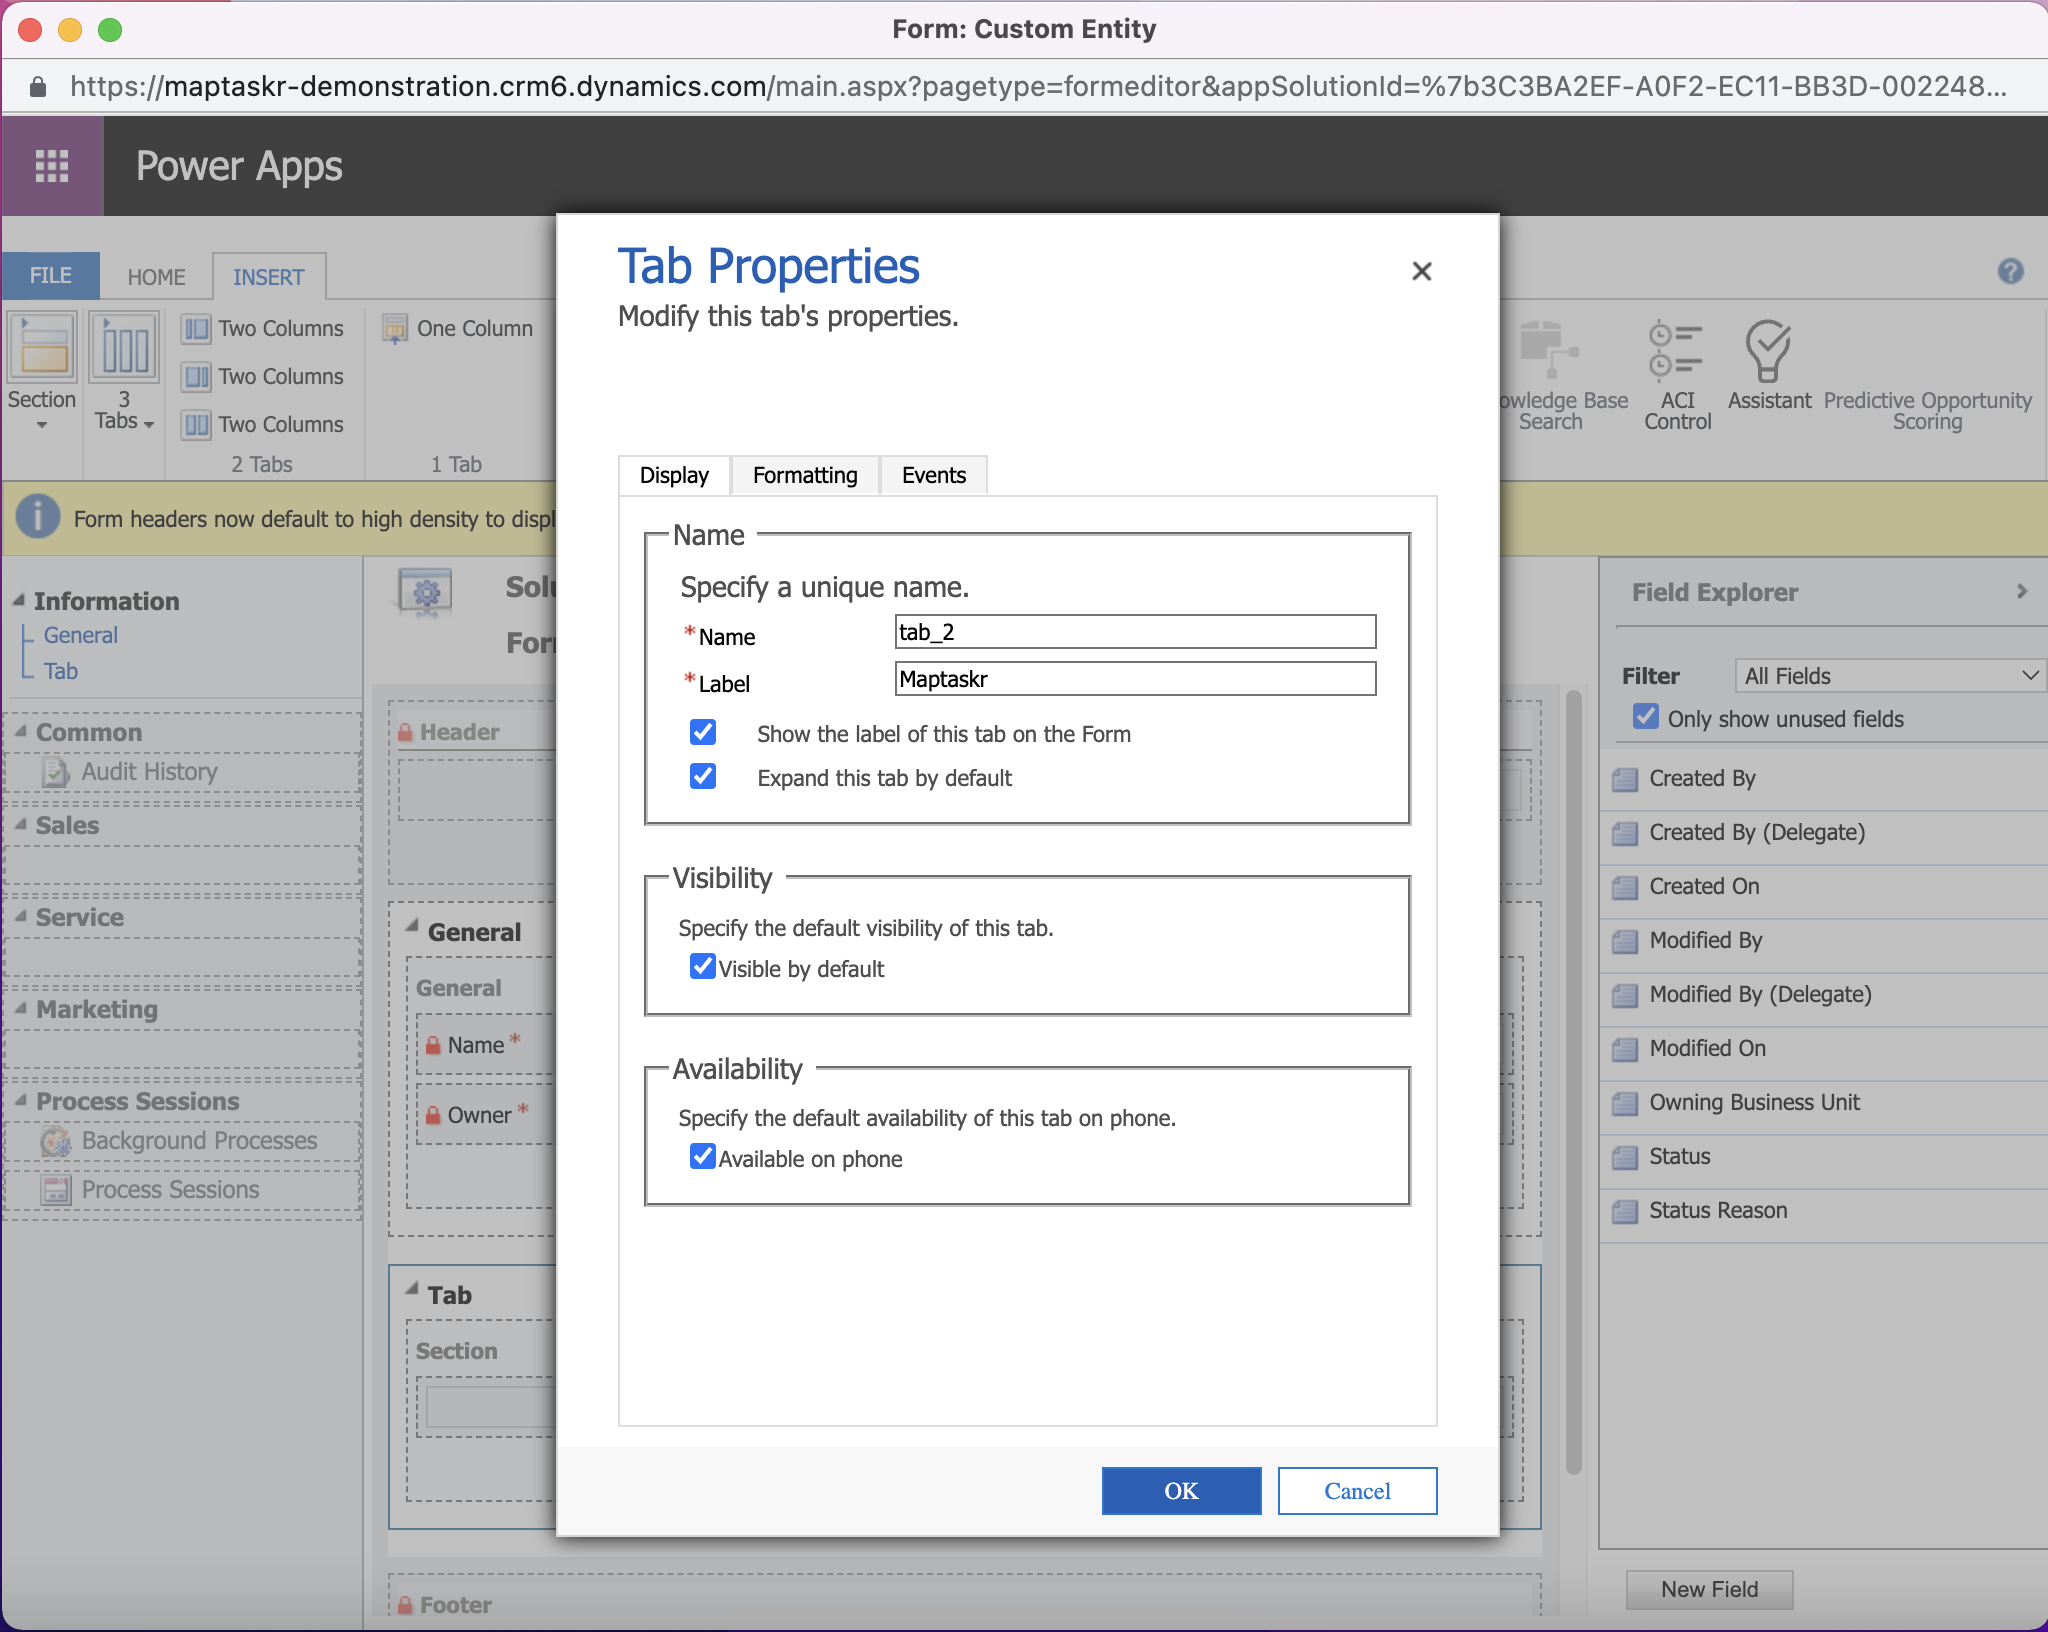
Double Click on the tab to rename it.
Figure 133: Tab Properties.
-
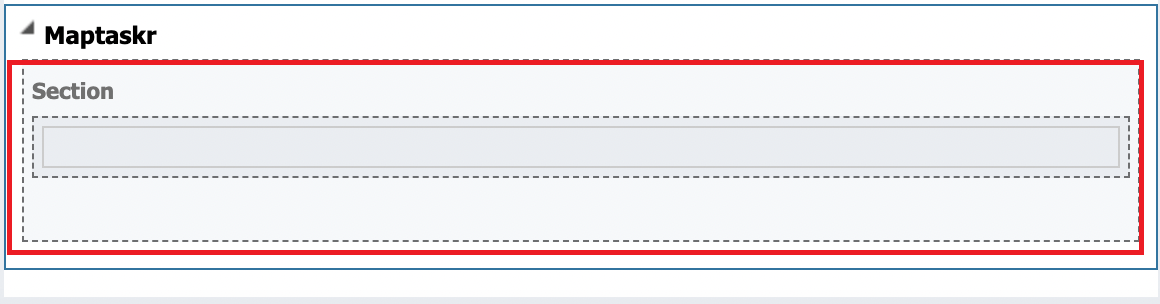
Select the section tab under the Maptaskr tab.
Figure 134: Section.
-
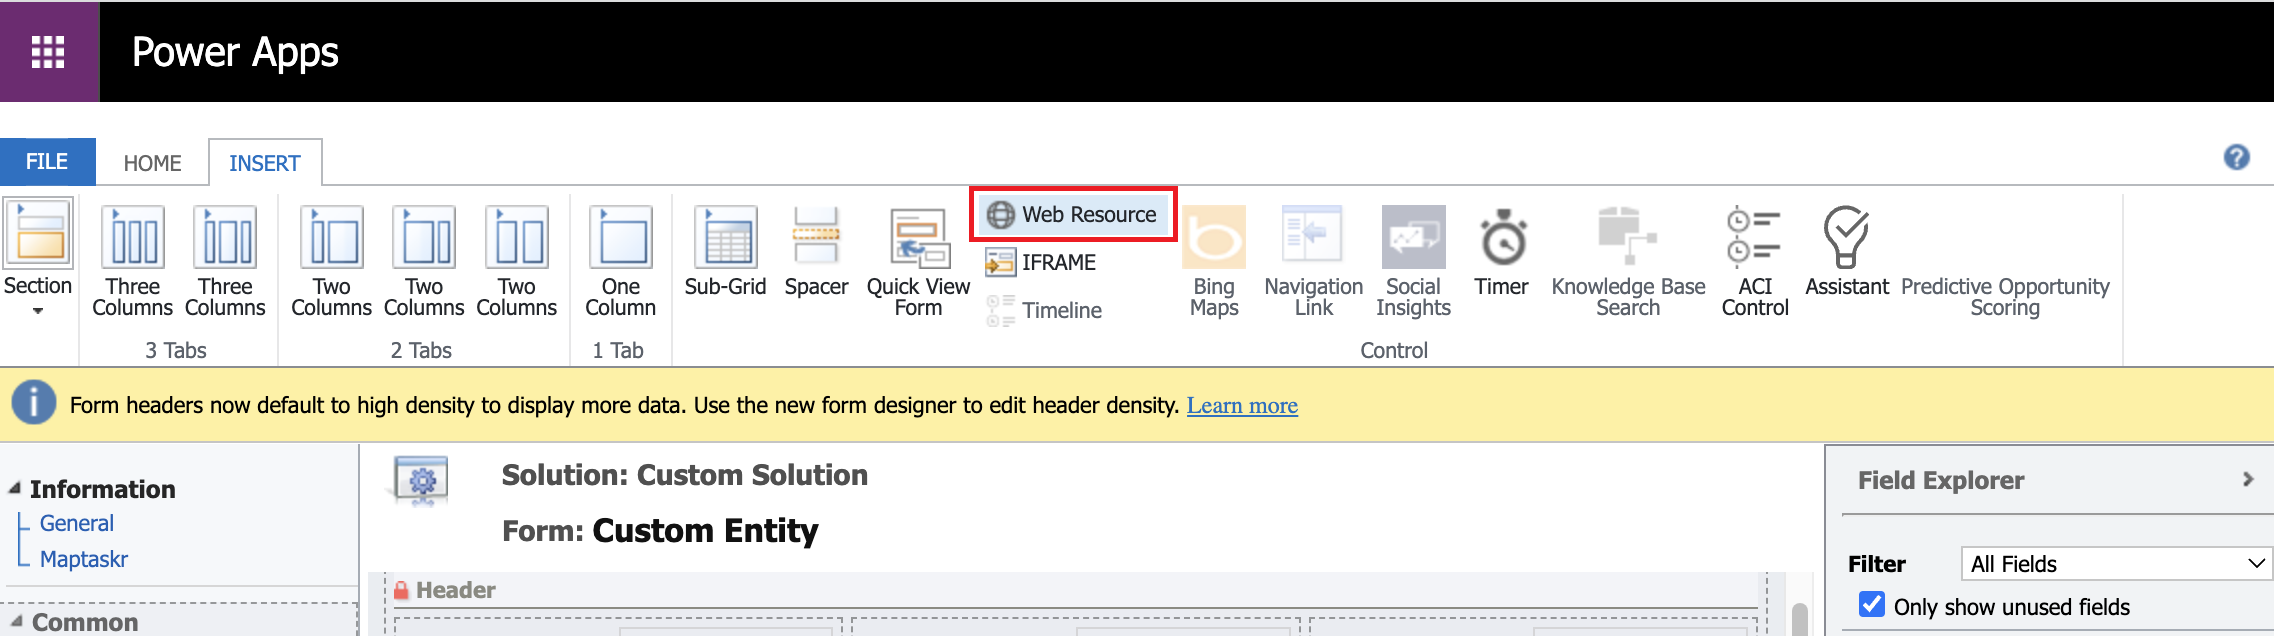
Click on the Web Resource component on the Ribbon.
Figure 135: Web Resource.
-
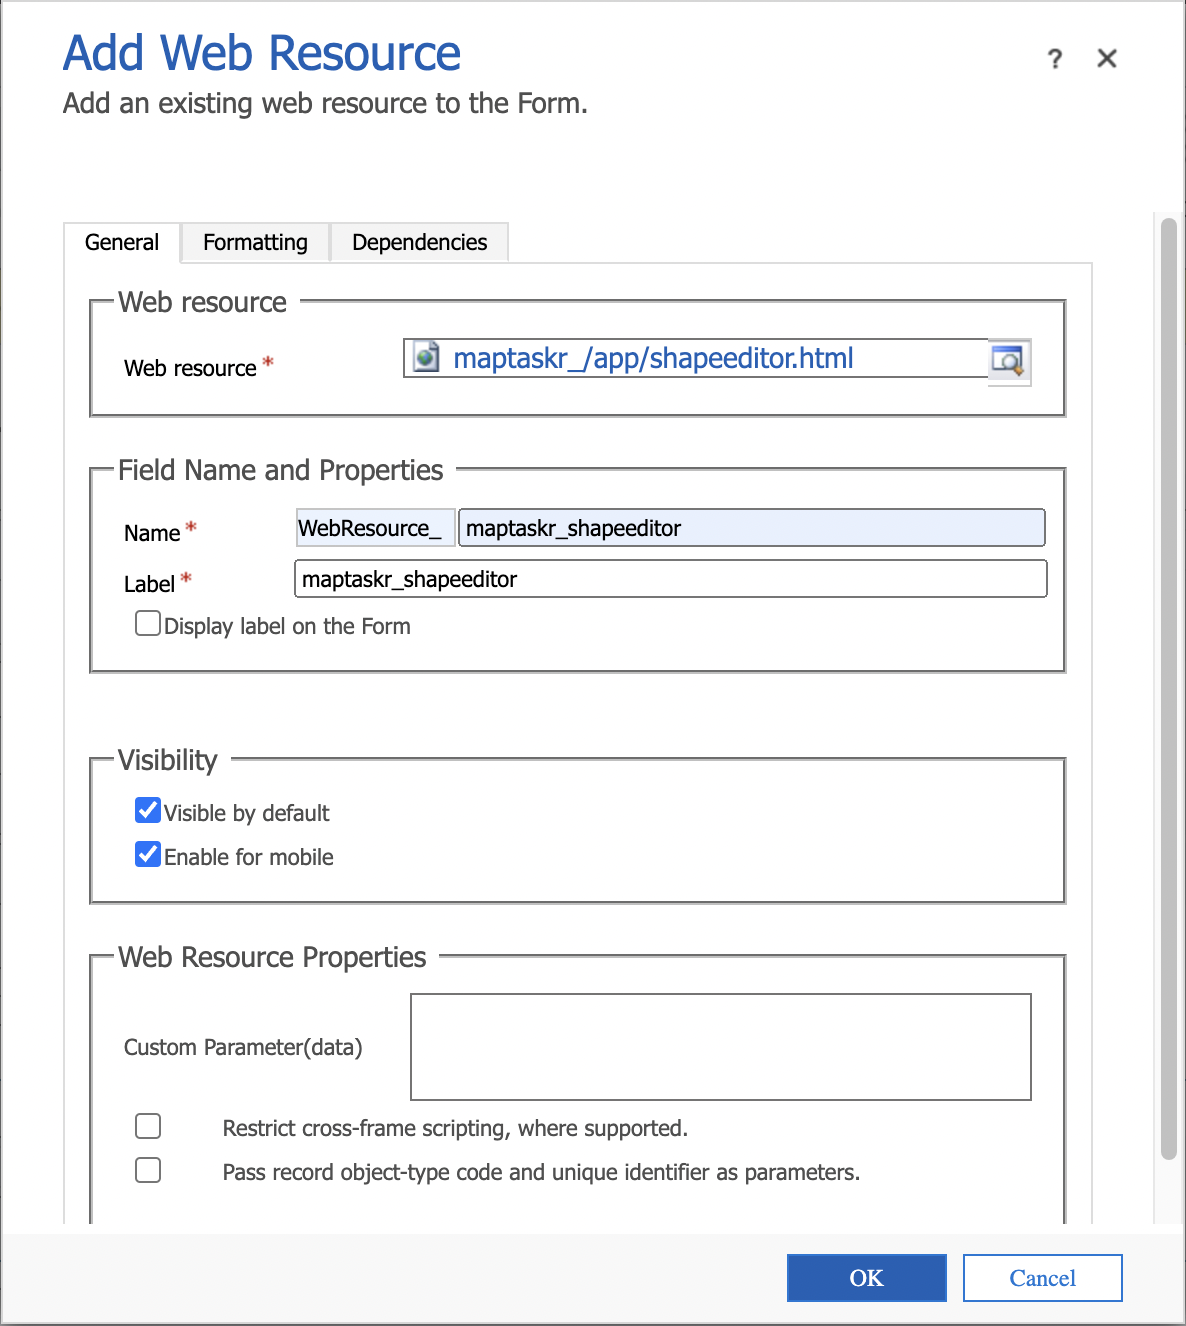
Update the web resource properties. In the general tab, on the Web resource section, set the Web resource field to:
maptaskr_/app/shapeeditor.html.In the
Field Name and Propertiessection, set the Name to:maptaskr_shapeeditorand the Label tomaptaskr_shapeeditor.In the Visibility section click the checkbox Enable for Mobile: Yes.
Figure 136: Web Resource Properties.
-
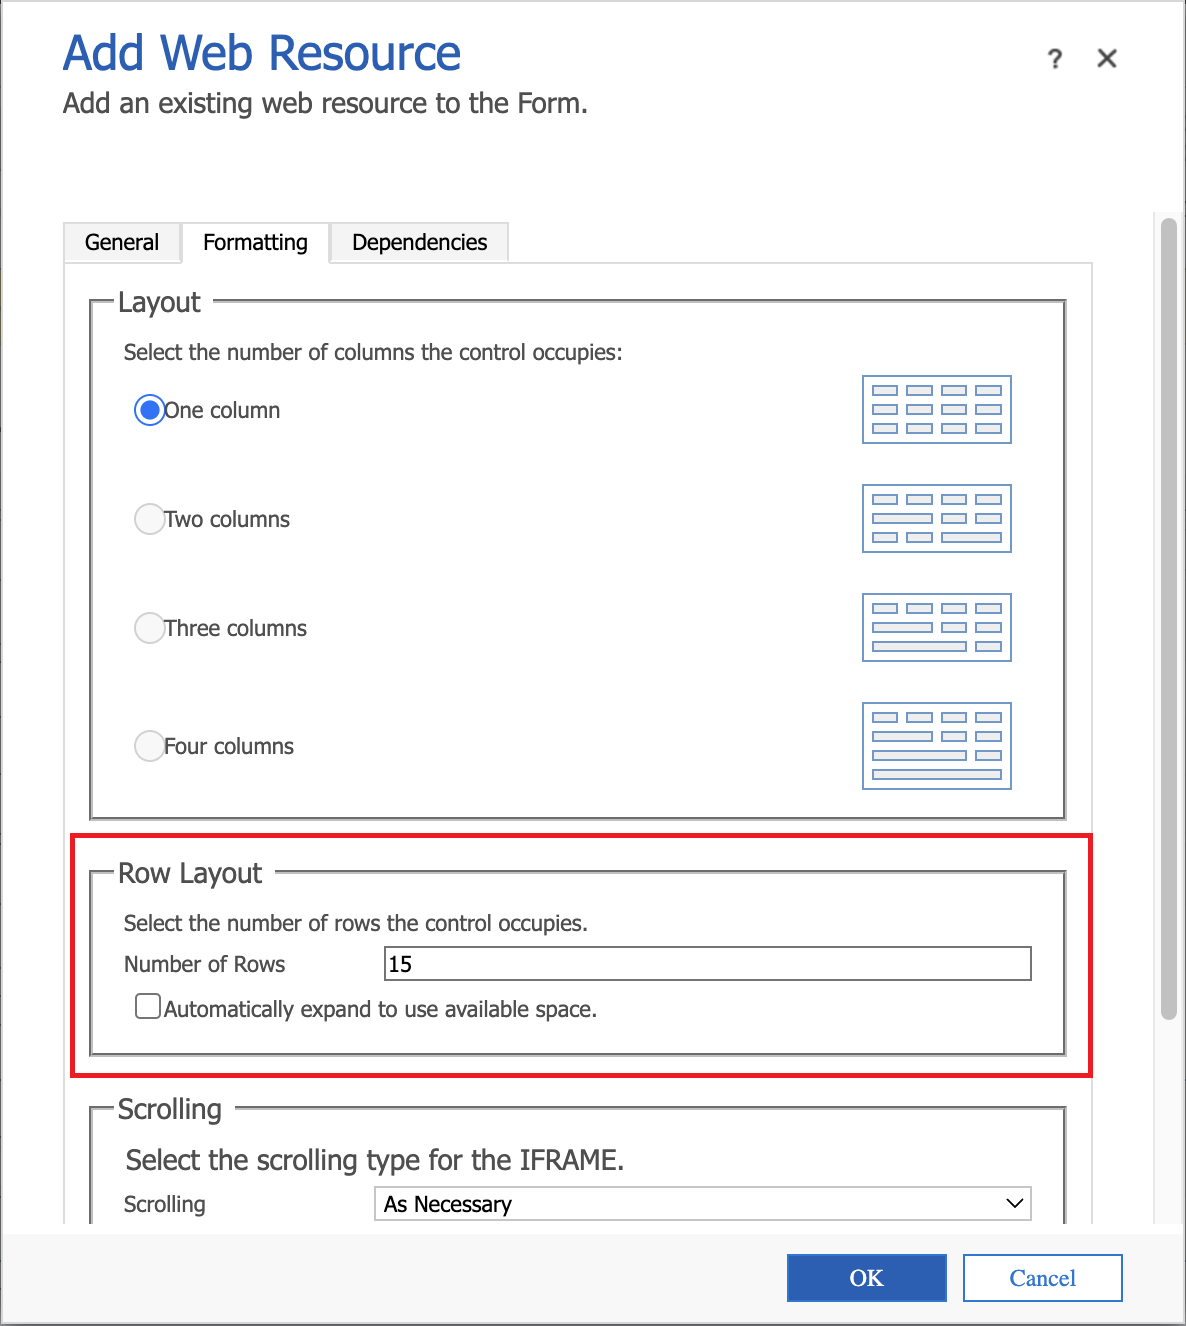
Update the number of Rows in the Formatting tab (will be shown on the map, for best user experience use between 12-20)
Figure 137: Formatting - Web Resource Properties.
-
Click OK to save the web resource properties.
-
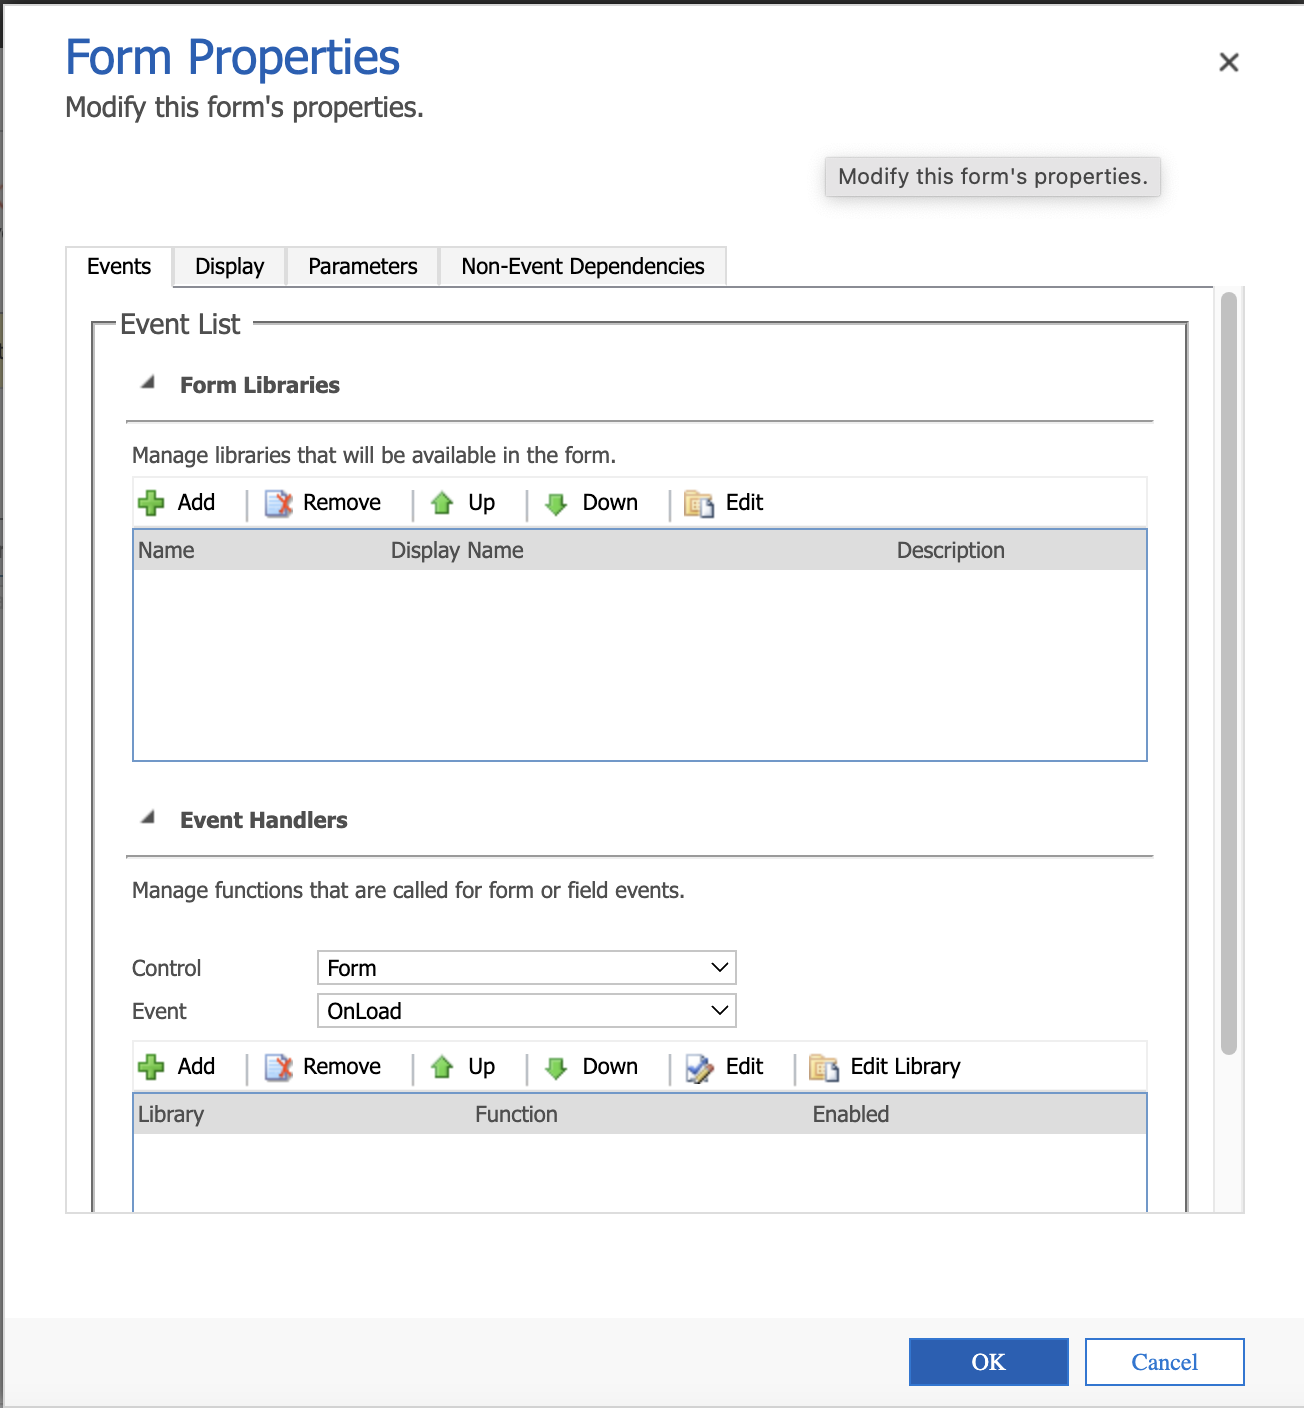
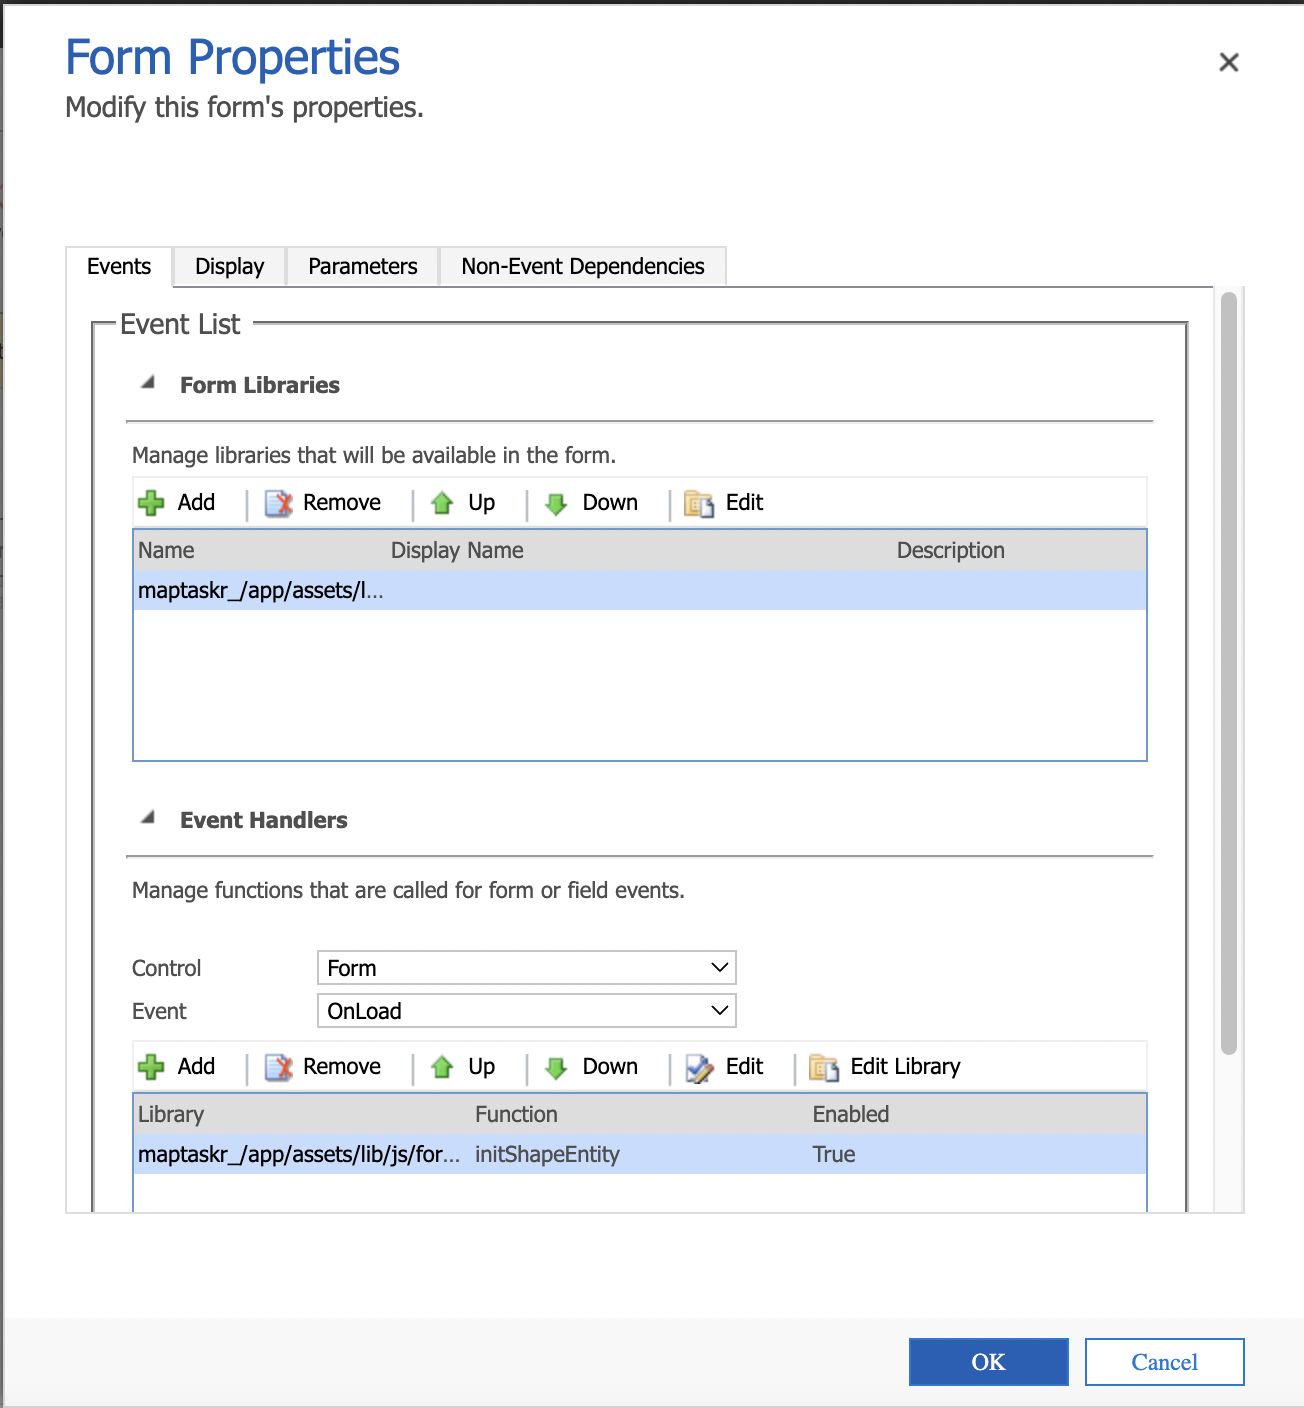
Navigate to HOME in the ribbon and click on the Form Properties.
Figure 138: Form Properties.

-
In the Events tabs, in the Event list section under the Form Libraries subsection, click on
Add.Figure 139: Form Properties.
-
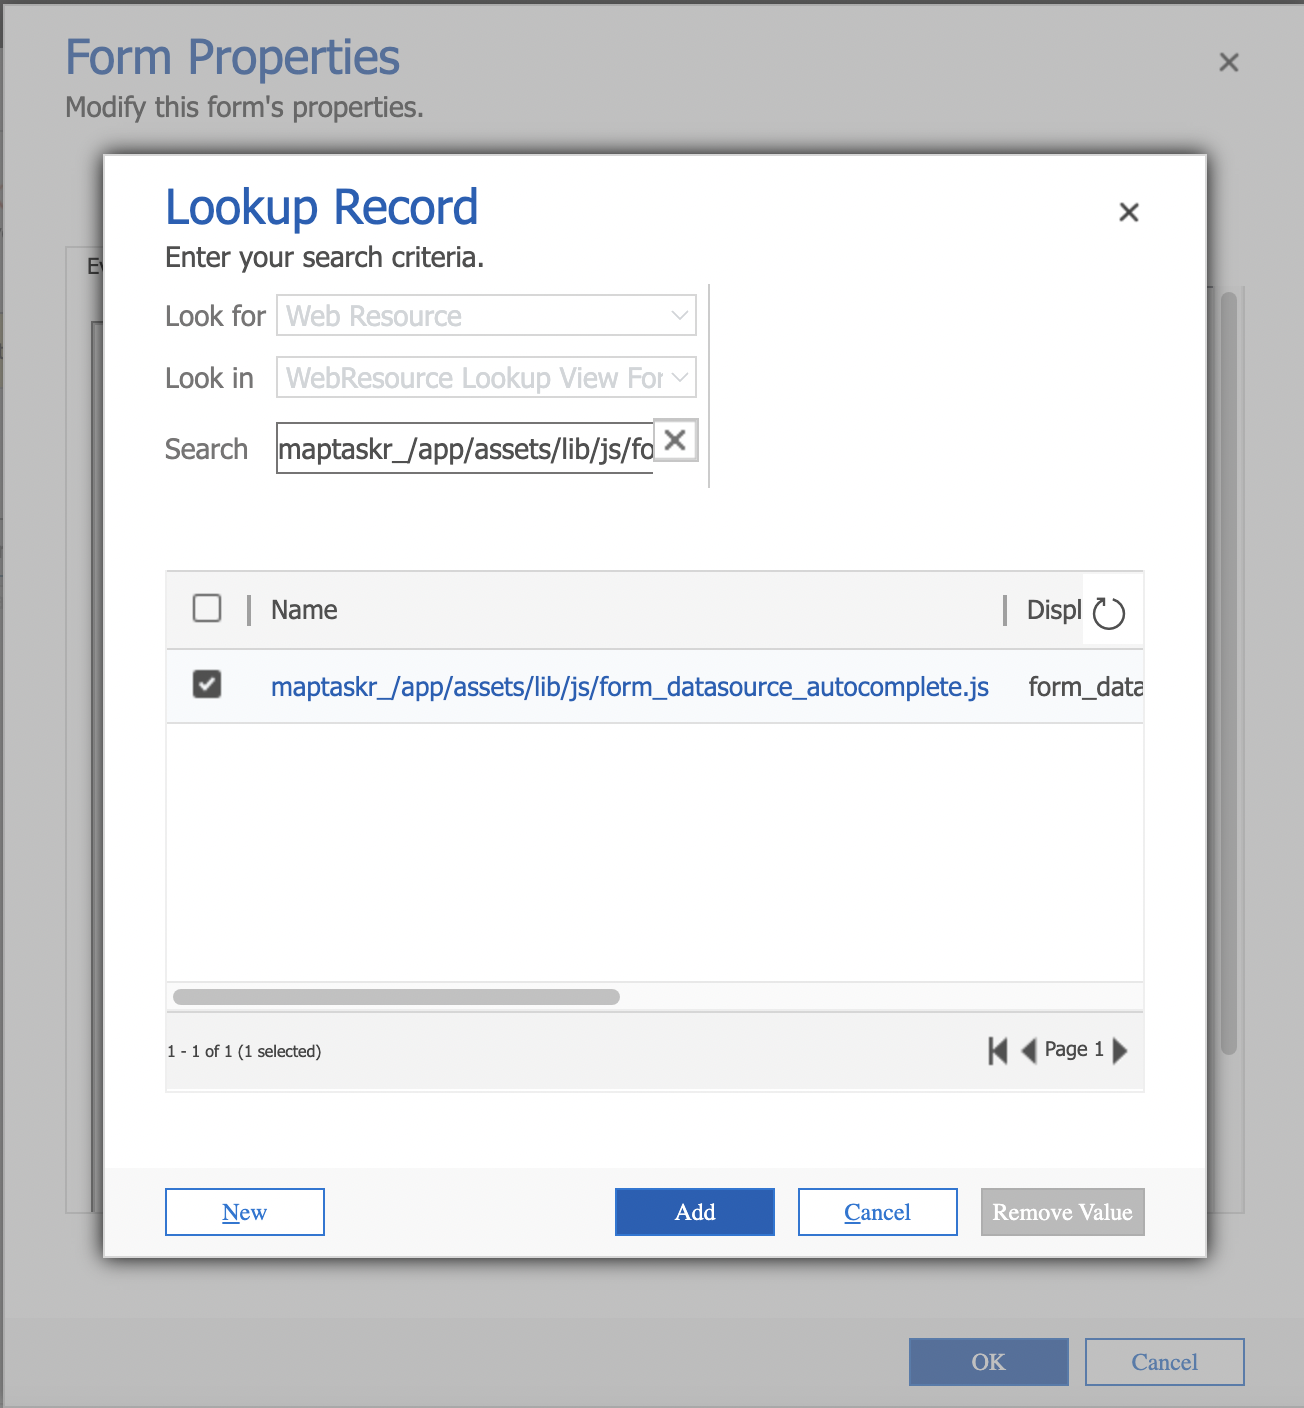
Search for the look up record
maptaskr_/app/assets/lib/js/form_datasource_autocomplete.jsand click onAdd.Figure 140: Library Properties.
-
In the Events tabs, in the Event list section under the Event Handlers subsection, click on
Addand set the function toinitShapeEntityfor the above Maptaskr library. -
In the parameters section click check box
Pass execution context as first parameterto Yes.Figure 141: Handler Properties.
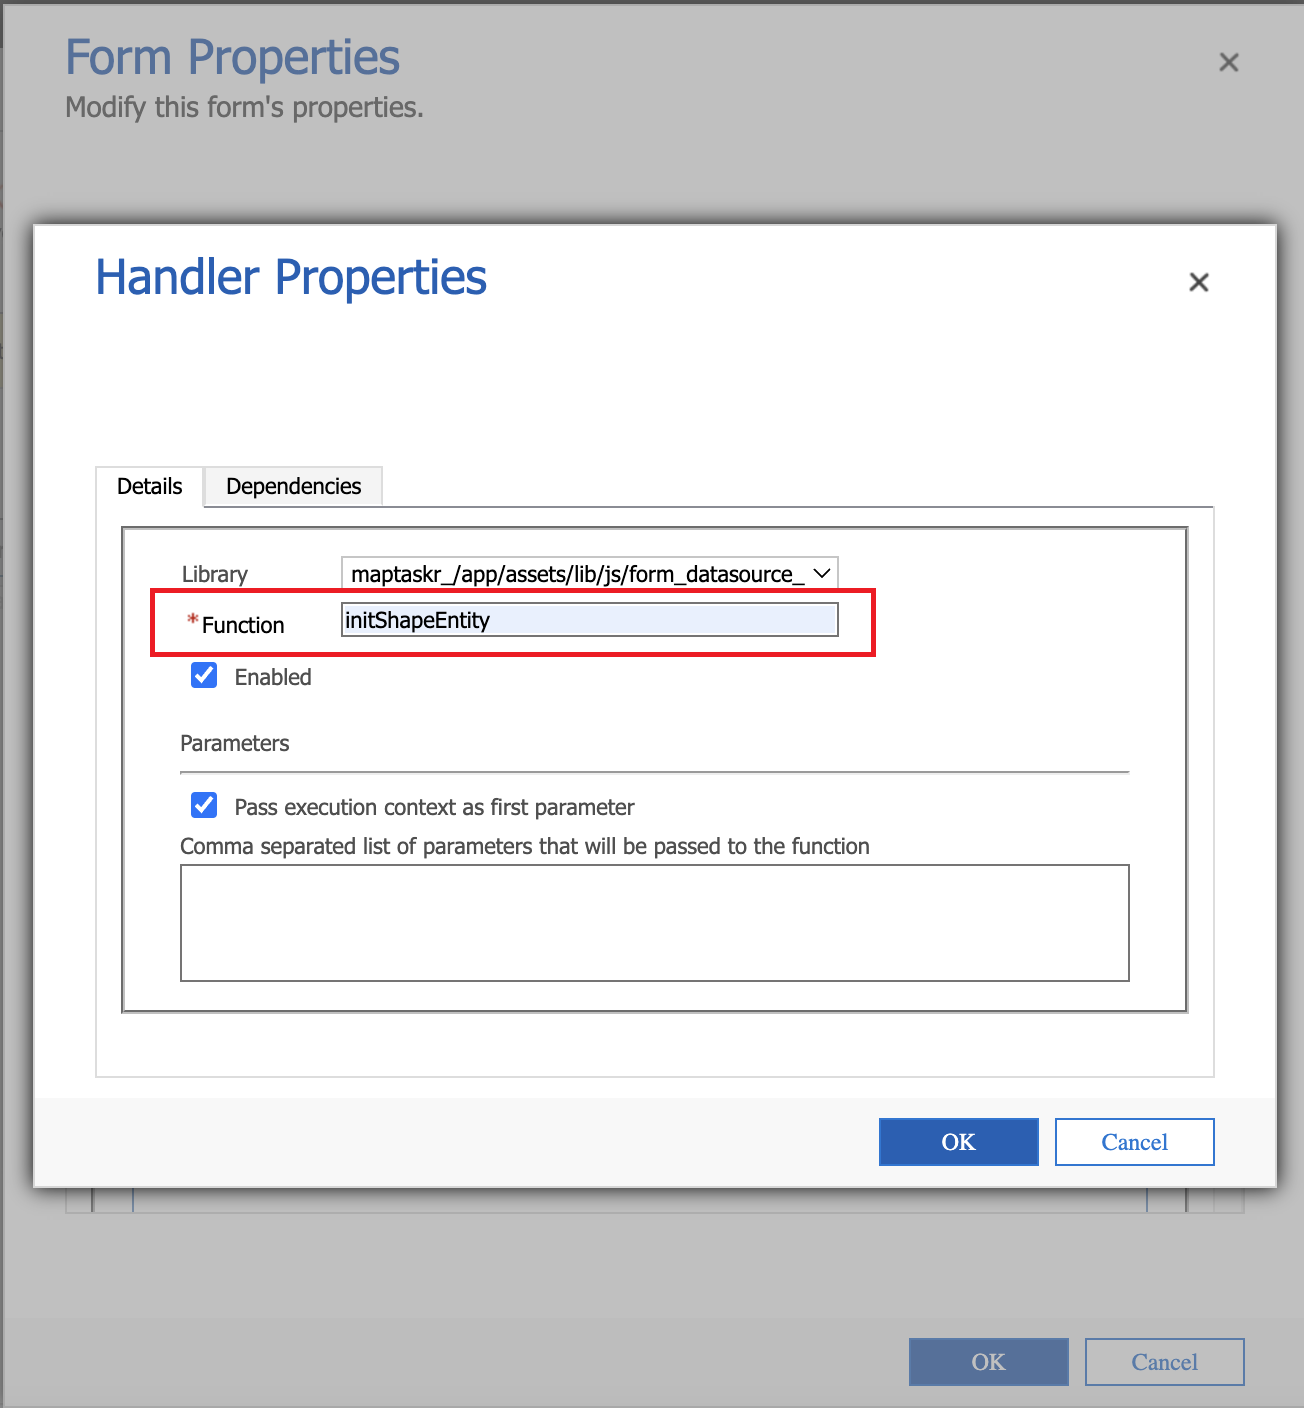
Figure 142: Final Form Properties.
-
Click on OK to add the form property changes.
-
Finally, click on Save and then click on Publish the changes.
Figure 143: Save and Publish Maptaskr Form.
-
The custom entity form now should include Maptaskr tab under the custom entity.
Adding a Dashboard Level Map to a Model-Driven App
A dashboard level map can also be added as a navigation item within a model-driven app.
-
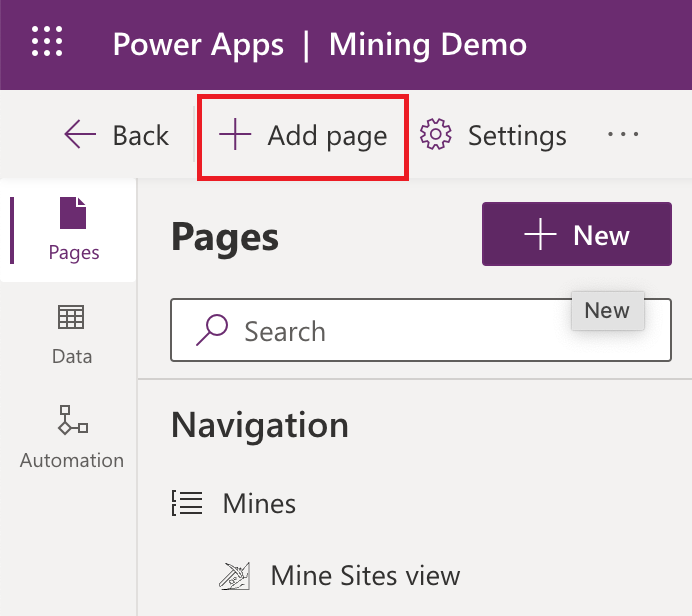
Log into to make.powerapps.com, select the environment you are targeting and edit the App you wish to add the map to.
-
Click the + New top left to add page
Figure 144: Add New Page to Model-Driven App.
-
Select Web Resource
Figure 145: Selecting Web Resource as the Content of the Page.

-
Set the Title you wish to use for the navigation of the Dashboard page.
Figure 146: Changing the Title of the Page.

-
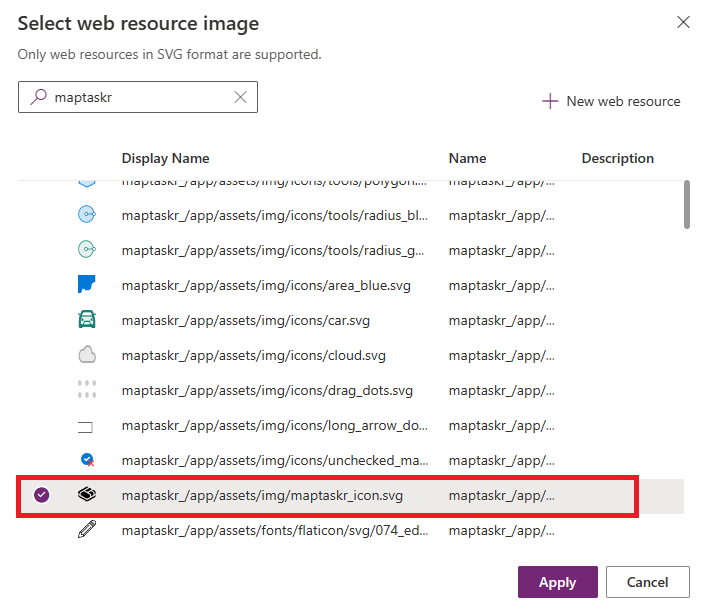
Set the icon in the right panel.
Figure 147: Changing the Icon of the Page.
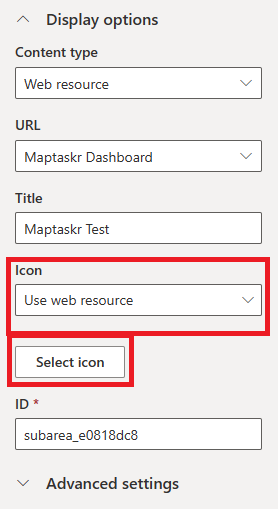
Figure 148: Selecting the Icon for the Page.
-
Move the page as required in the navigation bar.
Figure 149: Moving Page in Navigation Bar.

-
Save and Publish the model-driven app.
-
Your Dashboard will be saved as a Web resource.
Figure 150: Saved Maptaskr Dashboard.
