Advanced Configuration and Capability
Field Service Company Locations
In the Maptaskr Configuration section (see section Display Settings) you will find a checkbox labelled: Enable Company Location.
Figure 166: Enable Company Location Checkbox.
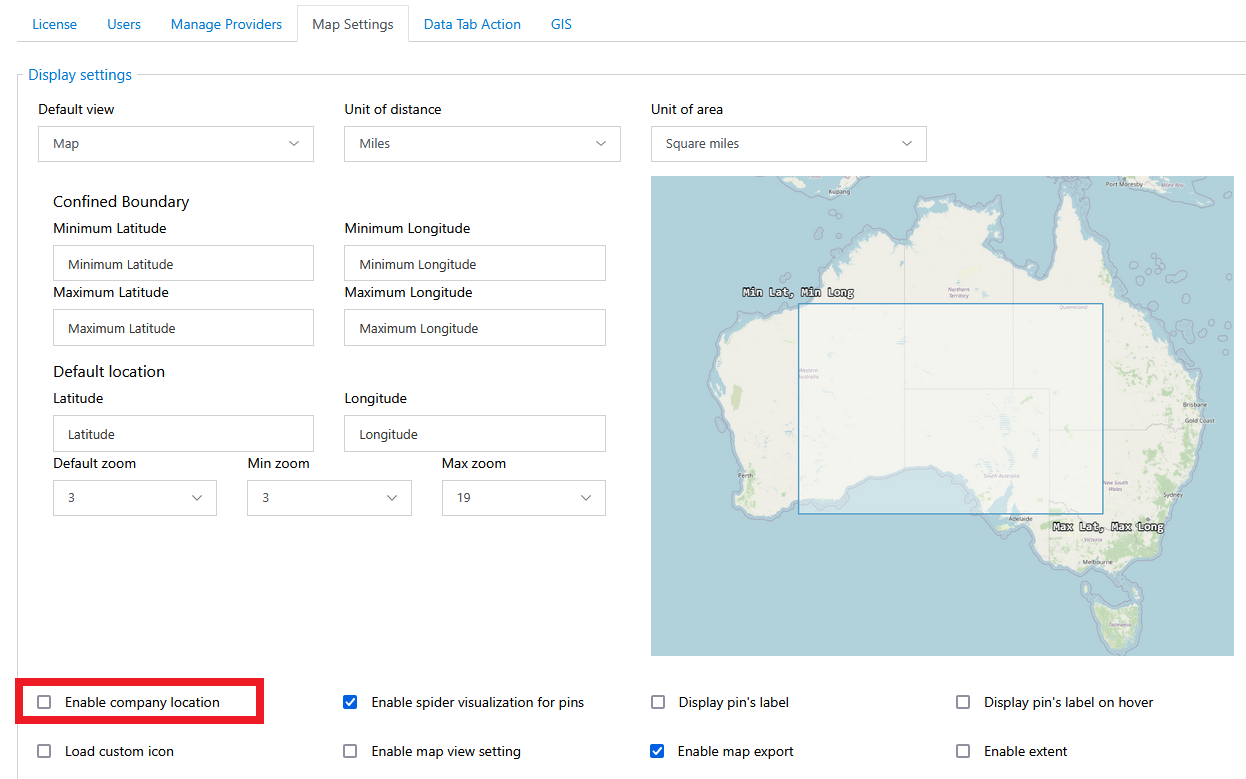
Selecting this checkbox will cause the Maptaskr Map to look for a Lambpet record associated with the users Site.
Configuring a Site Location
-
Open the field service app.
Figure 167: Field Service Model-Driven App.
-
Change area to
Settings.Figure 168: Selection of Settings Configuration Area.
-
Select Users.
Figure 169: Selection of Users Page.
-
Open the target user, and select Summary tab.
Figure 170: Field Service User Record - Summary Page.
-
Select the site or create a new one.
Figure 171: Selection of Existing Site or Creation of a New Site.
-
Create a new site, name it, and save the record.
Figure 172: Creating a Site Record.

-
Copy out the site id from the URL as we will need this shortly.
Figure 173: Copying out the Site Record ID.
-
Head back to your user and select the test site as the user’s
Site.Figure 174: Selecting the Site on a User.
-
Save and close the user record.
Figure 175: Saving the User Record.
-
Now open to the table
Maptaskr Lambpets.This can be achieved by heading to make.powerapps.com and selecting the table from the Tables section.
Figure 176: Navigation to make.powerapps.com.
Figure 177: Accessing Dataverse Tables.
Figure 178: Finding the Maptaskr Lambpet Table.
-
Click Edit on the table data.
Figure 179: Editing Table Data.

-
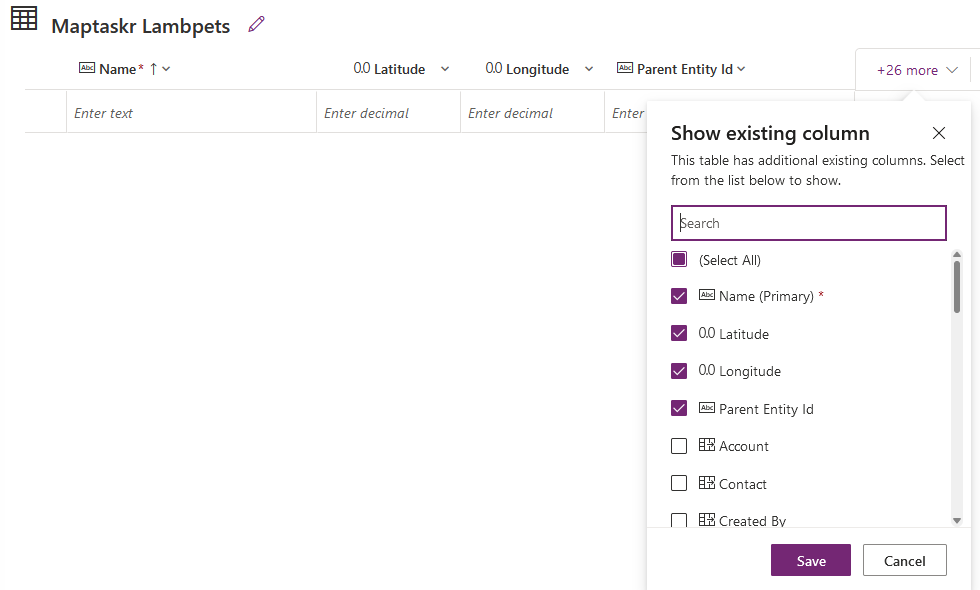
Show the columns
Latitude,Longitude, andParent Entity Id.Figure 180: Selecting the Required Columns.
-
Then add the Name
Test Site Location, Latitude (in 4326), Longitude (in 4326) and the ID of the site copied from step 7.e.g.
Figure 181: Adding the Site Location.
-
Test this configuration by navigating to the Maptaskr Dashboard Map.
Figure 182: Testing the Site Location.
-
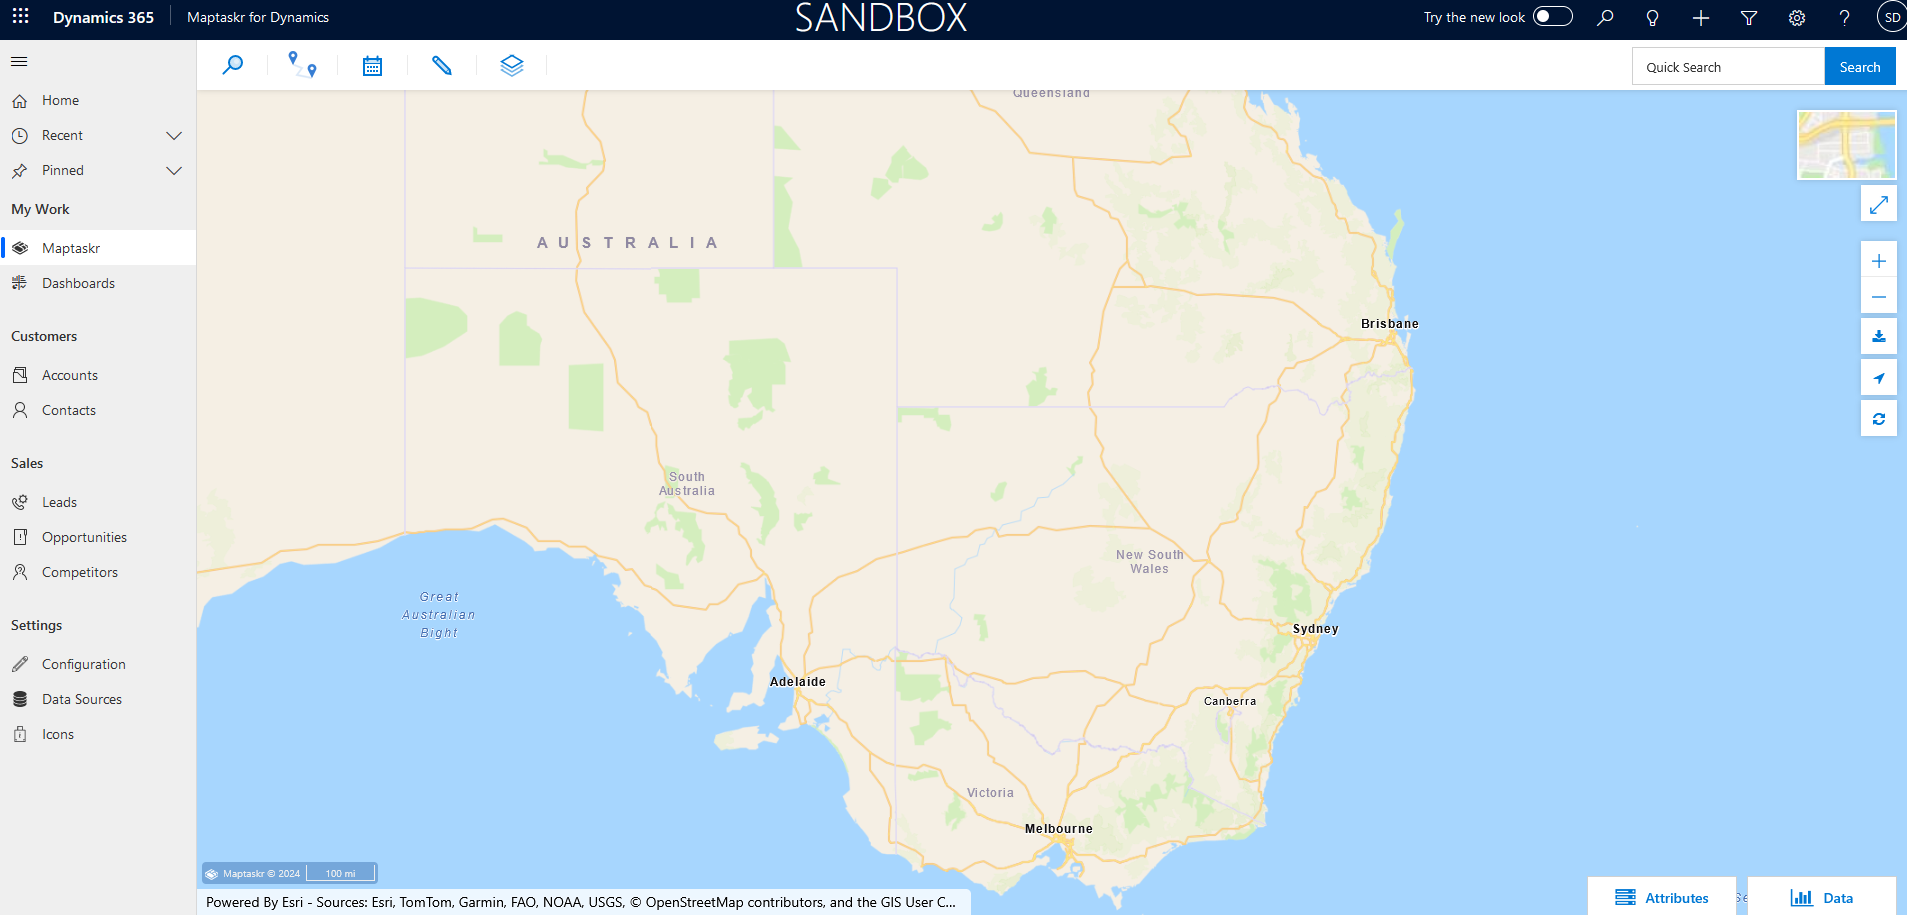
The map should navigate to the defined
Sitelocation.Figure 183: Resulting Default Location.
Custom CSS & JavaScript
The Maptaskr controls provided in the D365 an PA solutions will be added to the dashboard, or record level forms as Web Resources. As such, customising the map control can be difficult. To allow solution implementation partners and technical product owners to customise the Maptaskr Control, Maptaskr has provided a mechanism to extend both the styling and the functionality provided by the map control.
Some use cases for the use of the Custom.JS and Custom.CSS files are:
-
Hiding buttons, tabs, or UI elements you do not wish your staff to use.
- E.g. You wish for all staff to only have access to upload shape files, and do not wish to have them draw either annotations or shapes.
-
Restyling the colours and layout of the control to better match your company brand.
- E.g. You wish to restyle all colours of the solution to match your company primary colour.
-
Extending the functionality of the control to integrate with external systems, or to apply business logic to the actions performed by users of the map control.
- E.g. Instead of saving shapes to the Dataverse, you wish to upload all shapes drawn to an external GIS system.
-
Adding validation logic to the submission of the annotations and shapes on a form to ensure that the data is valid prior to saving to the Dataverse.
- E.g. Prior to allowing the users to upload a shape, you wish to compare the shape boundaries, and ensure that all drawn or uploaded shapes reside inside the boundaries of the selected record.
To extend the Custom.JS and Custom.CSS files, you will need to create a solution layer that sits on top of the Maptaskr Solution.
Creating Your Own Custom.JS and Custom.CSS
Custom.JS Source Code
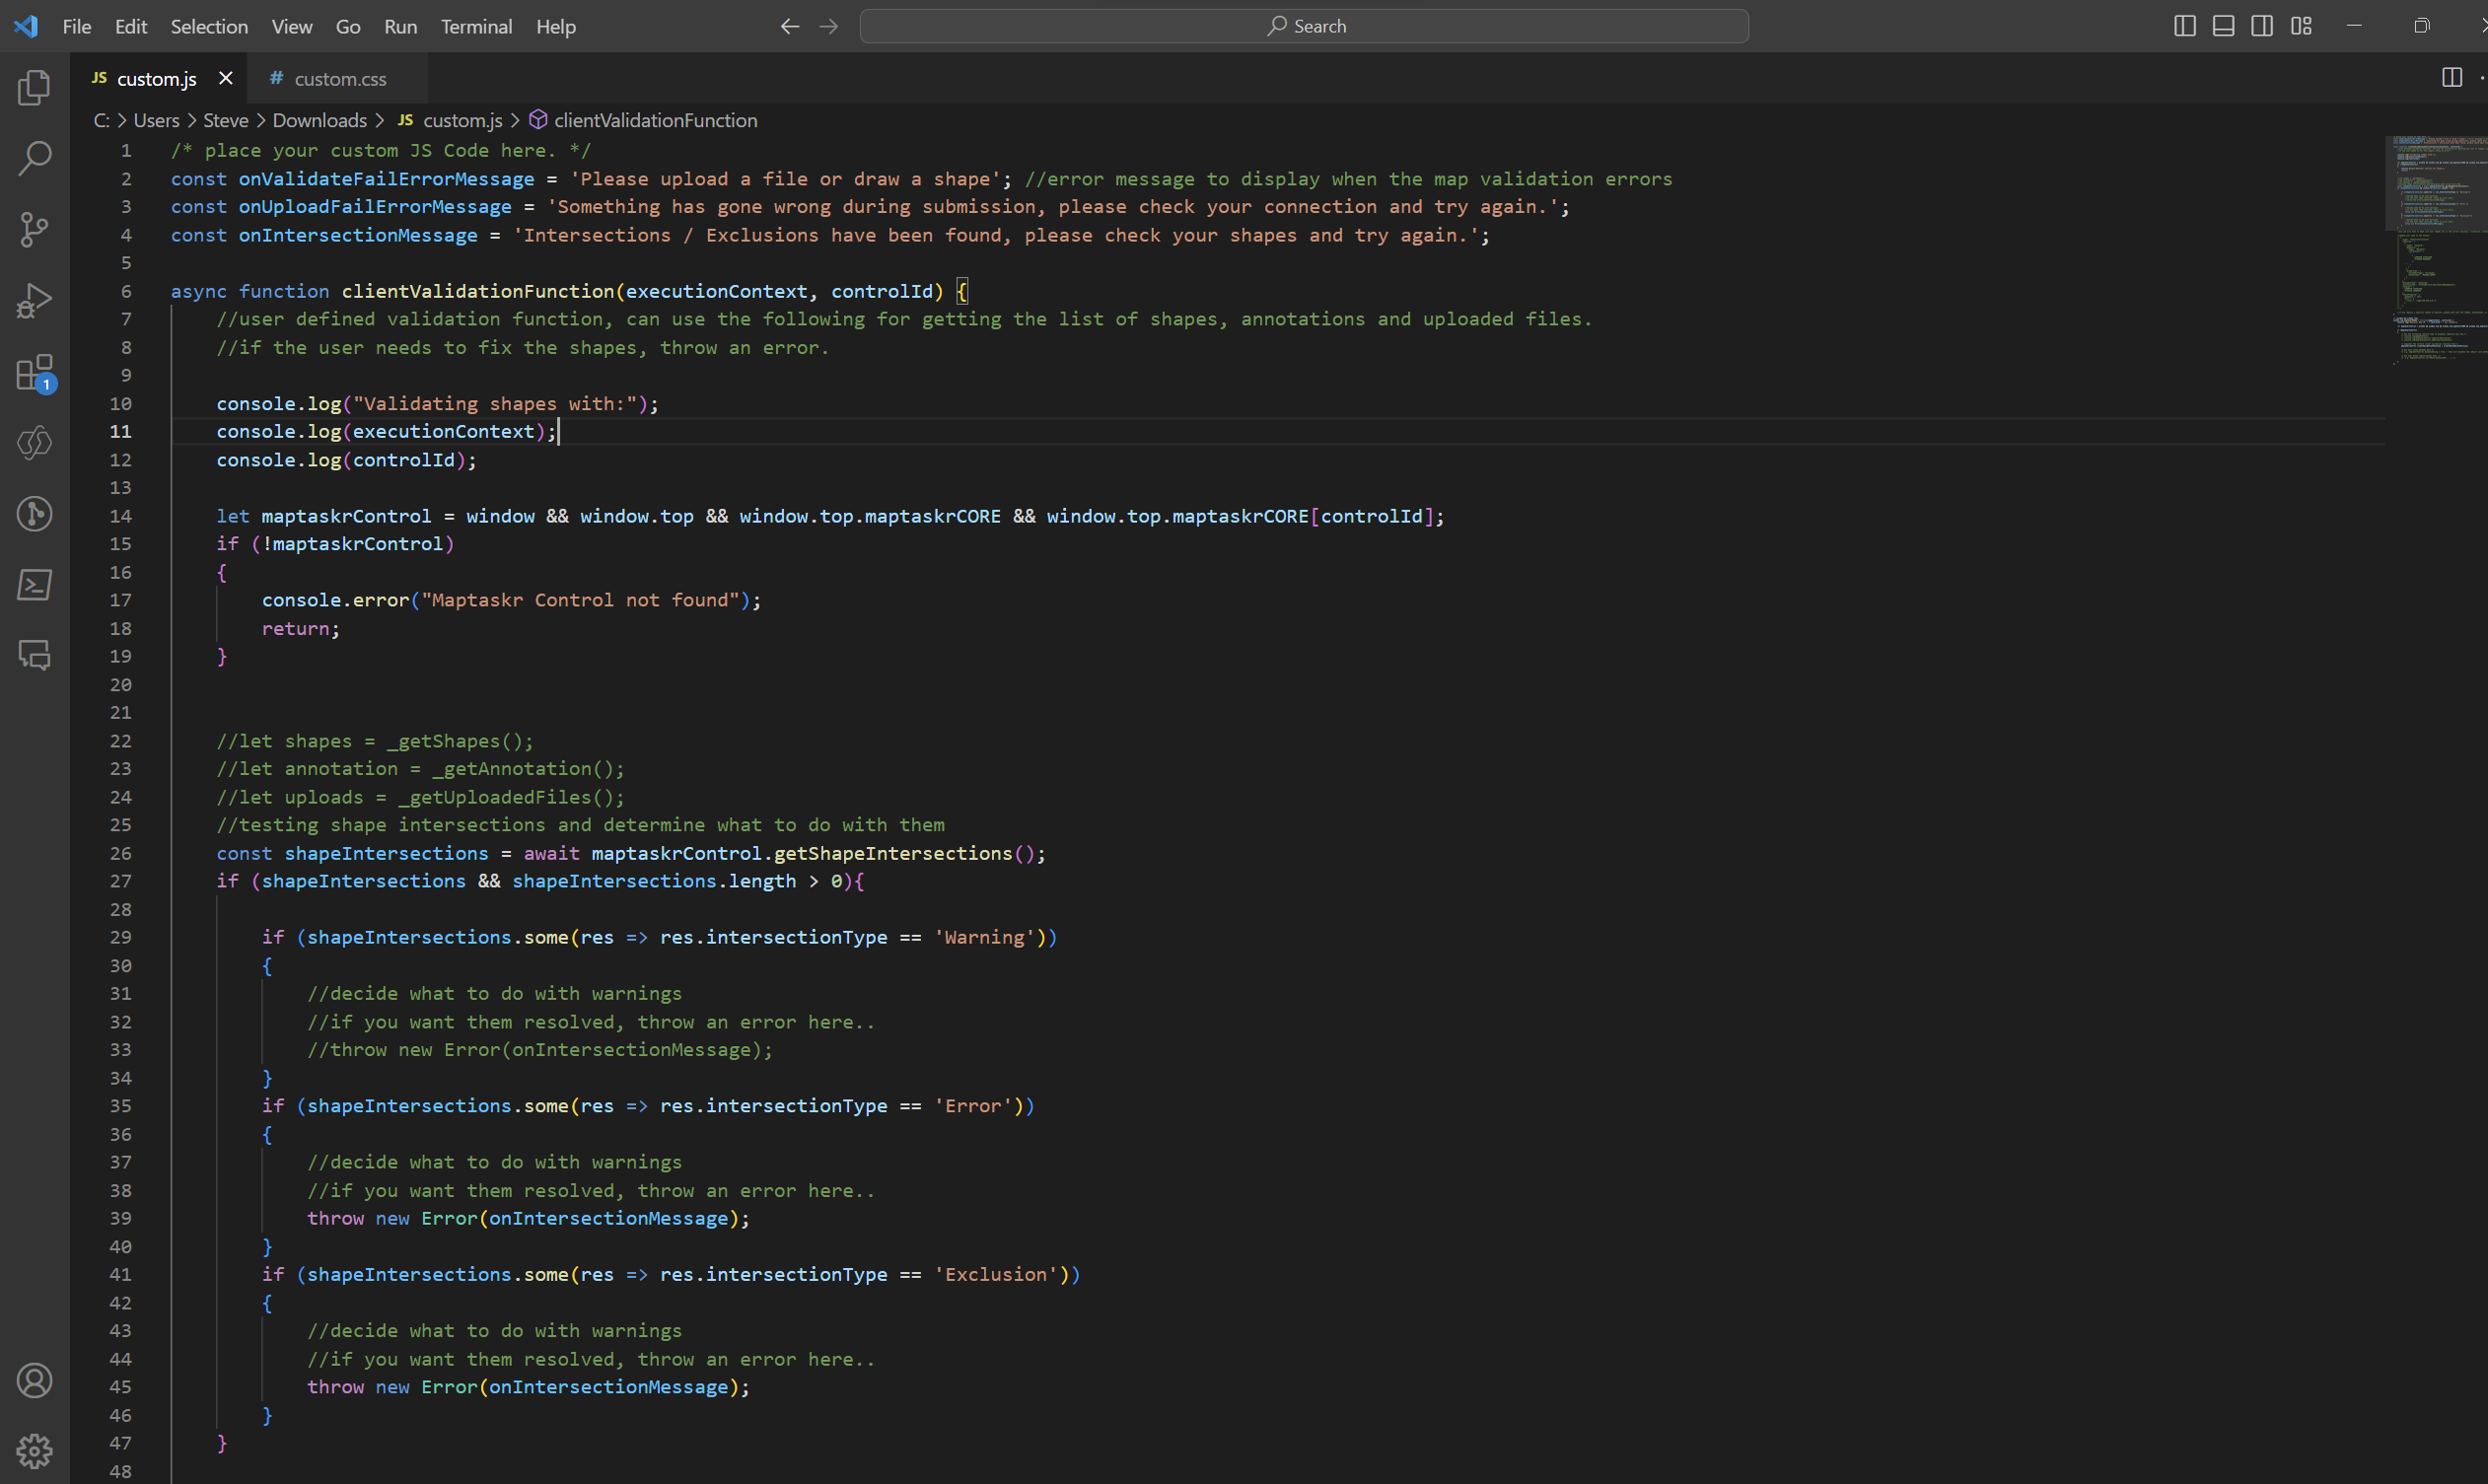
/* place your custom JS Code here. */
const onValidateFailErrorMessage = 'Please upload a file or draw a shape'; //error message to display when the map validation errors
const onUploadFailErrorMessage = 'Something has gone wrong during submission, please check your connection and try again.';
const onIntersectionMessage = 'Intersections / Exclusions have been found, please check your shapes and try again.';

async function clientValidationFunction(executionContext, controlId) {
    //user defined validation function, can use the following for getting the list of shapes, annotations and uploaded files.
    //if the user needs to fix the shapes, throw an error.

    console.log("Validating shapes with:");
    console.log(executionContext);
    console.log(controlId);

    let maptaskrControl = globalThis && globalThis.top && globalThis.top.maptaskrCORE && globalThis.top.maptaskrCORE[controlId];
    if (!maptaskrControl)
    {
        console.error("Maptaskr Control not found");
        return;
    }


    //let shapes = _getShapes();
    //let annotation = _getAnnotation();
    //let uploads = _getUploadedFiles();
    //testing shape intersections and determine what to do with them
    const shapeIntersections = await maptaskrControl.getShapeIntersections();
    if (shapeIntersections && shapeIntersections.length > 0){

        if (shapeIntersections.some(res => res.intersectionType == 'Warning'))
        {
            //decide what to do with warnings
            //if you want them resolved, throw an error here..
            //throw new Error(onIntersectionMessage);
        }
        if (shapeIntersections.some(res => res.intersectionType == 'Error'))
        {
            //decide what to do with warnings
            //if you want them resolved, throw an error here..
            throw new Error(onIntersectionMessage);
        }
        if (shapeIntersections.some(res => res.intersectionType == 'Exclusion'))
        {
            //decide what to do with warnings
            //if you want them resolved, throw an error here..
            throw new Error(onIntersectionMessage);
        }
    }

    //you can also test to make sure your shapes are in the correct position, orintation, contained within eachother, any geometric tests here.

    //shapes will come in the format:
    // {
    //   "type": "FeatureCollection",
    //   "features": [
    //     {
    //       "type": "Feature",
    //       "geometry": {
    //         "type": "Polygon",
    //         "coordinates": [
    //           [
    //             [
    //               12899598.276481498,
    //               -3758060.96802893
    //             ],
    //      ...
    //           ]
    //         ]
    //       },
    //       "properties": {
    //         "uploadDocType": "Envelope",
    //         "markerType": "MARKER_SHAPE"
    //       }
    //     }
    //   ],
    //   "DocumentType": "Envelope",
    //   "annotationId": "1ffb72d6-c7c3-ed11-83fd-002248e1bcf1",
    //   "longlat": [
    //     12899440.776481498,
    //     -3758143.46802893
    //   ],
    //   "styleProperty": {
    //     "geometry_": null,
    //     "fill_": {
    //       "color_": "rgba(149,255,0,0.1)"
    //     },
    //  ...
    //   }
    // }

    //if you require a specific subset of objects, please look into the shapes, annotations, or uploads to ensure specific number of shapes or named shapes are included.
}

if (globalThis && globalThis.top){
    globalThis.top.maptaskrReady = function(pageContext, controlId) {
        console.log("Maptaskr Map ID: " + controlId + " has Loaded");

        let maptaskrControl = globalThis && globalThis.top && globalThis.top.maptaskrCORE && globalThis.top.maptaskrCORE[controlId];

        if (maptaskrControl)
        {
            /* Use the following console logs to uniquely identify your map */
            // console.log(pageContext);
            // console.log(maptaskrControl.registeredLocation);
            // console.log(maptaskrControl.webresourceLocation);

            /* register the correct client validation function here */
            maptaskrControl.clientValidationFunction = clientValidationFunction;

            /* put your setup methods here */
            /* e.g. maptaskrControl.disableSaving = true; - this will disable the inbuilt save methods, you an use maptaskrControl.saveShapes() to save your own shapes.*/

            /* put your event registrations here. */
            /*  e.g. maptaskrControl.on("FeaturesSelected", ...) */

        }
    };
}
Custom.CSS Source Code
/* place your custom CSS Code here. */

/* Here you can override the Maptaskr classes
e.g.

.maptaskr .btn-primary {
    background-color: #ff00ff !important;
    border-color: #440044  !important;
}

*/
-
Navigate to make.powerapps.com.
Figure 184: Navigating to make.powerapps.com.
-
Create a new Solution.
Figure 185: Creating a New Unmanaged Solution.
-
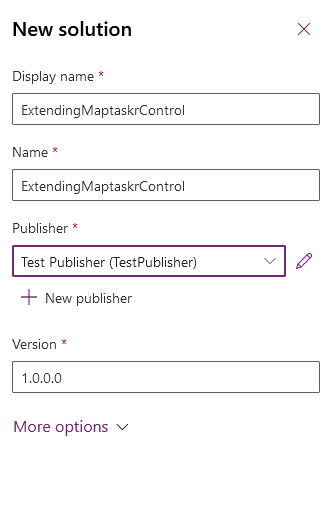
Select a publisher or create a new one.
Figure 186: Specifying the Publisher.
-
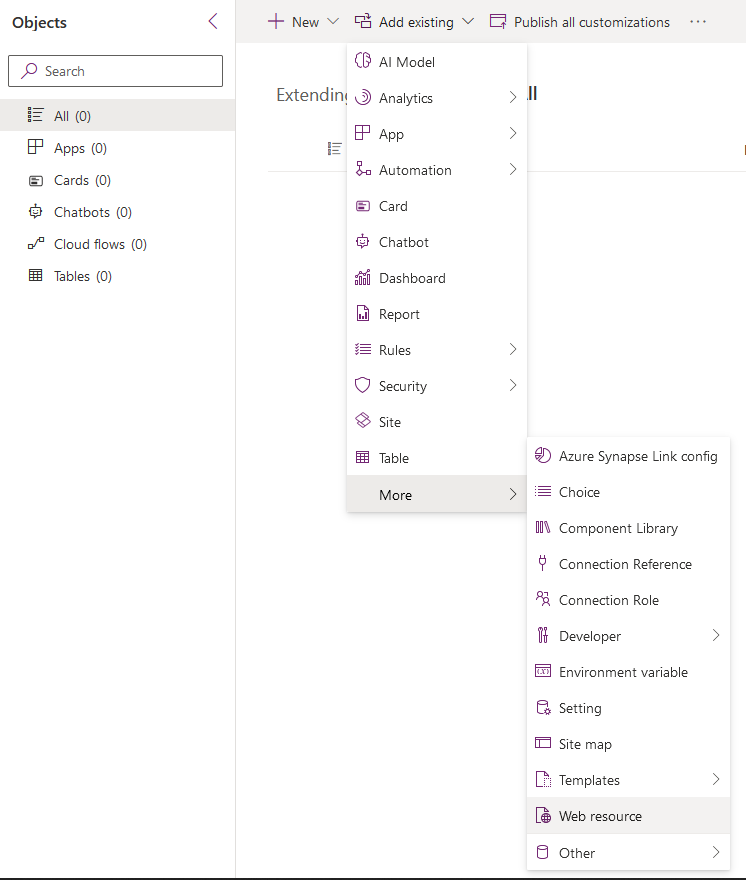
Under the new solution, add an existing resource, and under More select a Web Resource.
Figure 187: Adding the Web Resources.
-
Add the Custom.js and Custom.Css files to your solution, ready to download and replace.
Figure 188: Adding the Custom Resources.

-
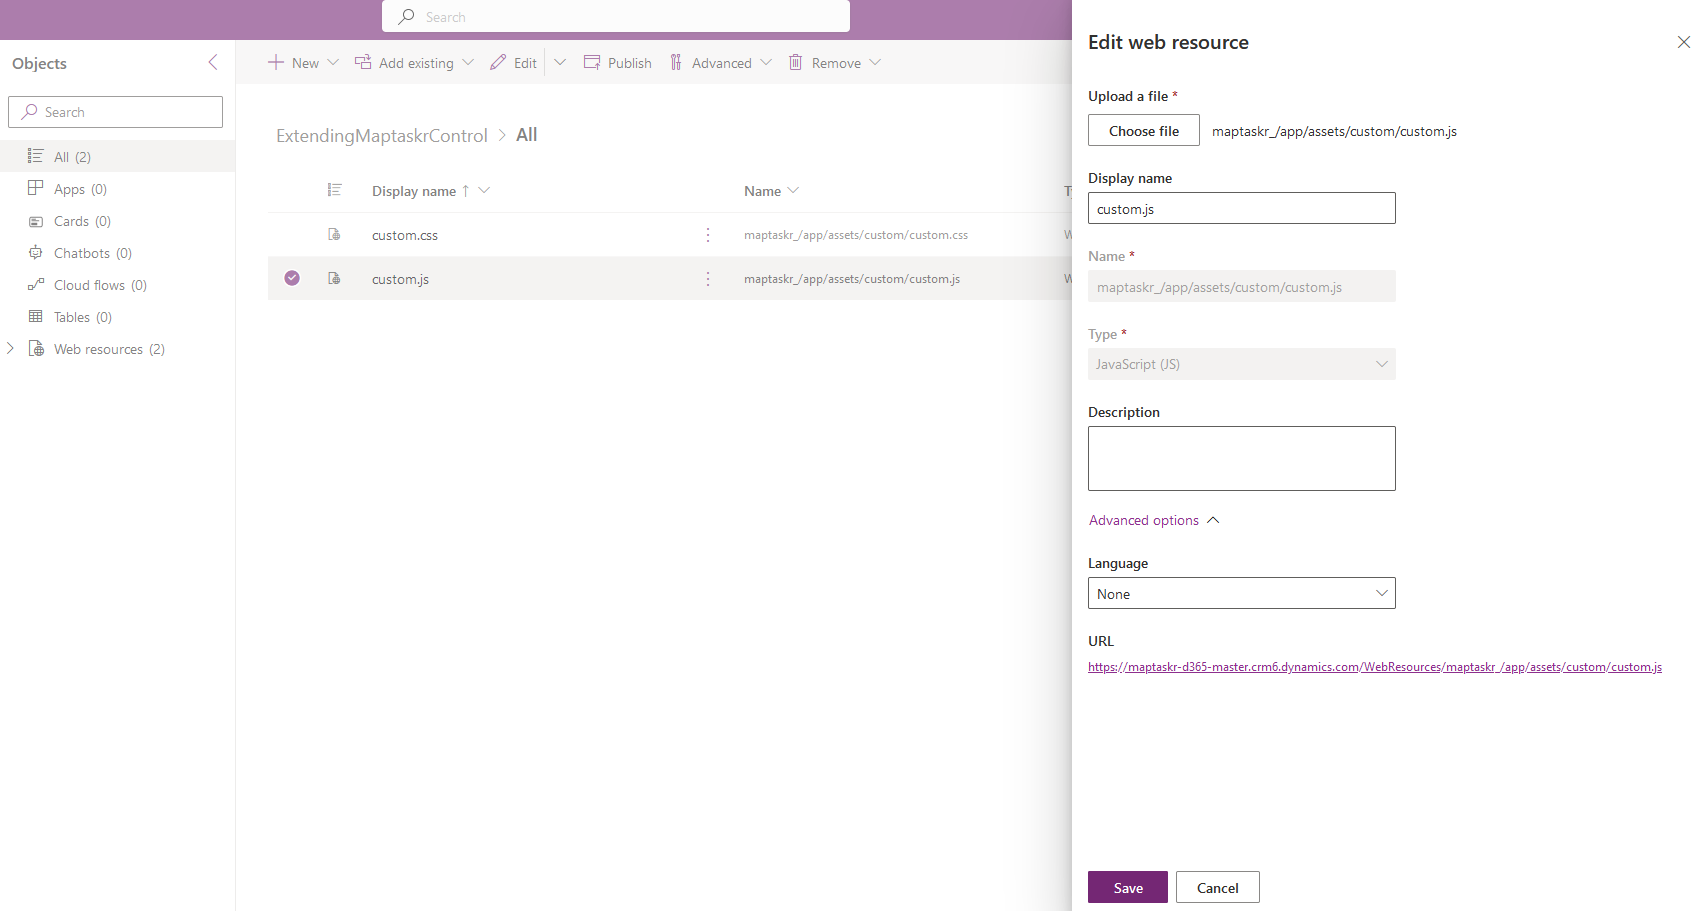
Open the Custom.js record, and then expand the Advanced Options to download the current custom.js file for editing.
Figure 189: Downloading the Existing Files from the URL.
-
Open the Custom.js and Custom.css in your favourite code editor.
Figure 190: Code Editing Custom.JS.
-
The comments here should help you get started with editing these functions.
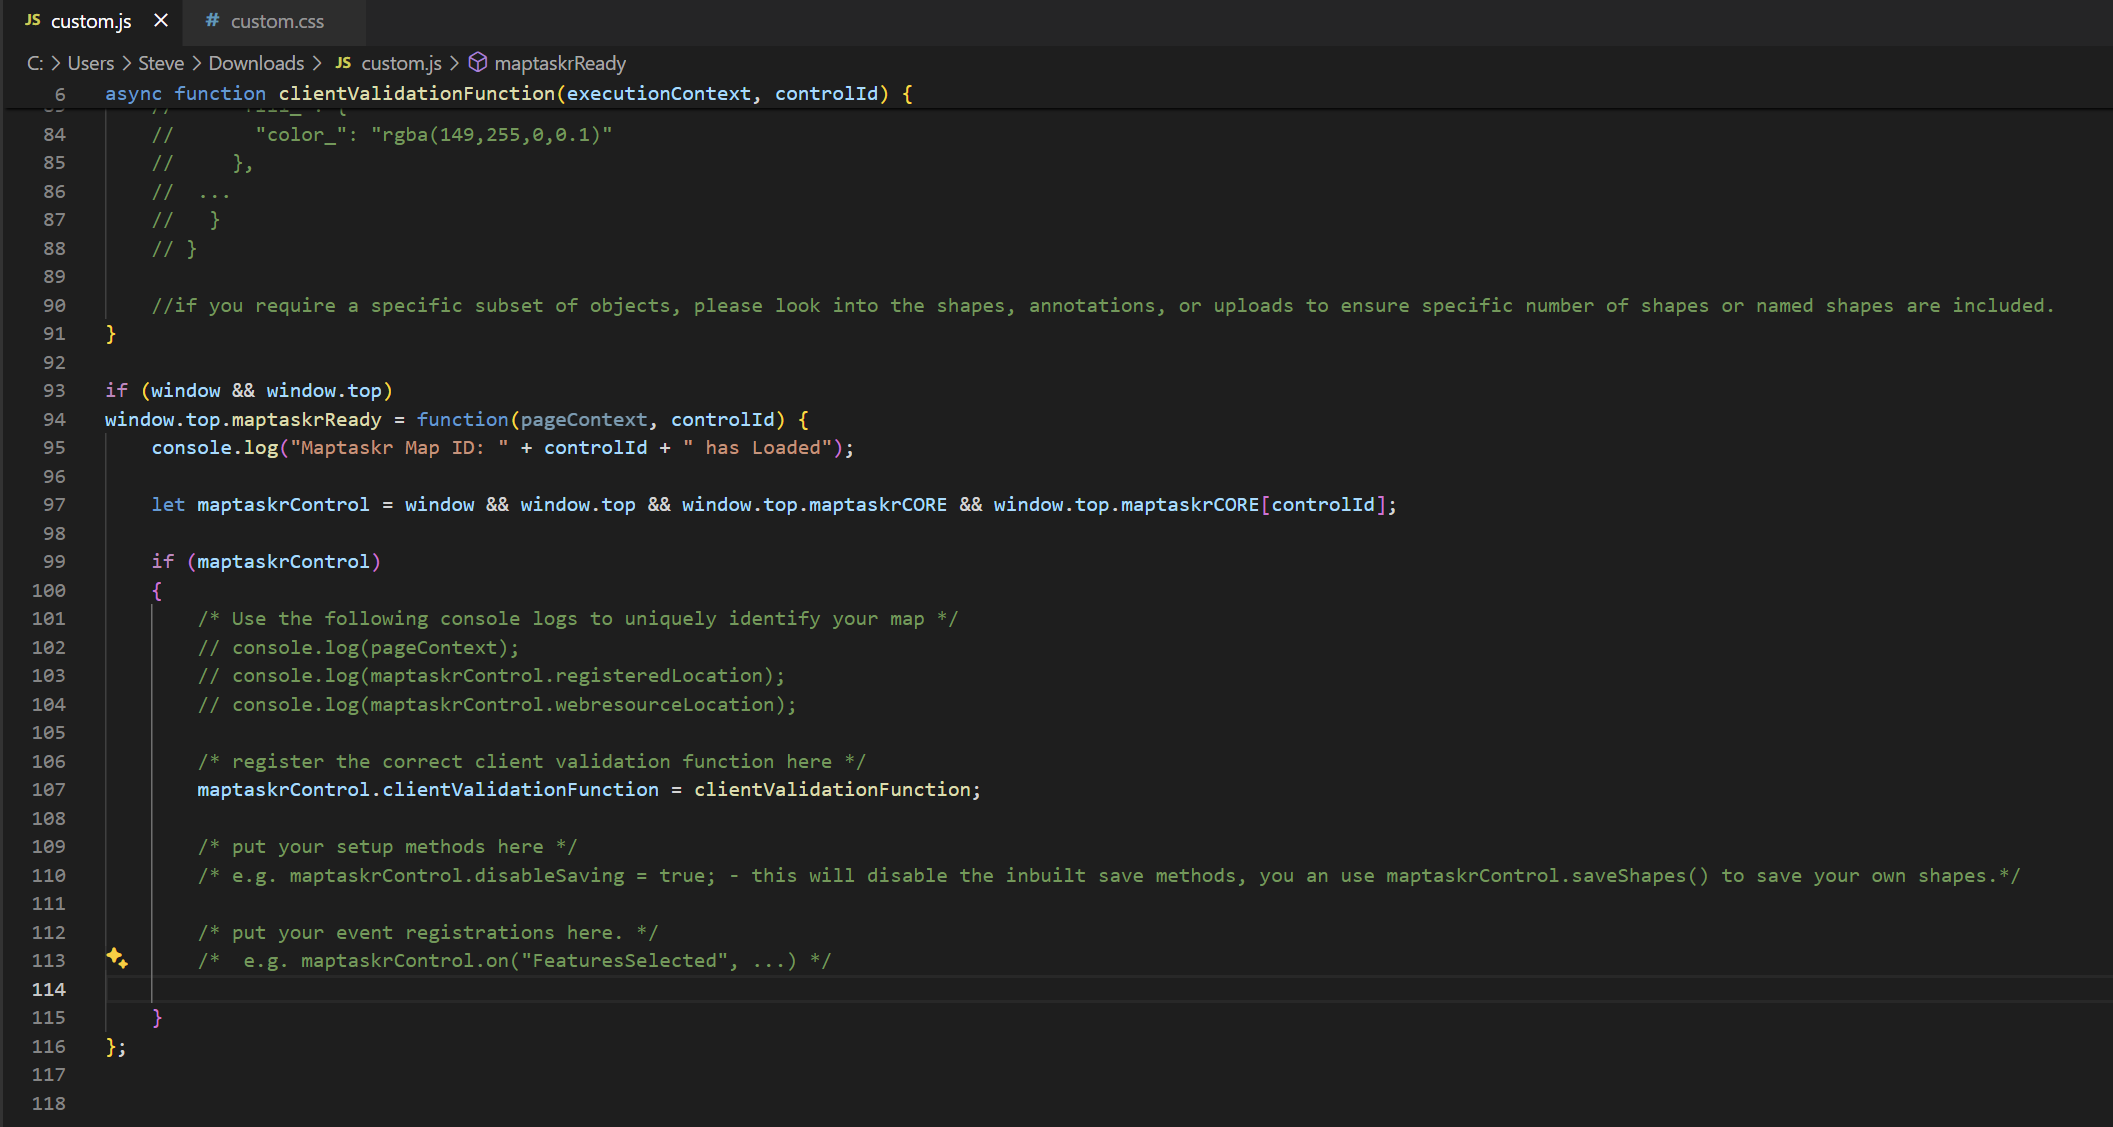
For example, scrolling down to the bottom of the custom.js file, you can add a console log to the loading of the map.
Figure 191: Editing the Maptaskr Ready Function.
-
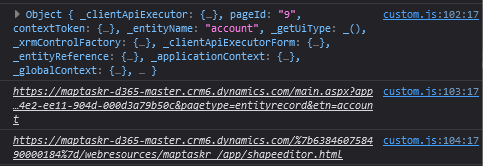
Uncommenting the 3 lines highlighted below should display some information about the current context.
Figure 192: Altering Custom.JS.
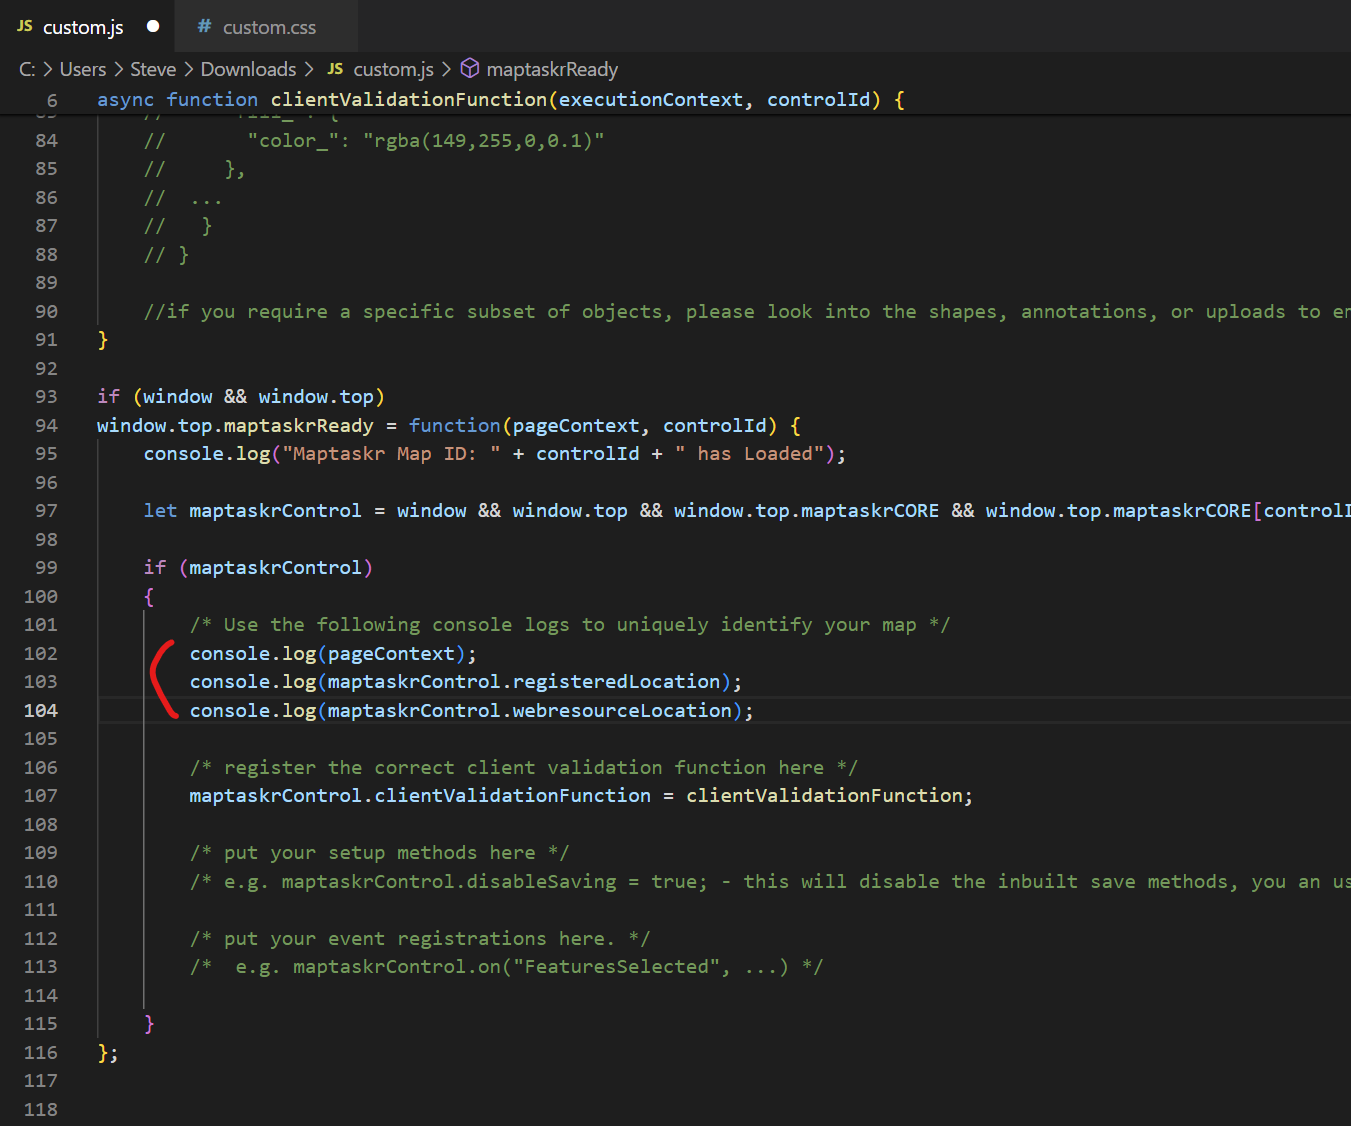
globalThis.top.maptaskrReady = function(pageContext, controlId) {
    console.log("Maptaskr Map ID: " + controlId + " has Loaded");

    let maptaskrControl = globalThis && globalThis.top && globalThis.top.maptaskrCORE && globalThis.top.maptaskrCORE[controlId];

    if (maptaskrControl)
    {
        /* Use the following console logs to uniquely identify your map */
        console.log(pageContext);
        console.log(maptaskrControl.registeredLocation);
        console.log(maptaskrControl.webresourceLocation);
        /* register the correct client validation function here */
        maptaskrControl.clientValidationFunction = clientValidationFunction;

        /* put your setup methods here */
        /* e.g. maptaskrControl.disableSaving = true; - this will disable the inbuilt save methods, you an use maptaskrControl.saveShapes() to save your own shapes.*/

        /* put your event registrations here. */
        /*  e.g. maptaskrControl.on("FeaturesSelected", ...) */

    }
}; -
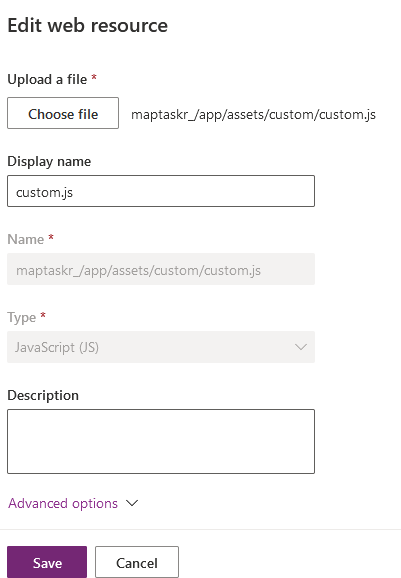
Once you have saved your changes, upload the Custom.js file to the resource.
Figure 193: Uploading Your New Custom.JS.
-
Then save and publish your changes. This should override the existing custom.js with your custom one.
Figure 194: Checking the Solution Layers.

-
To test the result of this, Load up a Maptaskr Map in a record form.
Figure 195: Loading the Maptaskr App.
-
Navigate to the Accounts section.
Figure 196: Navigating to a Form.

-
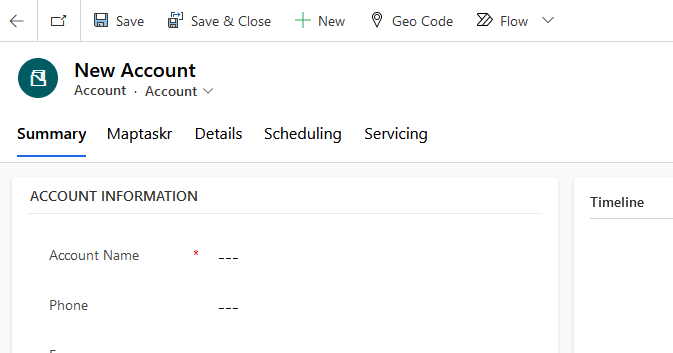
Create a new Account.
Figure 197: Creating a New Record.
-
Open the Developer Tools by pressing
F12(Chrome, Firefox and Edge). -
Select the Console Tab (and clear any existing messages).
Figure 198: Viewing the Console Log.
-
Then open the Maptaskr tab on the Account form.
Figure 199: Loading the Map.
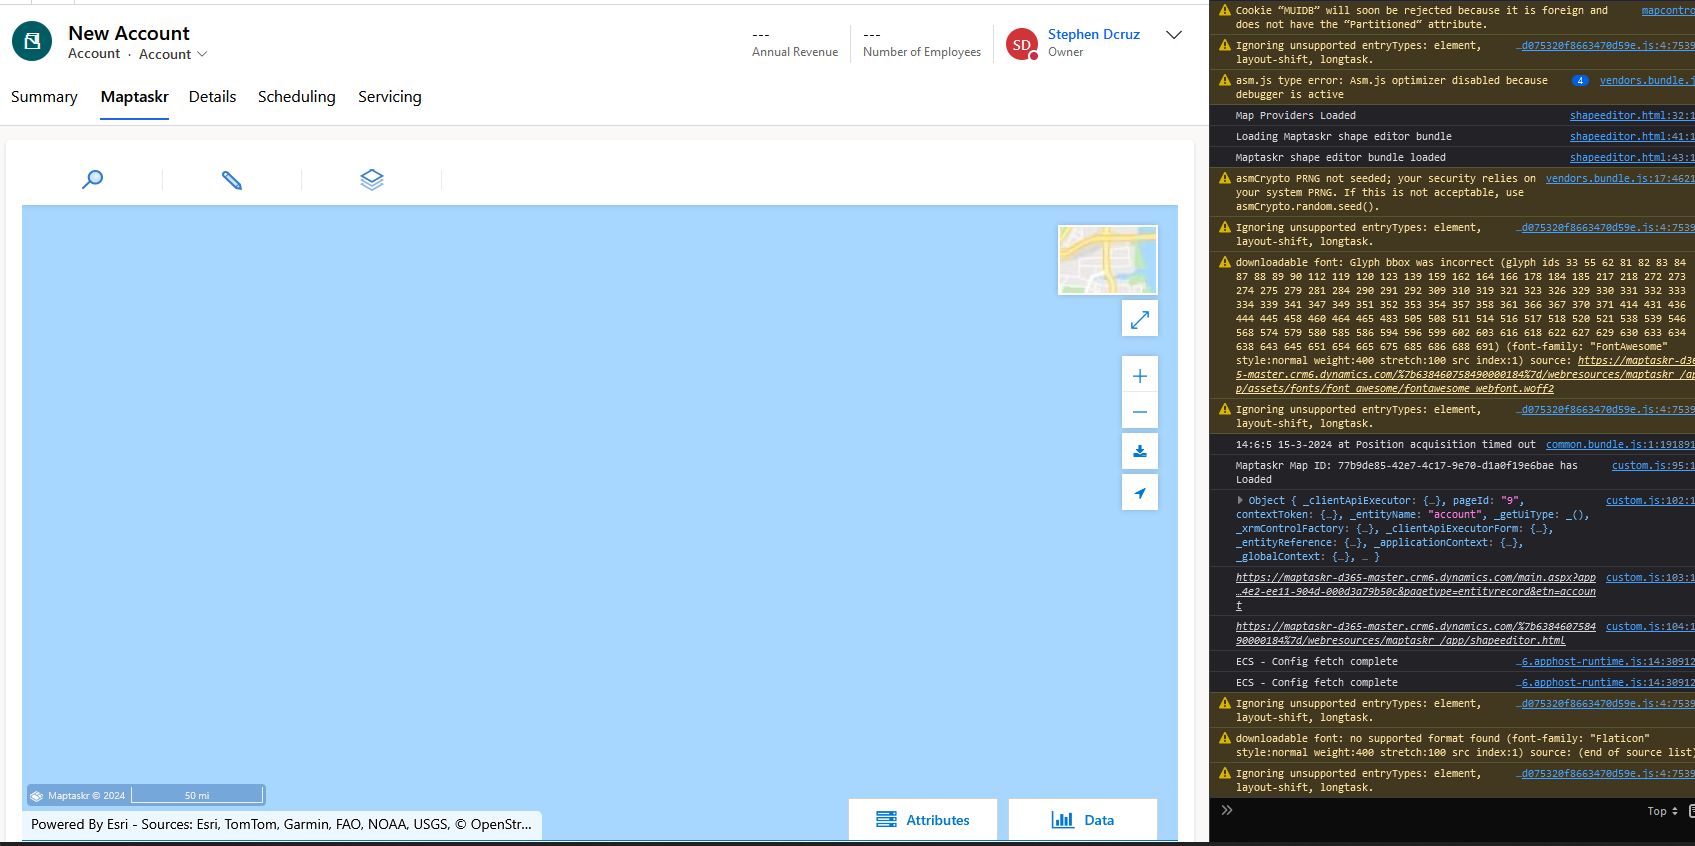
-
Note the addition of the Page Context, and the web URLs of the current page and the iframe loading the
shapeeditor.htmlFigure 200: Successful Modification.
For more information on what functionality is available to you to alter please refer to the document Maptaskr for D365 - Registerable Events and Functions
Pre-Selected, Exclusion, and Intersection Layer Configuration
When configuring the Maptaskr control, there are parameters that require the population of a Layer Name / Sub-layer Name. These values can be easily copied from the Map UI, when selecting layer attributes.
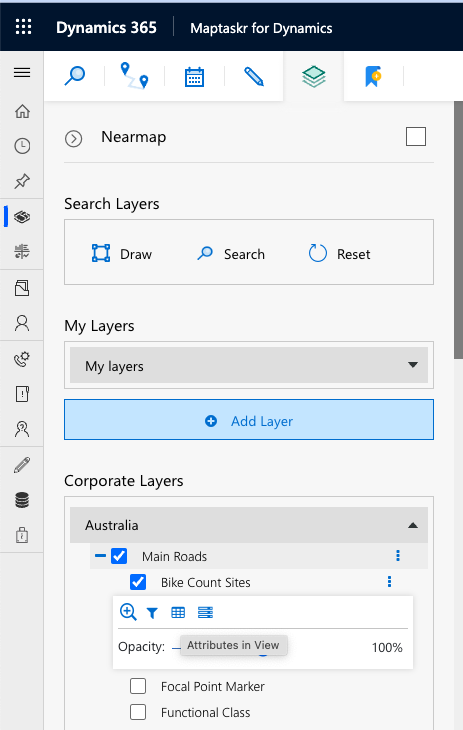
To view the value, navigate to a dashboard level map, and select the layer you wish to add to the configuration. Select the layer options and then choose either the All Attributes or Attributes in View option as per the figure below
Figure 201: View Layer Attributes.
Once the attribute table loads, you will find the layer unique identifier string under the layer title.
Figure 202: Layer Attribute Table.

Copy the unique identifier string (not including the ID: text) and paste it into your configuration.
Prior to 2.2.2.92 the Layer and Sublayer names were displayed as is and were separated with a forward slash character. For backwards compatibility, this will still function. To correctly process layers that may have special characters such as / we have updated the layer ID's to be sanitised of any special characters or white space.
Intersection Detection
This powerful feature introduces a new level of precision and efficiency in handling geographic data, providing users with the ability to detect intersections within their mapped shapes and layers.
-
Exclusionary Selected Layers: Administrators can define an ArcGIS Feature Server layer to be loaded and enabled as default. The features provided by the layer are loaded onto the map and will prevent the user from uploading a shape that intersects with the layer’s features.
-
Intersection Selected Layers: Users can define specific layers to act as intersect zones when working with submitted shapes on the map. This capability is highly versatile, allowing users to set up preselected layers for intersection detection. The layers chosen for intersection detection must be ArcGIS Feature Server layers. After a shape has been drawn or uploaded, users can trigger the intersect detection process with a simple validation button. This feature MUST be used in conjunction with the Intersection Warning and Error Buffers.
-
Intersection Warning / Error Buffers: For each layer defined as an Intersection, a Warning and Error Buffer must be defined. These are defined in Metres and will be used to present the user with Warning and Error messages.
-
Custom.js: As part of the Warning and Intersection logic, Maptaskr has preconfigured the Custom.js to allow users to submit shapes within the warning buffers, but to deny submission when a shape comes within the error buffer. This can be changed by modifying the Custom.js as per section Custom CSS & JavaScript
-
Registerable Events and Functions
These features empower developers to integrate event registration and call on functions directly from the applications being built.
-
Registerable Events: Developers can integrate event registration directly into their dashboard and record level maps, allowing for the programmatic detection of select user driven actions or outcomes as they happen.
-
Data Accessor Functions: Developers can call select functions that provide direct access to specific map data, enabling developers to create custom interactions, analyse data, and trigger actions-based business rules and requirements.
These features not only allow for the enhancing of user experience, but also opens exciting opportunities for developers to create dynamic and user-centric mapping applications. It's a powerful tool for organisations looking to foster user engagement, facilitate event coordination, and programmatically detect and respond to events as they unfold on the map.
For a comprehensive list of registrable events and extensible functions, please refer to Maptaskr for D365 - Registerable Events and Functions.