Geocoding
Maptaskr provides geocoding capability throughout the solution to assist with determining address and/or coordinate locations for the various records Maptaskr is configured to work with.
By default, Maptaskr ships with 3 Workflows which are preconfigured to work with the three (3) core entities; Account, Contact and Lead as you can see in the figure below.
Figure 151: Maptaskr Geocoder Workflows.
Maptaskr supports Bing Maps, HERE Maps and ArcGIS. For Bing, we use the map provider key provided respectfully. For ArcGIS we use the Client ID and Secret provided.
When these Workflows are activated, geocoding is triggered automatically for Accounts, Contacts and Leads. Any time a record is created or edited, Maptaskr validates and geocodes the address or reverse geocodes based on the latitude and longitude.
Note: The Maptaskr Geocoder flows are set to be deactivated when first installing Maptaskr, as not to conflict with similar geocoding processes provided by the Field Services App. If you wish to utilise these Workflow in your implementation you will need to activate them. See Activating Maptaskr Geocoder Workflows for instructions on how to do this.
Activating Maptaskr Geocoder Workflows
-
In order to activate Maptaskr Geocoder Workflows, got to Advanced Settings > Process Center > Processes
Figure 152: Advanced Settings Process Center Menu.

-
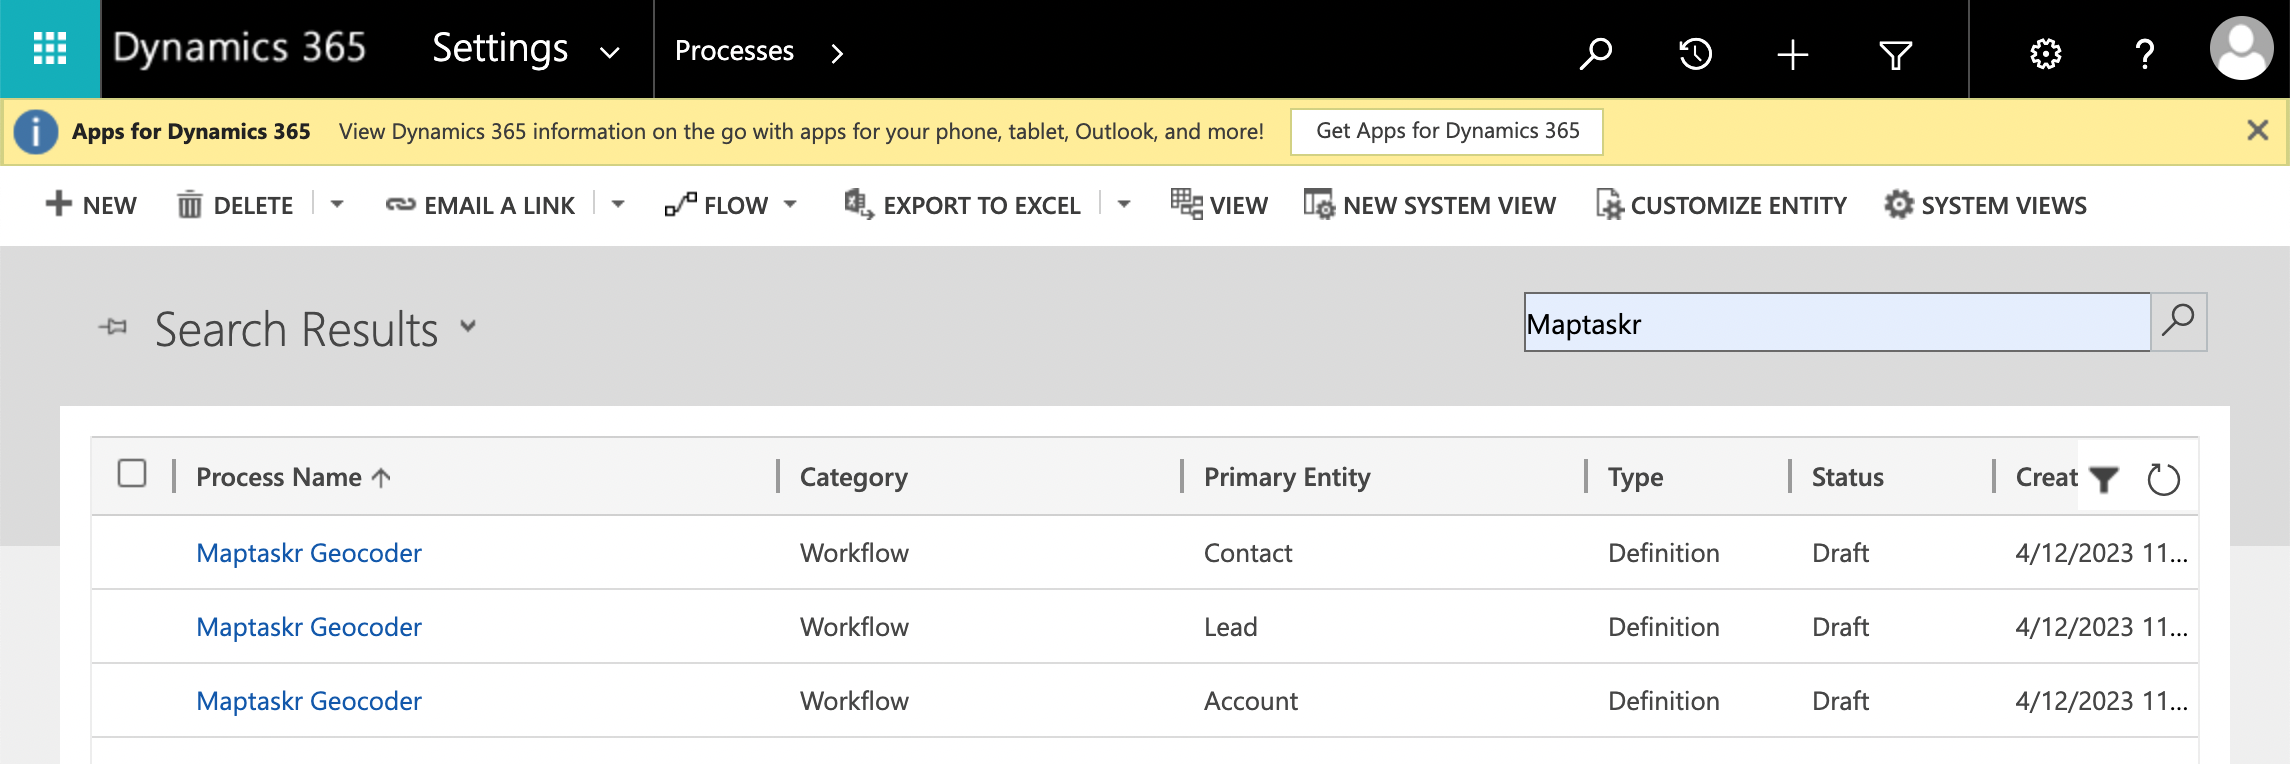
Once at the Processes list screen, switch the to
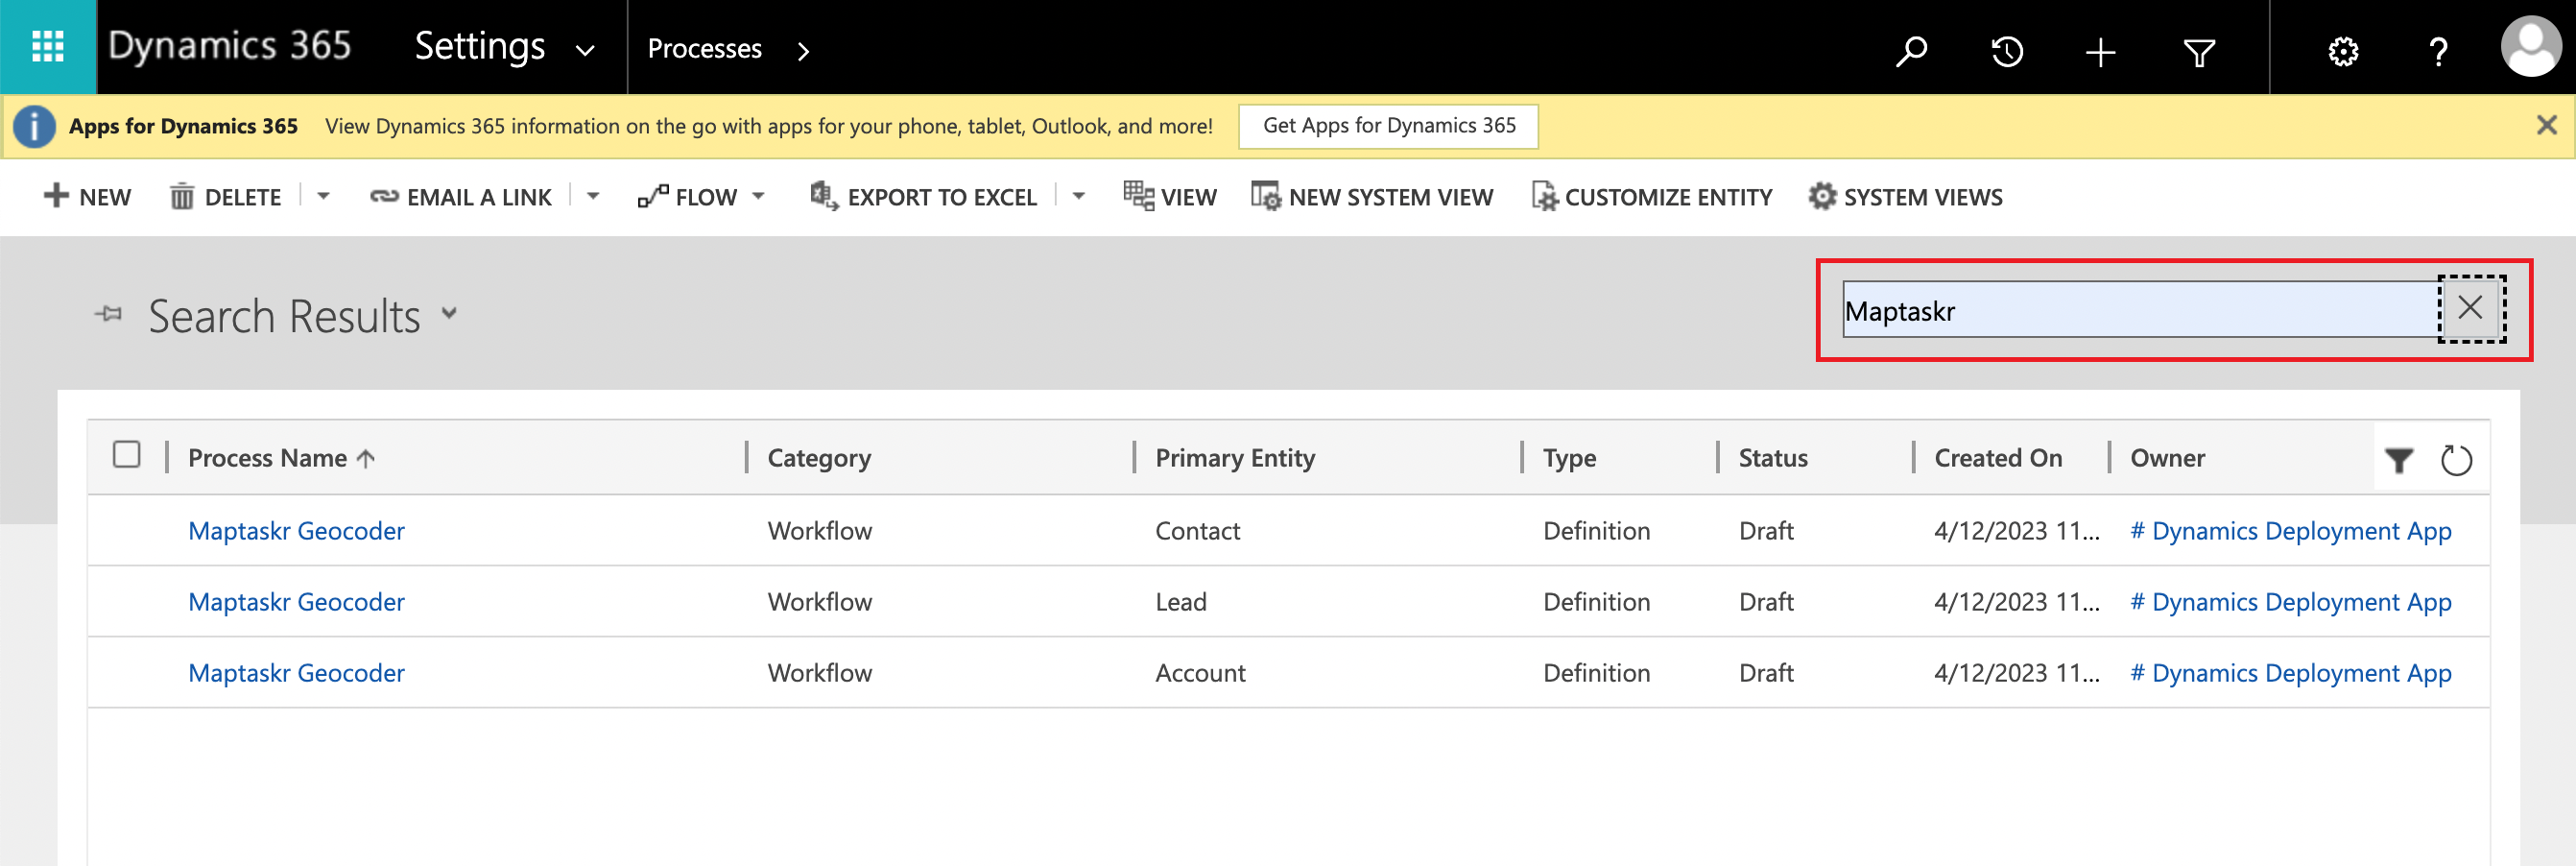
All Processes, and search for Maptaskr in the search box.Figure 153: All Processes View.
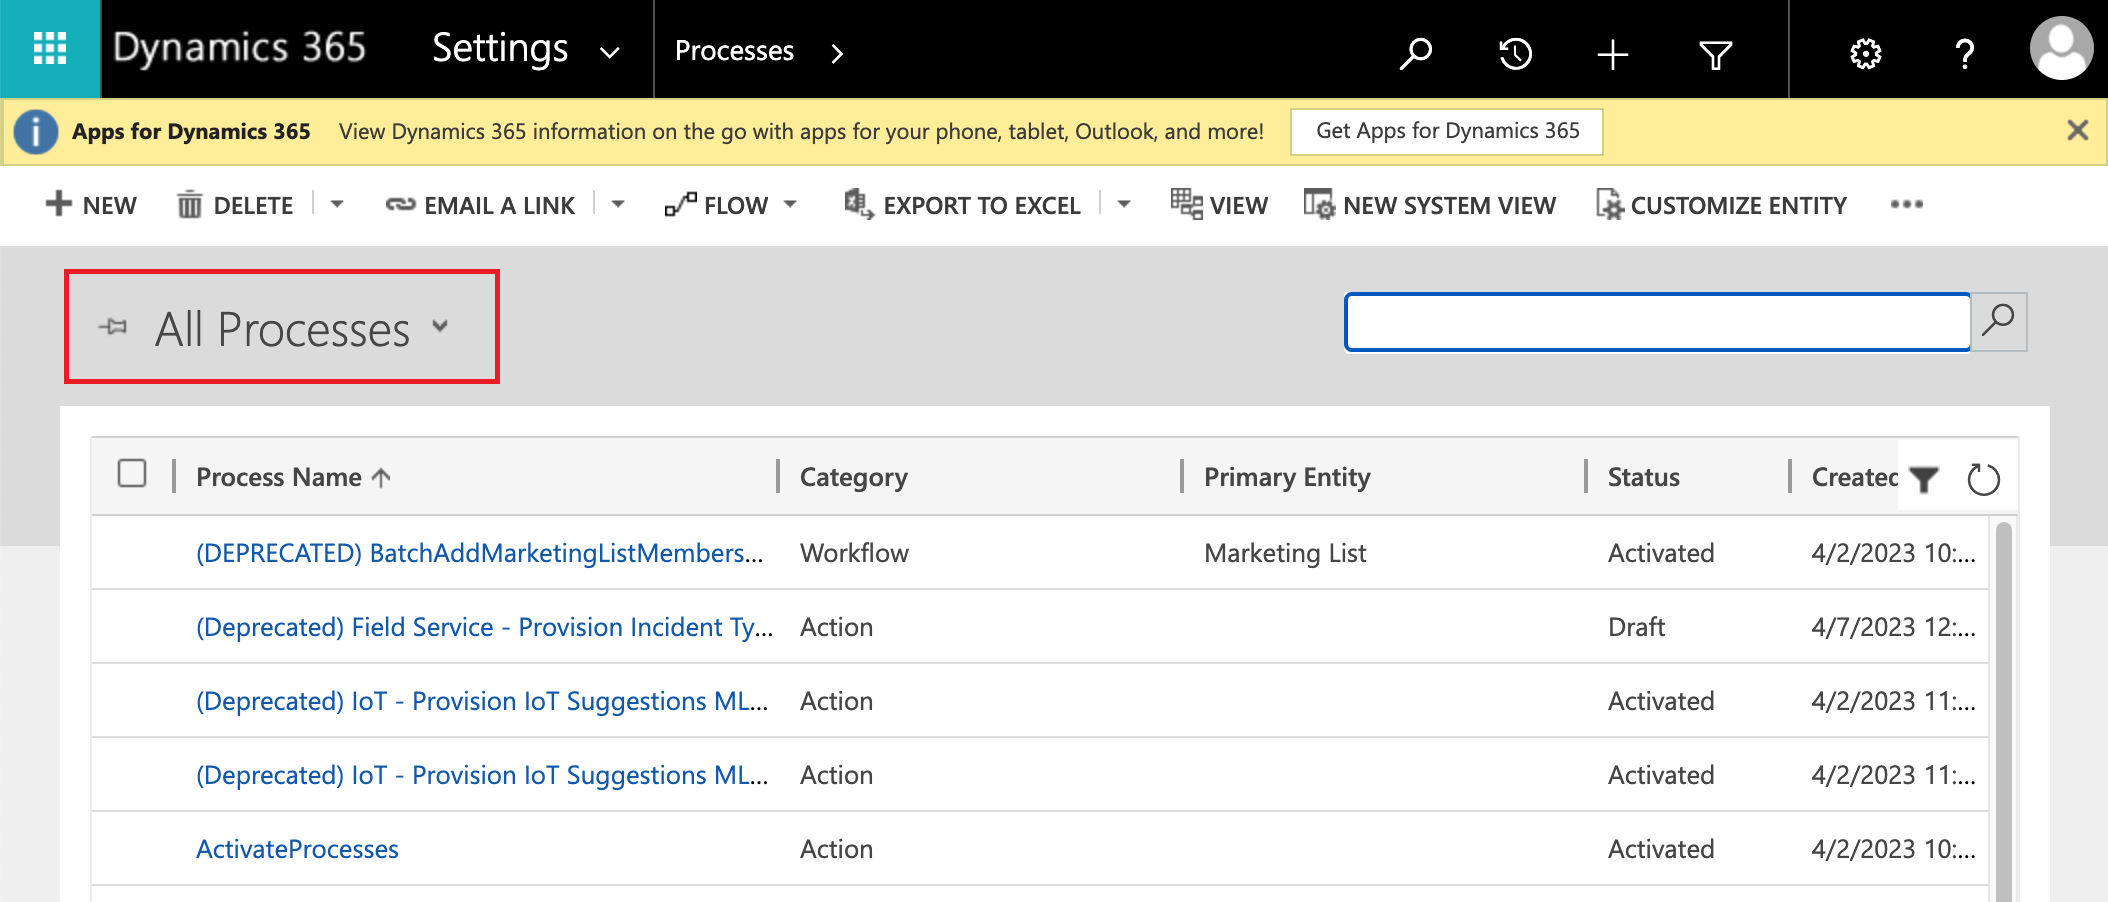
Figure 154: Search for Maptaskr Workflows.
-
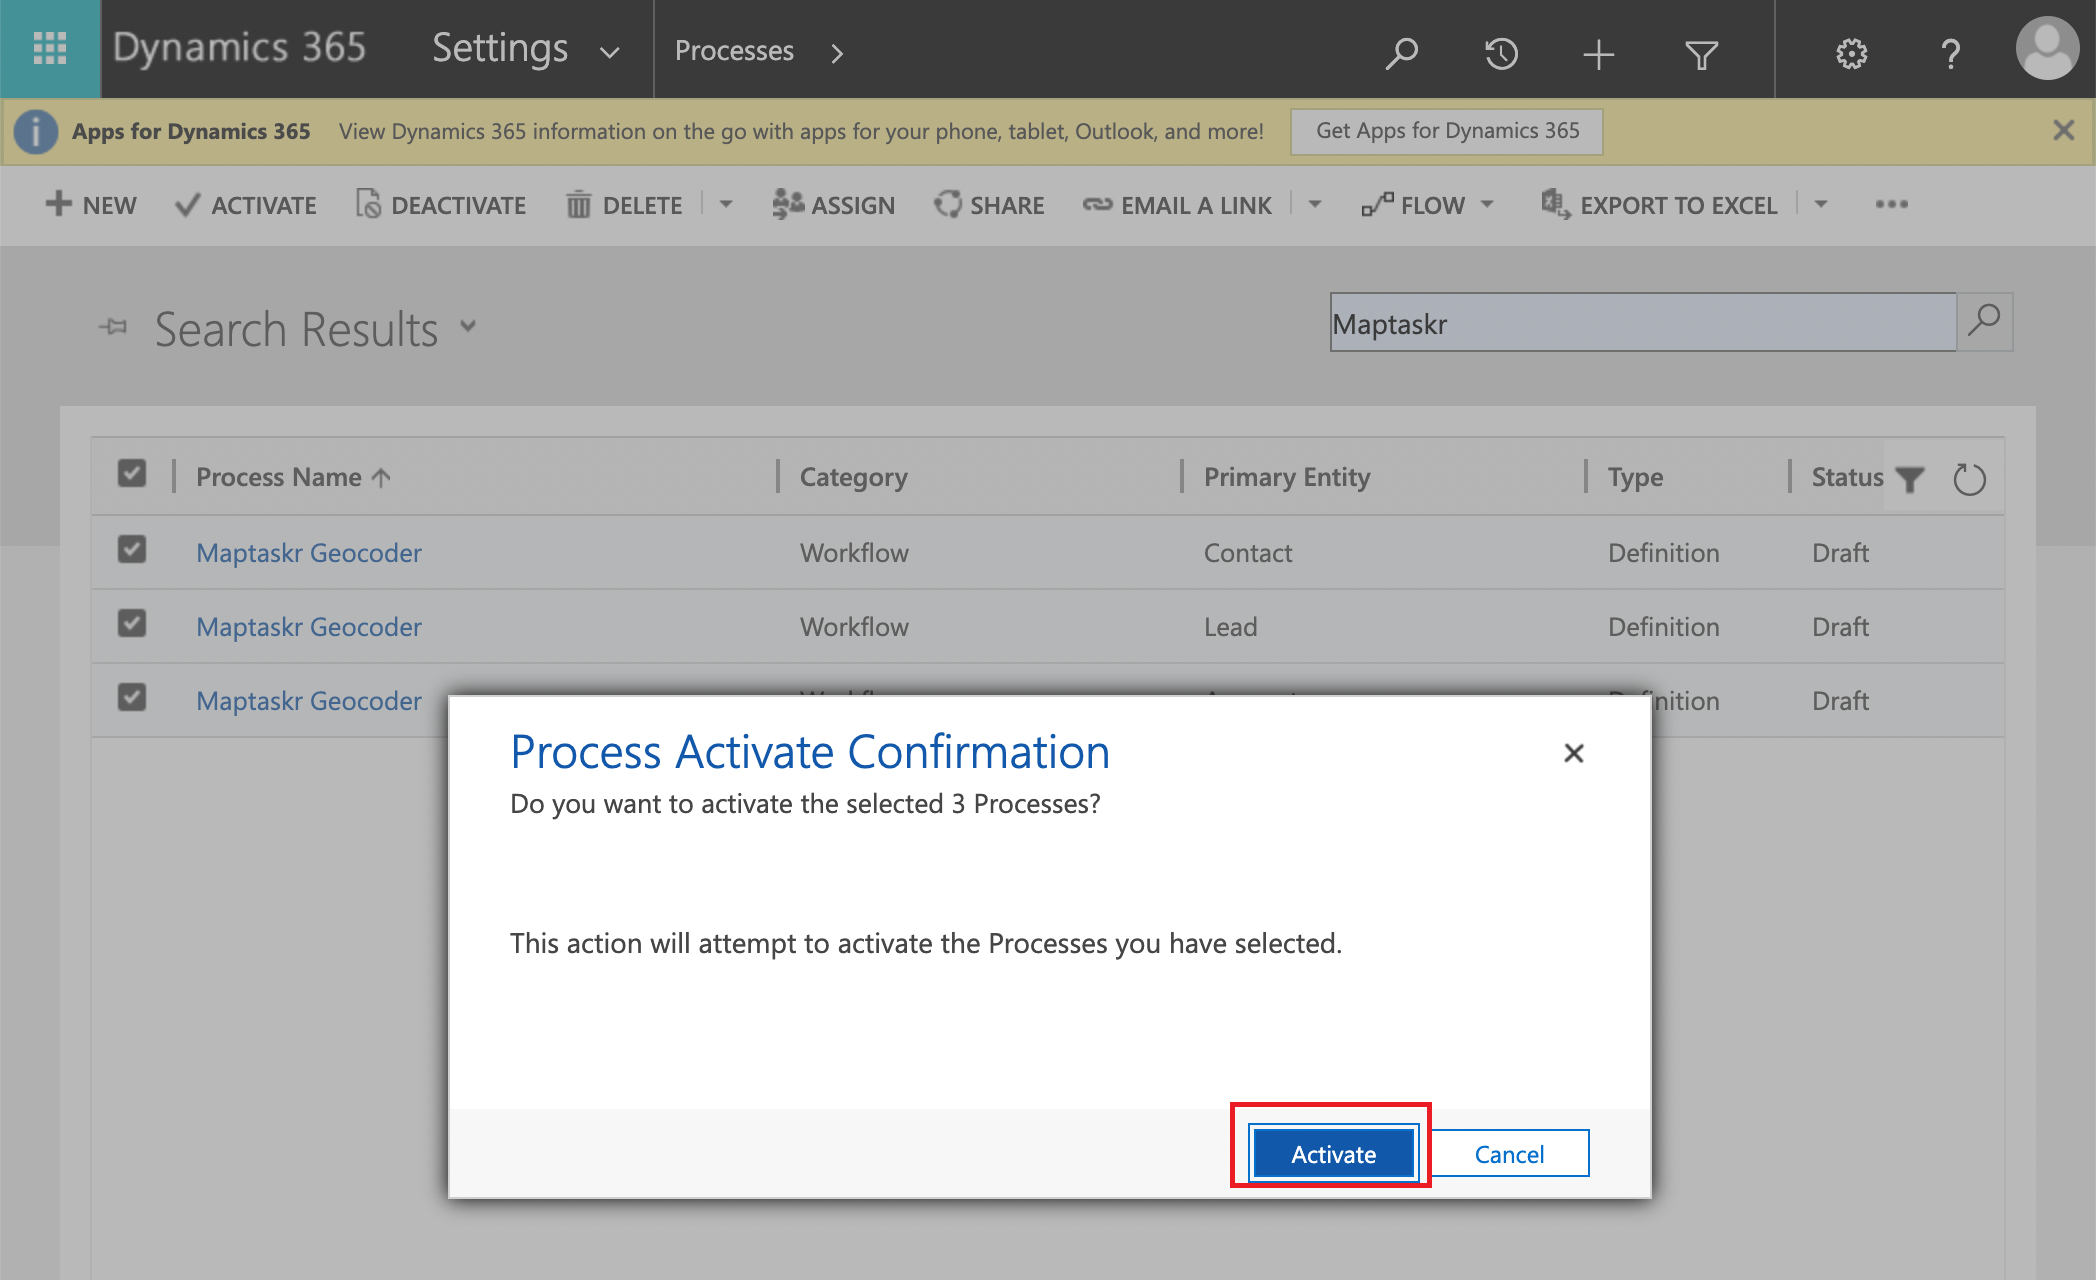
Select the Maptaskr Geocoder Workflows you wish to activate and click
Activateon the ribbon menu. You will be prompted for confirmation, clickActivateto continue.Figure 155: Select and Activate Maptaskr Geocoder Workflows.
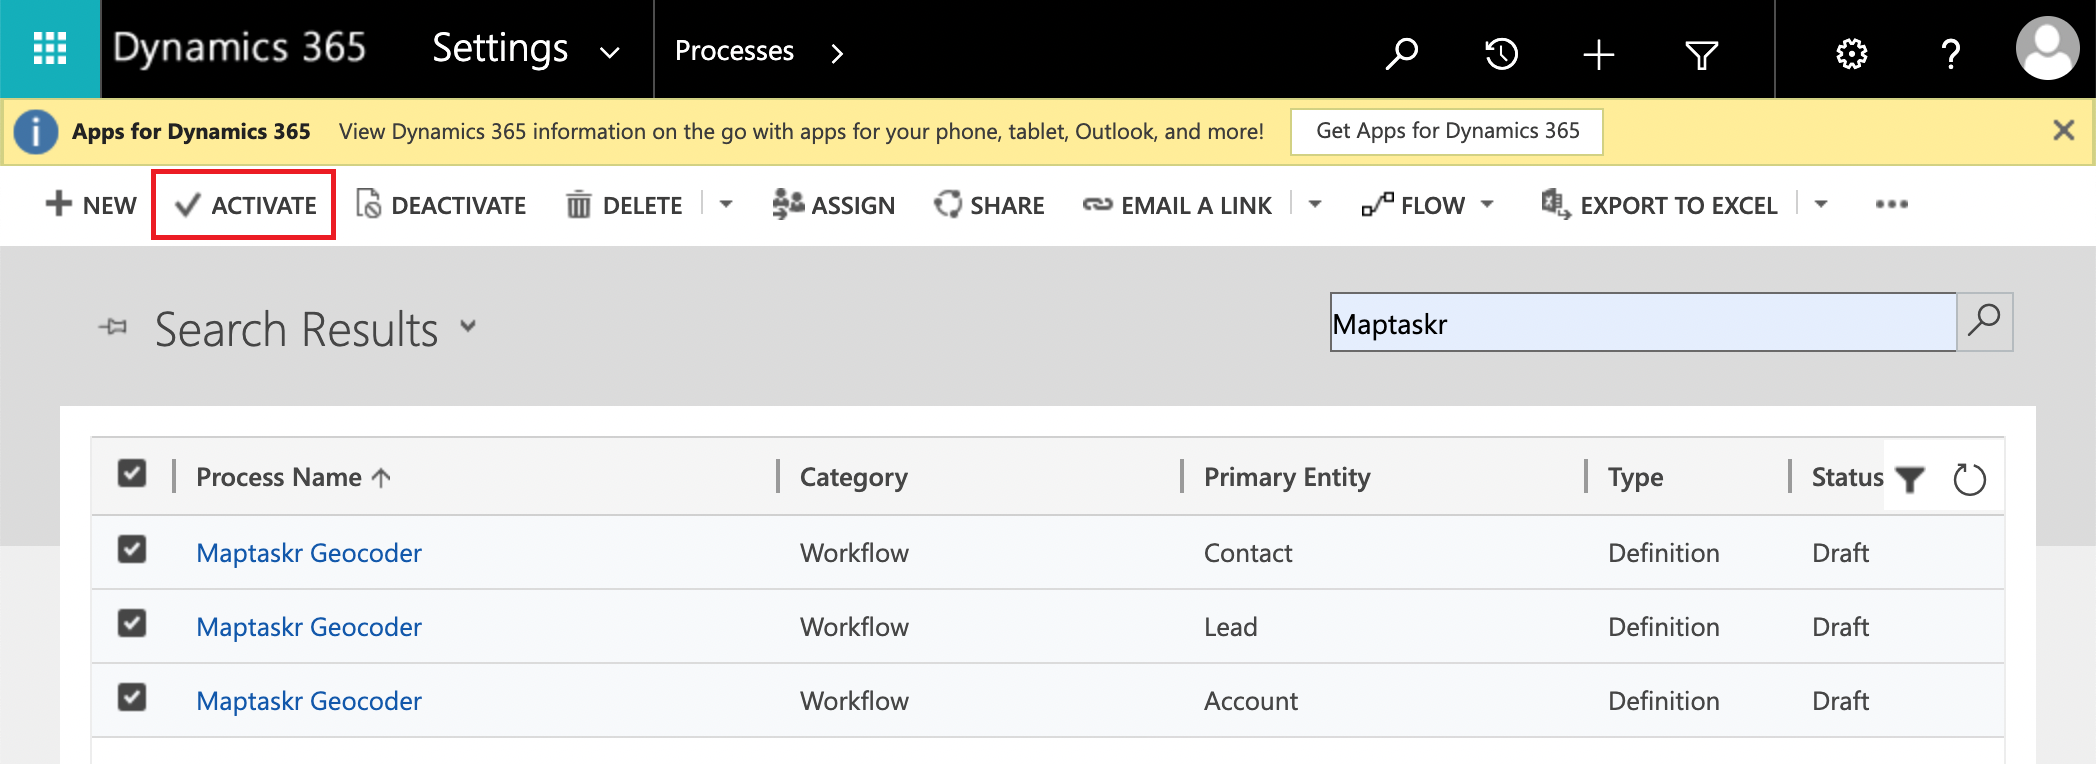
Figure 156: Confirm Activation.
-
Once activation is complete you will see the status of the Workflows change from
DrafttoActivated. The workflows will now run whenever the configured trigger settings are met.Figure 157: Maptaskr Geocoders Activated.
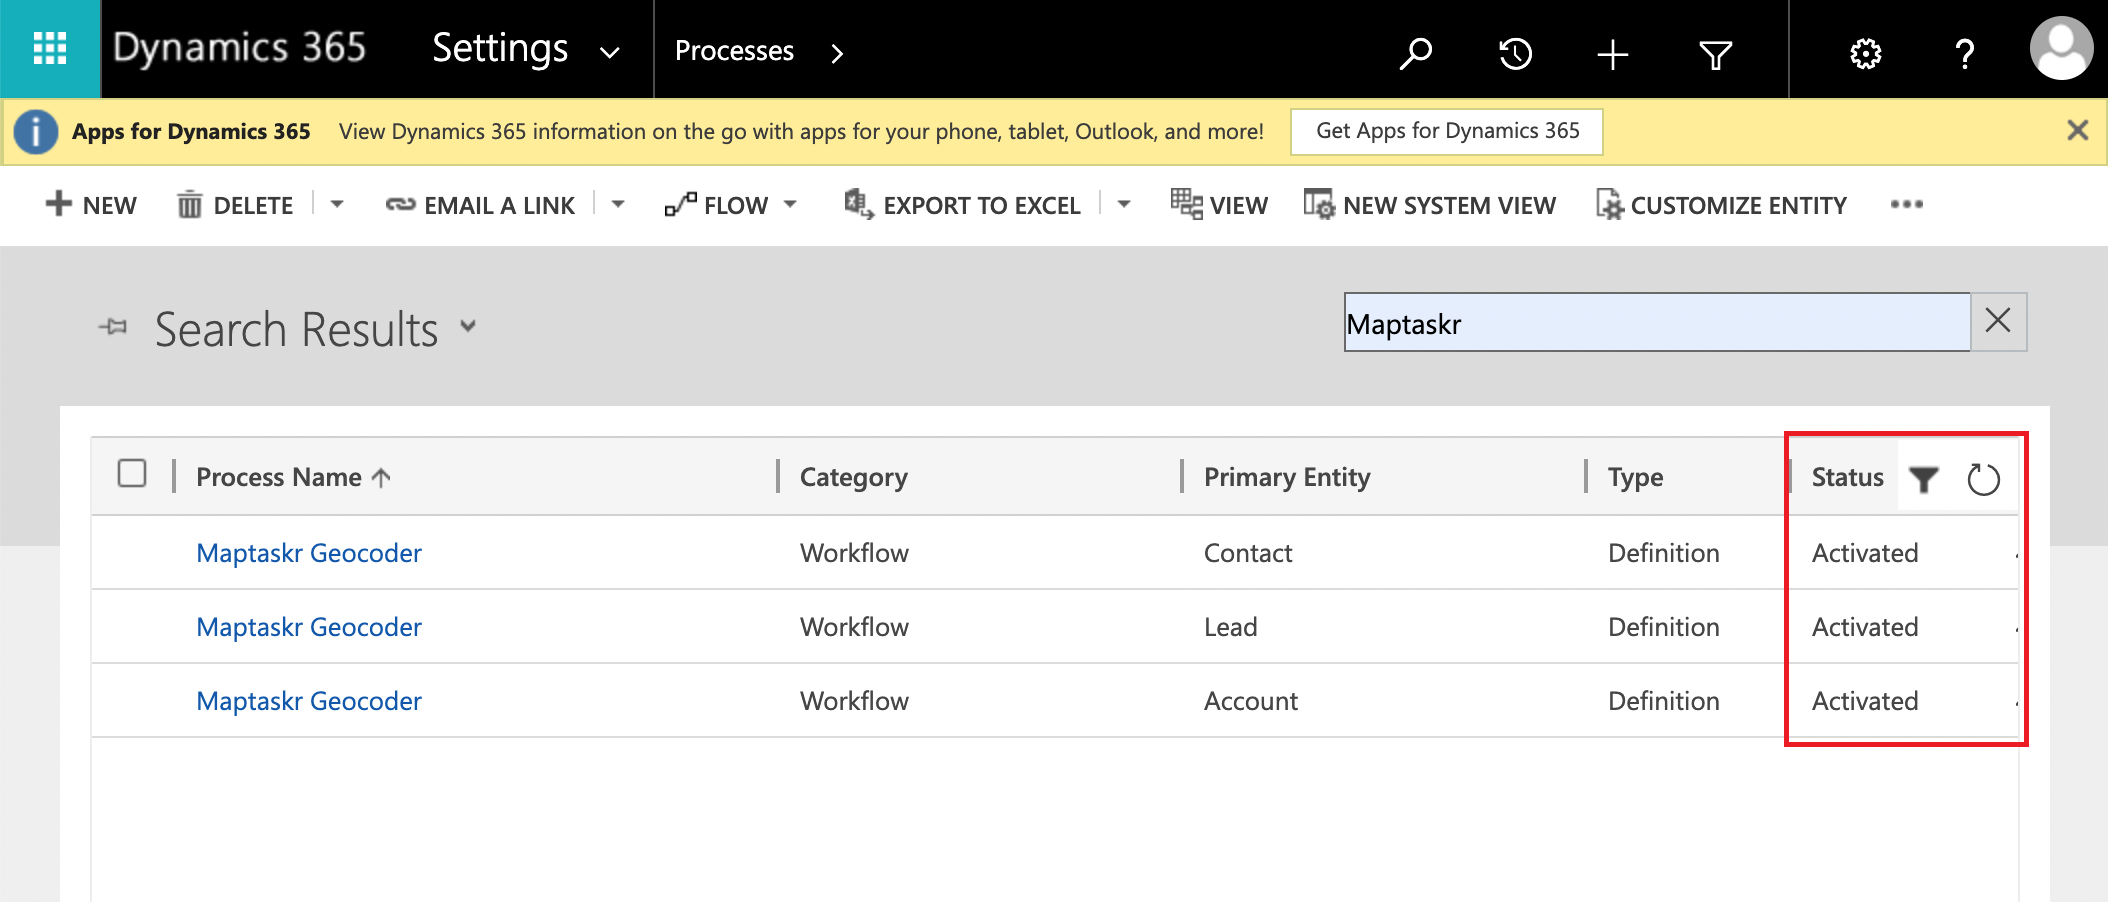
Figure 158: Maptaskr Geocoder Configuration Example.

-
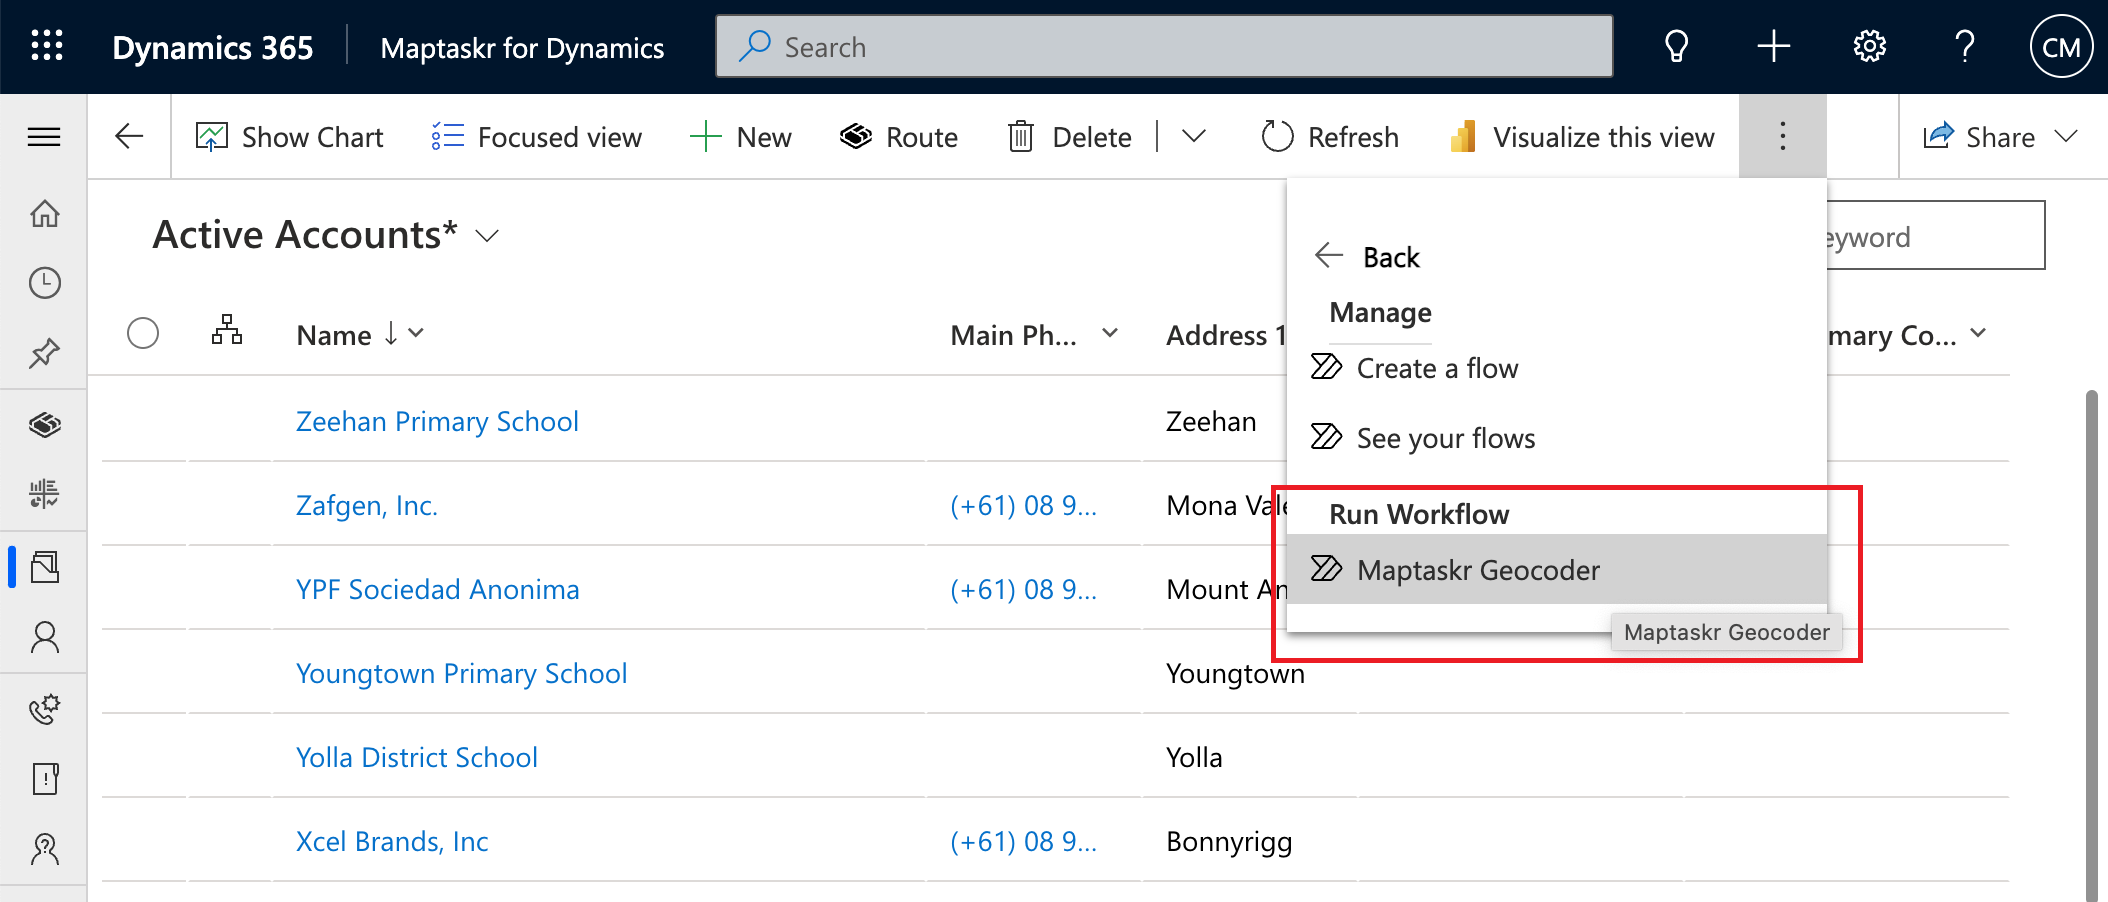
To test that the workflow has been activated successfully, you will now see the Maptaskr Geocoder Workflow appear as an option in the Flow menu options section on any of the configured entities.
Figure 159: Maptaskr Geocoder Option Selectable.
Manually Running Maptaskr Geocoder Workflows
Occasionally there may be the need to run the geocoding workflows on a record, or group of records, manually. This can be done for any of the configured entities as per the following steps.
-
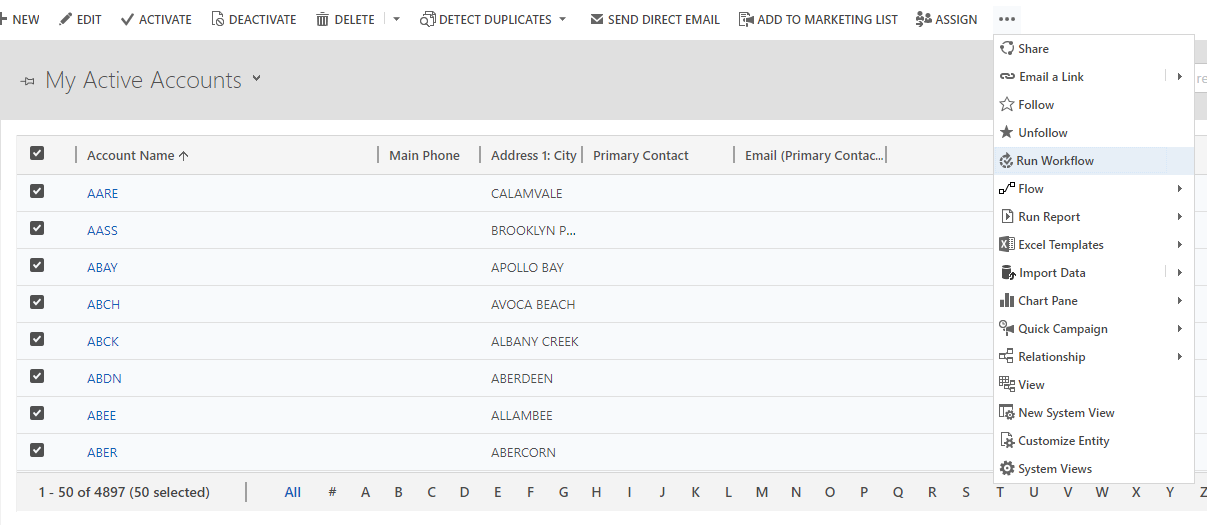
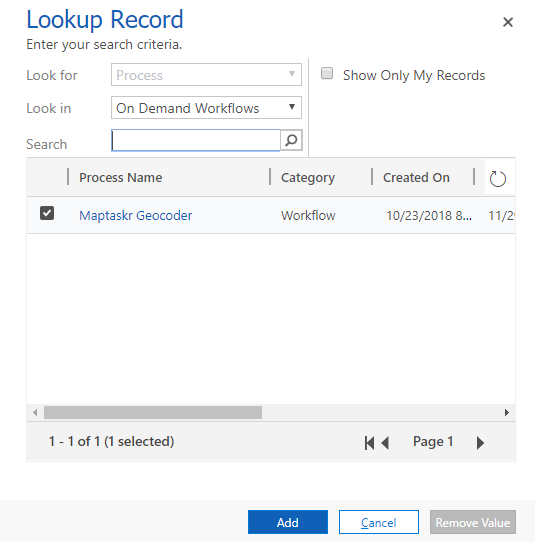
To run geocoding on existing addresses, navigate to the Entity, select one or more records, click on
More CommandsandRun Workflow.Figure 160: Geocoding - Run Workflow.
-
Select the
Maptaskr Geocoderworkflow and click on the Add button to the run the geocoding on the selected records.Figure 161: Geocoding Workflow.
This process is simplified in the Unified Interface. This can be done for any of the configured entities as per the following steps.
-
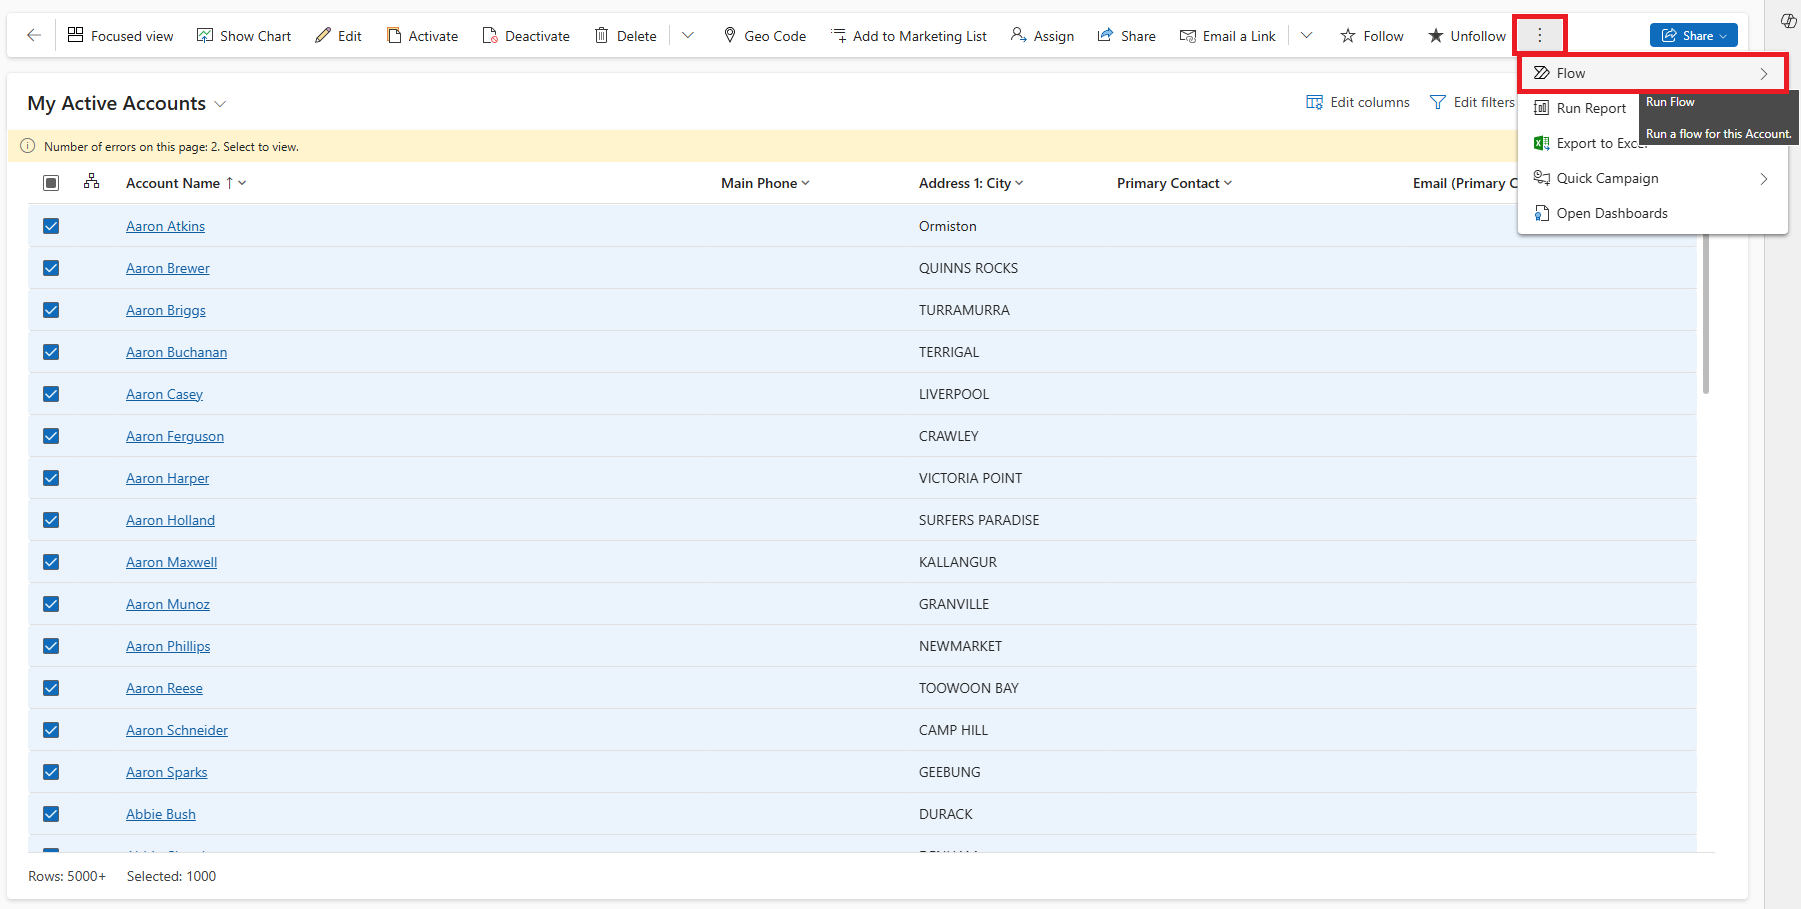
To run geocoding on existing addresses, navigate to the Entity, select one or more records, click on the three-dot icon on the top ribbon and select
Flow.Figure 160.1: Geocoding - Flows.
-
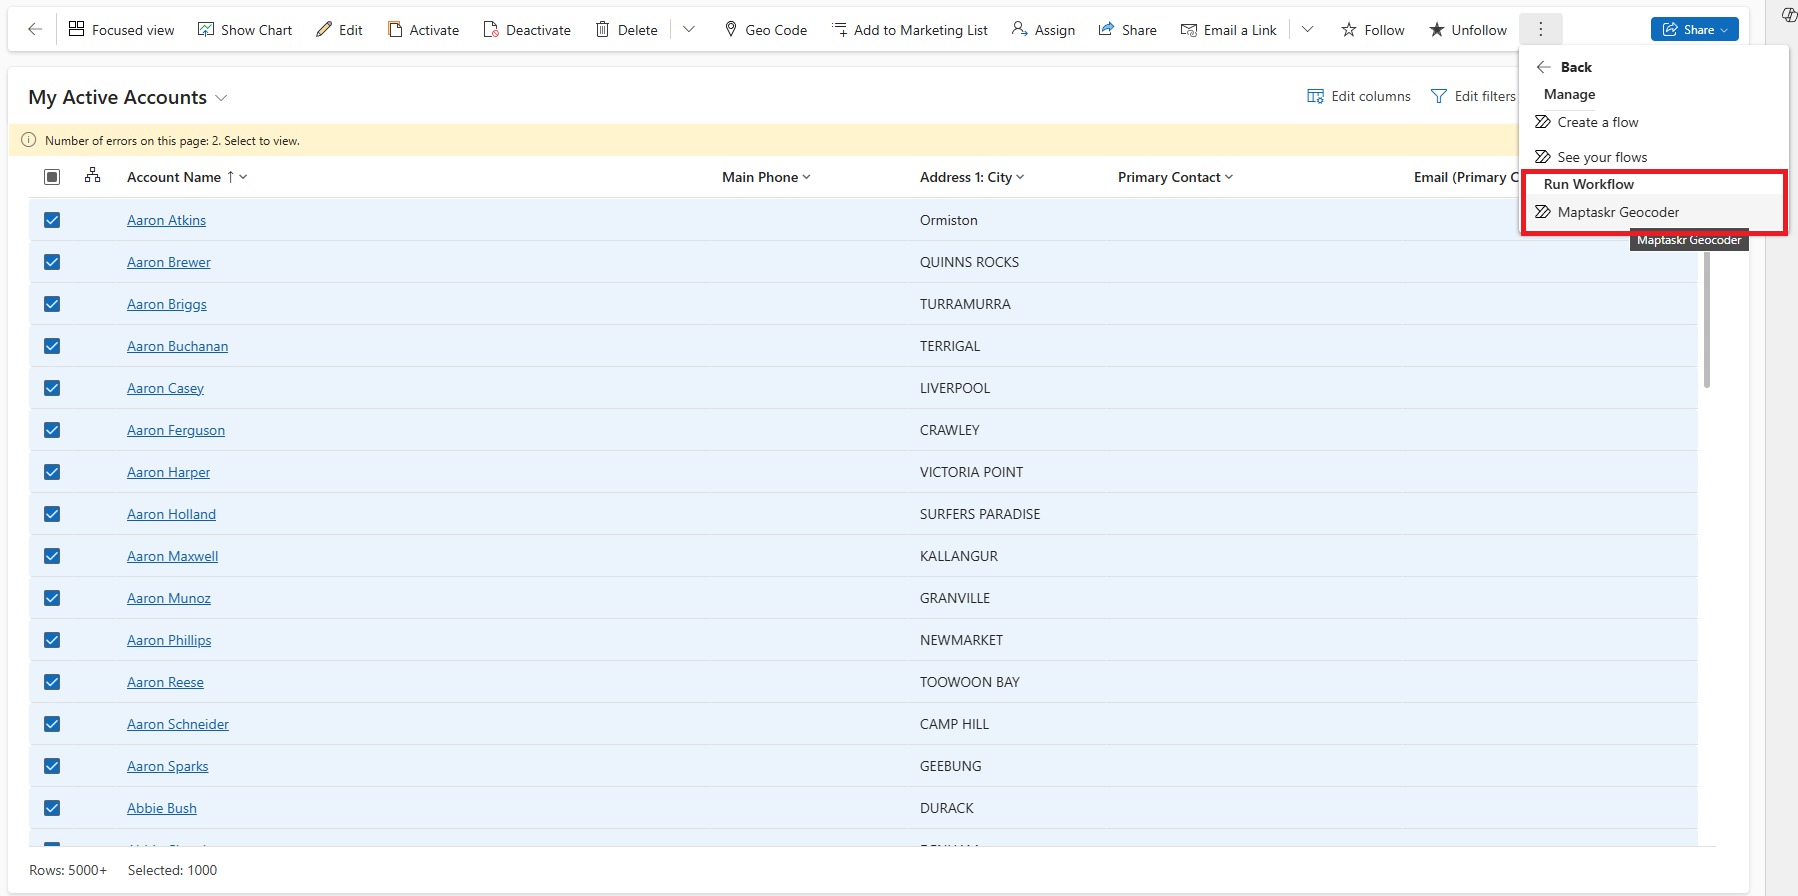
Select the
Maptaskr Geocoderworkflow in theRun Workflowsection to run the geocoding on the selected records.Figure 160.2: Geocoding - Run Workflow.
 note
noteIf you are not seeing your workflow in this list, ensure that you have configured it to be available to run as
As an on-demand process.
Configuring Geocoding Workflow for Custom Entities
Maptaskr provides a geocoding flow that can be used to geocode records within additional/custom entities. Follow the below steps to configure this flow for Custom Entities:
Create a new Workflow Process:
-
Navigate to → Settings → Processes and click on the new button or by creating a new empty Solution and then navigating to Processes.
-
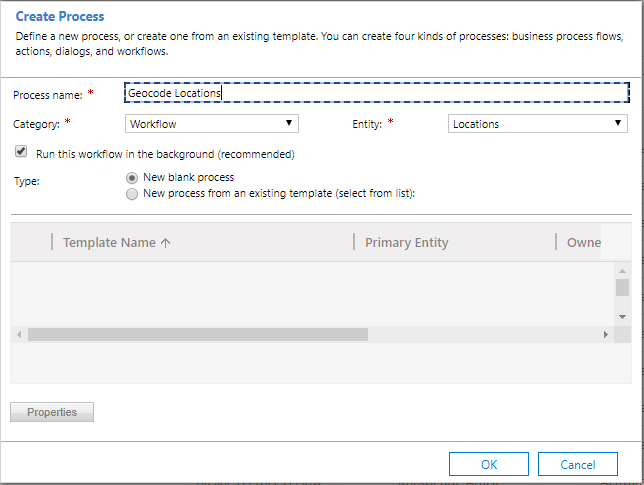
Enter the process name, select category as Workflow, and select the Entity you wish to design workflow and click
OK.Figure 162: Create Process.
Set the Properties:
-
Set the Scope as an organization and in Start when: select
Record is createdandRecord fields change. -
For the
Record fields changechoice, select all the address fields that require geocoding when any of the address fields are changed.
Ensure you tick As an on-demand process in the Available to Run section.
-
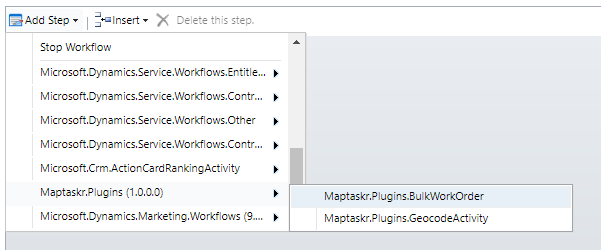
Click on
Add Stepand select theMaptaskr.Plugins (1.0.0.0)→Maptaskr.Plugins.GecodeActivityFigure 163: Select Process.
-
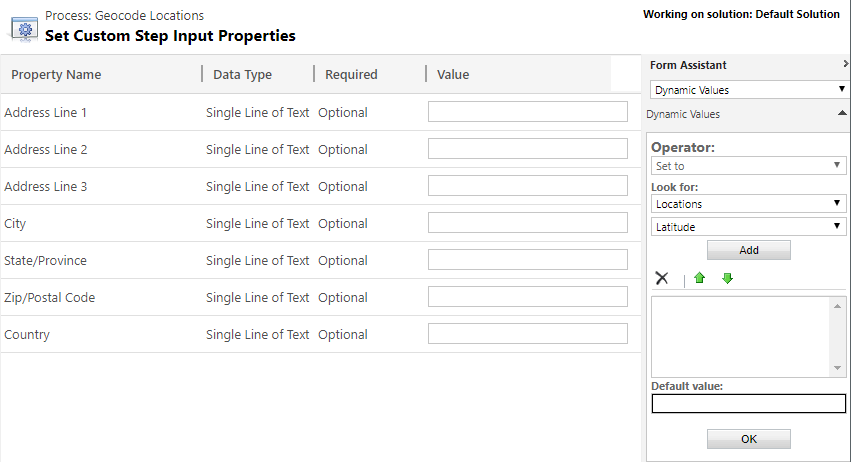
Set the address parameter by clicking on Set Properties for the workflow and save and close the window.
Figure 164: Select Properties.
-
Click on
Add Stepand add Update Record. -
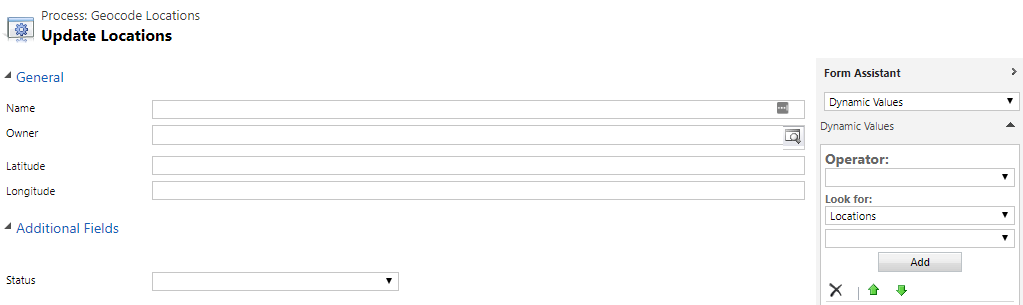
As per the entity that the workflow is being configured, click on Set Properties. Set the Latitude and Longitude to the output parameters returned by the workflow, save and close the window.
Figure 165: Set Outputs.
Once the workflow is activated, the geocoding workflow will trigger on creation and update of address fields.