Configuring PCF & Power Pages Management
Ensure you follow our Power Pages Installation Guide before continuing this section. It is crucial that you have created all the neccessary records and settings to allow the PCF to function correctly.
Let's create a Multi Step Form for our Permit Application
Create a form step for the first tab of the form we created in the previous section, and a form step that will contain our map.
Once the form step is configured, select the Form Options tab and scroll down to the Custom JavaScript section.
We want to utilise the FeatureSelected event. Below is a snippet of JavaScript that will detect when a layer feature is selected and will generate a button in the attribute pop-up that will allow the user to select the highlighted feature. Selecting the button will populate our fields on the form with the desired layer attributes.
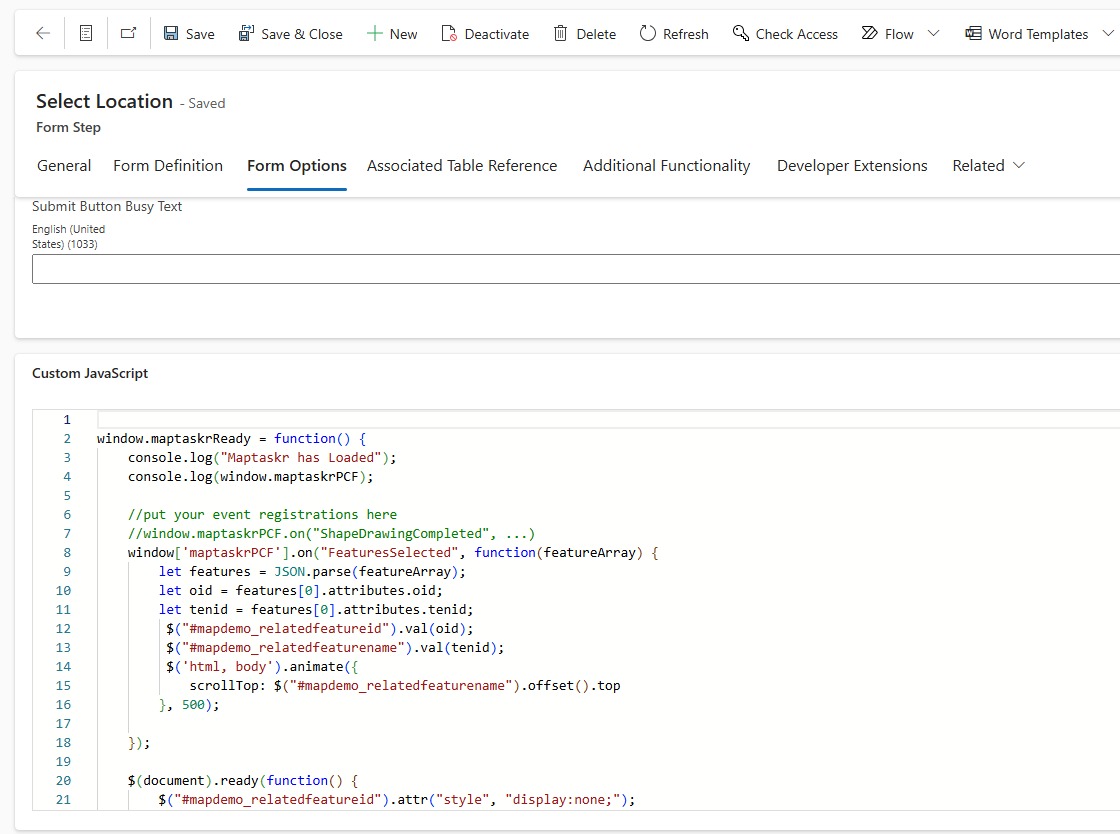
This code snippet will respond to ANY layer currently on the map, this tutorial operates under the assumption that only one layer will be made available to the end-user. Please do your due-dilligence and add your own additional checks if you plan to expose more than one layer.
You will also need to modify some sections to suit your needs better. These have been highlighted for your attention.
function addButtonToDialog() {
    // Check if the button already exists in the .mtr-sidenav-content
    let sidenavContent = document.querySelector('.mtr-sidenav-content');
    if (!sidenavContent) return; // Exit if the container doesn't exist
    if (sidenavContent.querySelector('#selectProperty')) return; // Exit if button already exists

     // Identify the current sidebar object ID and tenement ID
    let oid = null;
    let tenid = null;
    let rows = sidenavContent.querySelectorAll('table tr');
    rows.forEach((row) => {
        let cells = row.querySelectorAll('td');
        if (cells.length > 1) {
            if (cells[0].textContent.trim() === 'OID') {
                oid = cells[1].textContent.trim();
            }
            if (cells[0].textContent.trim() === 'TENID') {
                tenid = cells[1].textContent.trim();
            }
        }
    });

    if (!oid || !tenid) {
        console.warn('OID or TENID not found in sidebar content.');
        return;
    }

    // Create the button element
    let button = document.createElement('button');
    button.id = 'selectProperty';
    button.className = 'btn btn-primary';
    button.type = 'button';
    button.style.backgroundColor = 'var(--main-colour)';
    button.style.padding = '10px';
    button.style.margin = '10px';
    button.style.width = 'calc(100% - 20px)';
    button.style.fontSize = '14px';

    button.textContent = 'Use this Tenement for the Application';

    // Set the button's click event
    button.onclick = function (event) {
        event.preventDefault(); // Prevent default behavior

        $("#mapdemo_relatedfeatureid").val(oid); // Set OID
        $("#mapdemo_relatedfeaturename").val(tenid); // Set TENID

        // Smooth scroll to the target element
        $('html, body').animate({
            scrollTop: $("#mapdemo_relatedfeaturename").offset().top,
        }, 500);
    };

    // Add the button to the sidenav content
    let targetDiv = document.querySelector(".mtr-right-container .row.mtr-sticky-panel-content");
    if (targetDiv) {
        targetDiv.insertBefore(button, targetDiv.firstChild);
    }

    // Hook up to all <a> elements in the dialog to re-call this function after timeout
    let links = sidenavContent.querySelectorAll('a');
    links.forEach((link) => {
        link.addEventListener('click', () => {
            setTimeout(addButtonToDialog, 100); // Re-call after a short delay
        });
    });
}


window.maptaskrReady = function() {
    console.log("Maptaskr has Loaded");
    console.log(window.maptaskrPCF);

    //put your event registrations here
    //window.maptaskrPCF.on("ShapeDrawingCompleted", ...)
    window['maptaskrPCF'].on("FeaturesSelected", function(featureArray) {
        setTimeout(addButtonToDialog, 100); // Delay to allow for UI adjustments if necessary
    });

    $(document).ready(function() {
        $("#mapdemo_relatedfeatureid").attr("style", "display:none;");
        $("#mapdemo_relatedfeaturename").attr("readonly", "readonly");
        $("#mapdemo_relatedfeaturename").attr("placeholder", "Please click on the map to select a tenement");
    });
}
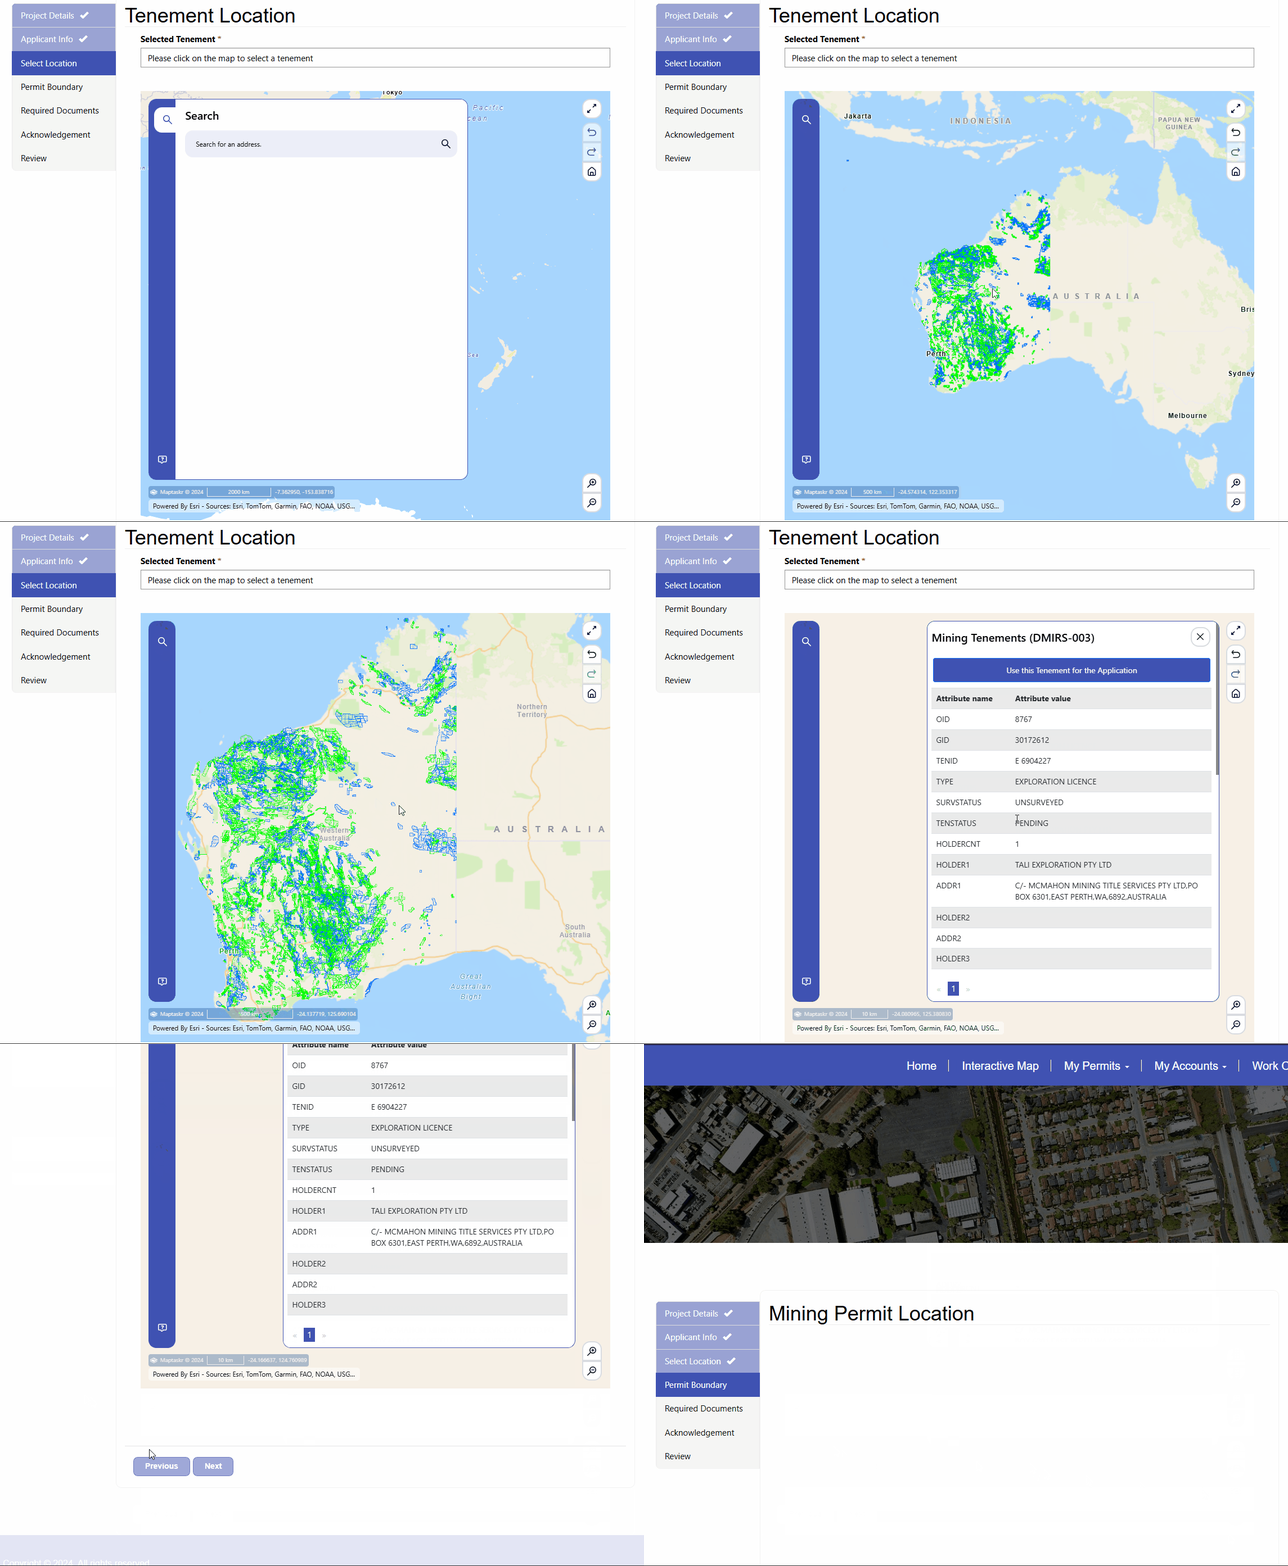
Now let's try it out!
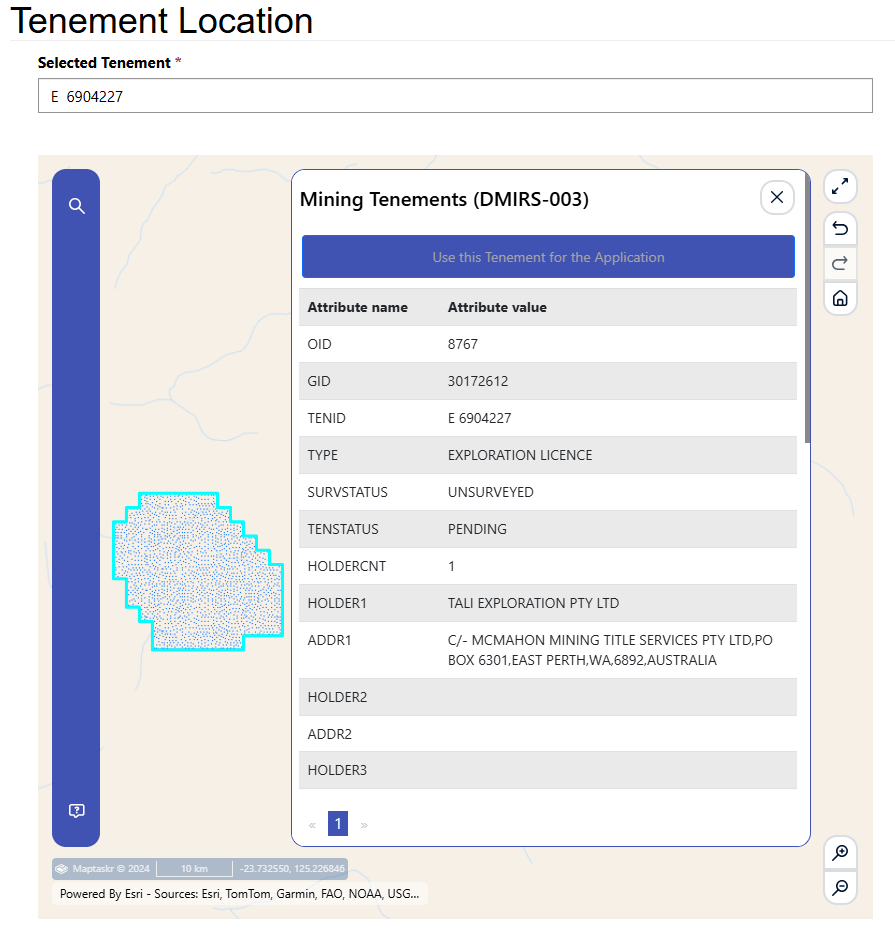
We can select a layer feature on the map which populates the form field.
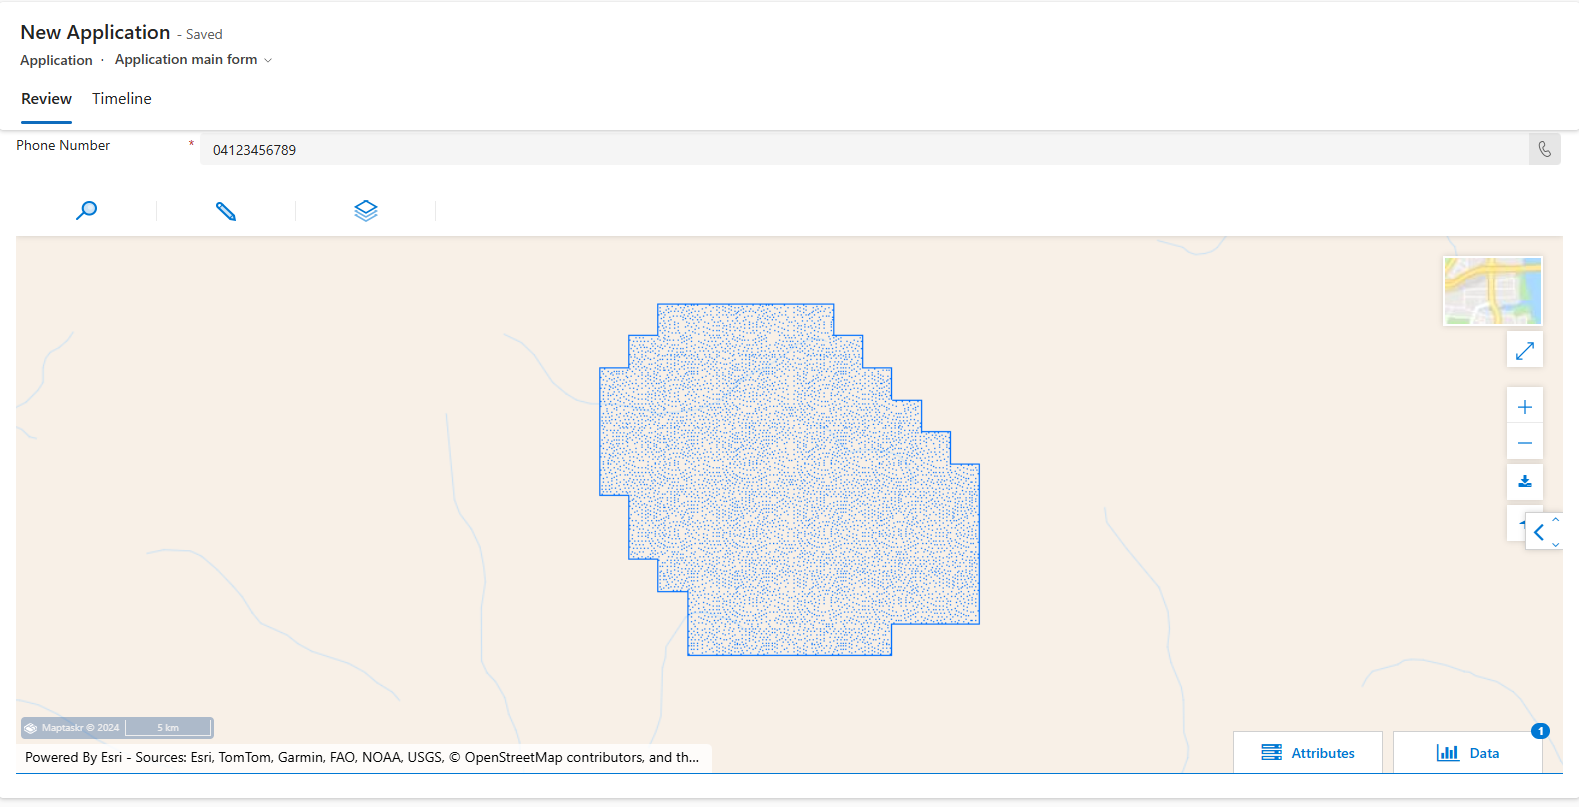
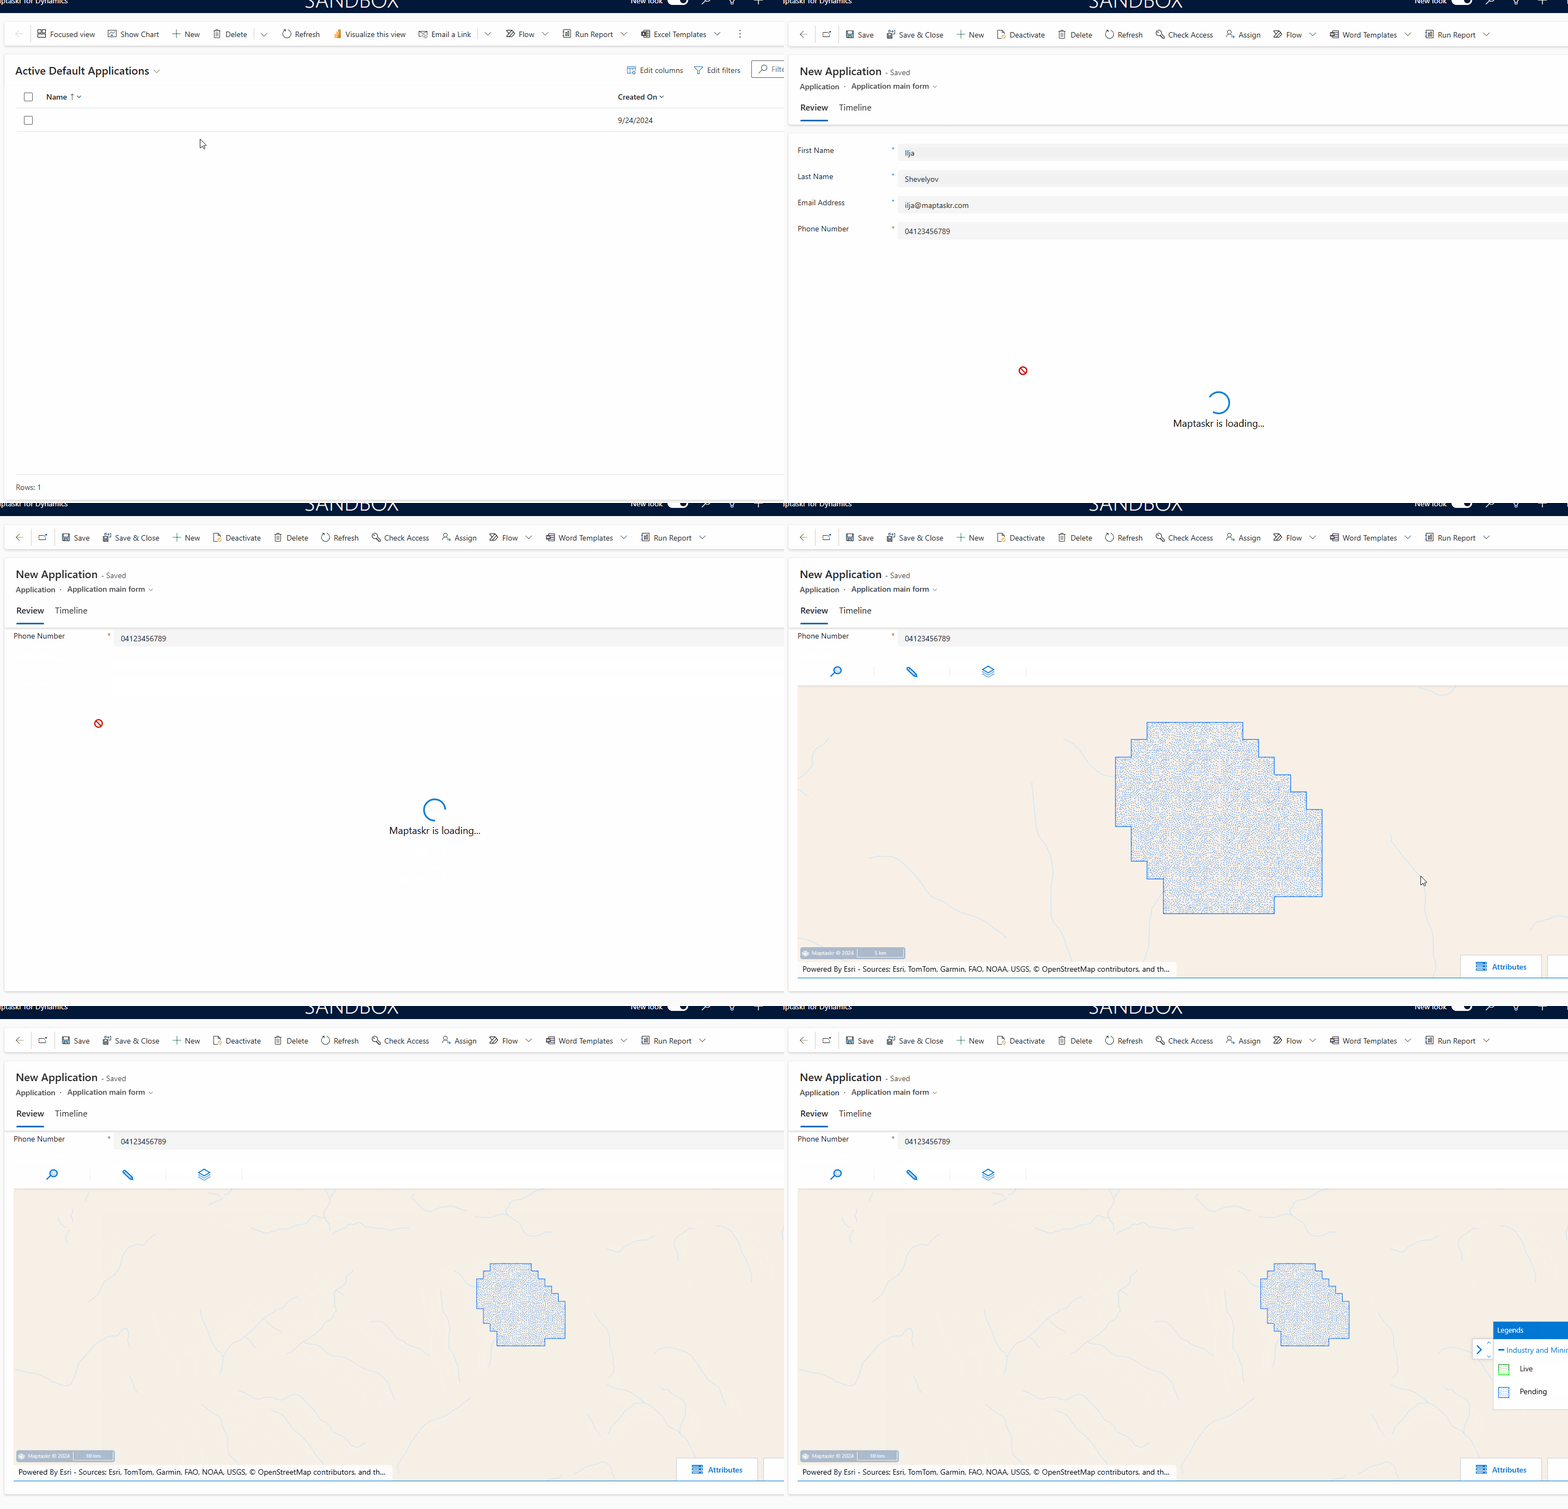
We can also go into D365 and open the record level map for that record (The setup for this is not covered in this tutorial, please refer to Adding Maptaskr to a Custom Entity Form), and due to our DataSource GIS configuration, the layer will automatically filter, render and zoom to the submitted feature.
Lastly, we will cover the custom JavaScript required for a view/edit form. This will grab the feature identifier from the form field, zoom in and highlight the layer feauture.
window.maptaskrReady = function() {
console.log("Maptaskr has Loaded");
console.log(window.maptaskrPCF);
//using the url to the arcgis layer to retrieve the geometry
let oid = $("#mapdemo_relatedfeatureid").val();
let featureUrl = "yourarcgislayerurl/query?where=oid+%3D+" + oid + "&text=&objectIds=&time=&geometry=&geometryType=esriGeometryEnvelope&inSR=&spatialRel=esriSpatialRelIntersects&distance=&units=esriSRUnit_Kilometer&relationParam=&outFields=&returnGeometry=true&returnTrueCurves=false&maxAllowableOffset=&geometryPrecision=&outSR=3857&havingClause=&returnIdsOnly=false&returnCountOnly=false&orderByFields=&groupByFieldsForStatistics=&outStatistics=&returnZ=false&returnM=false&gdbVersion=&historicMoment=&returnDistinctValues=false&resultOffset=&resultRecordCount=&returnExtentOnly=false&datumTransformation=¶meterValues=&rangeValues=&quantizationParameters=&featureEncoding=esriDefault&f=json"
$.ajax(featureUrl).then((data) => {
//Create the Feature from the extent.
let geoJson = {
"type": "Feature",
"properties": {},
"geometry": {
"coordinates": data.features[0].geometry.rings,
"type": "Polygon"
},
"id": 1
}
//create a highlighted feature
maptaskrPCF.addHighlight(geoJson, "#FF0000", "#FF000055");
});
//now let's retrieve the extent of the feature
let url = "yourarcgislayerurl/query?where=oid+%3D+" + oid + "&text=&objectIds=&time=&geometry=&geometryType=esriGeometryEnvelope&inSR=&spatialRel=esriSpatialRelIntersects&distance=&units=esriSRUnit_Kilometer&relationParam=&outFields=&returnGeometry=false&returnTrueCurves=false&maxAllowableOffset=&geometryPrecision=&outSR=3857&havingClause=&returnIdsOnly=false&returnCountOnly=false&orderByFields=&groupByFieldsForStatistics=&outStatistics=&returnZ=false&returnM=false&gdbVersion=&historicMoment=&returnDistinctValues=false&resultOffset=&resultRecordCount=&returnExtentOnly=true&datumTransformation=¶meterValues=&rangeValues=&quantizationParameters=&featureEncoding=esriDefault&f=json"
$.ajax(url).then((data) => {
//create latlong extent for navigation
let minExtent = maptaskrPCF.getLatLongFromCoordinate(data.extent.xmin, data.extent.ymin)
let maxExtent = maptaskrPCF.getLatLongFromCoordinate(data.extent.xmax, data.extent.ymax)
//zoom to the extent
maptaskrPCF.navigateToExtent(minExtent.latitude, minExtent.longitude, maxExtent.latitude, maxExtent.longitude);
});
}
//hide the form fields
$(document).ready(function() {
$("#mapdemo_relatedfeatureid").attr("style", "display:none;");
$("#mapdemo_relatedfeaturename").attr("style", "display:none;");
});
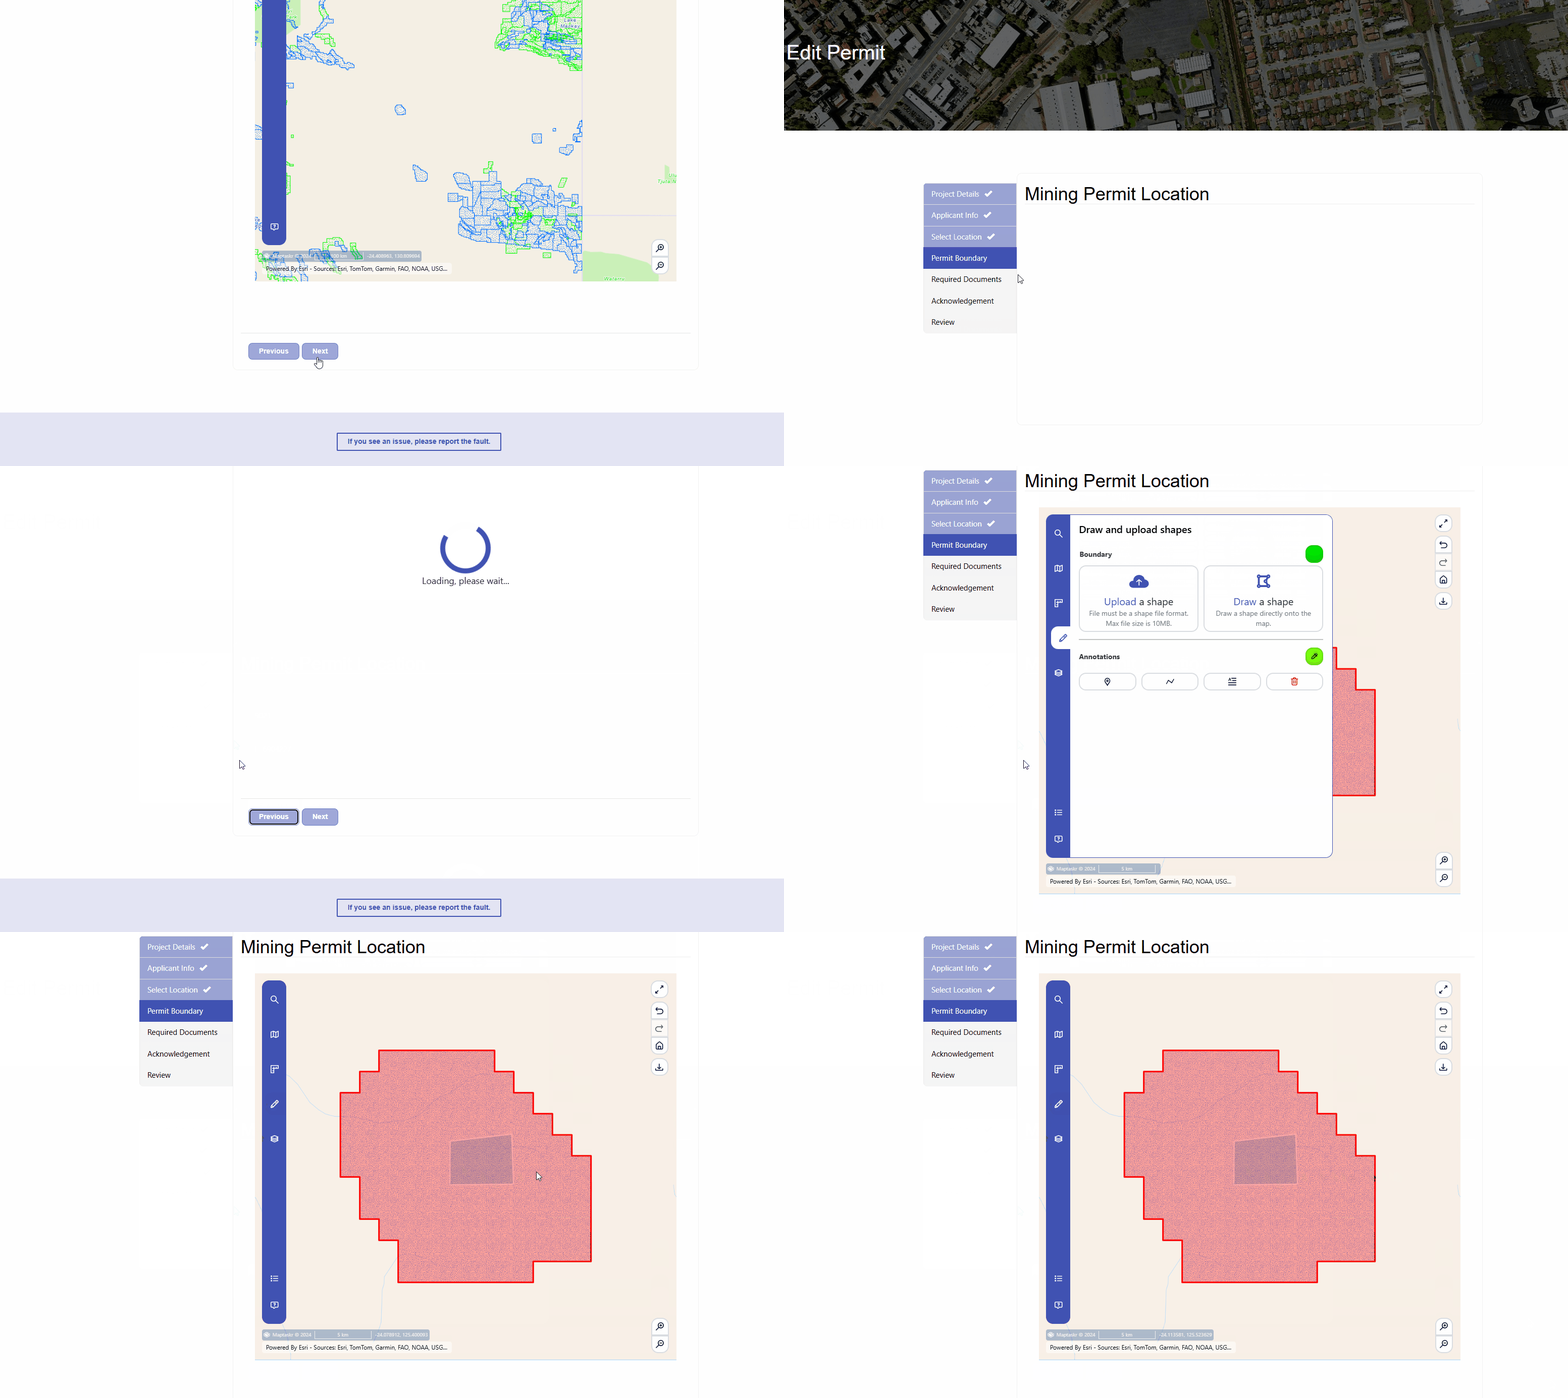
Let's demonstrate the functionality end-to-end!
Portal user submitting a boundary:
Internal user viewing the submission in D365:
Portal user viewing their submission:
