Maptaskr for Power Pages Setup
Upload Solution Files
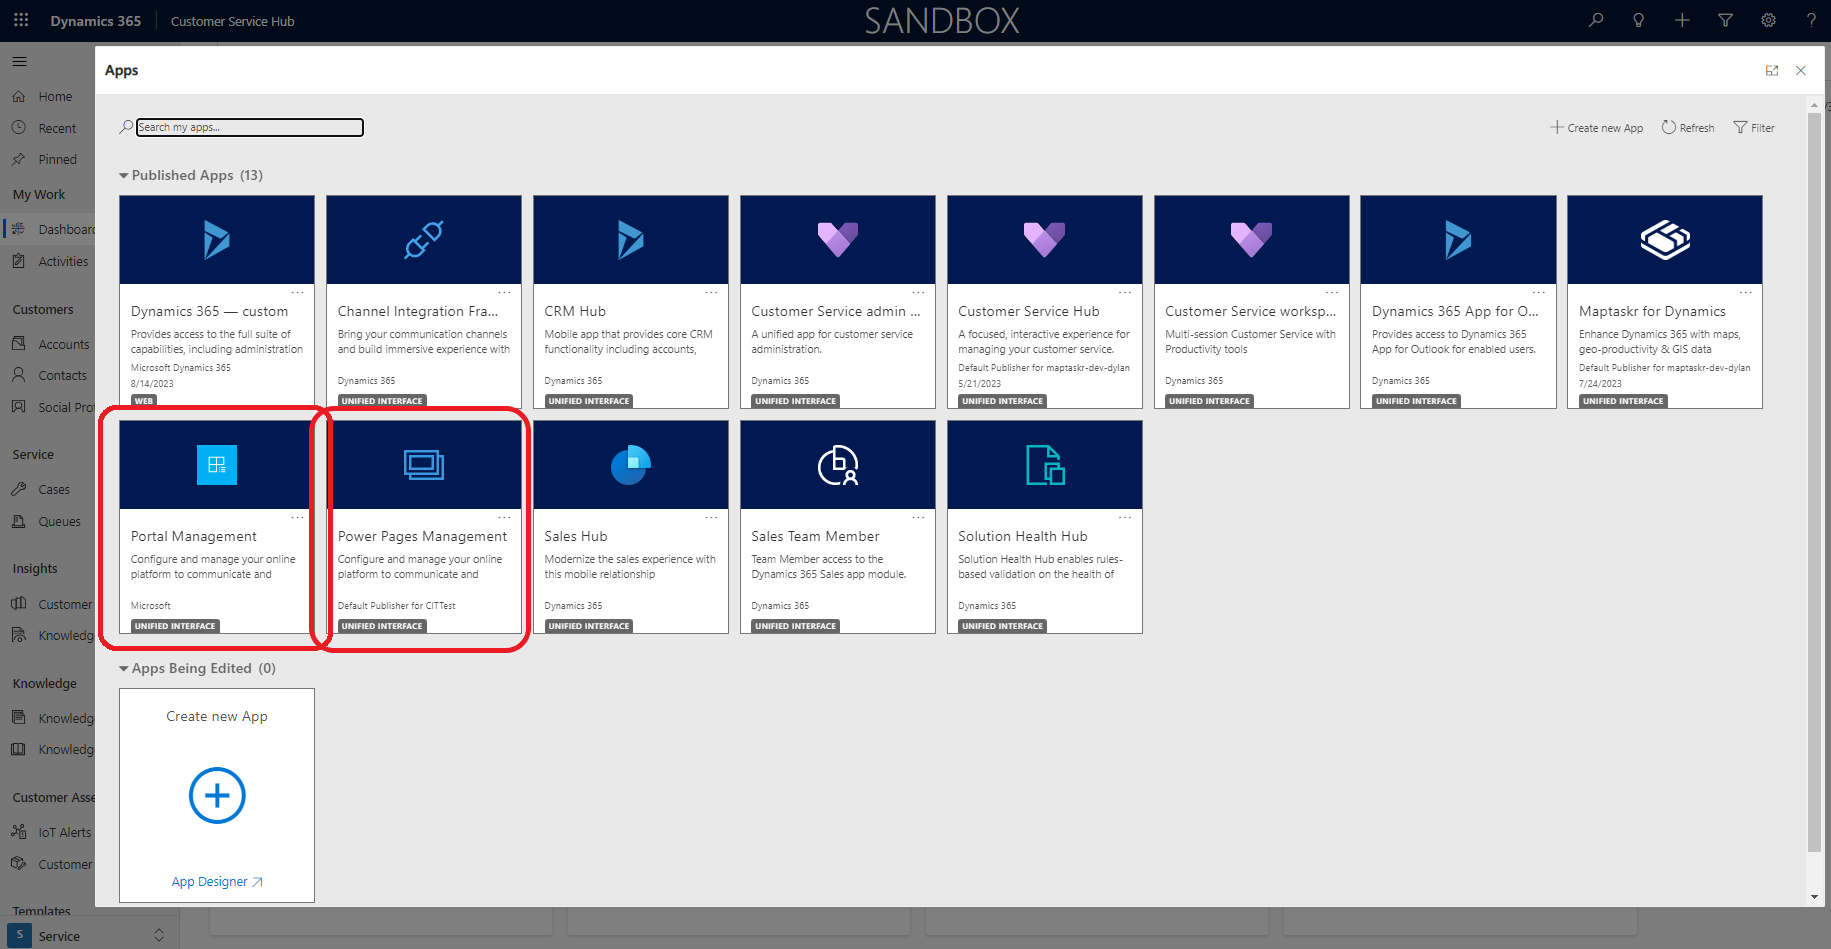
To upload solution file to your portal, navigate to Portal/Power Pages Management App.
-
To do this, click on the Application name in the Dynamics top ribbon next to the
Dynamics 365title as highlighted below.A list of all available applications will be displayed. Please note that your list may not match the example below. Click on
Portal/Power Pages Management.Figure 30: Portal/Power Pages Management App
-
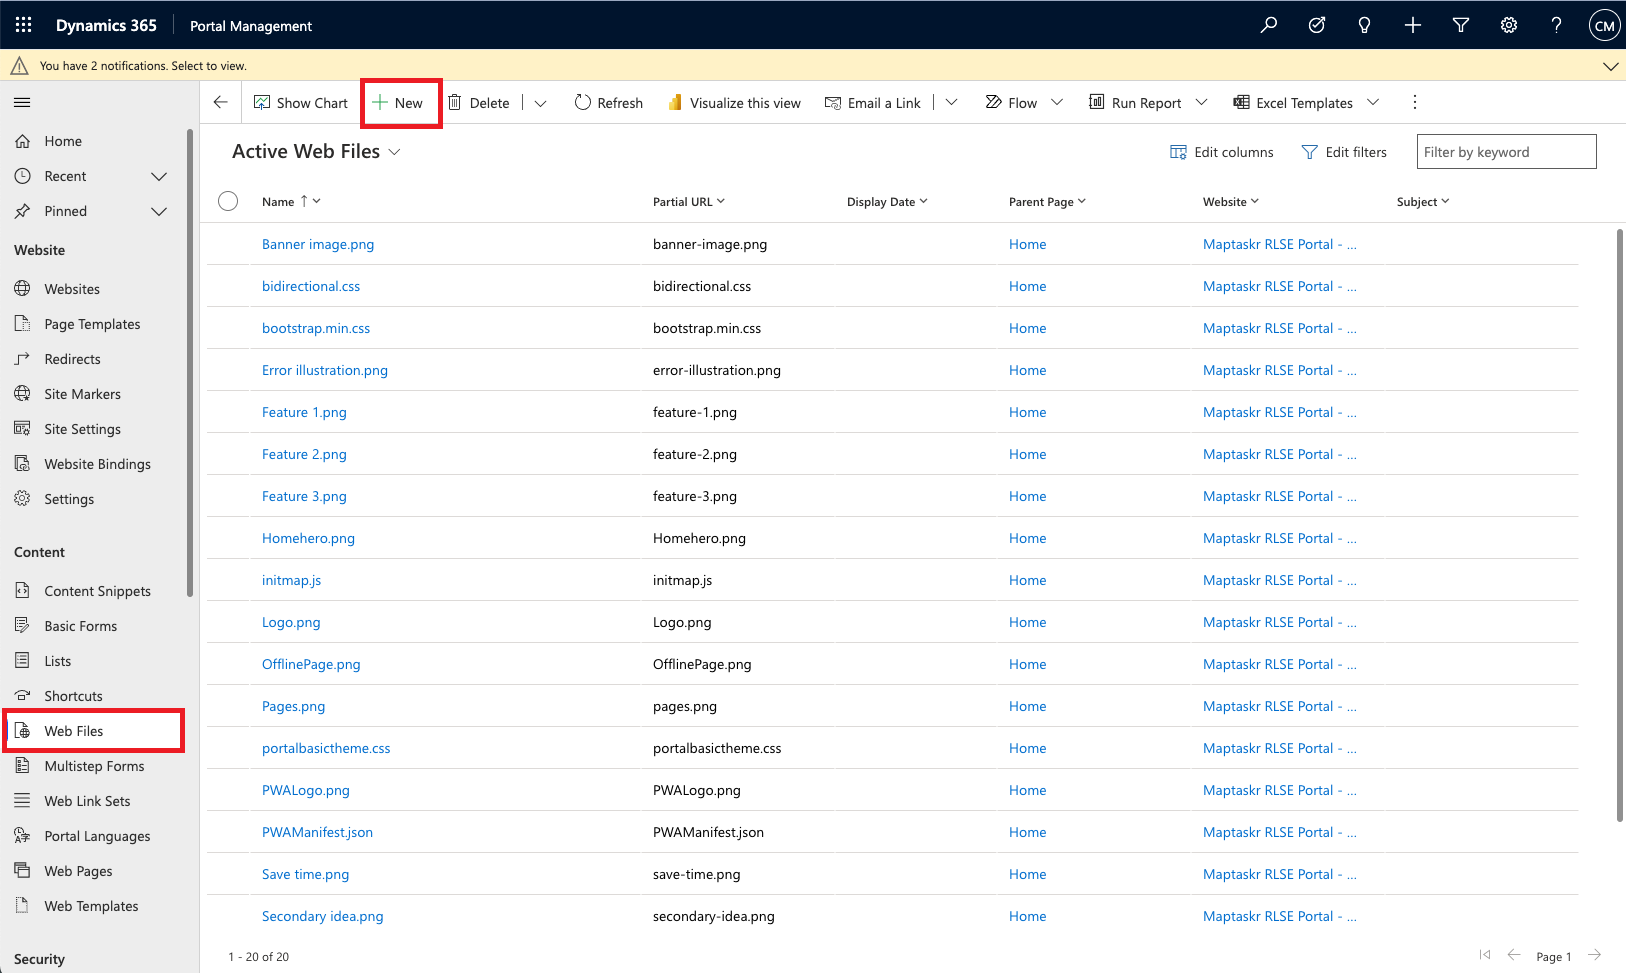
Open
Web Filesunder the Content sectionFigure 31: Portal/Power Pages Management Web Files
-
Create a
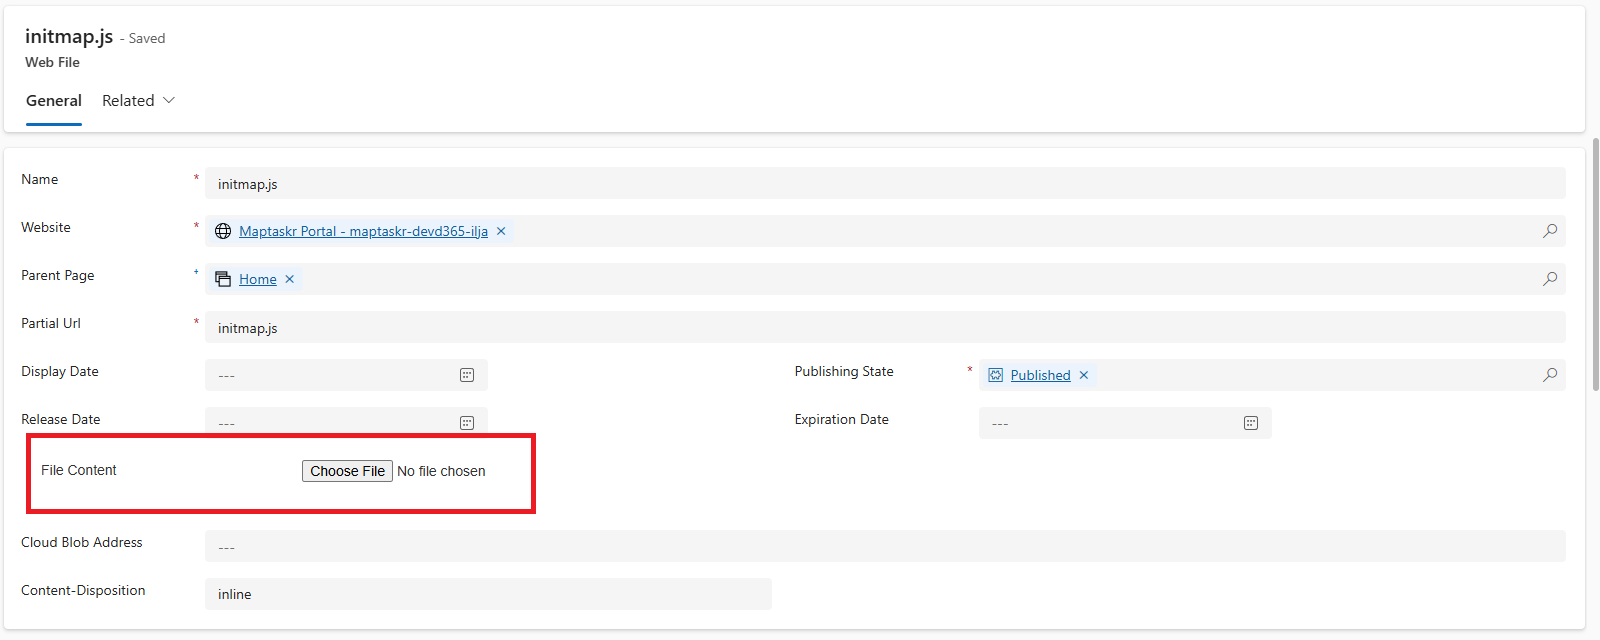
Newrecord with the following details:Table 3: Create new Web File
Column Value Name initmap.js Website *Select your portal website here* Parent Page Home Partial URL initmap.js Publishing State Published
- Portal Management
- Power Pages Management
-
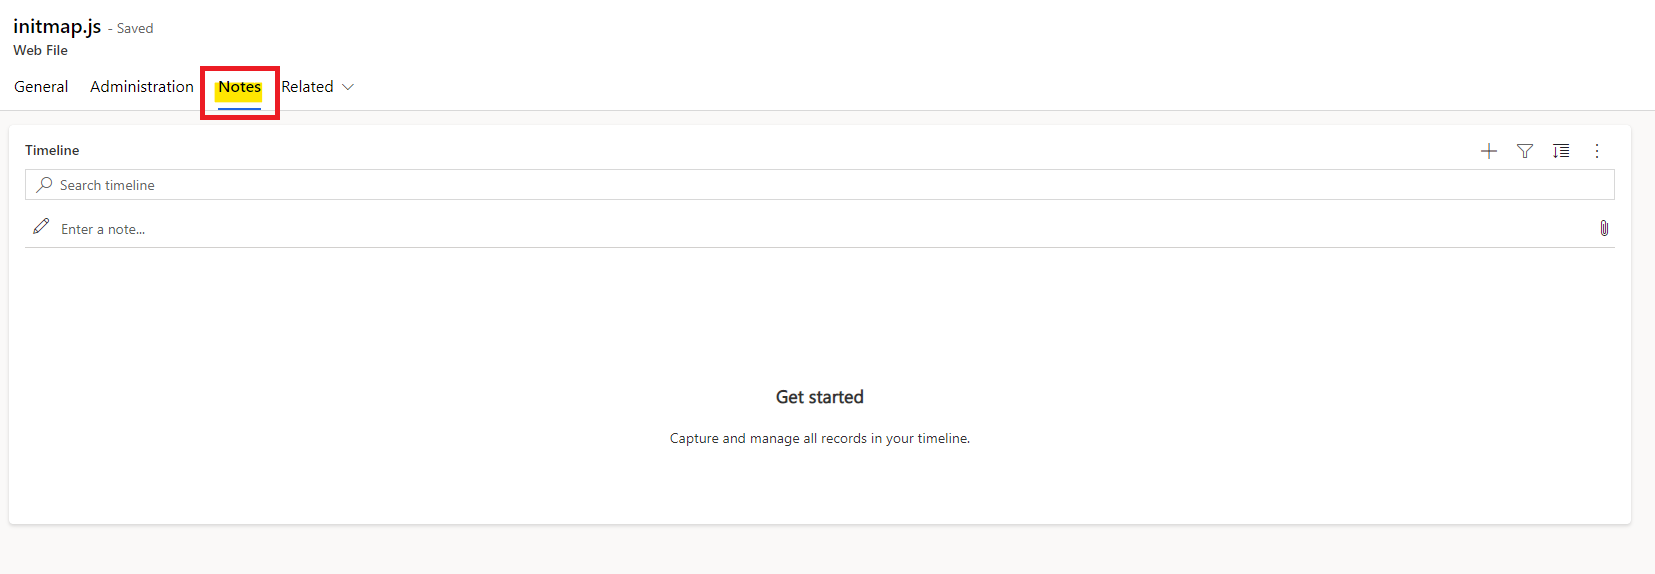
Save the record and then select the
Notestab.Figure 32: Add initmap.js note.
-
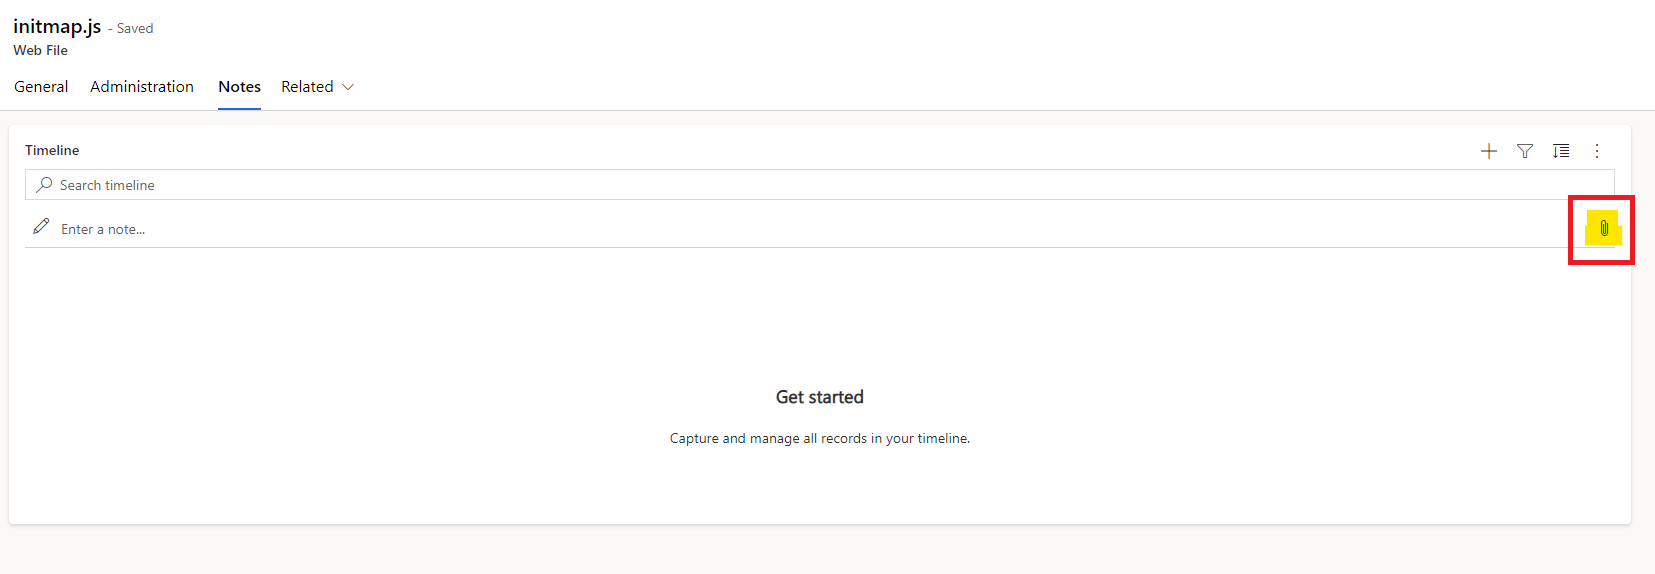
In the Timeline control, click on the paperclip icon to upload a file.
Figure 33: Add note attachment.
-
Upload the file described in the table below. Save and close the record.
Table 4: Solution Files to Upload
File Name Type Source initmap.js JavaScript InitMap Source
-
Save the record and then select the
Choose Filebutton on theFile Contentcolumn.Figure 32: Add initmap.js file.
-
Upload the file described in the table below. Save and close the record.
Table 4: Solution Files to Upload
File Name Type Source initmap.js JavaScript InitMap Source
Entity Lists
Maptaskr Entity Lists are required to be added. To add the relevant Lists
-
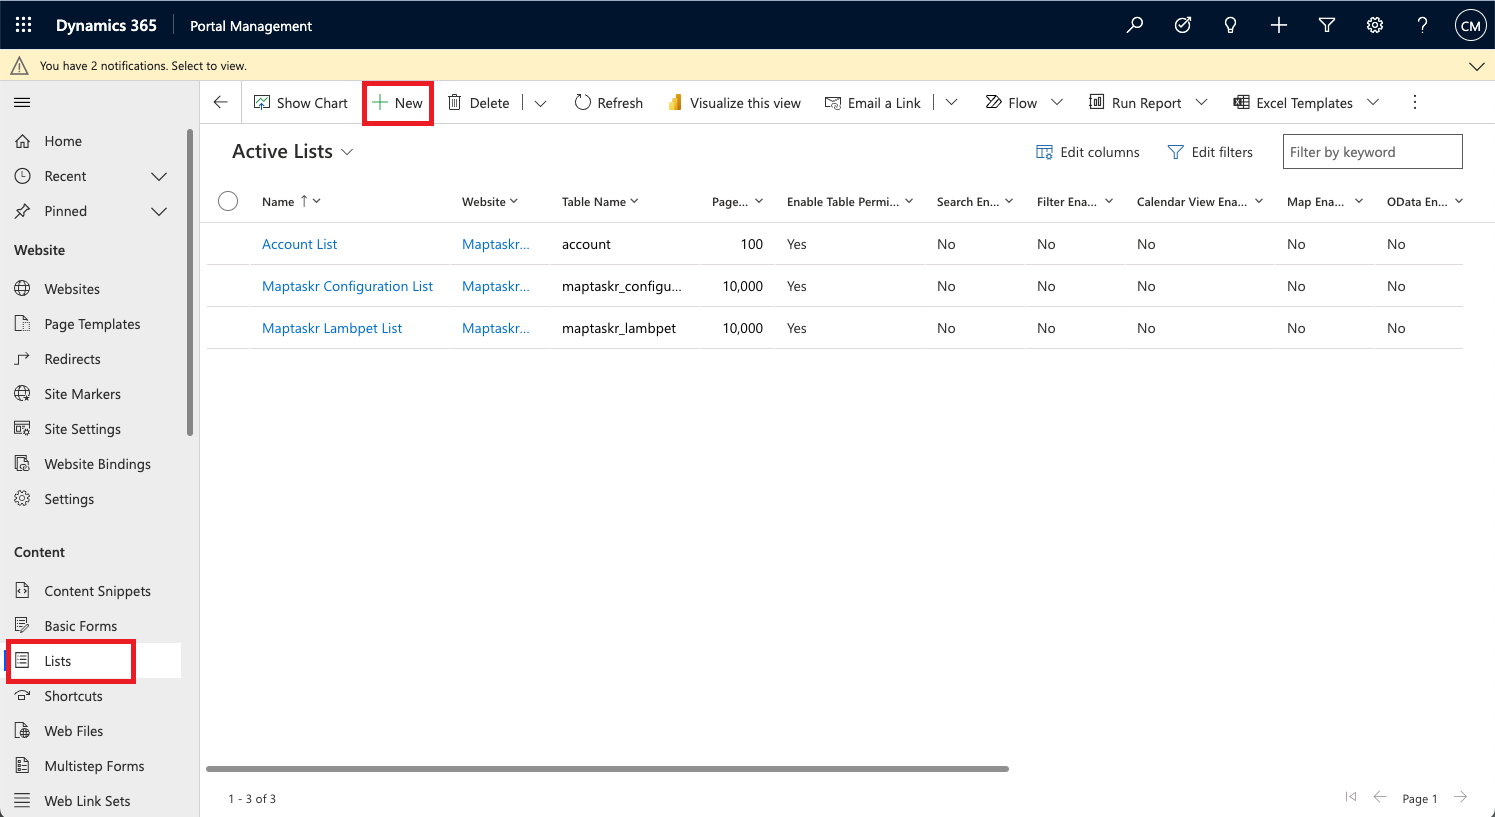
Navigate to
Listsunder the Content section.Figure 34: Portal/Power Pages Management Lists
The following entities needs to be created and enabled under Entity Lists -
Table 5: Entity Lists to Configure
Name Internal Name View Page Size Maptaskr Configuration List Maptaskr_configuration Active Configurations 10,000 Maptaskr Lambpet List Maptaskr_lambpet Active Lambpets 10,000 -
Click
Newto get theNew Listform. Populate the details as shown below.Figure 35 – New Maptaskr Configuration List
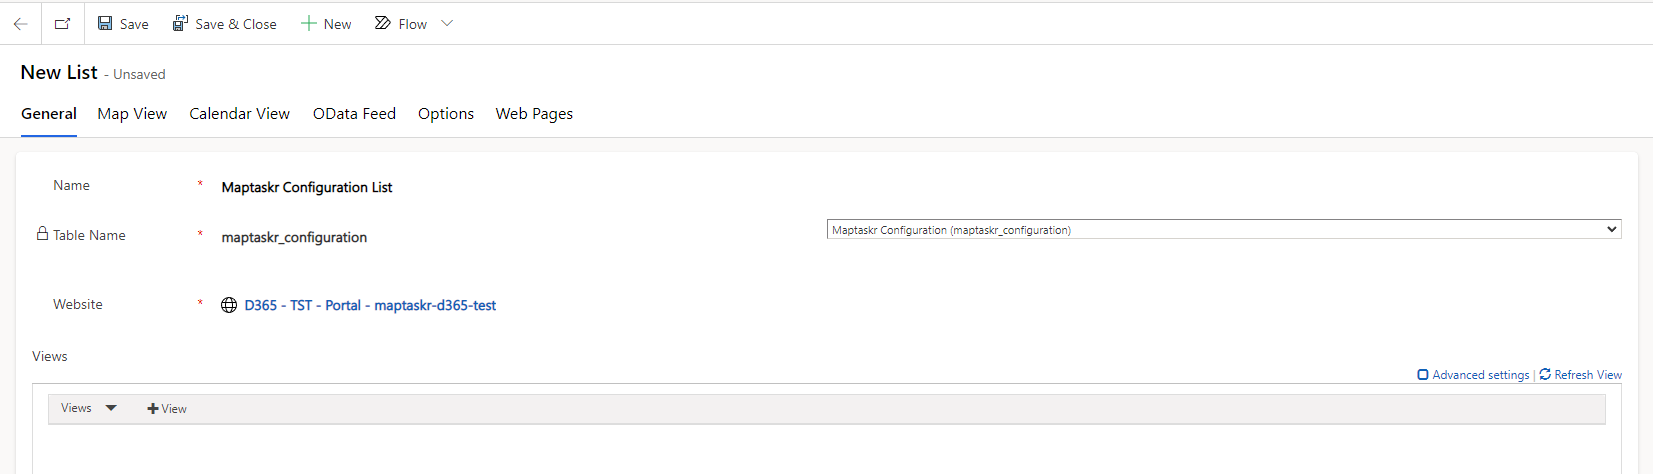 note
noteThe website name here will be the website you are installing Maptaskr on.
-
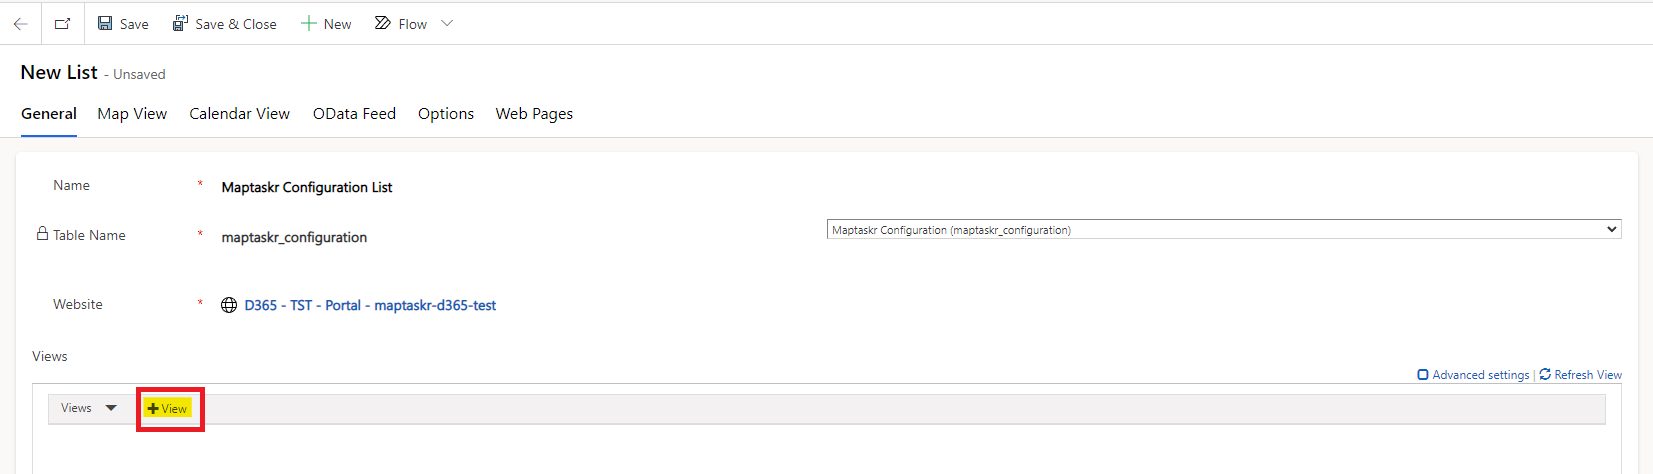
Then to add a view click on the
+ Viewbutton as highlighted below. A new entry will appear and auto-populate with the default view for that table.Figure 36: New List +View Configuration

-
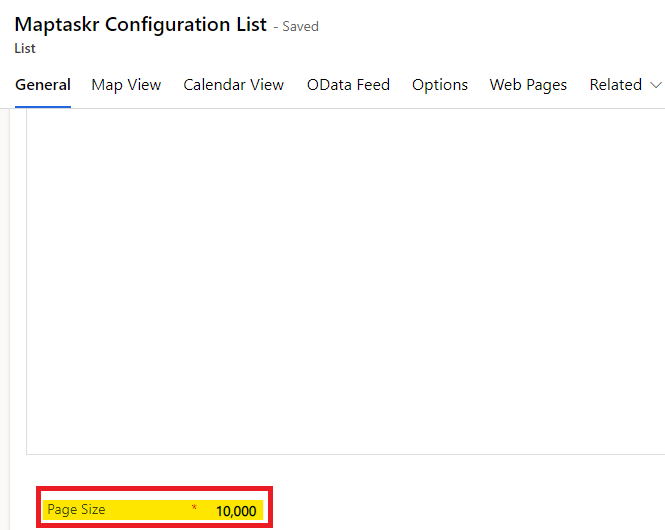
Scroll down to the
Page Sizecolumn and set this one according to the table above.Figure 37: List Page Size Configuration
Site Settings
Maptaskr Site Settings are required to be added to the portal. To add the relevant Site Settings:
-
Navigate to
Site Settingsunder the Website section.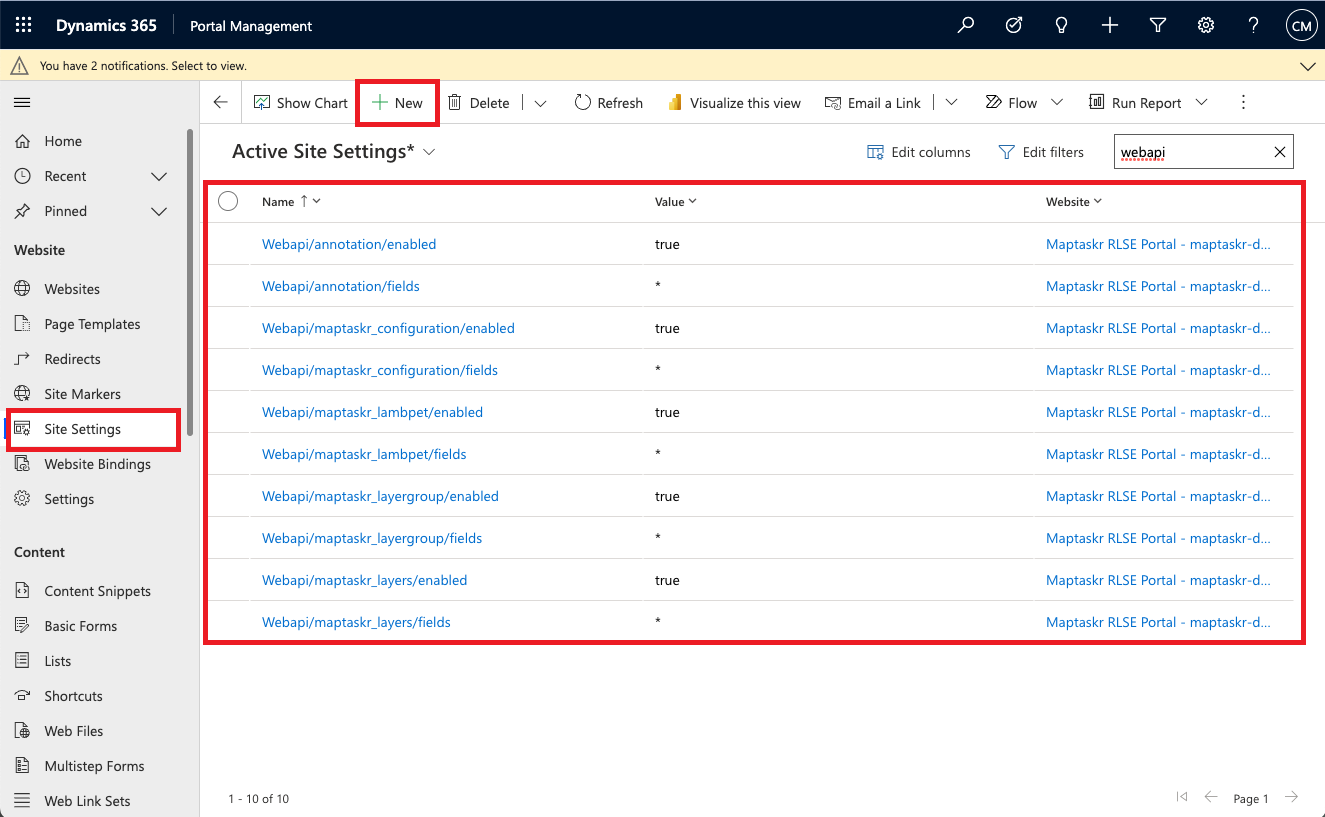
-
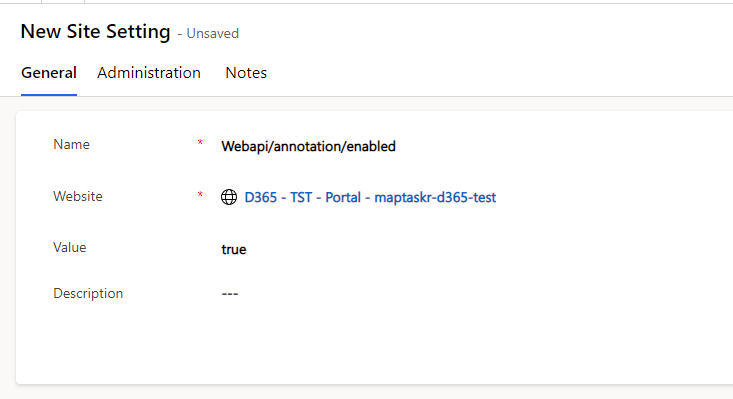
Add the following Site Settings to enable communication with the entities -
Table 6: Site Settings
Name Value Webapi/annotation/enabled true Webapi/annotation/fields * Webapi/maptaskr_configuration/enabled true Webapi/maptaskr_configuration/fields * Webapi/maptaskr_lambpet/enabled true Webapi/maptaskr_lambpet/fields * Webapi/maptaskr_layergroup/enabled true Webapi/maptaskr_layergroup/fields * Webapi/maptaskr_layers/enabled true Webapi/maptaskr_layers/fields * An example of how to populate this record is shown below.
Figure 38: New Site Setting - Example
Web Roles
Web Roles are required to ensure that portal users have permission to map related tables. Newly registered users should be configured to automatically be assigned to the below Web Role(s), this needs to be performed by a Power Apps Administrator. For more information, please refer to the Microsoft documentation for Creating and assigning a Web Role.
Navigate to Web Roles under the Security section.
Figure 39.1: Add Web Role
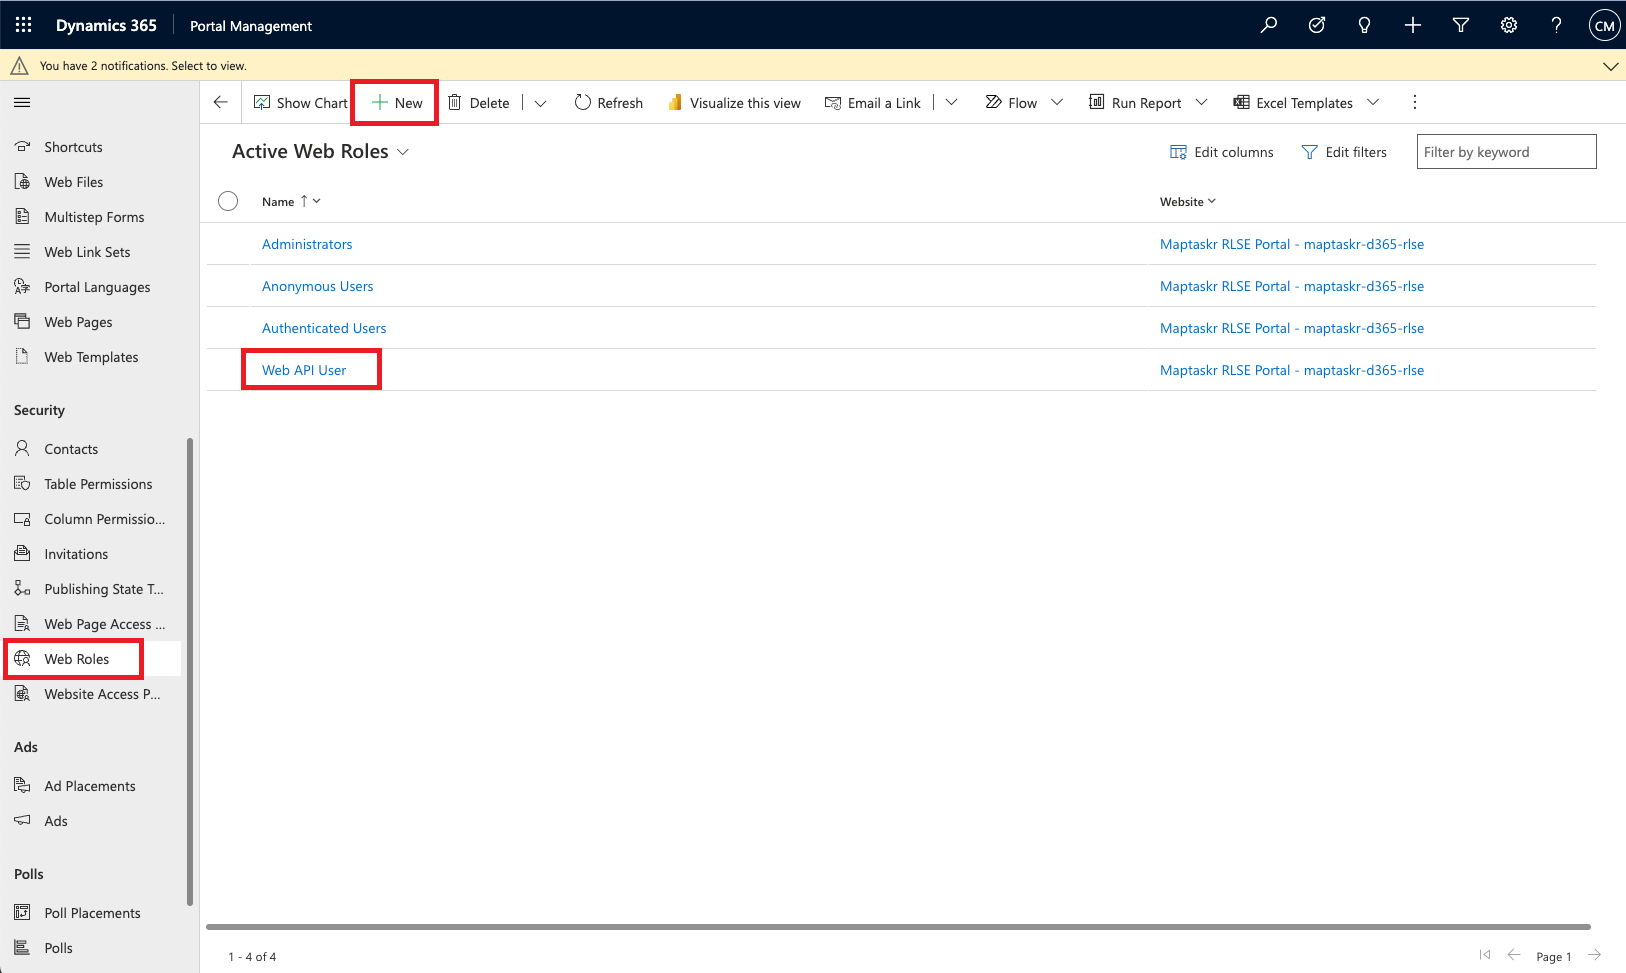
The following web role needs to be added/created:
Table 8: Web API User
| Property | Value |
|---|---|
| Name | Web API User |
| Authenticated Users Role | Yes |
| Anonymous Users Role | No |
Figure 39.2: New Web Role Creation
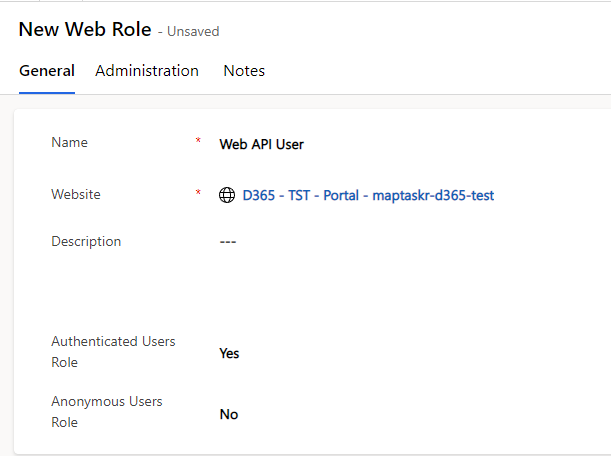
Once you've entered the detail save and close the new active web role.
Table Permissions
Navigate to Table Permissions under the Security section. From here you will need to create various table permissions as shown below.
Figure 40: Table Permissions
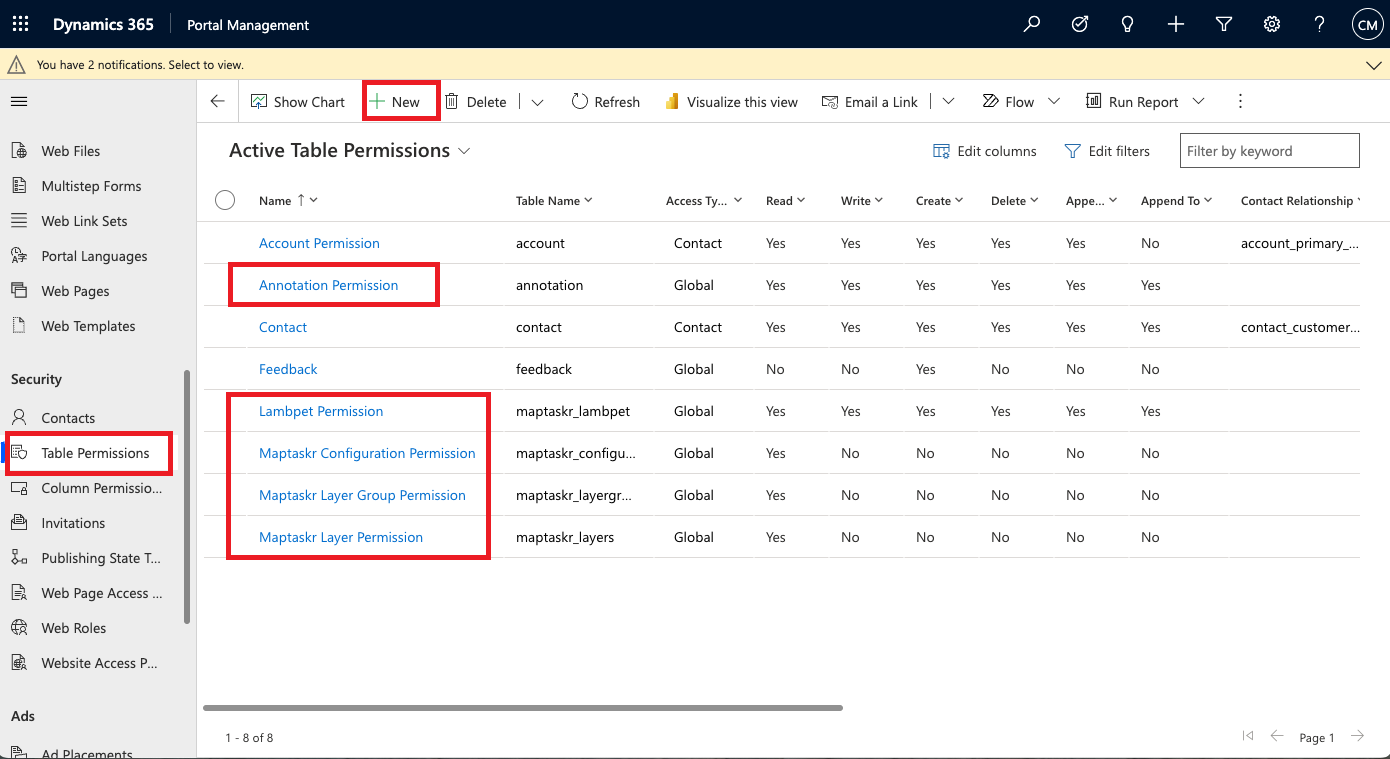
Figure 41: New Table Permissions screen

The following five (5) table permissions are required to be created:
- Annotation Permission
- Lambpet Permission
- Maptaskr Configuration Permission
- Maptaskr Layer Group Permission
- Maptaskr Layer Permission
When creating table permissions, the ability to add Web Roles is only available after saving the record.
The table below gives an overview of the settings required for each table permission.
Table 9: Table Permissions Overview
| Name | Table Name | Access Type | Privileges | Web Roles |
|---|---|---|---|---|
| Annotation Permission | annotation | Global | Read, Write, Create, Delete, Append and Append To | Web API User |
| Lambpet Permission | maptaskr_lambpet | Global | Read, Write, Create, Delete, Append and Append To | Authenticated Users, Web API User |
| Maptaskr Configuration Permission | maptaskr_configuration | Global | Read | Web API User |
| Maptaskr Layer Group Permission | maptaskr_layergroup | Global | Read | Web API User |
| Maptaskr Layer Permission | maptaskr_layers | Global | Read | Web API User |
Add Table Permissions to Web Roles
Once the permissions in section Table Permissions have been created, they are required to be added to the Web API User previously created.
- Portal Management
- Power Pages Management
-
Head back to
Web Rolesand select theWeb API role.Figure 42: Add Table Permissions to Web Role.
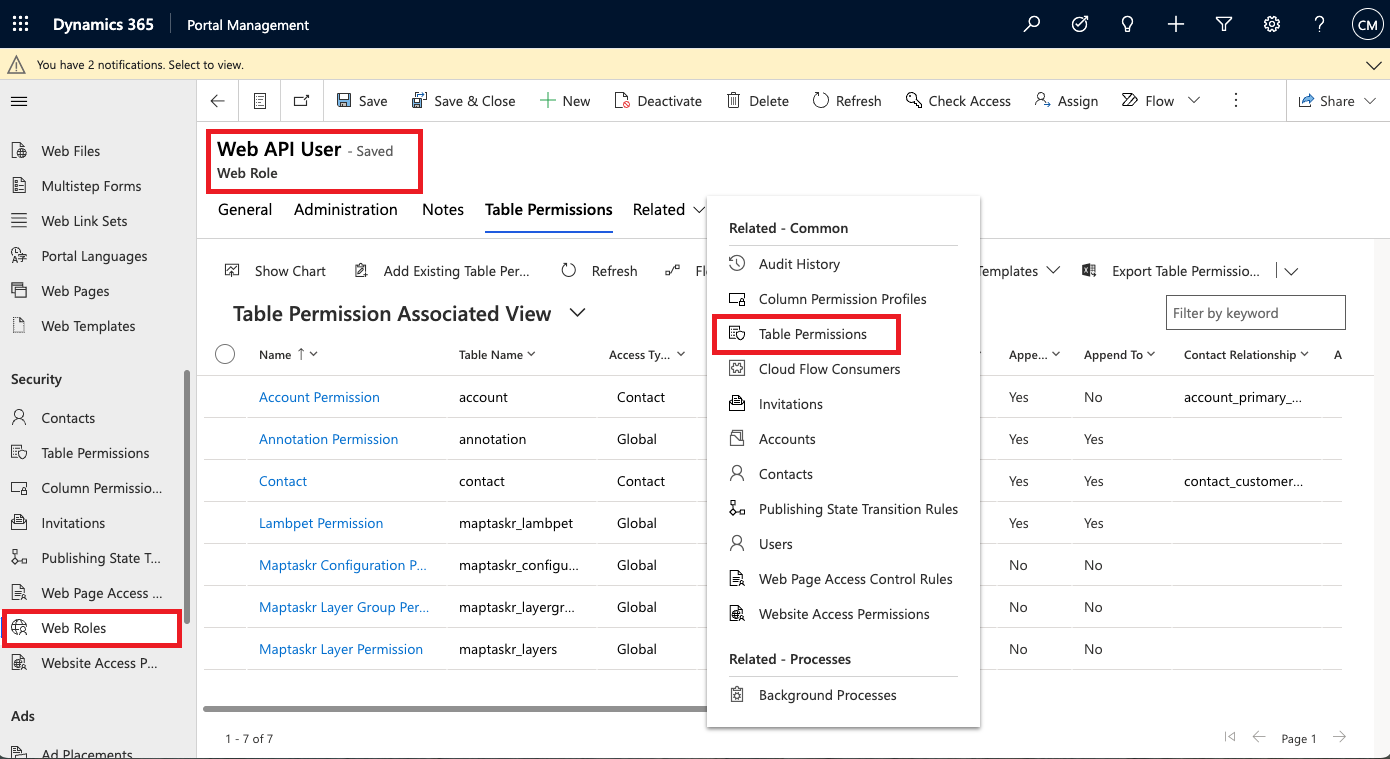
-
From here go to the
Relatedtab section and selectTable Permissions -
Add the following permissions to
Web API Useras shown in Figure 42: Add Table Permissions to Web Role- Annotation Permission,
- Case Permission,
- Lambpet Permission,
- Maptaskr Configuration Permission,
- Maptaskr Layer Group Permission and
- Maptaskr Layer Permission
-
Within the newly created Table Permission record form, scroll down to the
Web Rolessubgrid.Figure 42: Add Web Role to Table Permissions.
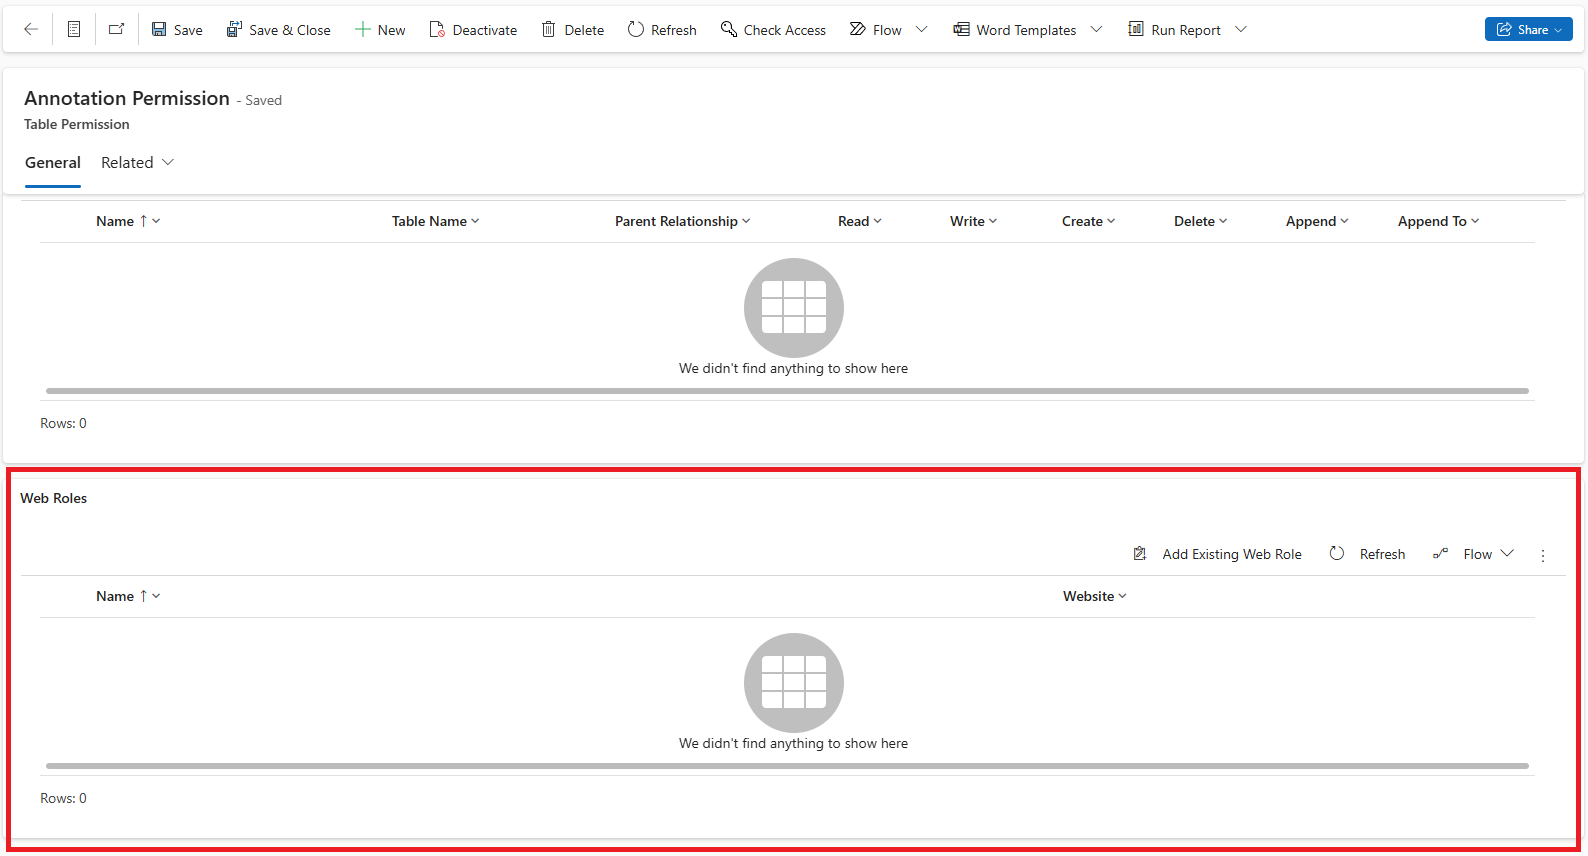
-
Select
Add Existing Web Role. -
Search for
Web API Userin the Lookup Records tab that has popped up on the right-hand side of the screen, select it and clickAdd. The pop-up should disappear and theWeb Rolessubgrid should now display theWeb API Userrole. -
Repeat steps 1-3 for the following tables:
- Annotation Permission,
- Case Permission,
- Lambpet Permission,
- Maptaskr Configuration Permission,
- Maptaskr Layer Group Permission and
- Maptaskr Layer Permission
Web Templates
Navigate to Web Templates under the Content section. Here you will need to create multiple Web Templates as shown below.
Figure 43: Maptaskr Web Templates
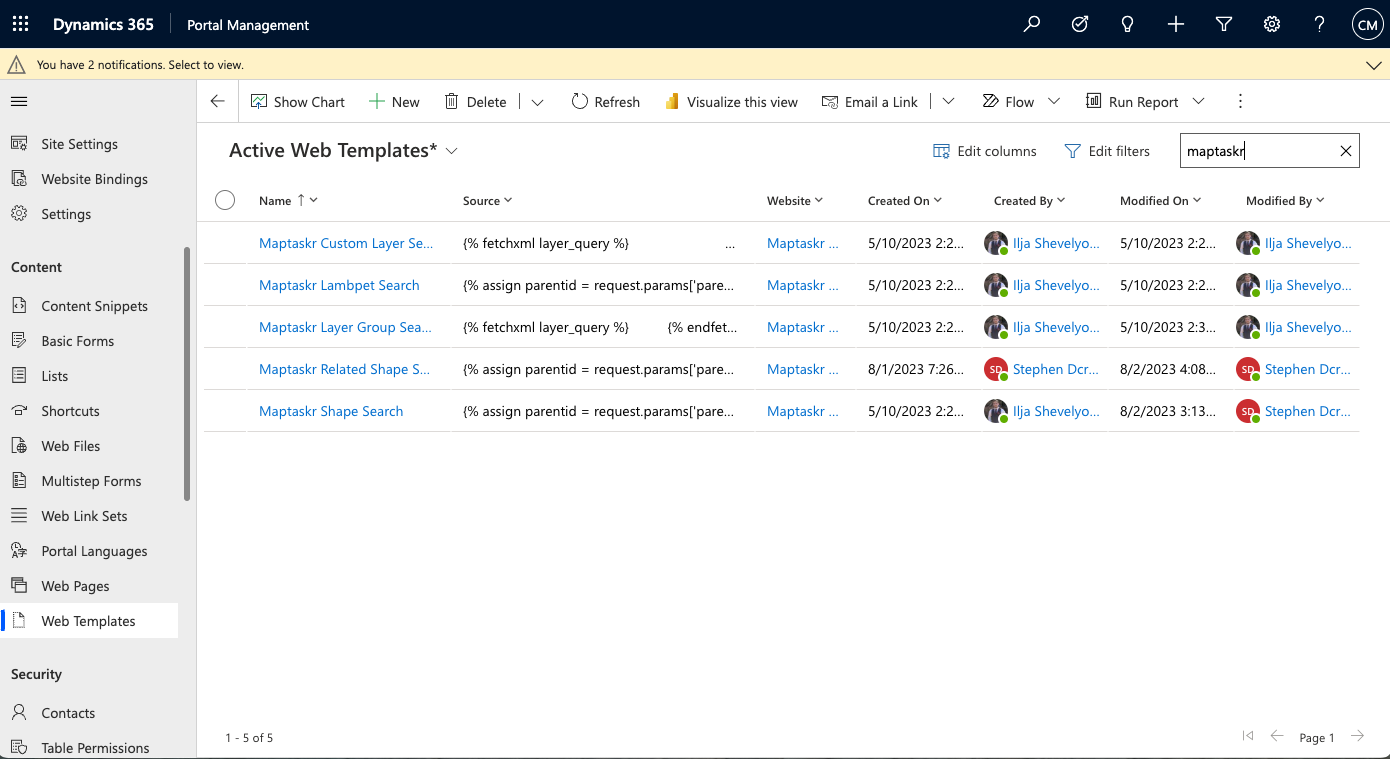
The table below shows Maptaskr Web Templates to add, including the name and source of each of the Maptaskr Web Templates that are required to be created. Please note that there are some specific considerations for the Maptaskr Custom Layer Search template detailed in the Maptaskr Custom Layer Search section.
Table 10: Maptaskr Web Templates to add.
| Web Template Name | Source |
|---|---|
| Maptaskr Custom Layer Search | See Appendix A: Web Templates |
| Maptaskr Lambpet Search | |
| Maptaskr Layer Group Search | |
| Maptaskr Related Shape Search | |
| Maptaskr Shape Search | |
| Maptaskr Dataverse Layer |
Figure 44 – Web Template example source record.
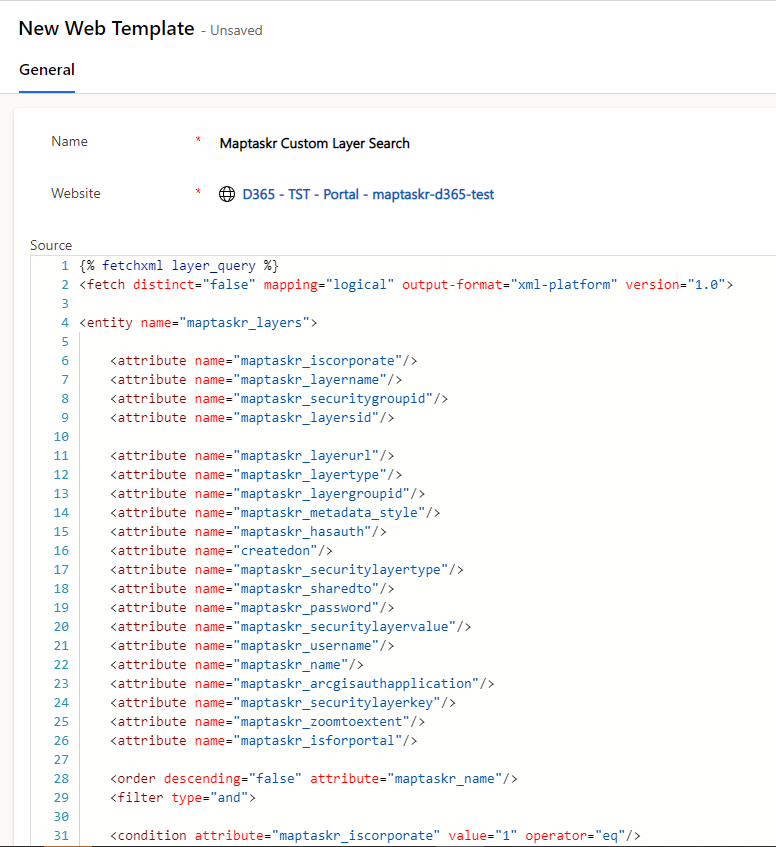
Maptaskr Custom Layer Search
Due to differences between the Maptaskr Layer table that comes with the Maptaskr Core solution you will need to be mindful of the following fields in your template.
- Core Solution version 2.2.1.58 and earlier DO NOT INCLUDE Static Token OR Additional Parameter fields in your template.
- Core Solution version 2.2.1.59 up to 2.2.1.63 DOES NOT INCLUDE Additional Parameters field in your template.
- Core Solution version 2.2.1.64 and up you can use both fields in your template without issue.
Updating other Web Templates
The following information applies to out of the box installations of the Power Apps Power Pages/Portals.
Please keep in mind that if you have a highly customized setup, Power Apps Administrators will need to configure Web Templates for Maptaskr. This can be done by updating the default Web Templates or by creating new Web Templates for specific forms.
-
Navigate to the
Active Web Templateslist under the Content section.Figure 45: Edit Web Template
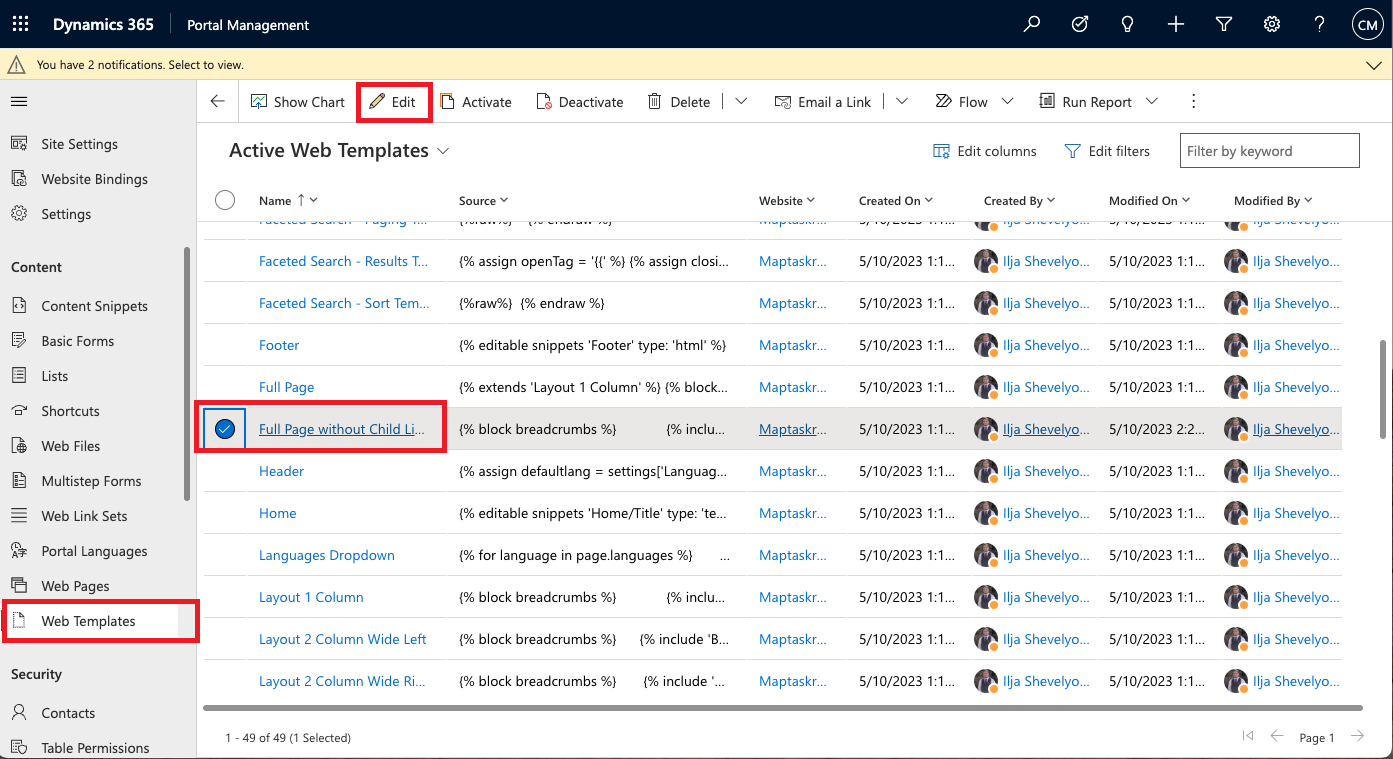
-
Edit
Full Page without Child Links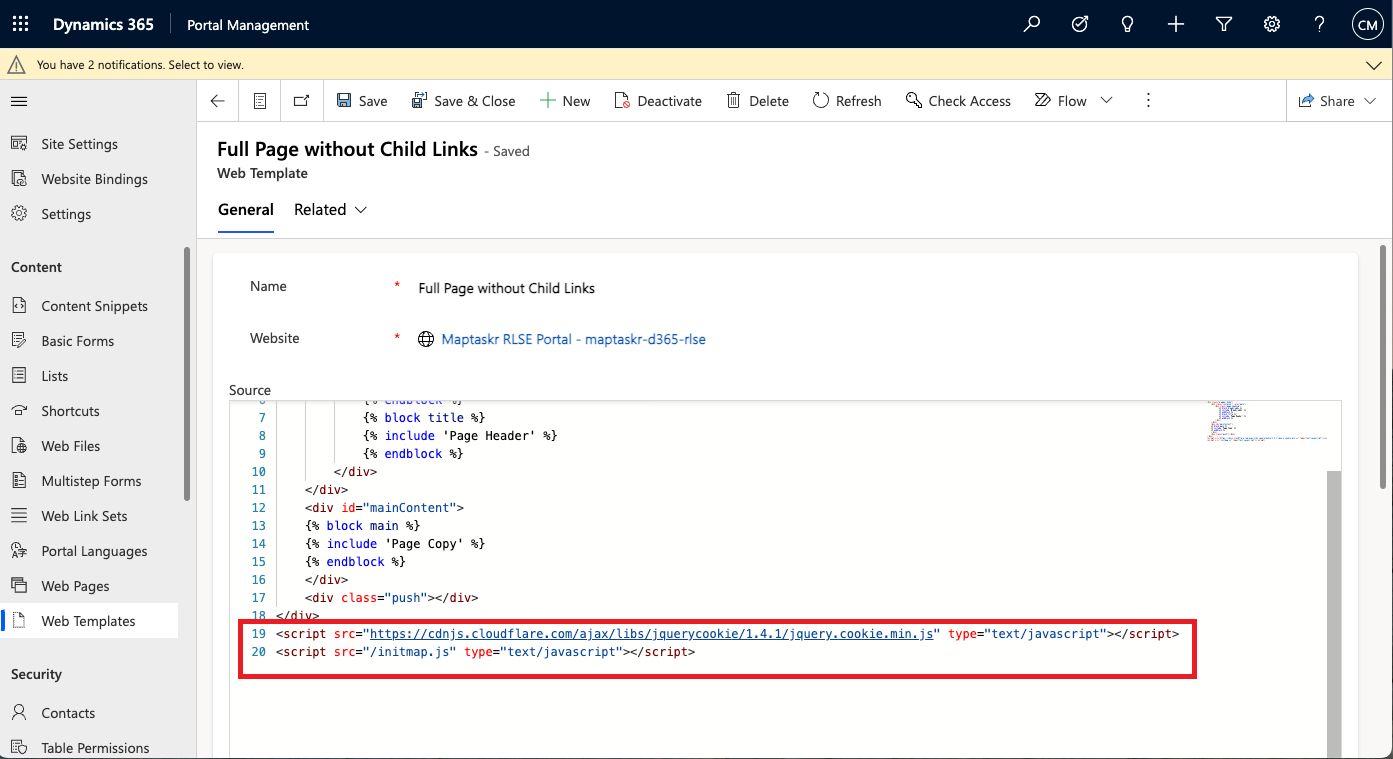
-
Update the following template source to include reference to initmap.js–
noteReplace only the highlighted area with correct reference filename.
<script
    src="https://cdnjs.cloudflare.com/ajax/libs/jquery-cookie/1.4.1/jquery.cookie.min.js"
    type="text/javascript">
</script>
<script
    src="/initmap.js"
    type="text/javascript">
</script>
Page Templates
The following five (5) Maptaskr Page Templates are required to be created;
- Maptaskr Custom Layer Search
- Maptaskr Lambpet Search
- Maptaskr Shape Search
- Maptaskr Layer Group Search
- Maptaskr Related Shape Search
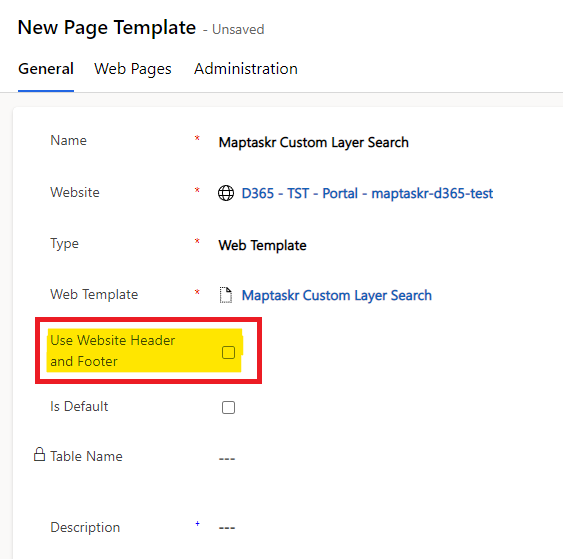
Please ensure you untick the "Use Website Header and Footer" checkbox when creating the Page Templates.
Figure 46: Untick "Use Website Header and Footer" checkbox.
-
Navigate to
Page Templatesunder the Website section and clickNewto create the Page Templates as specified in Table 11: Maptaskr Page Templates.Figure 47: Page Templates
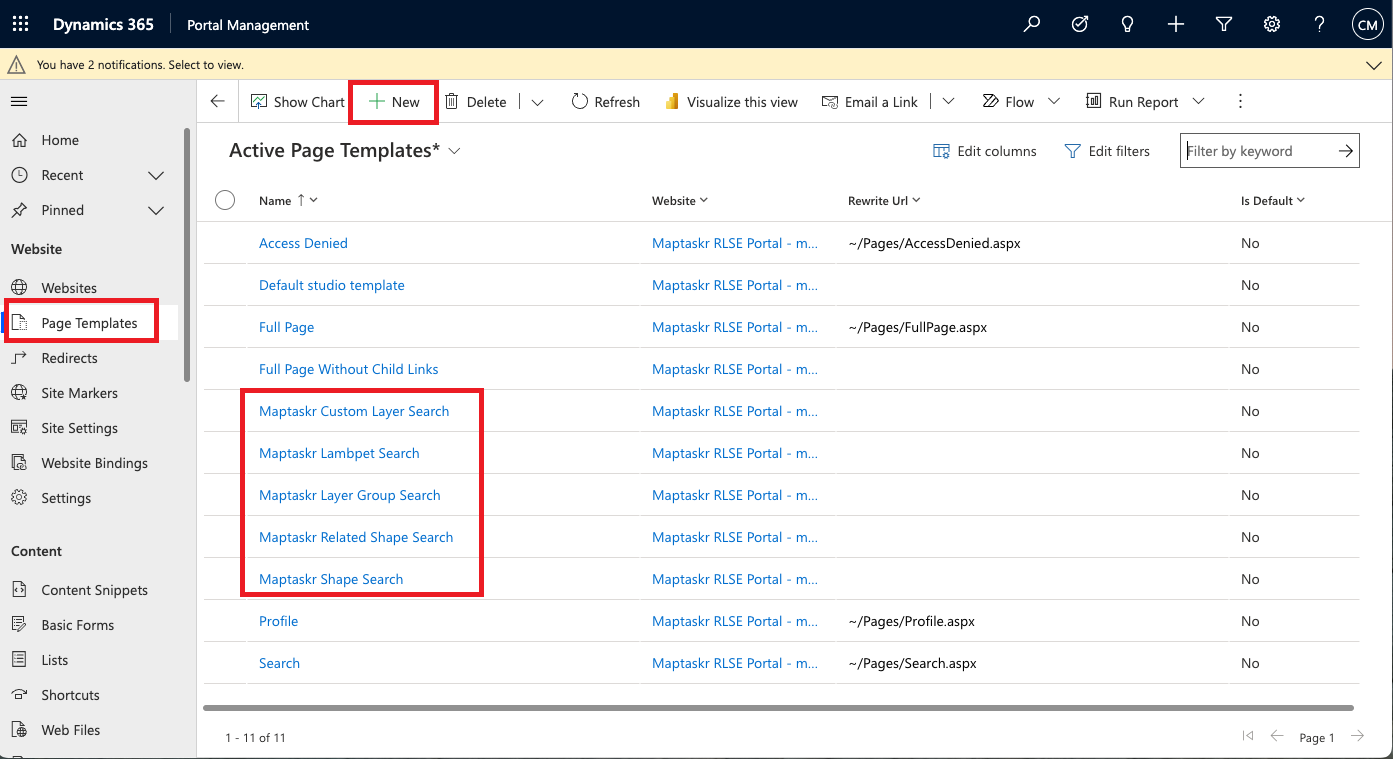
Table 11: Maptaskr Page Templates
Name Type Web Template Use Website Header and Footer Maptaskr Custom Layer Search Web Template Maptaskr Custom Layer Search False Maptaskr Lambpet Search Web Template Maptaskr Lambpet Search False Maptaskr Shape Search Web Template Maptaskr Shape Search False Maptaskr Layer Group Search Web Template Maptaskr Layer Group Search False Maptaskr Related Shape Search Web Template Maptaskr Related Shape Search False
Web Pages
The following five (5) Maptaskr Web Pages are required to be created;
- Maptaskr Custom Layer Search
- Maptaskr Lambpet Search
- Maptaskr Shape Search
- Maptaskr Layer Group Search
- Maptaskr Related Shape Search
-
Navigate to
Web Pagesunder the Content section. ClickAddand create the required pages as outlined in Table 12: Maptaskr Web Pages to create.Figure 48: Maptaskr Web Pages
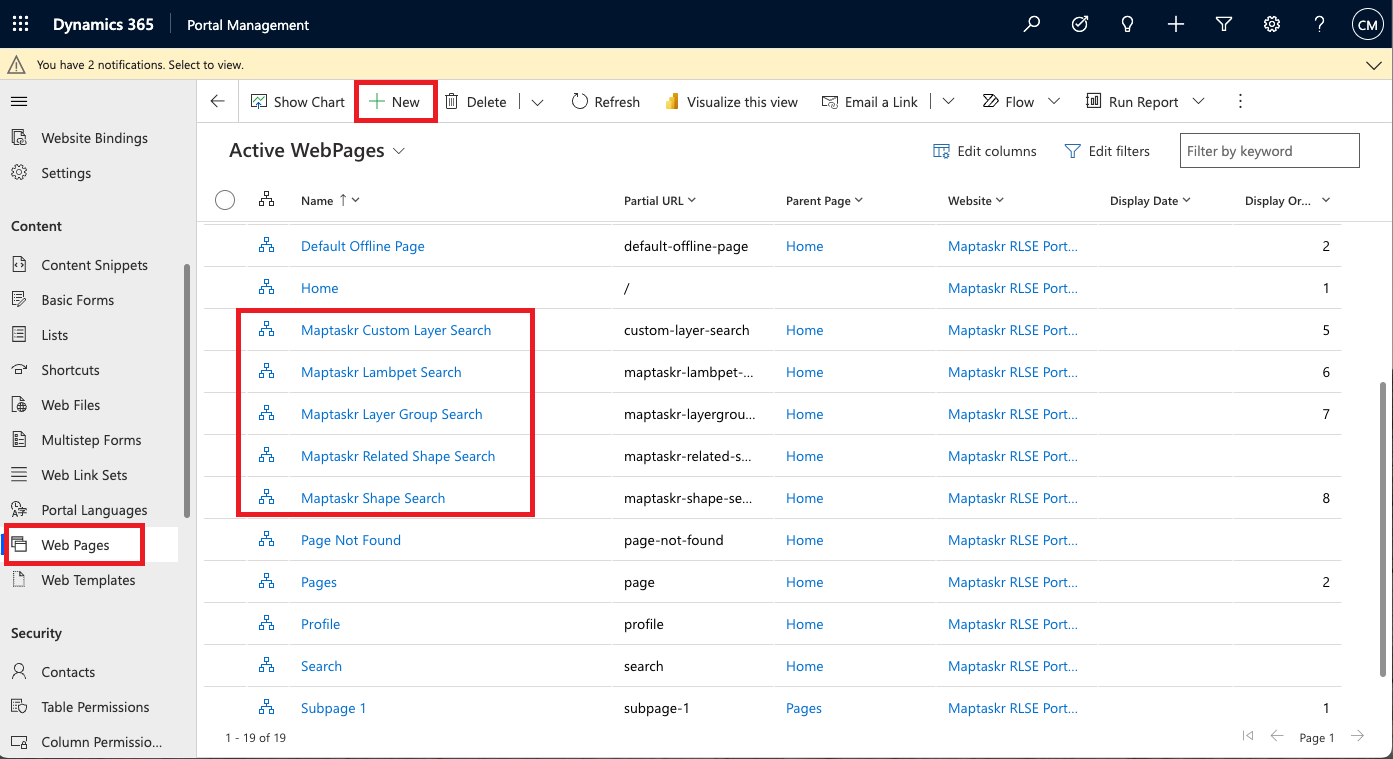
Table 12: Maptaskr Web Pages to create.
Name Parent Page Partial-URL Page Template Publishing State Maptaskr Custom Layer Search Home custom-layer-search Maptaskr Custom Layer Search Published Maptaskr Lambpet Search Home maptaskr-lambpet-search Maptaskr Lambpet Search Published Maptaskr Shape Search Home maptaskr-shape-search Maptaskr Shape Search Published Maptaskr Layer Group Search Home maptaskr-layergroups Maptaskr Layer Group Search Published Maptaskr Related Shape Search Home maptaskr-related-shape-search Maptaskr Related Shape Search Published
Advanced/Multistep & Basic Forms
To enable shape submission functionality from the Maptaskr PCF in forms, a small JavaScript code snippet needs to be included as part of the form step question.
Forms within Dynamics 365 needs to be configured, and a new section needs to be created. For more details, please refer to Table Setup. The following sections provide an overview of where and how to add the code snippet to either a Basic or Multistep form.
Due to the way Power Pages/Portals are architected, maps requiring data submission in a create scenario need to be placed in a subsequent step to ensure that the map has access to the record's newly generated GUID to create the neccessary relationship connections.
In the case of Basic Forms, this will require a separate form.
In the case of Advanced/Multistep Forms, this will require a new form step.
Basic Form – (Create & Edit)
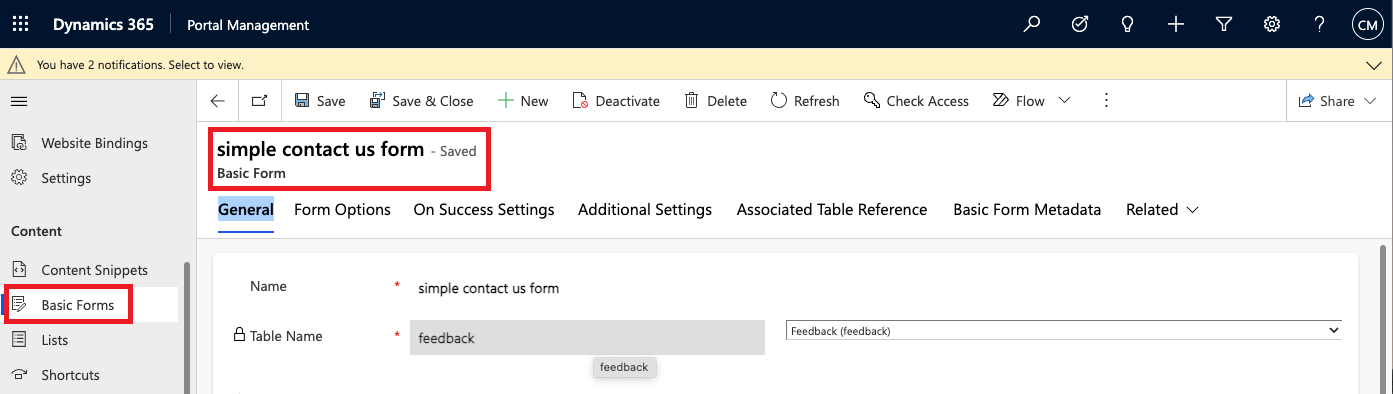
Navigate to the Basic Form you are wanting to configure by Going to Basic Forms and clicking on the form listed. For the below example we will be using the simple contact us form.
Figure 49: Basic Form
-
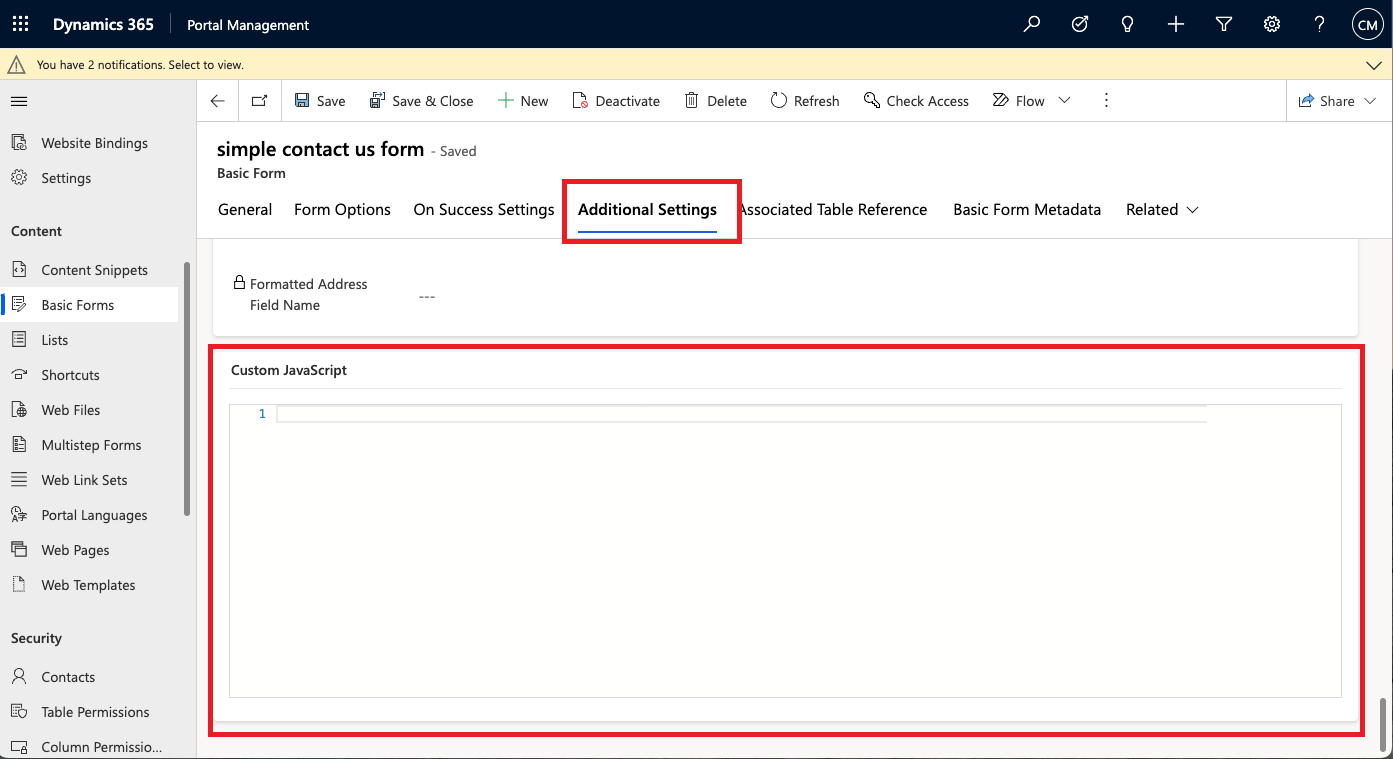
From the ribbon menu click on
Additional Settingsand scroll down to theCustom JavaScriptsection at the bottom of the page.Figure 50: Basic Form Additional Settings��
-
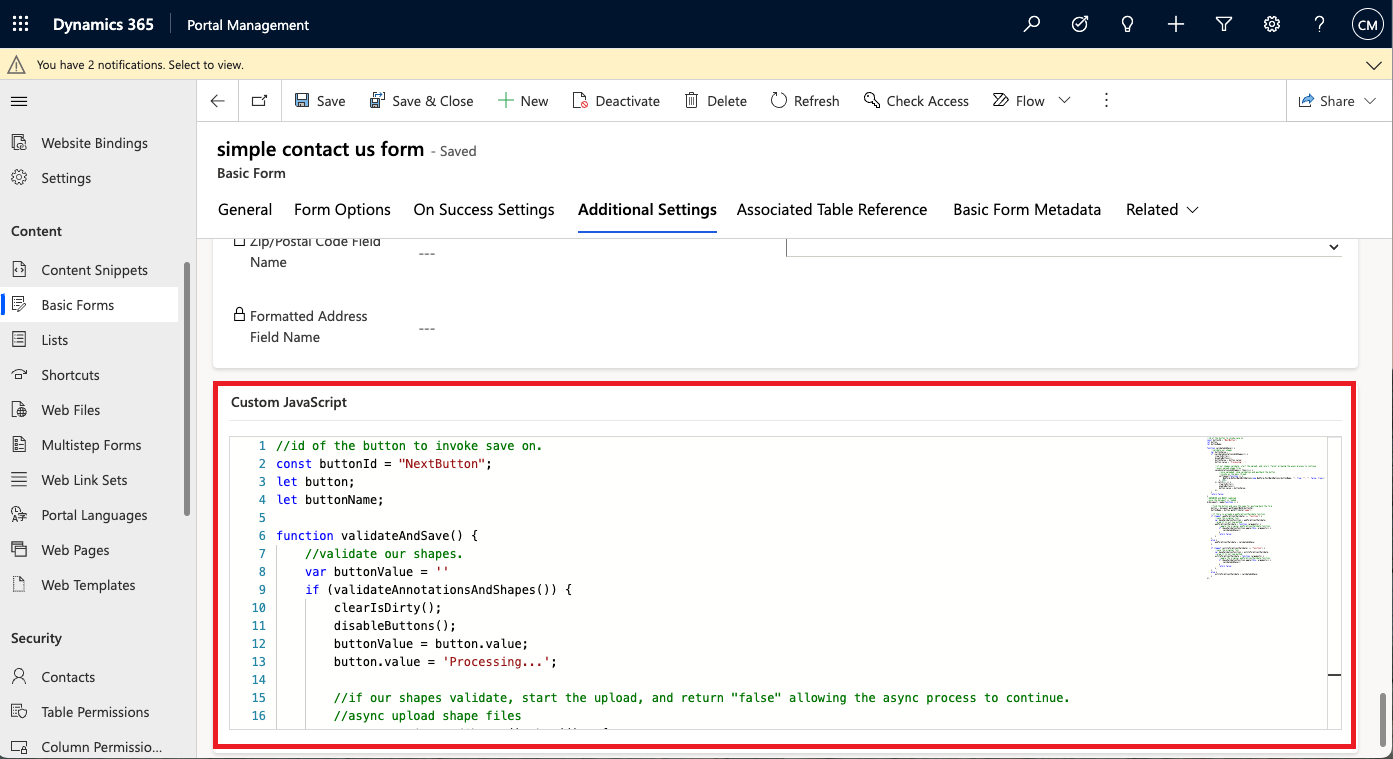
In the
Custom JavaScriptsection paste in the following code snippet found at Appendix B: Custom Javascript, and click Save.Figure 51: Insert Custom JavaScript
Advanced/Multistep Form (Create & Edit)
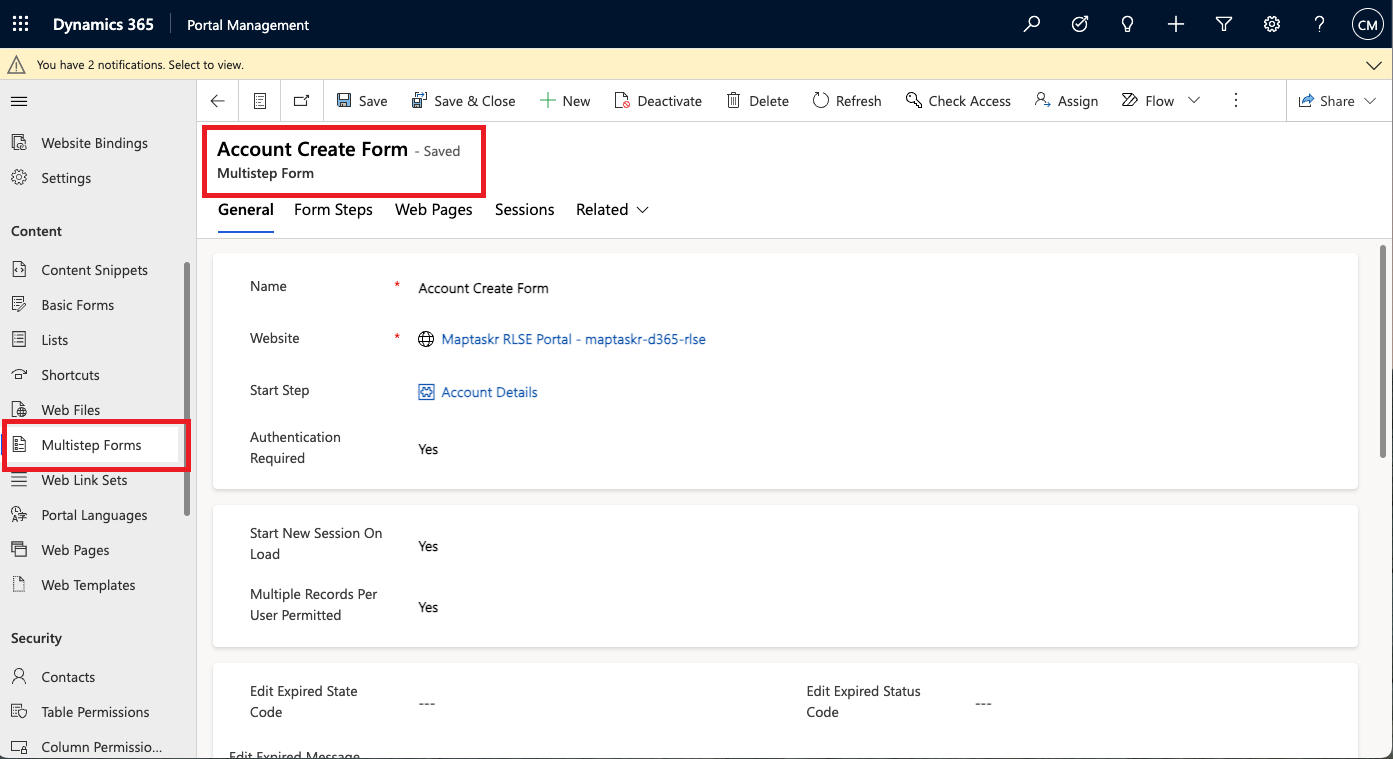
Navigate to the Multistep Form you are wanting to configure by going to Multistep Forms. For this example we will be showing the Account Create Form that has a map control on the Location form step.
Figure 52: Multistep Form 1.
-
From the ribbon menu click on ->
Form Stepsand select theNameof the form step you will have the PCF control embedded.Figure 53: Multistep Form – Form Steps

-
Once in the step, click on the
Form Optionsribbon options and scroll down to theCustom JavaScriptsection where you will need to insert the code snippet found at Appendix B: Custom Javascript, and click Save.Figure 54: Insert Custom JavaScript

Basic/Advanced Form Metadata
Once table columns have been set up and configured as per Table Setup, it is important to add Form Metadata in the Portal/Power Pages Management app. For the relevant Basic Form or Advanced Step Form (If you don't see the Metadata tab, click on Related or the three-dot icon), create a new record and enter the following details:
Basic Form
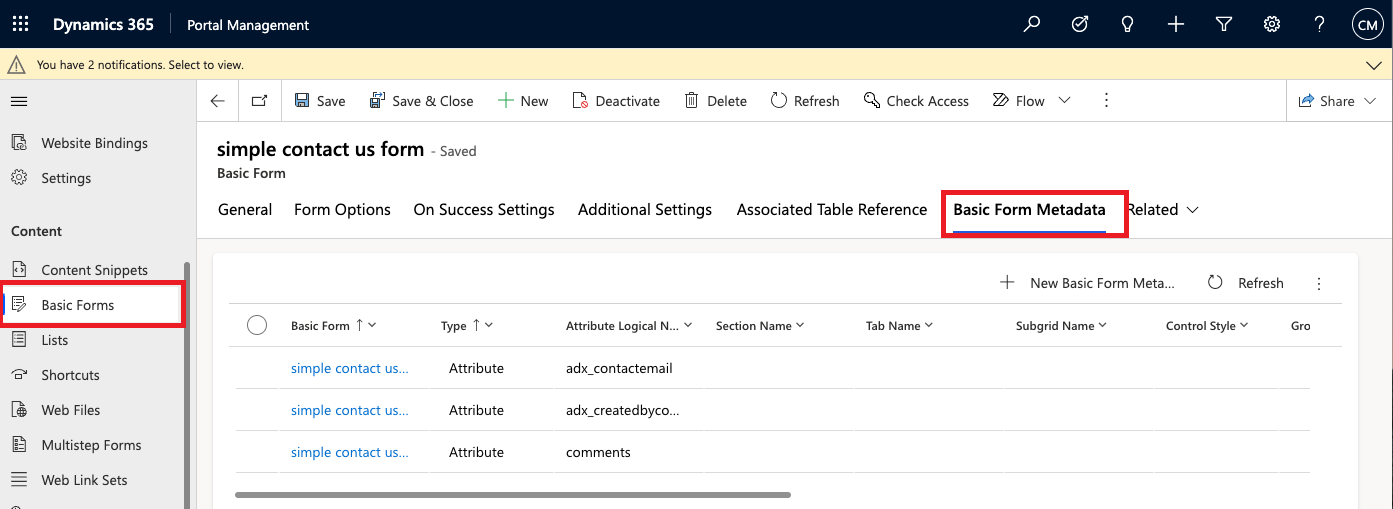
Navigate to the Basic Form you are wanting to configure by Going to Basic Forms and clicking on the form
listed. For the below example we will be using the simple contact us form.
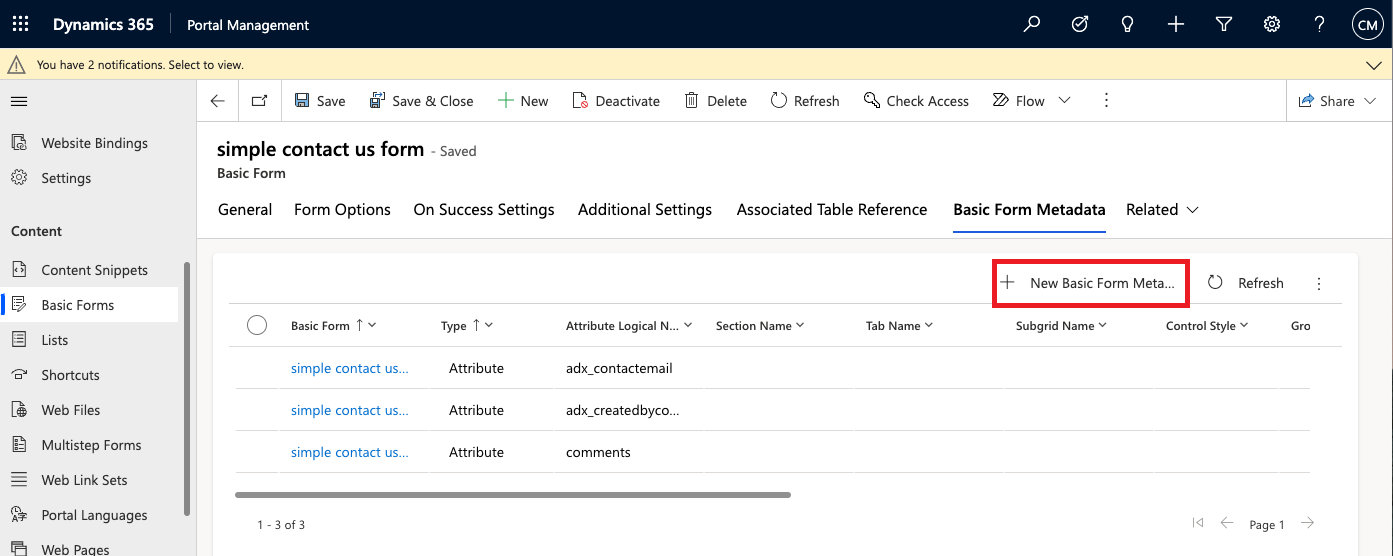
Figure 55: Basic Form - Basic Form Metadata
-
Click on the
+ New Basic Form Metadatabutton.Figure 56: New Basic Form Metadata
-
Fill in the details according to Table 13: Basic Form Metadata details and click Save.
Figure 57: Create New Basic Form Metadata
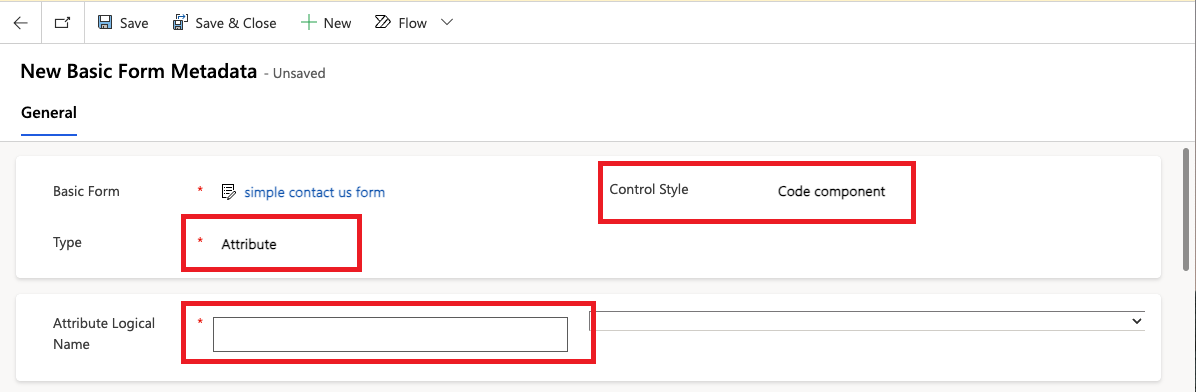
Table 13: Basic Form Metadata details
Property Value Basic Form <Name of your Basic Form> Type Attribute Control Style Code Component Attribute Logical Name PCF Bind Fieldas configured in Table Setup
Advanced Form
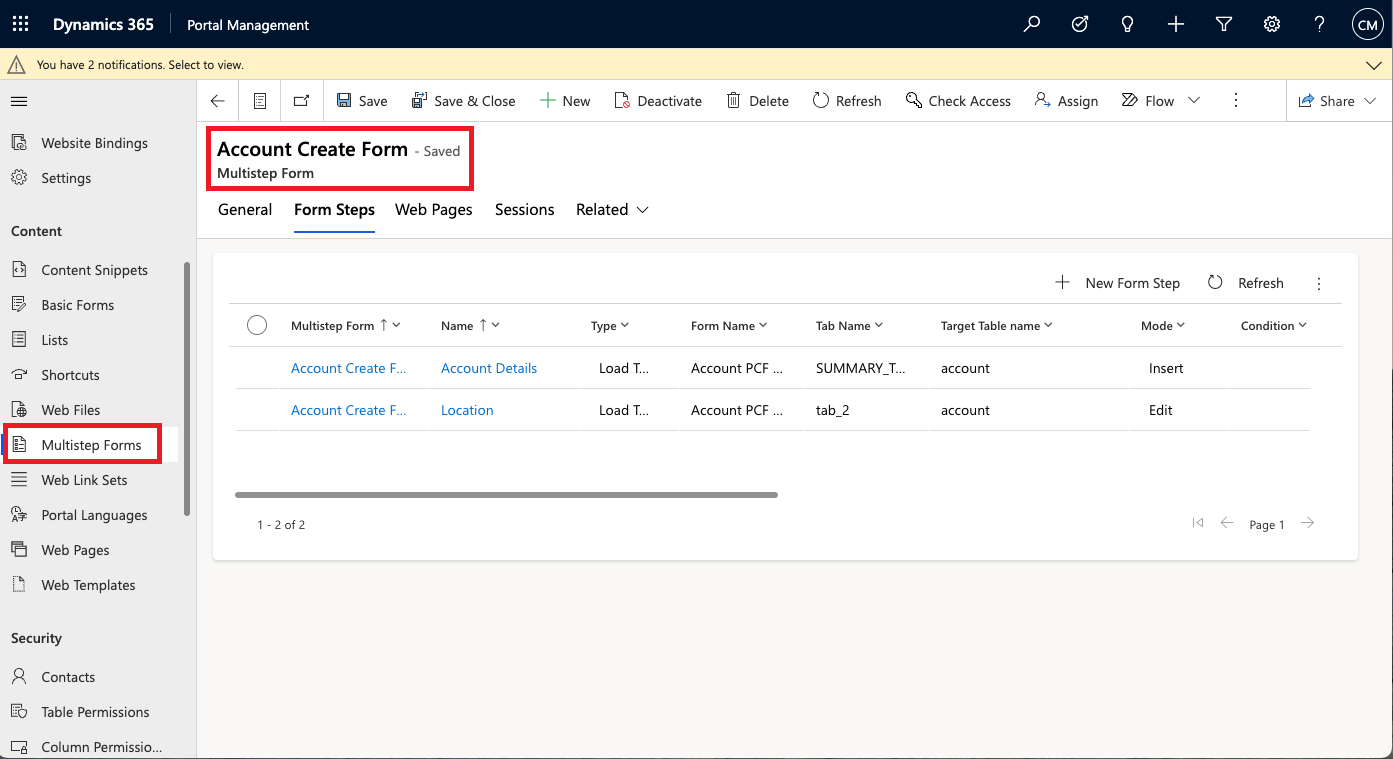
Navigate to the Multistep Form you are wanting to configure by going to Multistep Forms. For this example, we will be showing the Account Create Form that has a map control on the Location form step.
Figure 58: Multistep Form
-
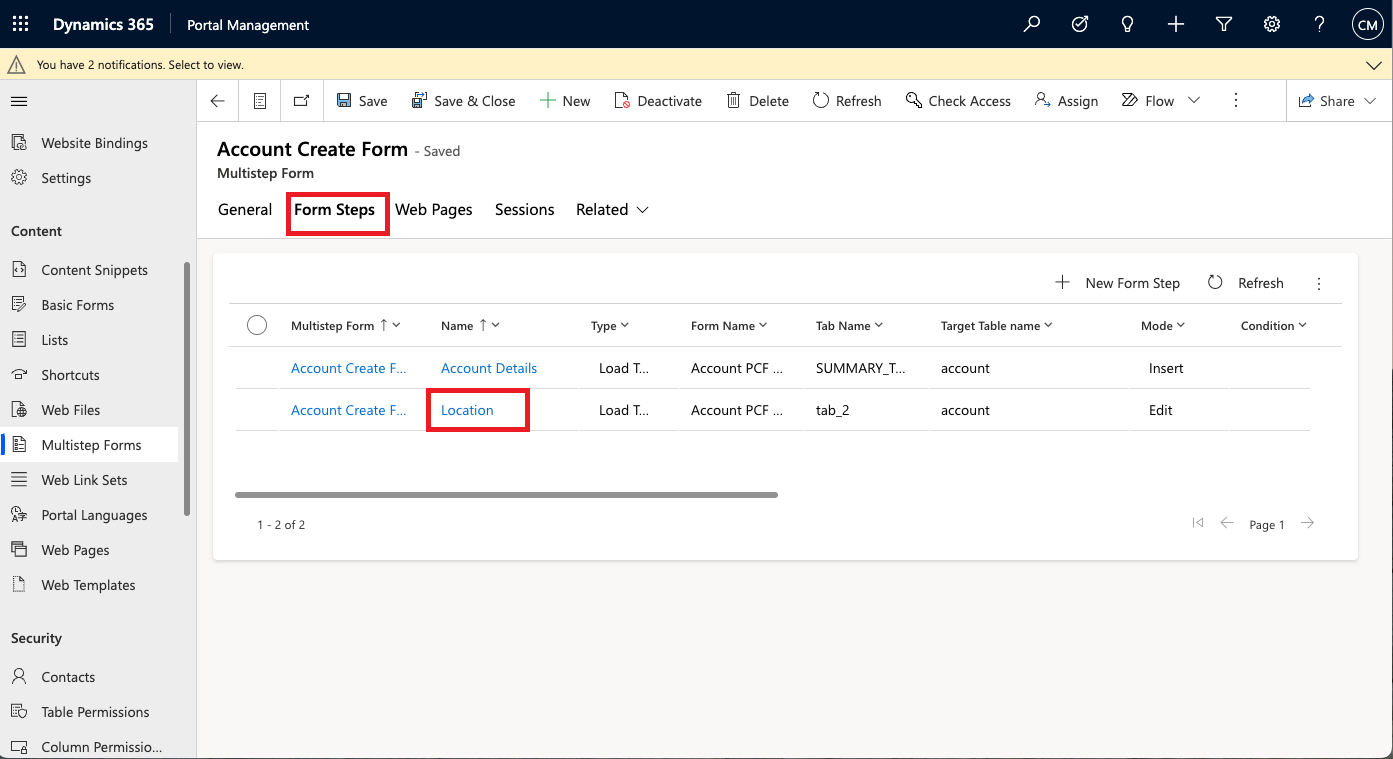
From the ribbon menu click on ->
Form Stepsand select theNameof the form step you will have the PCF control embedded.Figure 59: Multistep Form – Form Steps
-
Click on
Relatedin the ribbon and selectMetadata.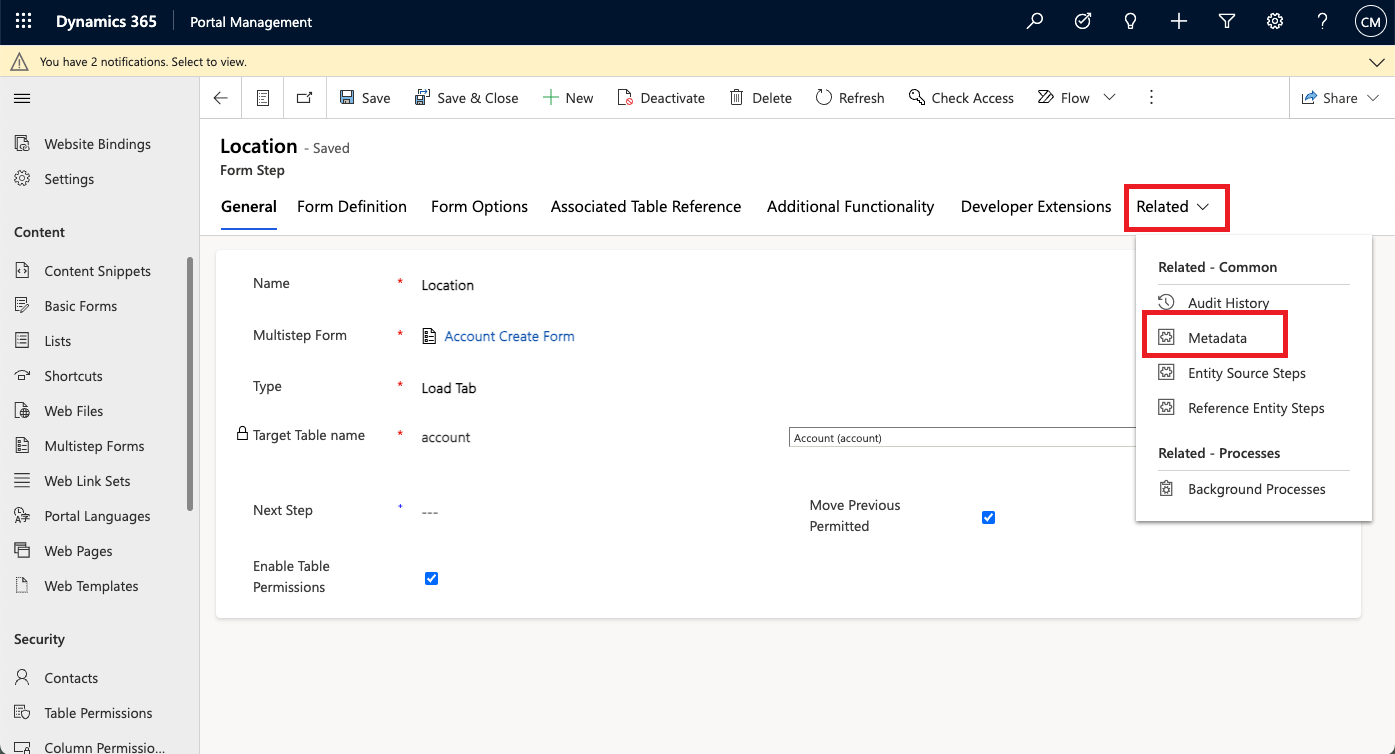
-
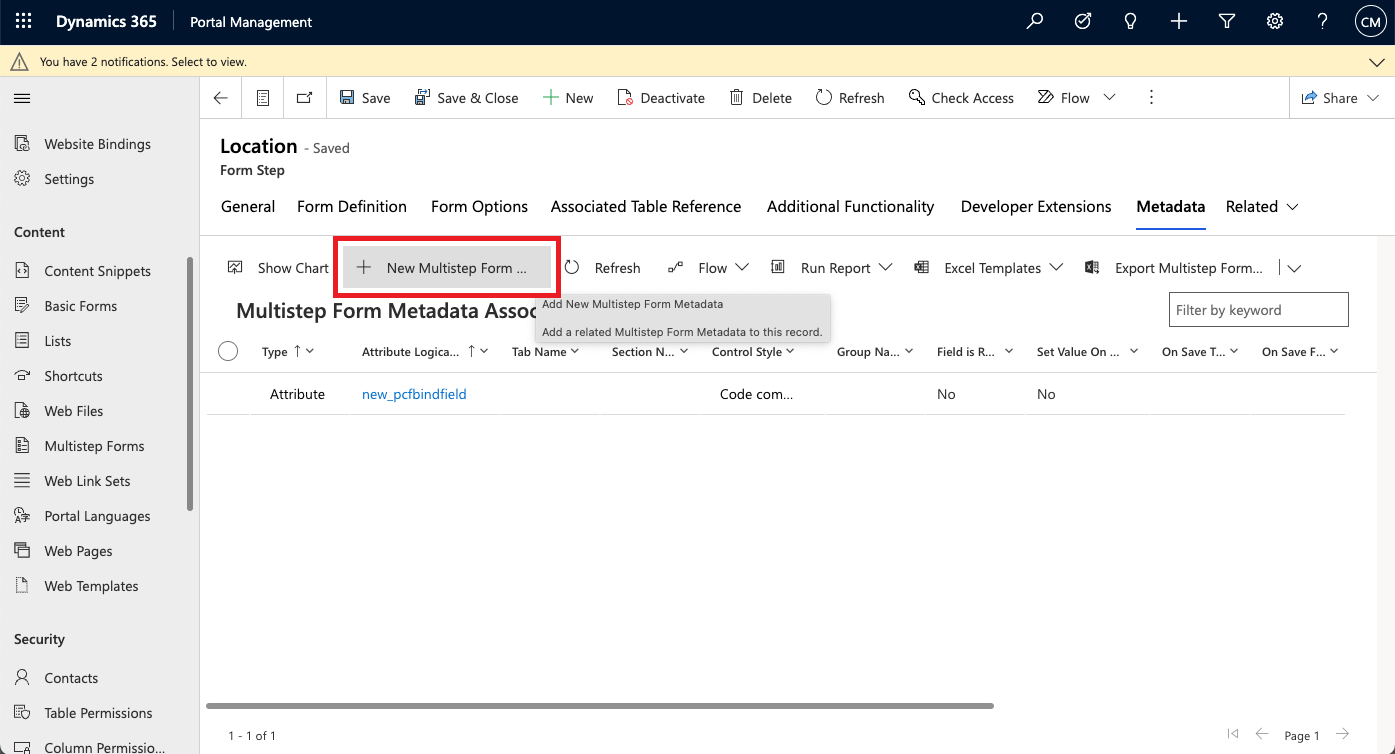
Click on the
+ New Basic Form Metadatabutton.Figure 60: New Multistep Form Metadata
-
Fill in the details according to Table 14: Multistep Form Metadata Details details and click Save.
Figure 61: Create New Multistep Form Metadata
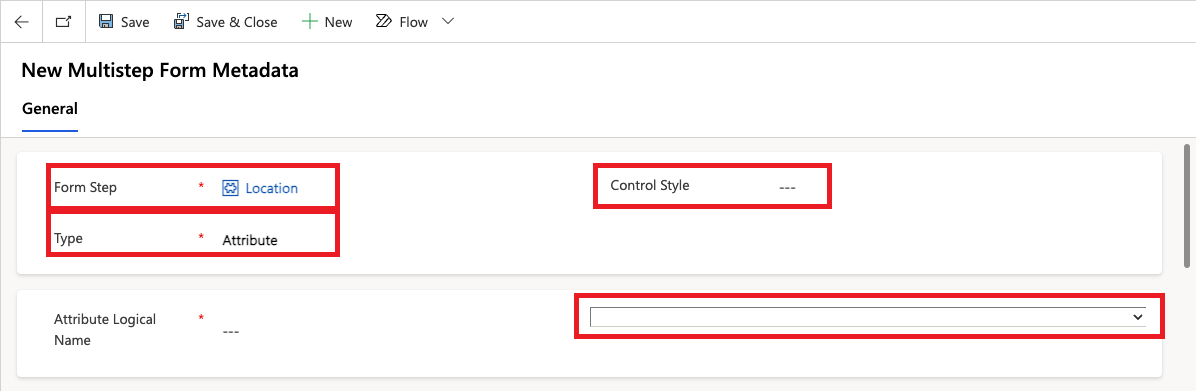
Table 14: Multistep Form Metadata details
Property Value Form Step <Enter the name of your Form Step> Type Attribute Control Style Code Component Attribute Logical Name PCF Bind Fieldas configured in Table Setup
InitMap.js
The initmap JavaScript file is the bridge between form submission and Maptaskr.
The saveAnnotationsAndShapes method is executed upon clicking the submit button. This function first validates the submission via the validateAnnotationsAndShapes function, which in turn calls the clientValidationFunction, checking for any intersections or exclusions. If validation fails an exception is thrown, the submission is cancelled, and an error message is displayed to the user.
After the validation is successful the saveAnnotationsAndShapes function performs the saving/updating/deleting of submission data in addition to the out-of-the-box save functionality.
This file can be tweaked to your requirements. We recommend modifying the variables and clientValidationFunction at the start of the file to suit your needs. If necessary other functions in initmap can be modified for advanced requirements, though this is not recommended for most applications.
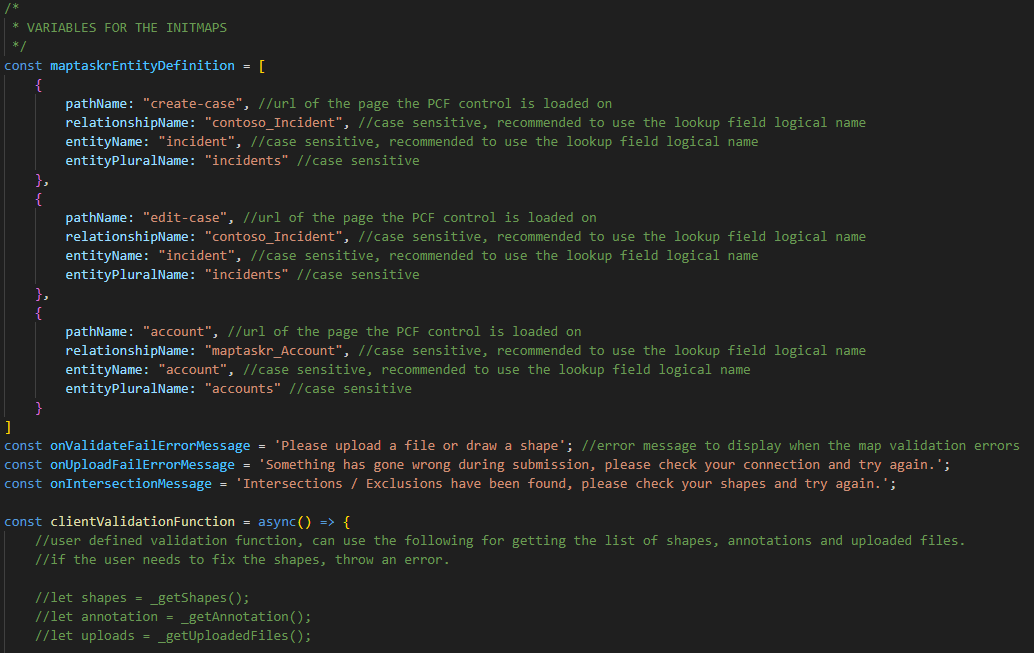
The start of the file contains variables that can be changed to suit your requirements. These are:
-
maptaskrEntityDefinition– This is an array of objects that is used to configure entity names when writing Maptaskr Lambpet data back to Dynamics 365 during submission. Each object contains 4 parameters:pathName– The partial URL of the page that the PCF control is loaded on.relationshipName– The schema name of the lookup field related to your entity configured within Maptaskr Lambpet, please note that this field is case sensitive.entityName– The schema name of the entity, please note that this field is case sensitive.entityPluralName– The plural name of the entity, please note that this field is case sensitive.
-
onValidateFailErrorMessage– If the validation of the submission were to be unsuccessful, this will be the validation error message displayed to the end user. -
onUploadFailErrorMessage– If any step of the upload process were to be unsuccessful, this will be the error message displayed to the end user. -
onIntersectionMessage– If the users uploaded or drawn shapes and annotations fail the intersection or exclusion tests against configured layers, this will be the error message displayed to the user. -
clientValidationFunction– If custom validation is required it can be implemented here. The Maptaskr scripts will invoke this function during validation when the user submits. The function should throw an error if validation fails or do nothing if validation passes. The Maptaskr scripts will handle any errors thrown, cancelling saving and navigation if any errors are thrown.
If you have included initmap.js into your form submission and are seeing a 500 error response and the payload contains undefined or null refences like the example below, then you need to ensure that your maptaskrEntityDefinition table is set up correctly.
undefined@odata.bind: "/null(<guid>)"
This error and payload indicates that initmap.js was unable to find a relevant maptaskrEntityDefinition based on the partial URL of the submission web page, and you need to ensure that the entity names have been correctly configured.