Prerequesites
Before installation and setup of Maptaskr for Power Pages, it's essential to ensure that you have met the necessary prerequisites. These prerequisites serve as the foundation for a seamless deployment, ensuring that your experience with our solution is as efficient as possible.
Portal/Power Pages
Before continuing with this guide, please ensure you have first created an instance of either a PowerApps Portal or Power Pages. You can find the relevant Microsoft documentation here:
Maptaskr Core
To be able to install Maptaskr for Power Pages, either of the following Maptaskr Core solutions needs to be installed and configured in its respective platform environment:
- Maptaskr for Dynamics 365, or
- Maptaskr for Power Apps
Maptaskr for Power Pages is dependent on these Core solutions to provide it with baseline setup and configuration.
Figure 1: Maptaskr AppSource Listings
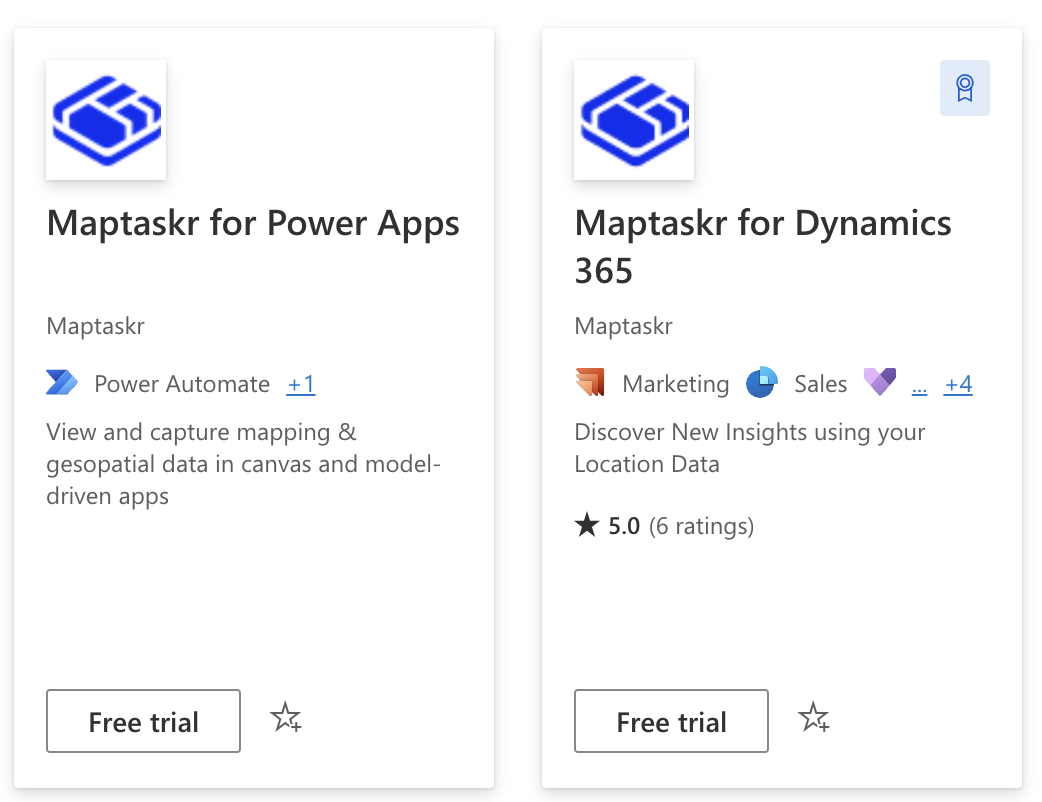
It is recommended that you install the latest version of these products which can be found at Microsoft AppSource1.
Solution Files
As is the nature of the Power Pages platform the Maptaskr for Power Pages solution is installed via a variety of Solution Files. These are listed in Upload Solution Files.
Maptaskr for Power Pages solution files are currently only available direct from the Maptaskr Team. If you are a current Maptaskr customer or are wishing to install Maptaskr into your target environment, you will receive available updates directly from the Maptaskr Team. Alternatively, please reach out to the Maptaskr Team (support@maptaskr.com) to request access to solution files.
Base Platform - Configure file size limit and file extensions
To install Maptaskr for Power Pages, you will need to configure the file size limit and files extensions on the base platform.
An overview of these settings can be found at the following Microsoft Learn page - Enable file attachments2. A more specific set of instructions is found in the following two sections.
Configure file size limit
- Classic Style Settings
- Power Platform Admin Settings
The file size limit is configured from the classic D365 style System Settings page. This page can be accessed from the classic style settings.
To access the classic style settings from a Model-Driven App
- Click on the cogwheel on the top right corner of the main Dynamics 365 ribbon.
Figure 2: Advanced Settings
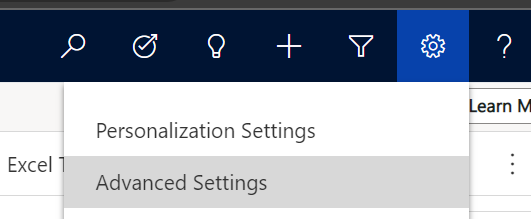
- In the dropdown that appeared select
Advanced Settings. - You should now be in the classic style settings.
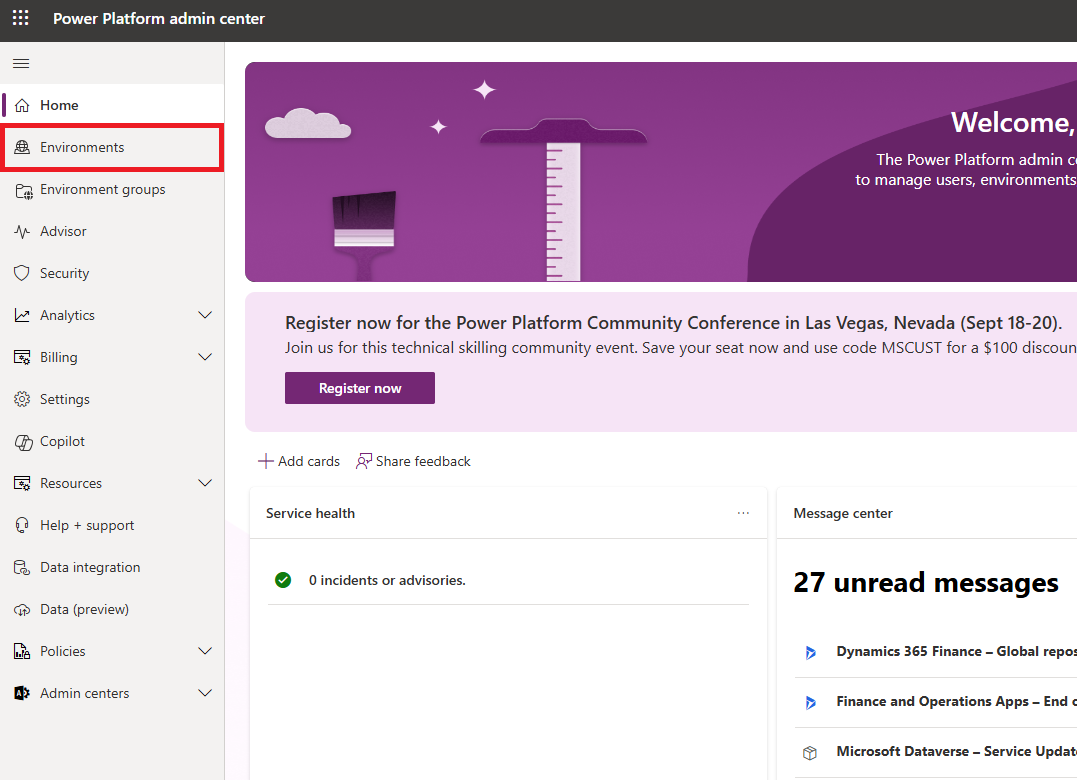
To access the classic style settings from the Power Platform admin center
- Select your environment, select "Settings" from the environment ribbon.
Figure 3: Power Platform admin center - Settings
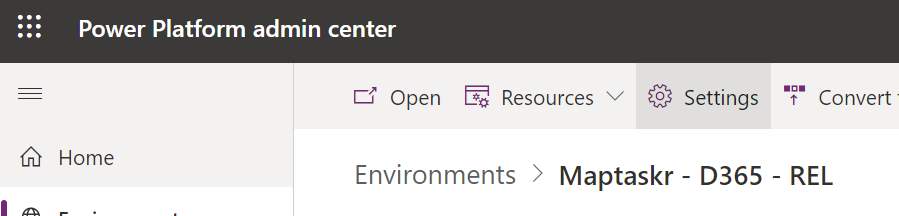
- Select the
Resourcesdrop-down and then selectAll legacy settings.

- You should now be in the classic style settings.
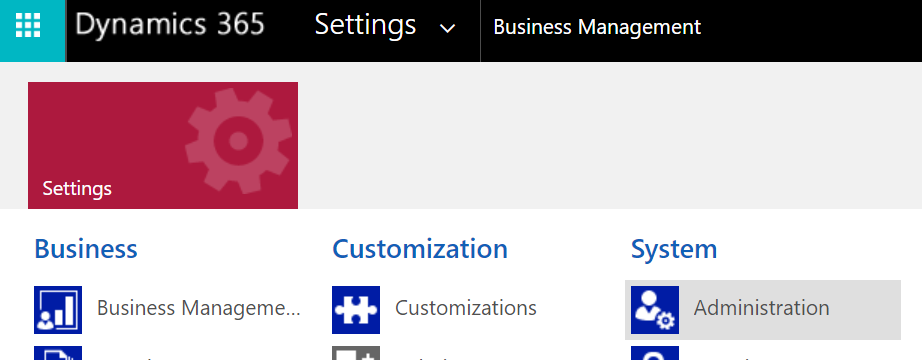
Once you are in the classic style settings Pages
From there click on the Settings chevron on the top ribbon and select Administration located in the System column.
Figure 4: Classic - System Administration
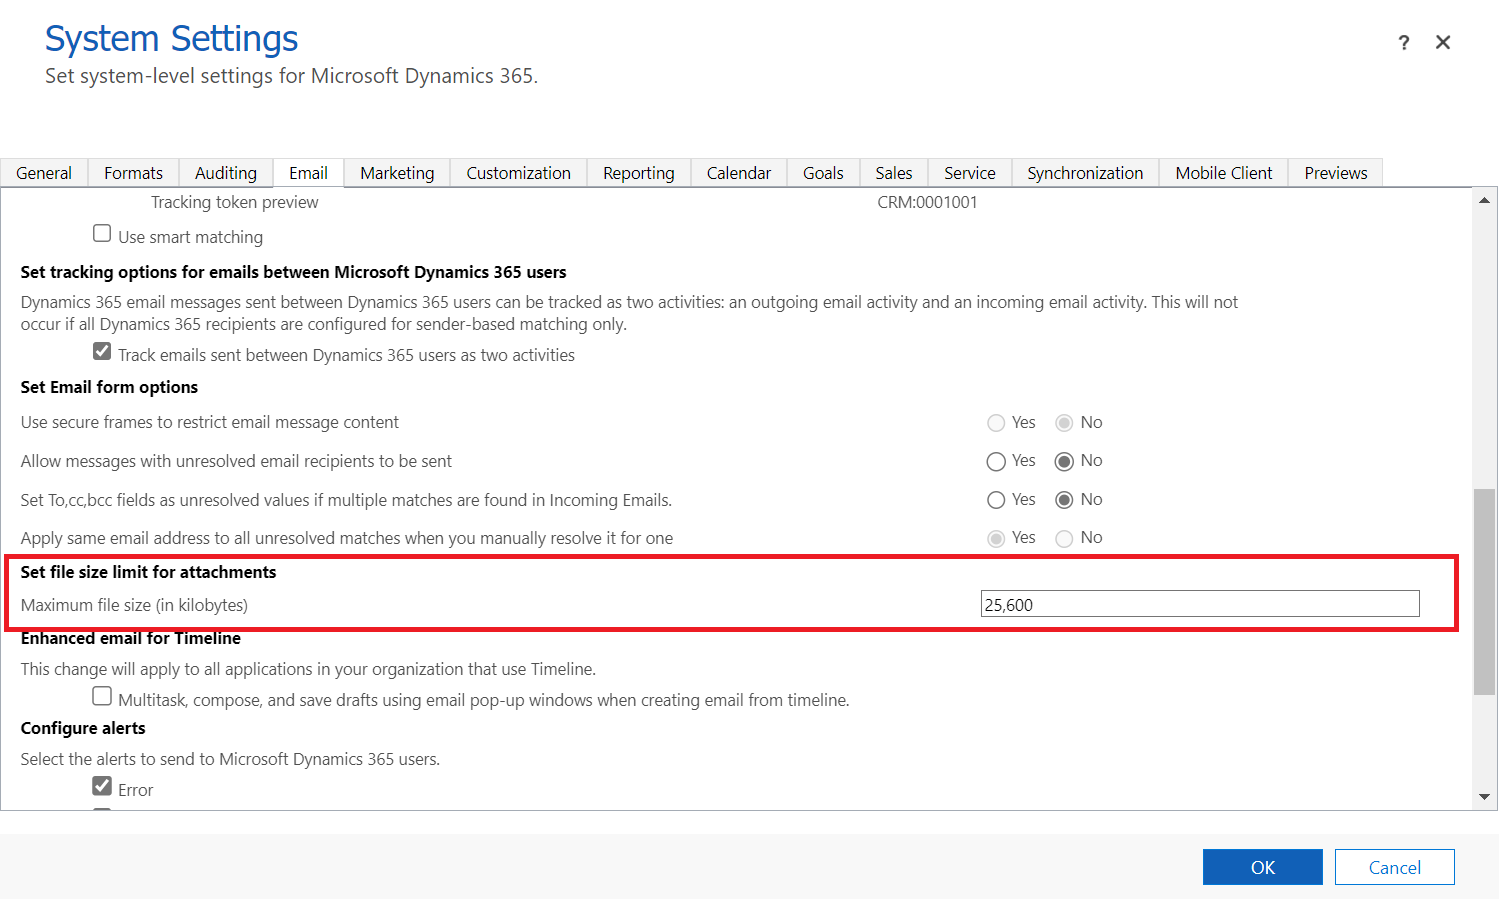
The System Settings are on the top-right of the results displayed.
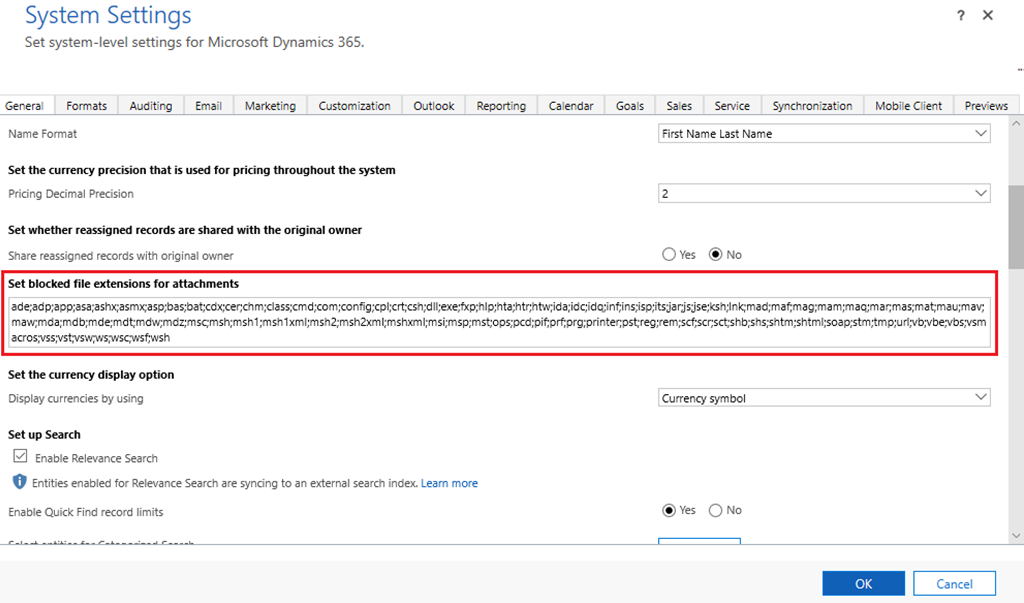
Figure 5: System Settings

In the System Settings configure the Set file size limit for attachments to 25Mb.
- In the System Settings window, go to the Email tab.
- Go to the Set file size limit for attachments section, and in the Maximum file size (in kilobytes) field, enter the value in kilobytes
25,600.
Figure 6: Configure file size limit.
The file size limit is configured from the Power Platform admin center . This page can be accessed from the Power Platform Admin Portal https://admin.powerplatform.microsoft.com/, navigate to the Environments tab from the left navigation bar.
-
Select your environment (either by clicking on it, or selecting the three-dot menu).
-
Select
Settingsand expand theEmailsettings.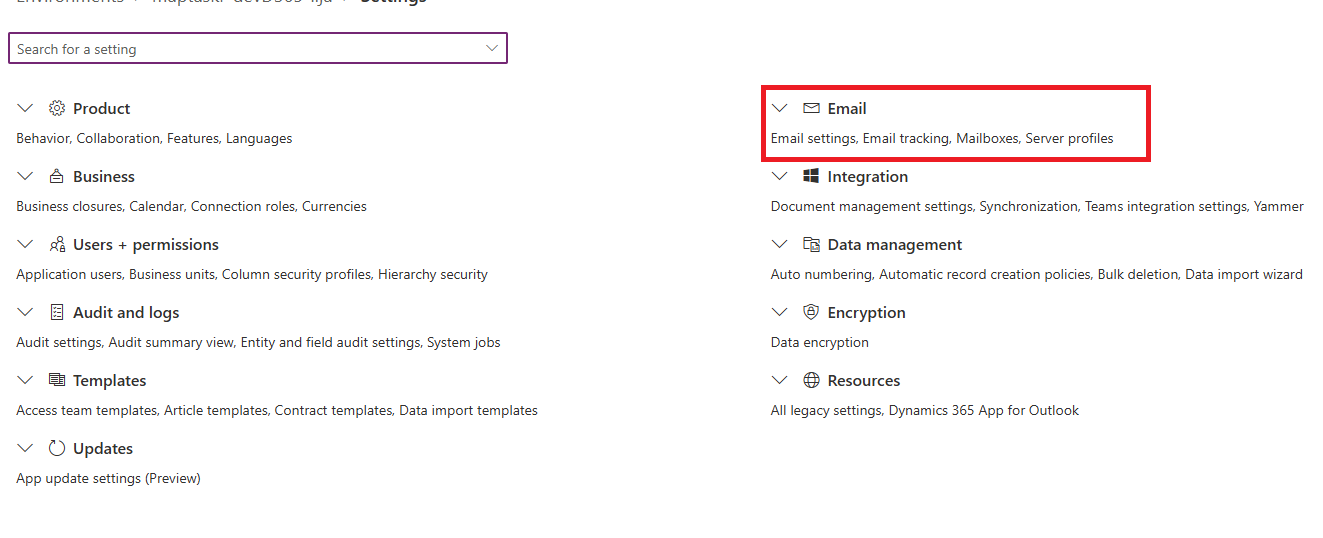
-
Select
Email Settingswhich will open a new page containing all Email related settings. -
At the bottom left, update the
Maximum file size for attachmentsfield to25,600kilobytes and clickSave.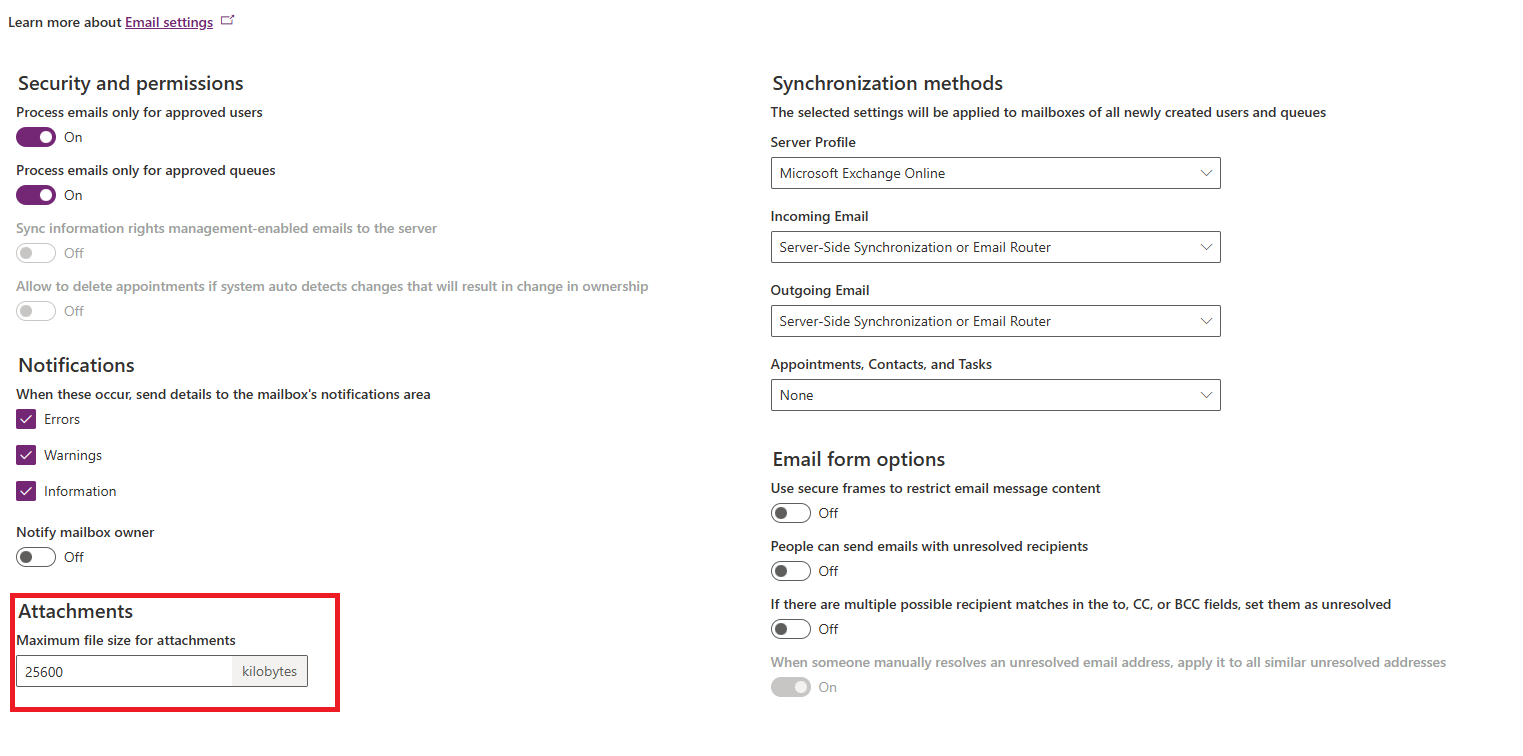
Enable JS files
To enable JS files, go to the General tab.
- In the Set blocked file extensions for attachments field, remove
jsas an entry.
Figure 7: Allow js extension.