Maptaskr Configuration
Map Settings
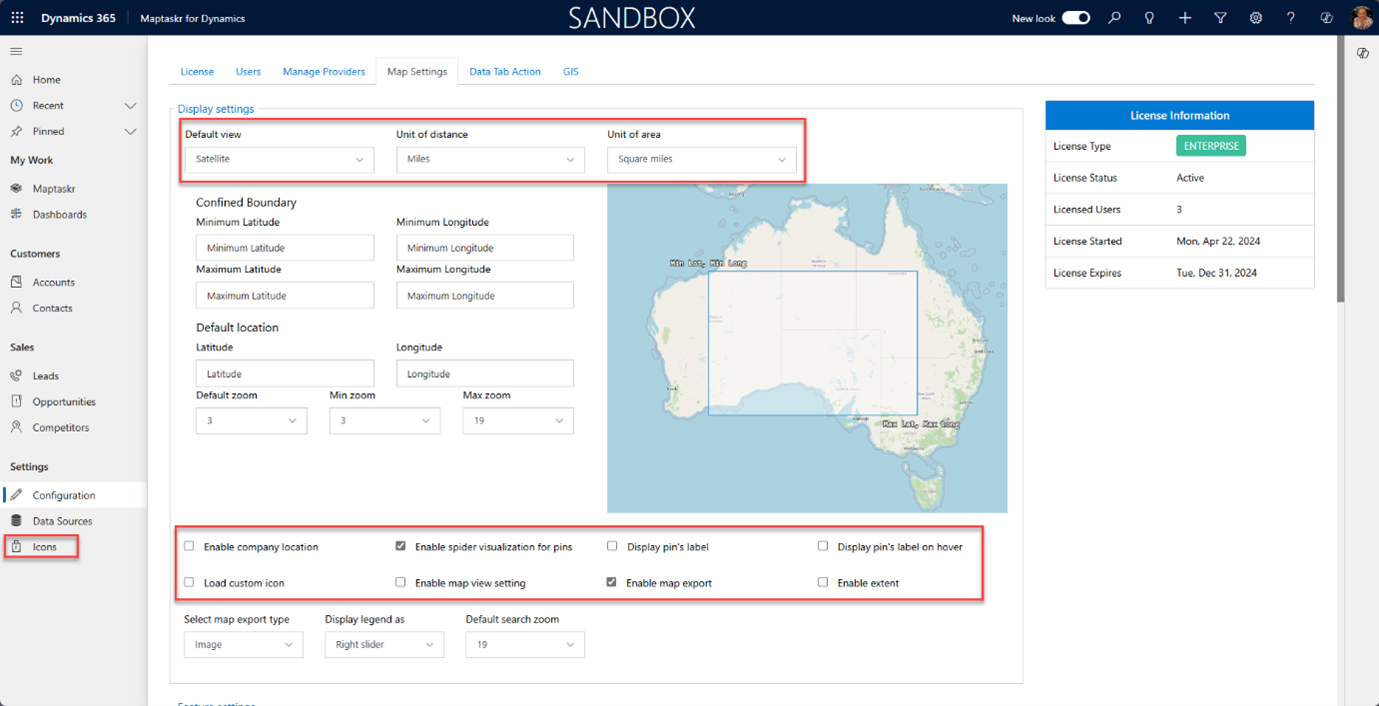
Display Settings
Set the default view to Satellite and units of measure to metric or imperial depending on the audience.
Consider setting the Display pin's label or Display pin's label on hover options depending on the number of data points on the Dashboard.
If you want to use icons rather than pins tick the Load Custom Icon checkbox and be sure to upload additional Push Pin images (24px * 24px) via the Icons menu.
Use different coloured versions of the same icon if you want to convey a second attribute, such as status, when displaying data.
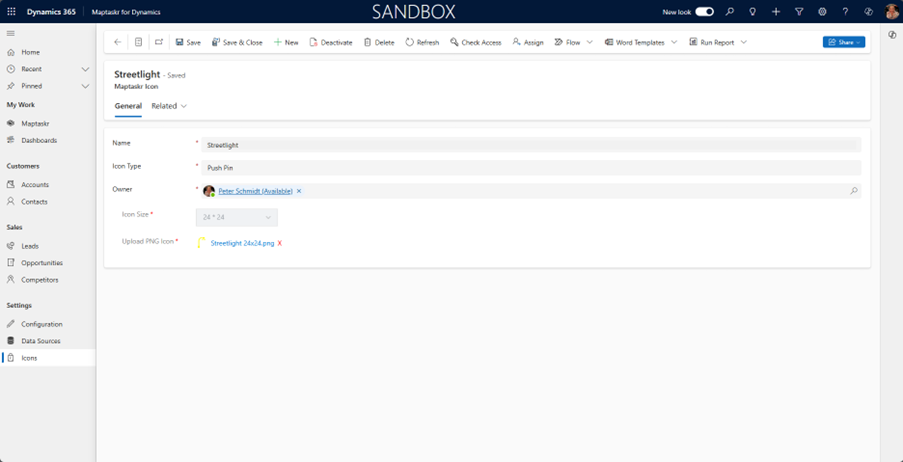
Microsoft PowerPoint has a great selection of icons that can be exported as SVG files for use in menus and as png files for use in Maptaskr!
Feature, Search and Style Settings
See the recommended settings in the screenshot below:
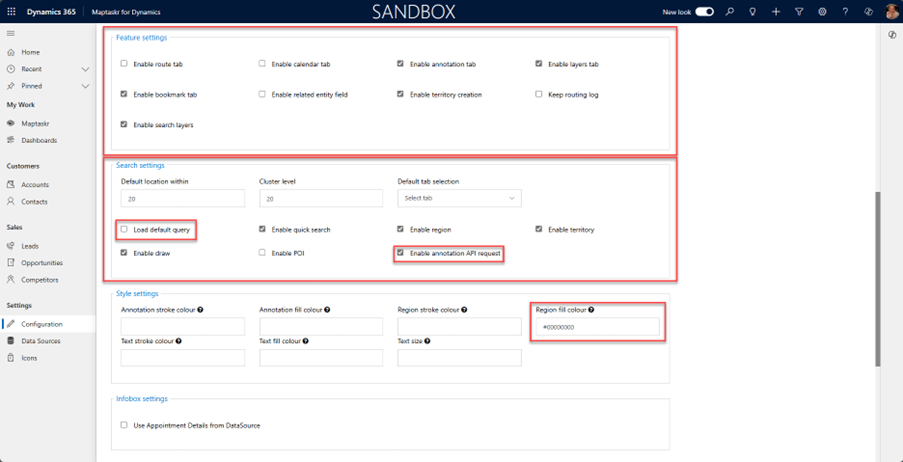
Load default query will automatically run the default query whenever the Maptaskr Dashboard is opened
Enable annotation API request will display any lines/shapes/annotations relating to the record on the Dashboard without needing to open each record to view these. See Oil Spill example screenshots above.
Setting the Regional fill colour to #00000000 makes it transparent so the underlying map is easier to see after performing a search.
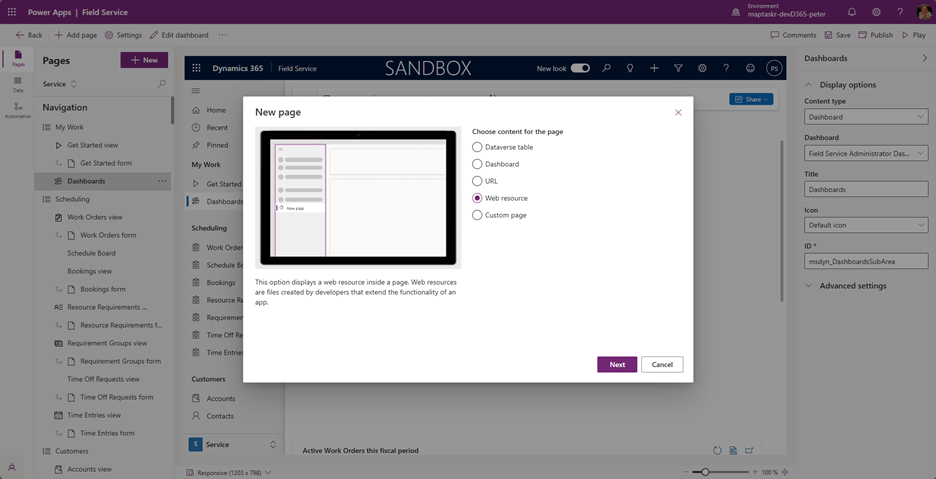
Adding Maptaskr Dashboard to the Field Service App Menu
Open the Field Service App in the editor and add a Web resource as a Page in the relevant place in the Navigation menu.
Select Maptaskr Dashboard as the URL and Map Dashboard as the Title.
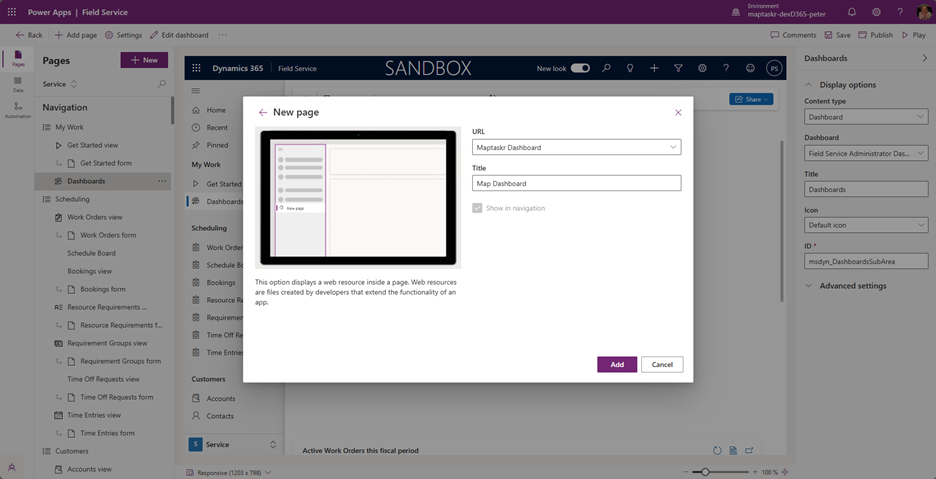
Edit the Icon to use a web resource and select the Maptaskr icon.

Adding Location to Forms
To view and edit geospatial data on records the Maptaskr control needs to be added to forms along with a JavaScript library and an Event Handler to connect it to the underlying data. In this example we are using Case and setting up Maptaskr on its own tab (full height/width), but it can be embedded alongside other controls on an existing tab.
Add a 1-column tab to the Case form and label it Location. Hide the section label.
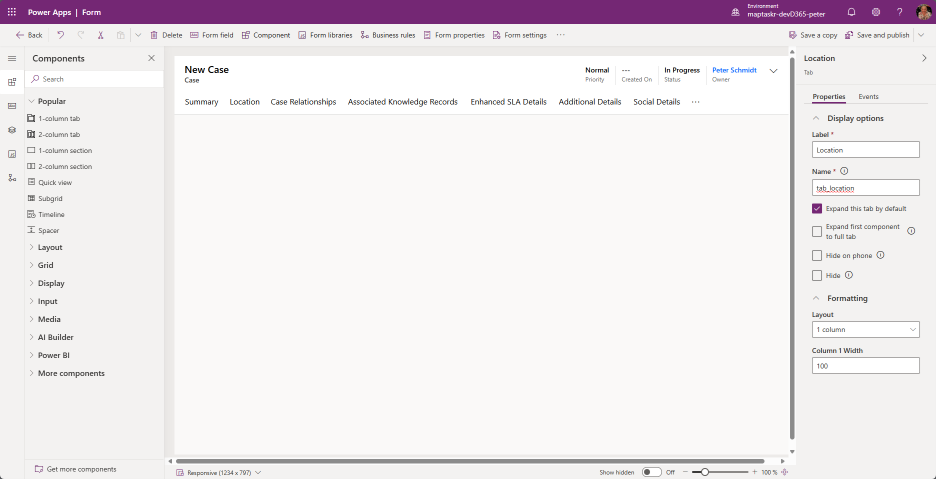
Add an HTML web resource.
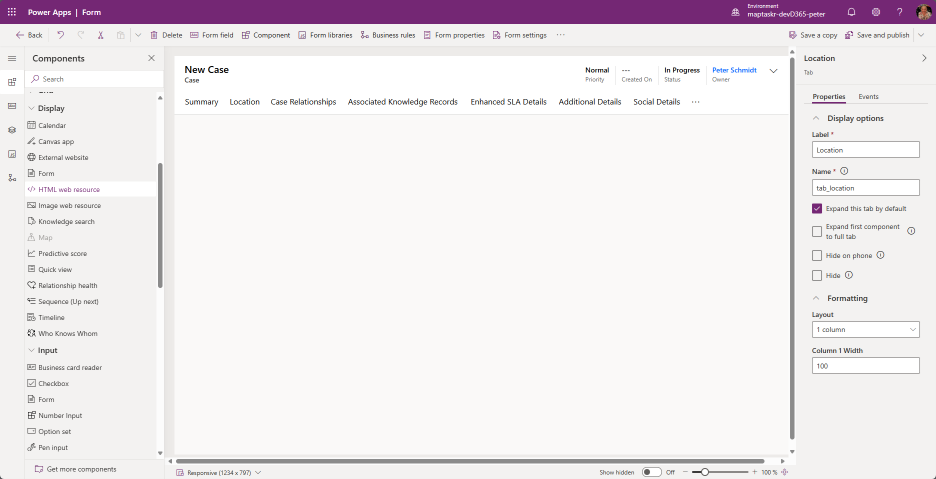
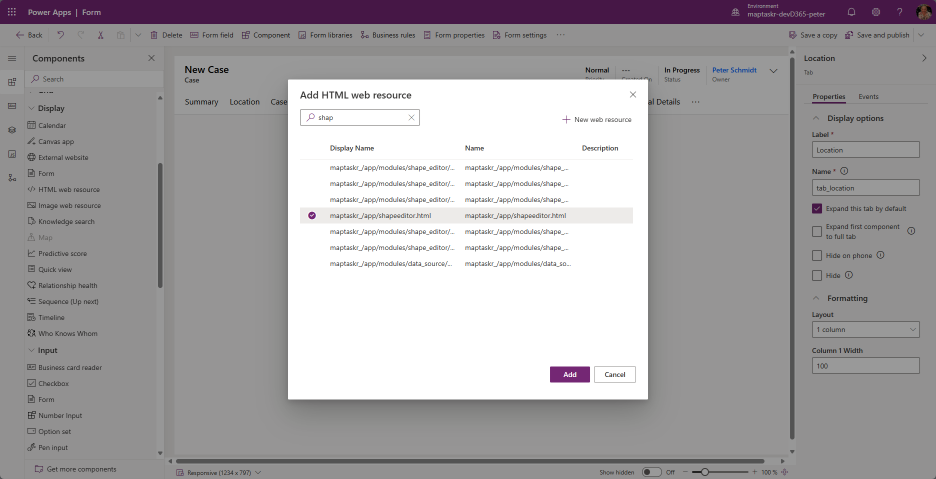
Add maptaskr_/app/shapeeditor.html
Set the Component height to 18 rows. Uncheck the Hide on phone check box – Maptaskr works with the Field Service mobile app.
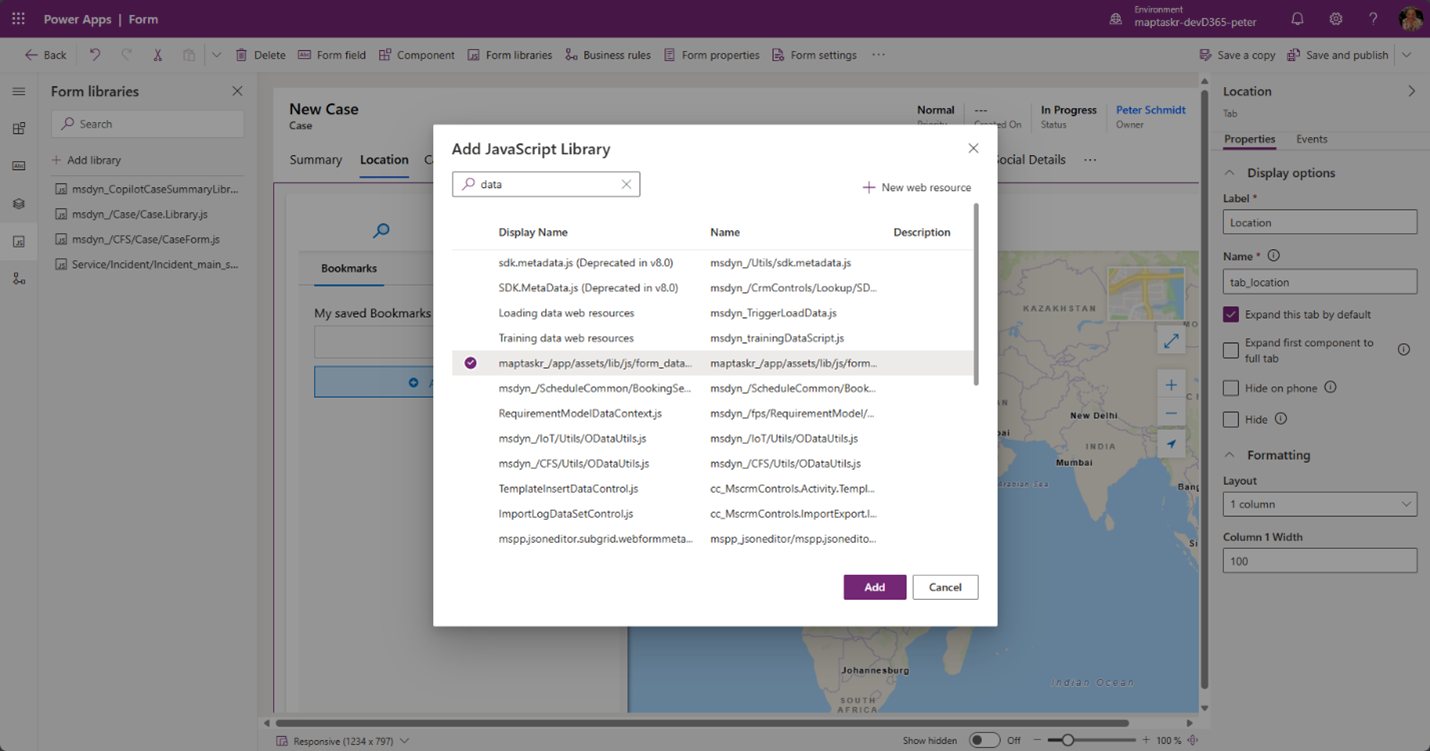
Add the Maptaskr JavaScript maptaskr_/app/assets/lib/js/form_datasource_autocomplete.js library to the Form library.
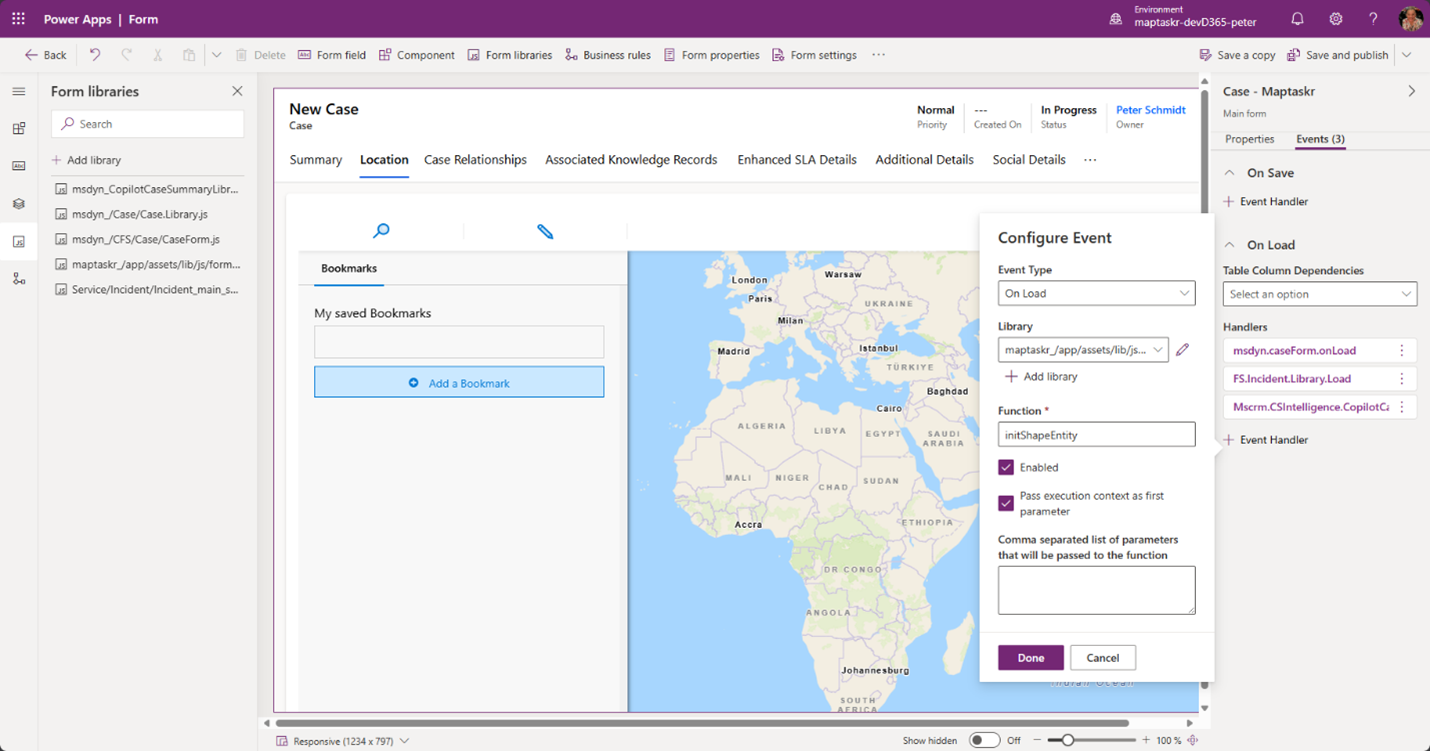
Add an On Load event to the form.

Select the maptaskr_/app/assets/lib/js/form_datasource_autocomplete.js library and enter initShapeEntity as the Function. Tick the Pass execution context as first parameter option.
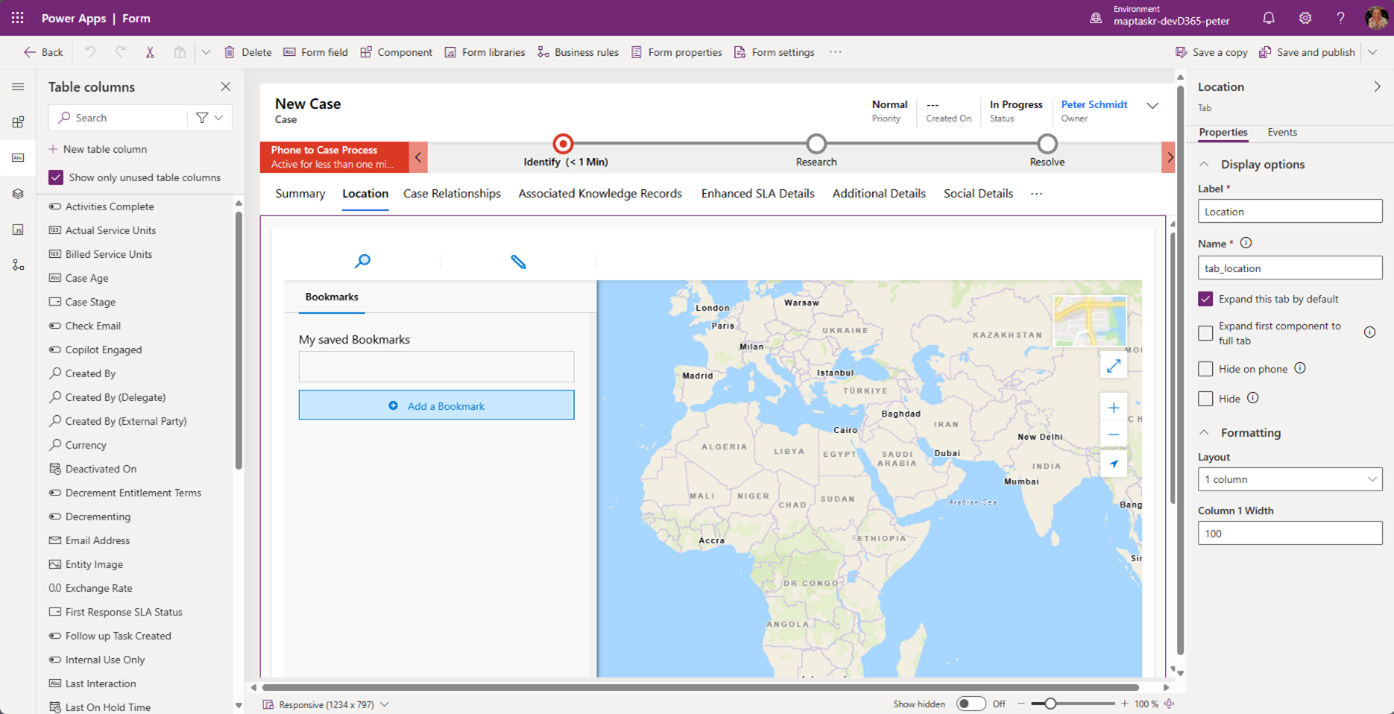
That’s all there is to it! Save and Publish the form.
Geo-tagged Case records can be created either from the Maptaskr Dashboard screen or the New Case form. In the case of the former the Maptaskr Latitude and Longitude fields are automatically populated on the record when it is created; in the case of the latter create and save the record before going to the location tab and right-clicking on the map and selecting Set Location.
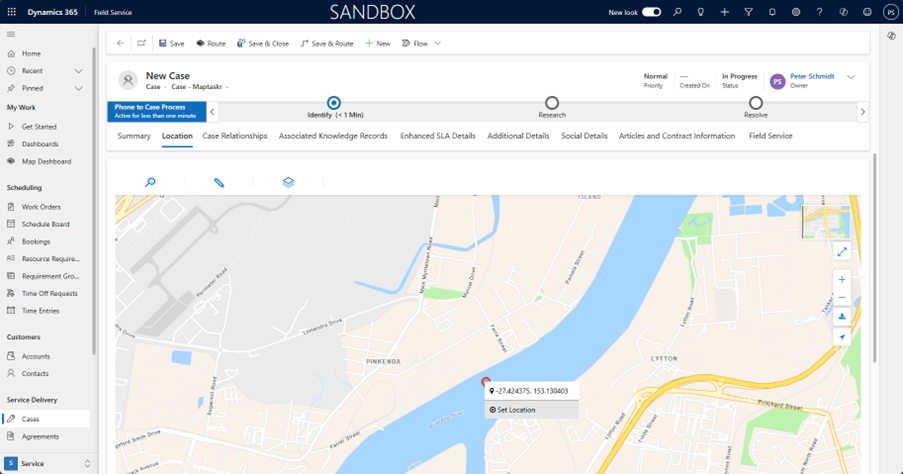
Once the record has been saved, the map can be edited to add lines, polygons, points of interest and text annotations. Dragging and dropping the pin will also update the latitude and longitude values on the case record.
Add a Layer to the Dashboard
For a Field Service demonstration use a public ArcGIS layer that has an attribute that can act as a Functional Location. For example, Brisbane City Parks:
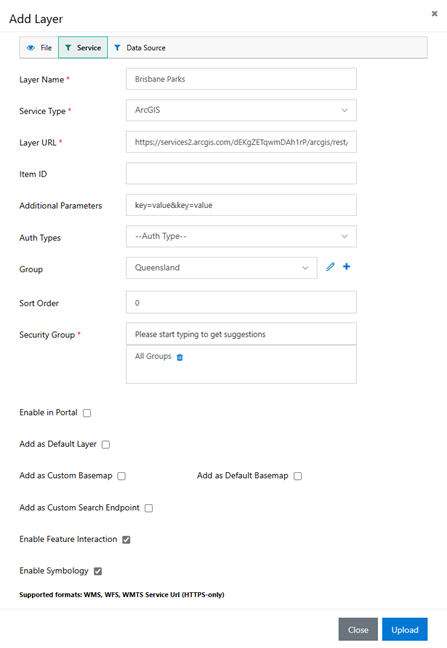
On the Maptaskr Dashboard Layers tab click Add Corporate Layer.
- Enter
Brisbane Parksas the name - Select ArcGIS as the Service Type (Note: this option is only available in Maptaskr Enterprise for Dynamics 365).
- Enter the following as the Layer URL: https://services2.arcgis.com/dEKgZETqwmDAh1rP/arcgis/rest/services/Park_Locations/FeatureServer/0
- Layers can be organised into Groups. Create a Group called
Queensland. - Add
All Groupsas the Security Group. - All other settings can be left as their default values.
- Click Upload.
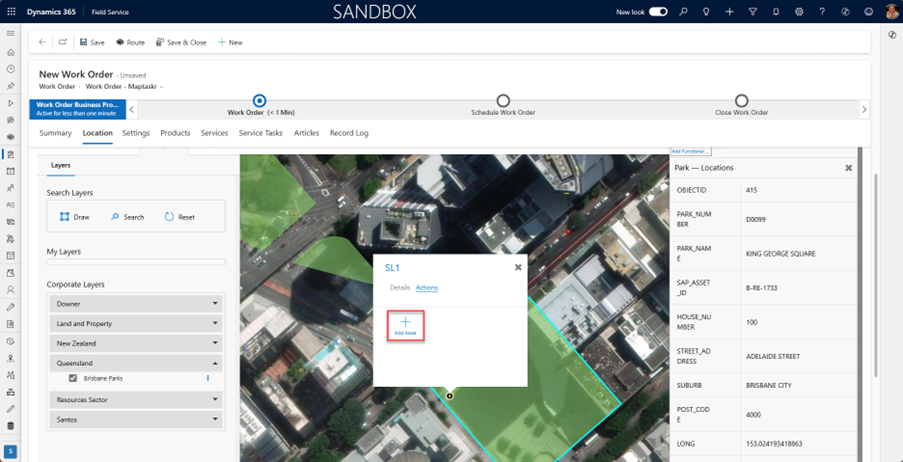
Clicking on a park will show its ESRI attributes in an info panel.
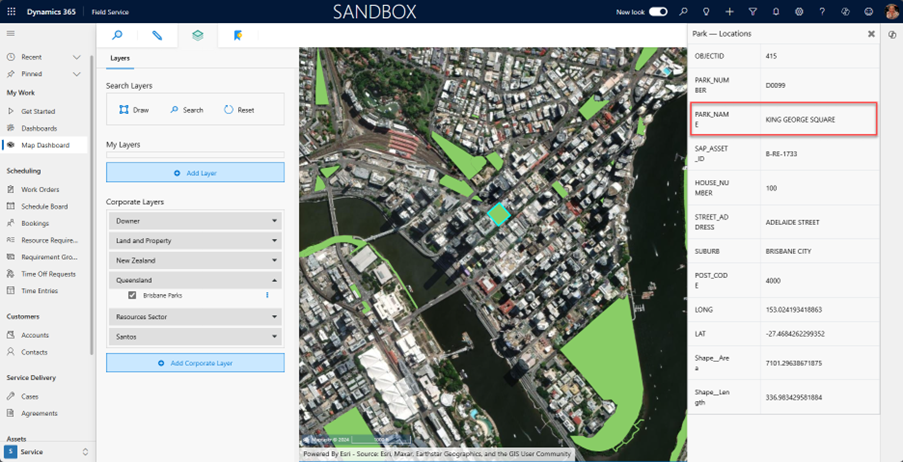
The PARK_NAME attribute can serve as the Functional Location. Let's add King George Square as a Functional Location in Field Service.
The names must match but are not case sensitive.
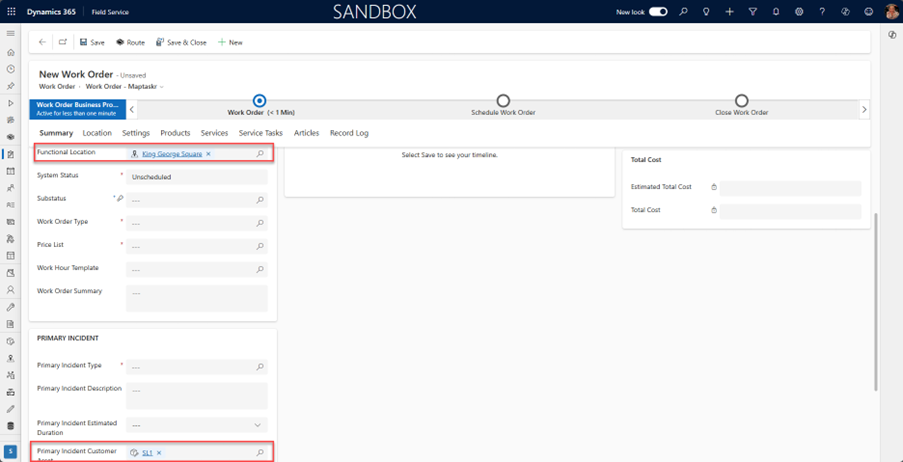
Add Actions to Populate Work Order with Functional Location and Asset
Adding Functional Locations and Assets to Work Orders when clicking on parks on the Brisbane Parks layer on the Maptaskr Dashboard requires the addition of a Related GIS Layer Action and a Related Entity Action on the Maptaskr Data Source configuration form for Work Order.
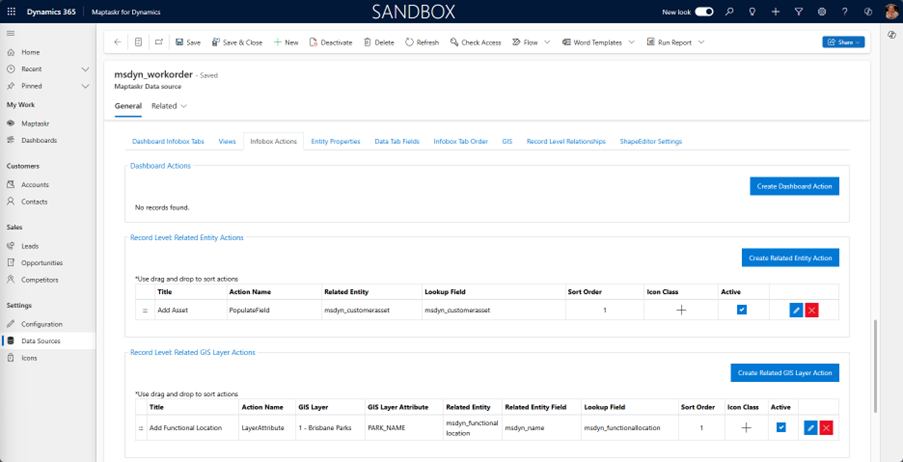
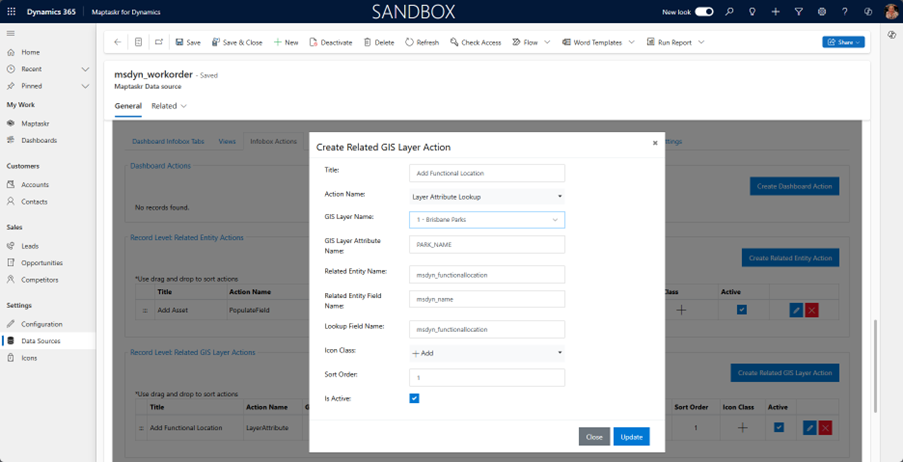
Related GIS Layer Action
Add a Related GIS Action with the following settings:
| Field | Value |
|---|---|
| Title | Add Functional Location |
| Action Name | Layer Attribute Lookup |
| GIS Layer Name | 1 - Brisbane Parks |
| Related Entity Name | msdyn_functionallocation |
| Related Entity Field Name | msdyn_name |
| Lookup Field Name | msdyn_functionallocation |
| Icon Class | + Add |

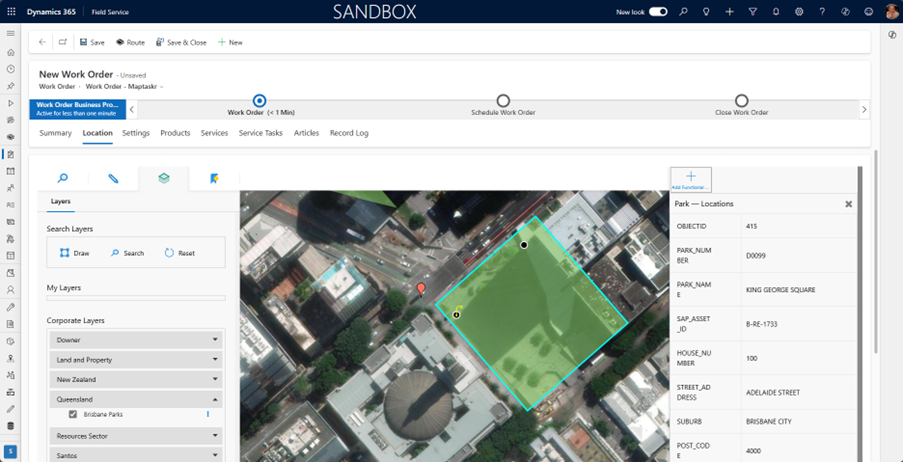
When the Add Functional Location is clicked it will be added to the Work Order and the Assets in that Functional Location will be displayed.
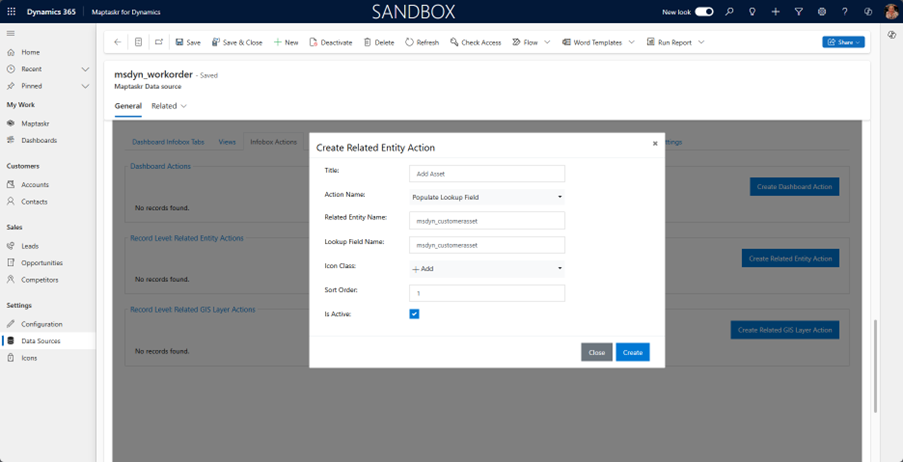
Related Entity Actions
Add a Related Entity Action with the following settings:
| Field | Value |
|---|---|
| Title | Add Asset |
| Action Name | Populate Lookup Field |
| Related Entity Name | msdyn_customerasset |
| Lookup Field Name | msdyn_customerasset |
| Icon Class | + Add |