Introduction
There are cases in Dynamics 365 that do not warrant the need for a full-fledged mapping experience. This is where the Canvas-App Search control is useful.
It can be added as a separate control and will allow you to bind the output data to text field components on the canvas.
Release
The solution containing this control can be downloaded here: Maptaskr Canvas Search PCF
Prerequisites
Maptaskr for Dynamics 365 or Power Apps must be installed, licensed and configured. The PCF heavily depends on the providers configured in Managing Mapping Service Providers.
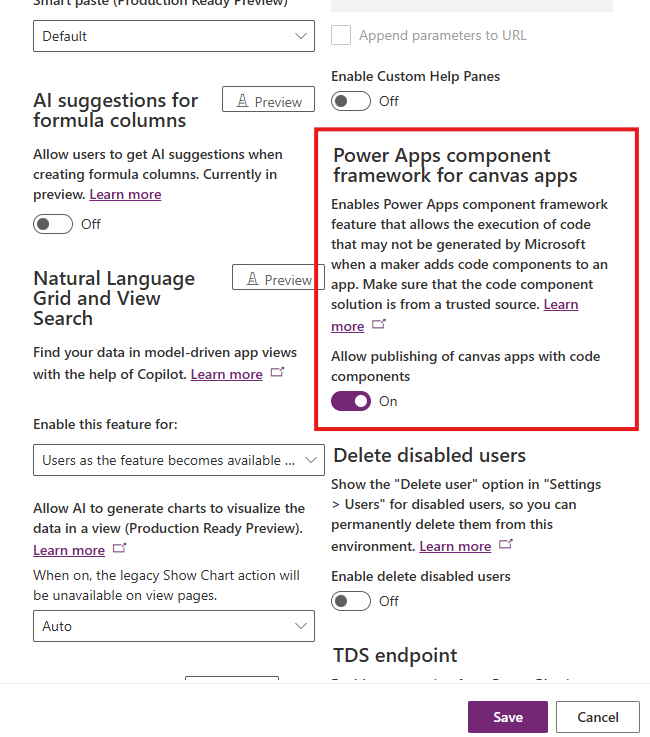
You also need to ensure that Power Apps component framework for canvas apps is enabled in your environment features.
This is accessible via the Power Platform Admin Center. It is located within Settings -> Features.
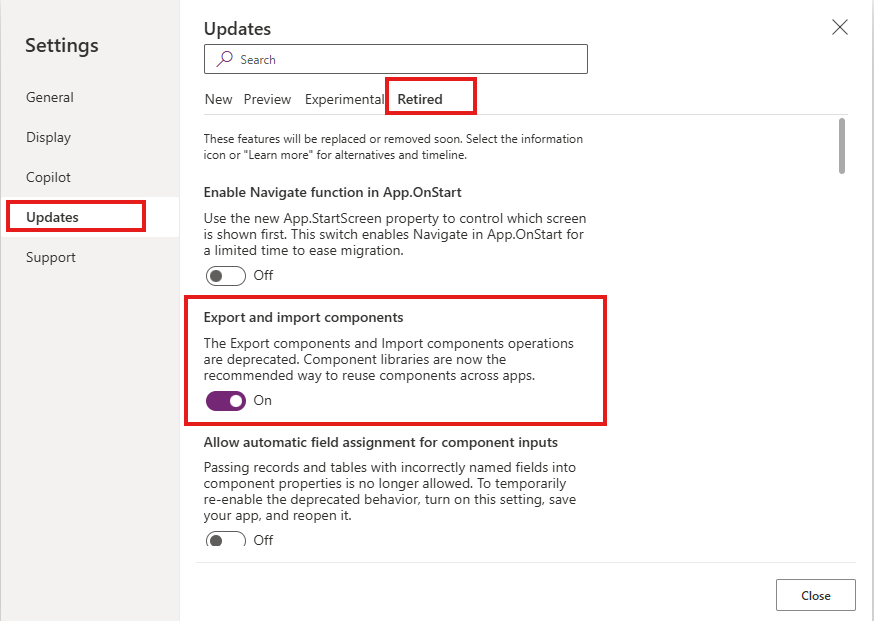
When the Canvas App has been created, you also need to enable the Export and import components in the Canvas App Settings -> Updates -> Retired
For creating component libraries, please refer to the Microsoft documentation here: Component library
How to use
After installing the solution, navigate to the workable solution in Power Apps Portal and create a new Canvas App.
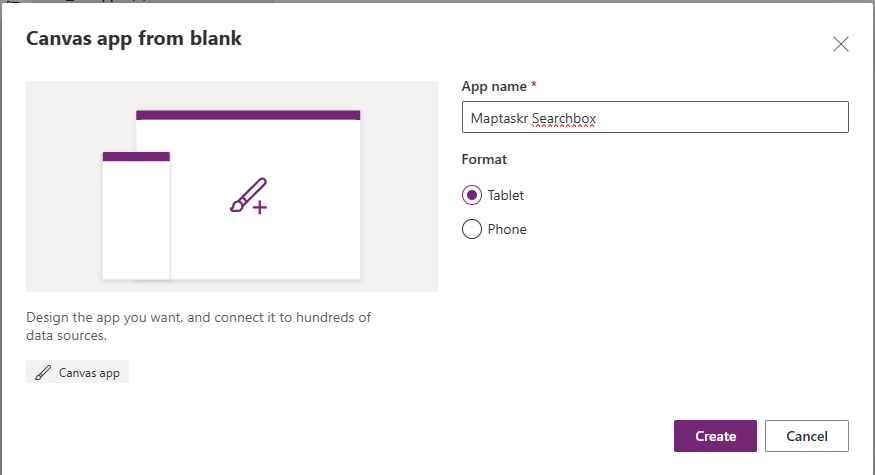
For demonstration purposes, we will use the Maptaskr SearchBox canvas app.
Firstly, create a new Canvas App.

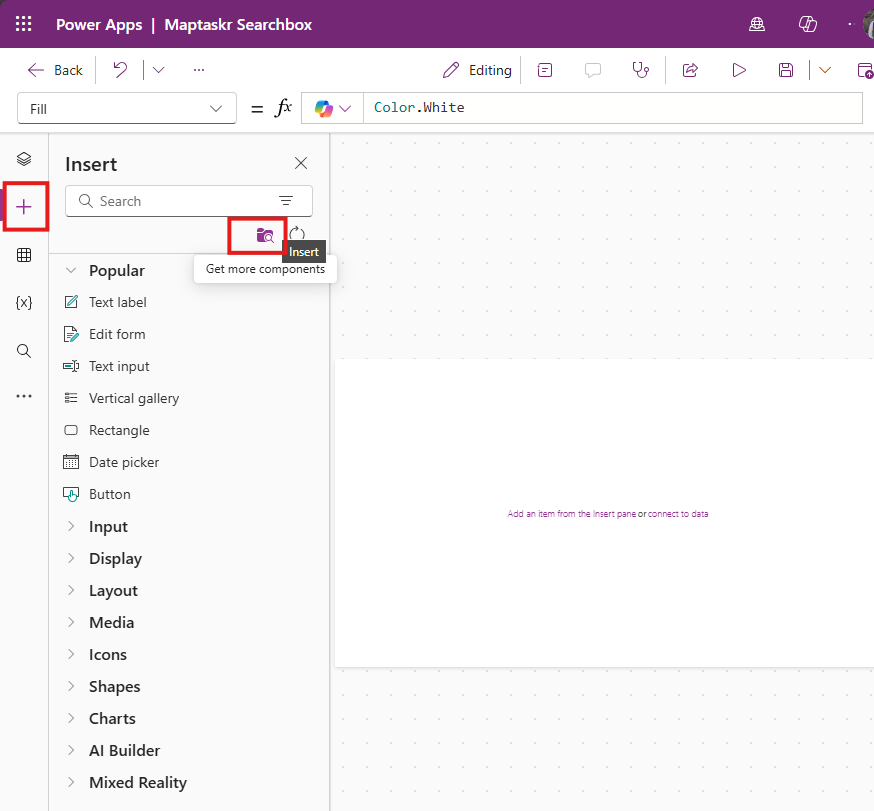
Click on the Insert menu on the left-hand side of the screen and then select Get more components.
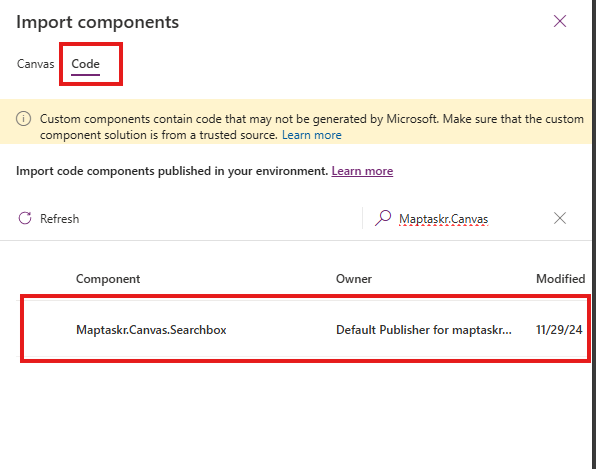
In the Import components menu, select the Code tab and search for Maptaskr.Canvas.Searchbox. Then select it and choose Import.
A new dropdown should appear in the Insert menu labelled Code components and within it you should now see Maptaskr.Canvas.Searchbox.
Drag it into the canvas and don't select a data source yet.
Select the component on the canvas and open the properties tab.
There are two datasets that we need to connect to the control.
layerDataSet_Items and configDataSet_Items. These need to be bound to Maptaskr Layers and Maptaskr Configurations tables respectively.
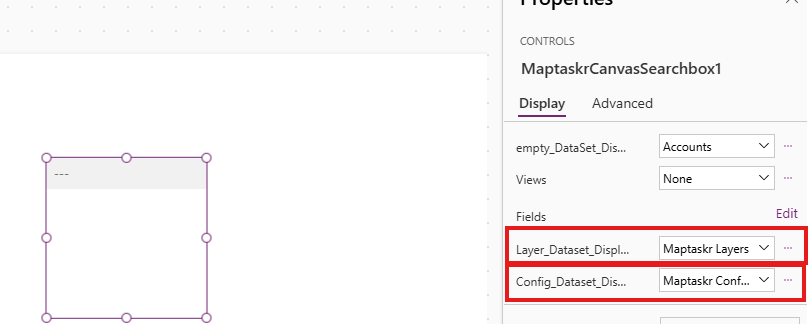
With this set up, the control can now access the required tables to function. Now we need to bind the output of the control to some text fields.
Let's create some text labels for the following outputs:
- Unit
- Street
- City
- State
- Post Code
- Country
- Latitude
- Longitude
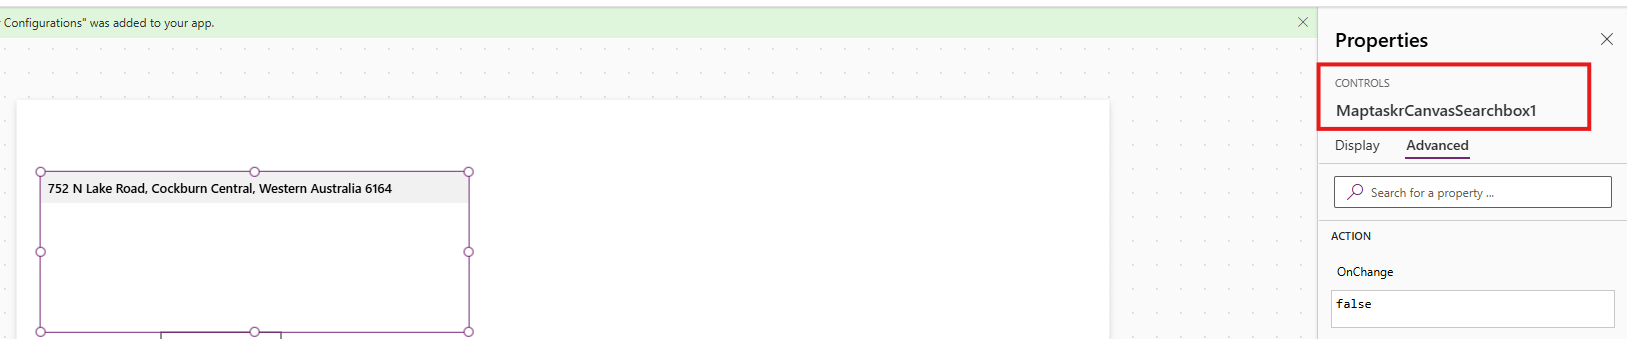
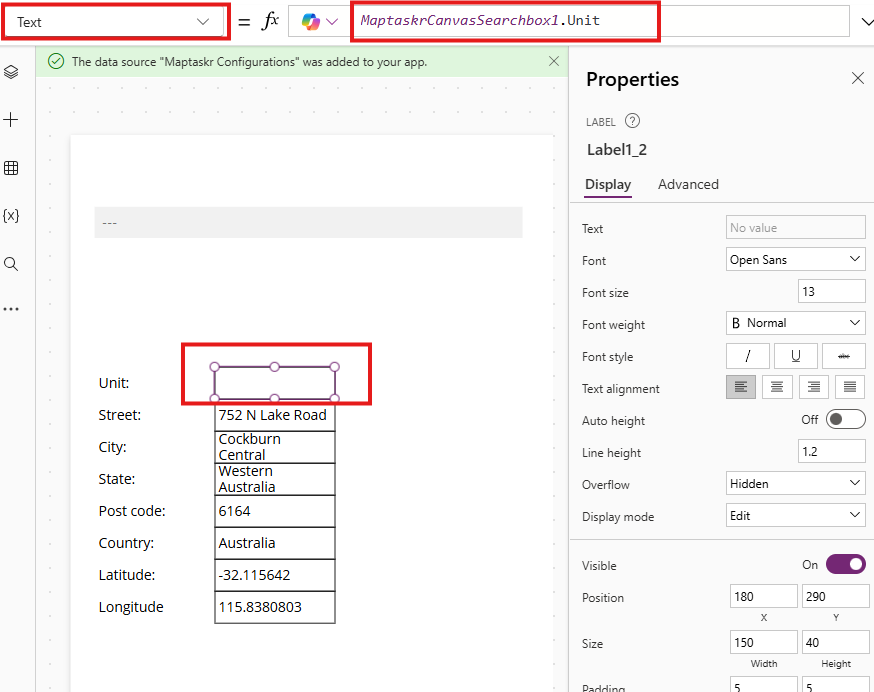
For each one of these text labels, the Text property needs to aim at the respective outputs of the component. By default the control's name should be MaptaskrCanvasSearchbox1 so the bindings should be as follows:
You can check the name of the control by selecting it and looking at the properties tab. If your control name is different, replacing MaptaskrCanvasSearchbox1 with the name in your canvas app.
| Name | Binding formula | Purpose |
|---|---|---|
| Unit | MaptaskrCanvasSearchbox1.Unit | Will store information on house unit numbers (if applicable) |
| Street | MaptaskrCanvasSearchbox1.Street | Will store main street address (if applicable) |
| City | MaptaskrCanvasSearchbox1.City | Will store the name of the city (if applicable) |
| State | MaptaskrCanvasSearchbox1.State | Will store the name of the state (if applicable) |
| Postal | MaptaskrCanvasSearchbox1.Postal | Will store post or zip codes (if applicable) |
| Country | MaptaskrCanvasSearchbox1.Country | Will store name of country (if applicable) |
| Latitude | MaptaskrCanvasSearchbox1.Latitude | Will store latitude of the selected location/address |
| Longitude | MaptaskrCanvasSearchbox1.Longitude | Will store longitude of the selected location/address |
| Latitude (string) | MaptaskrCanvasSearchbox1.LatitudeString | Will store latitude with more than 10 decimal points |
| Longitude (string) | MaptaskrCanvasSearchbox1.LongitudeString | Will store longitude with more than 10 decimal points |
Latitude (string) and Longitude (string) are designed for storing coordinates that exceed the maximum decimal limit of standard D365 decimal/floating point columns. If accuracy of coordinates is important, then it's recommended to use these fields.
That's it! Now let's see it in action.