How to procure ArcGIS Map Keys
To add ArcGIS as a service provider in Maptaskr, you must first have credentials configured via the ArcGIS Developer Portal/My ArcGIS Portal. We'll go over the step-by-step guide on establishing a new set of Oauth 2.0 credentials for use within Maptaskr.
This guide is valid as of 28th February 2025. While we strive to ensure our documentation stays up-to-date, the UI/UX of setting up credentials in the ArcGIS Portal may change.
-
Go to developers.arcgis.com and click
Sign Inon the top-right corner of the screen. A pop-up appears to let you know that the developer dashboard has moved and shows two options. PickYour ArcGIS Portalas shown below: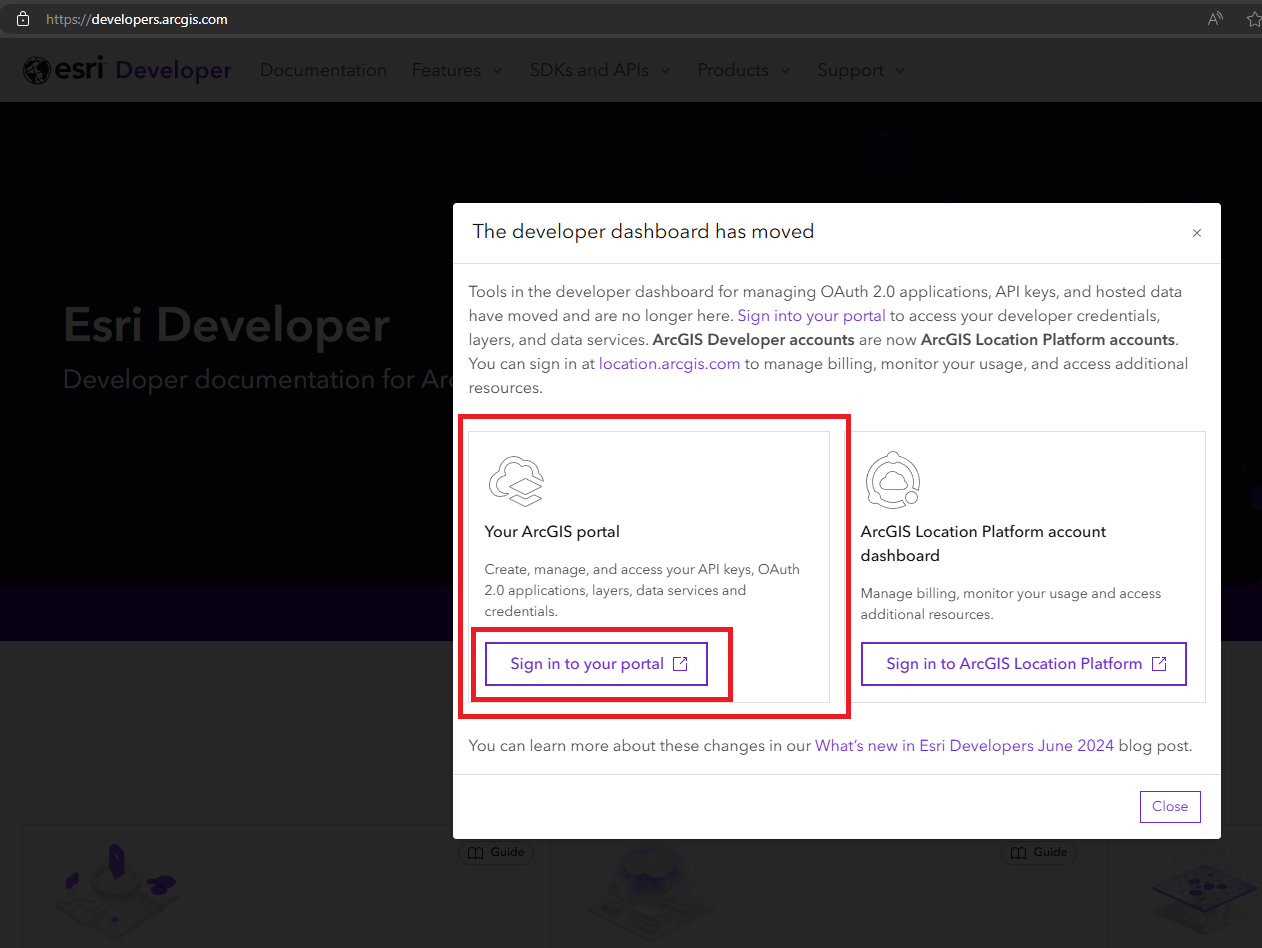
-
Sign-in with your credentials.
Some of the content you see in the images may differ from your experience due to various user-specific configurations and setup
-
Click on
Contentin the top-most navigation ribbon then selectMy contentin the nextlevel ribbon. On the left side of the screen you should see a collapsible list of items available to configure. We want to expandDeveloper credentialsas shown below: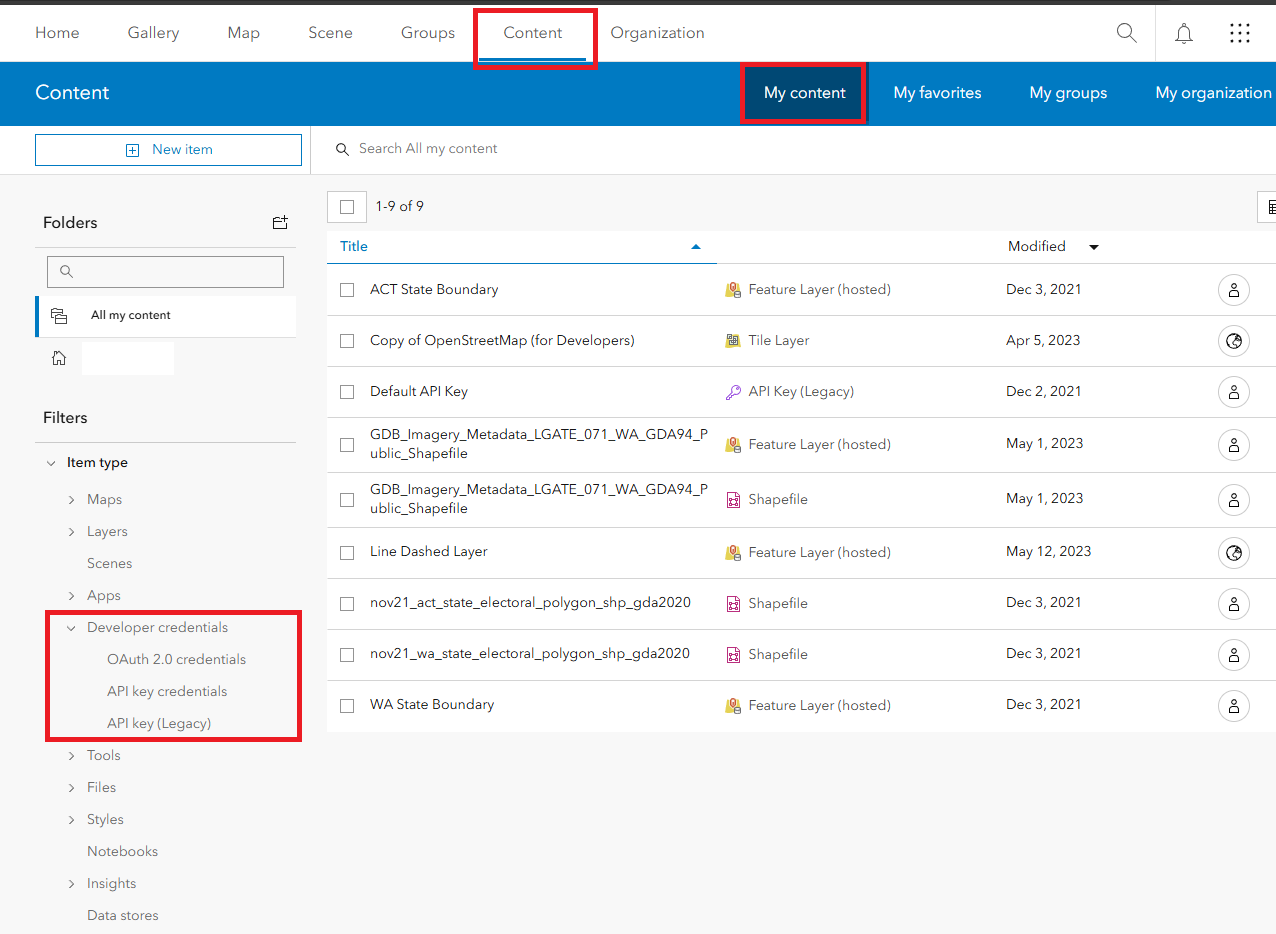
-
Select
OAuth 2.0 credentialsand, assuming you haven't configured anything previously, you should see that there's no content currently available. Now select+ New itemas shown below: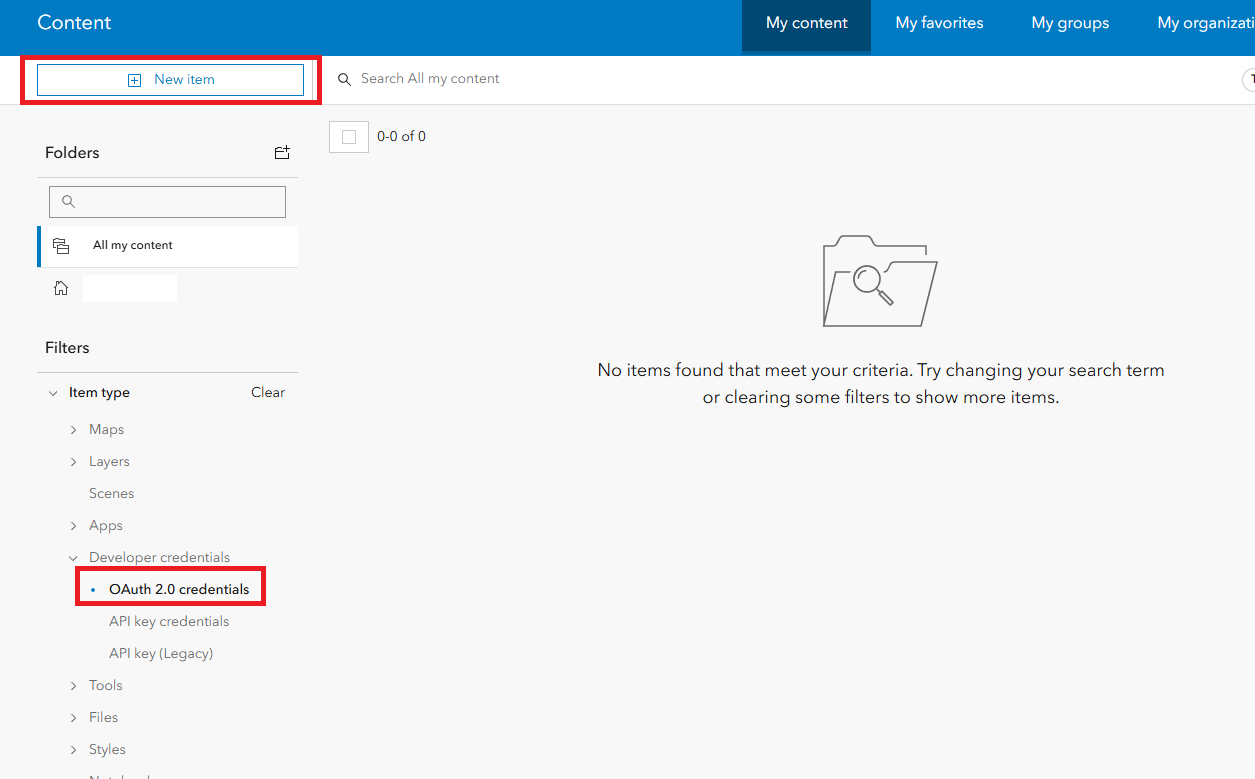
-
Once the pop-up appears, select
Developer credentials.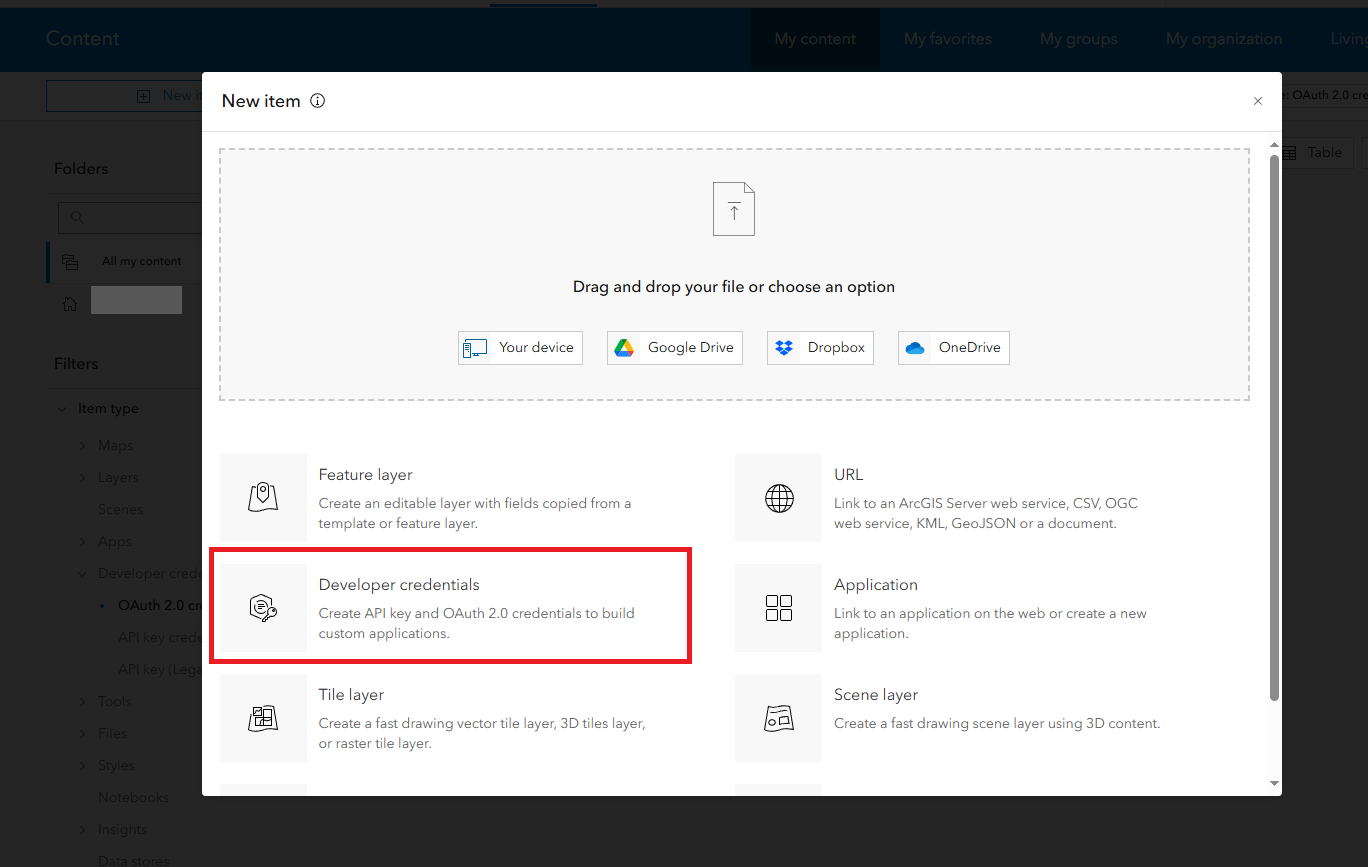
-
Then, select
OAuth 2.0 credentials.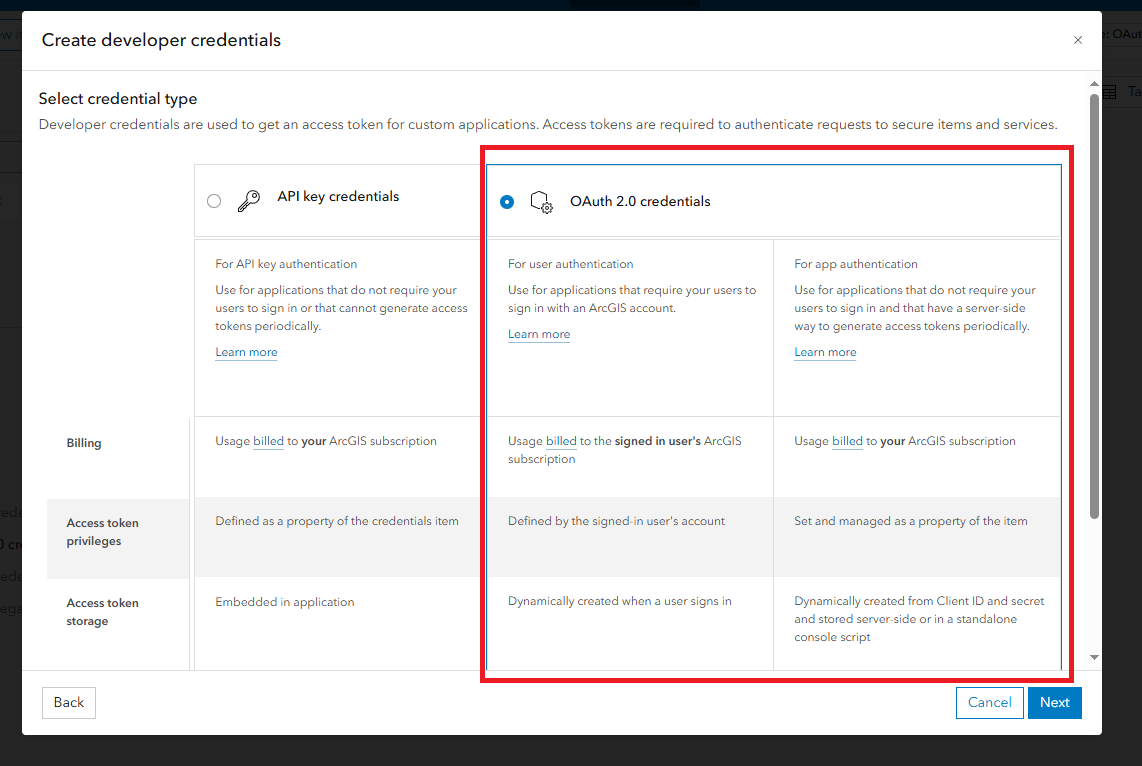
-
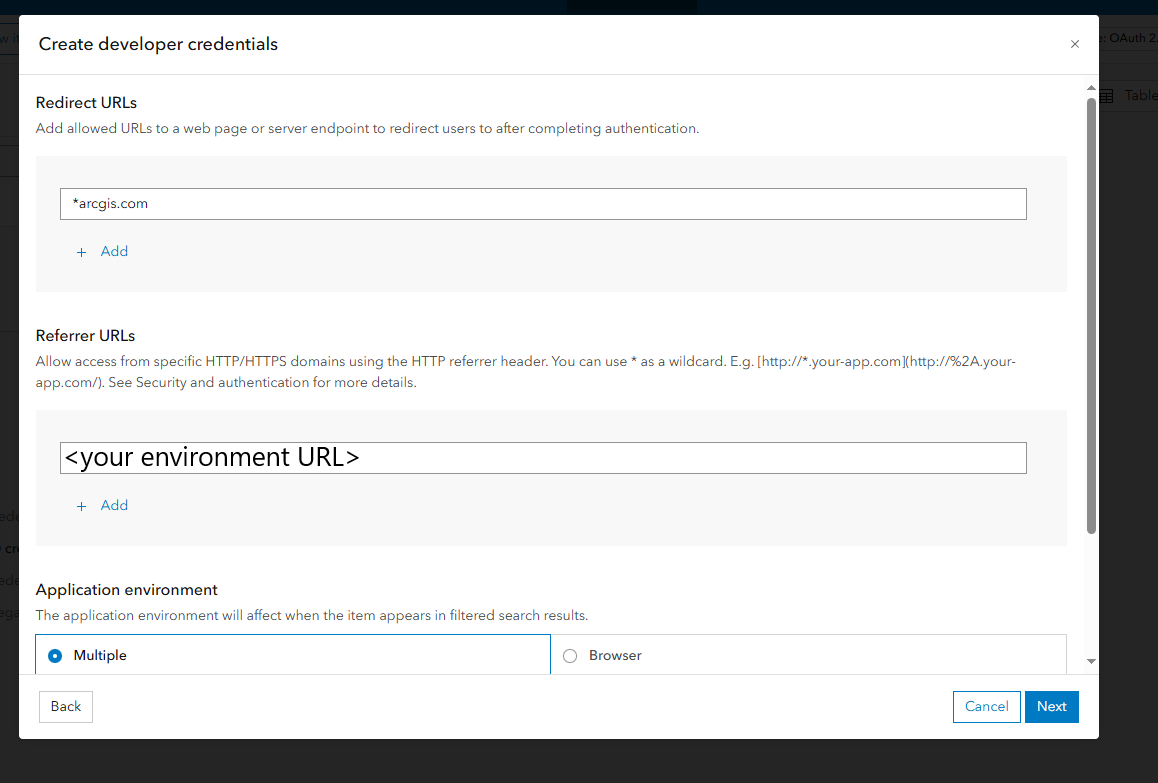
Now we need to configure some URL's. These will all depend on your application and use-case. However, for our needs we can keep it simple.
-
Redirect URL we've provided the wildcard value of
*arcgis.comsince we're using out-of-the-box authentication -
Referrer URL here should be the URL's of all the websites/services that will be using this set of credentials. In our case, its the URL of the environment we're using.
-
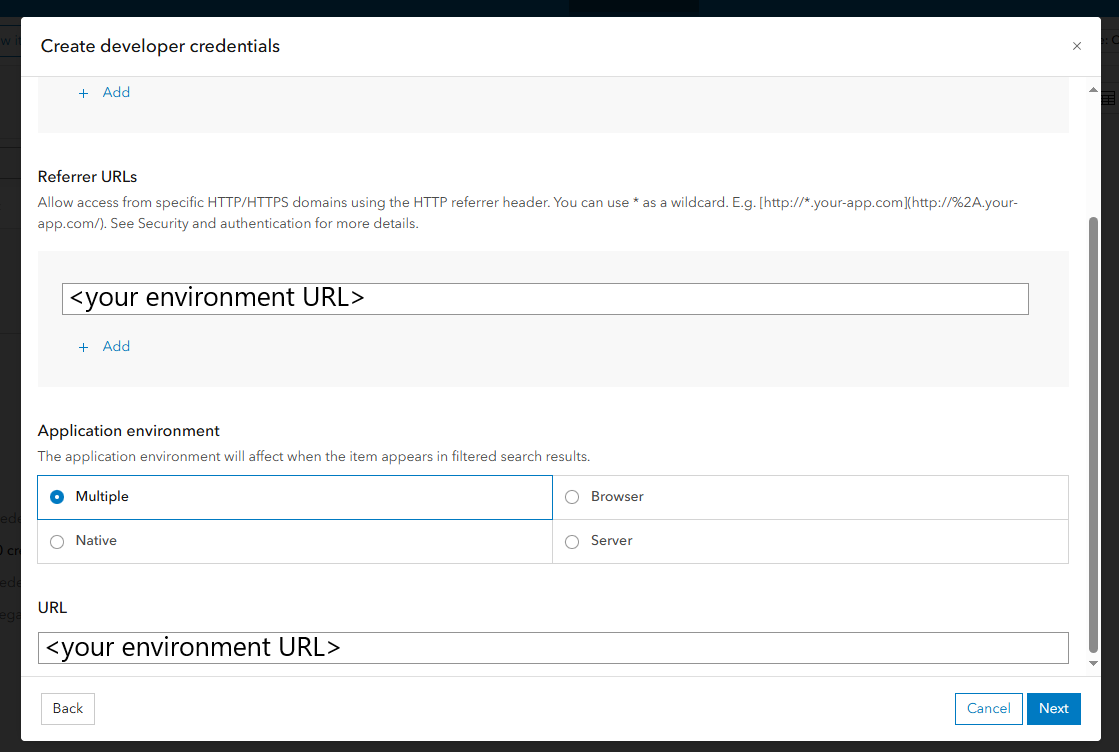
Application environment is set to
Multiple. -
For the URL section we've also provided the URL of our environment.
-
Click
Next.
-
-
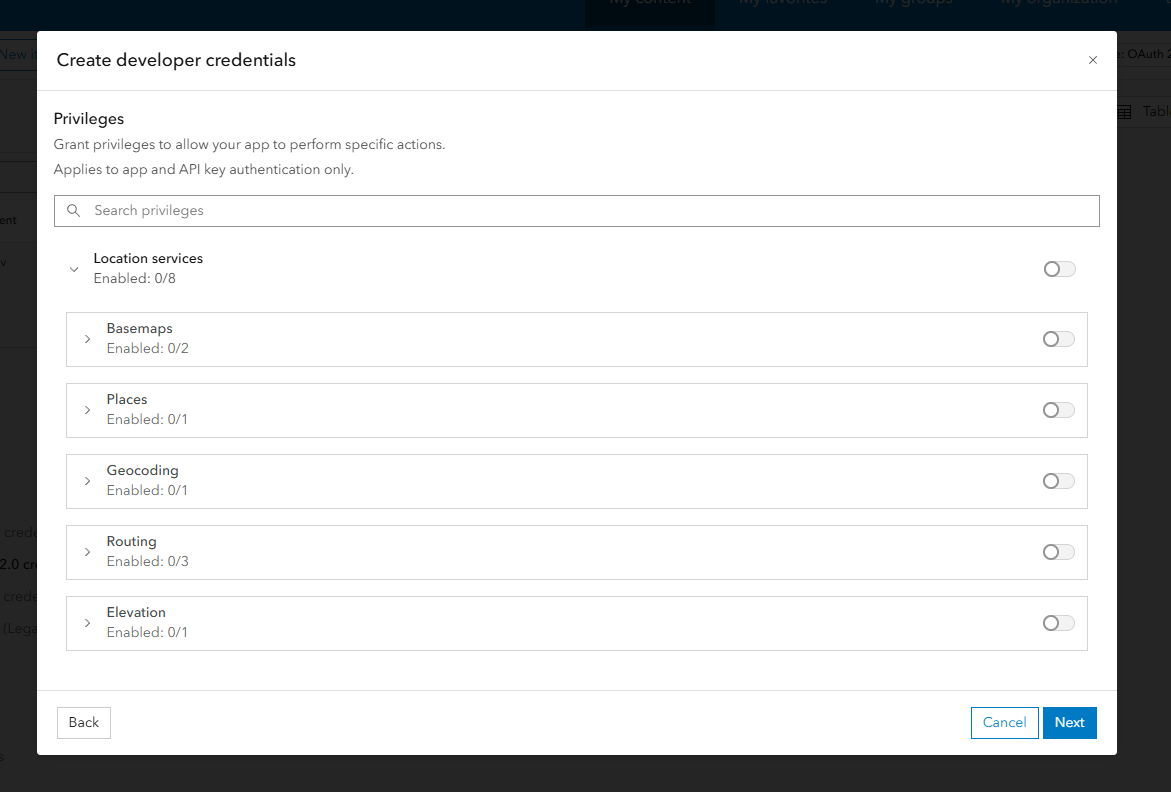
We're now presented with a list of privileges that can be granted to the credentials we're creating. To keep it simple, we've assigned all privileges but you may do this at your own discretion. Keep in mind that at minimum, Maptaskr requires the following privileges if you're using ArcGIS exclusively:
- Basemaps
- Places
- Geocoding
- Routing

-
Give the credentials a title, and a folder.
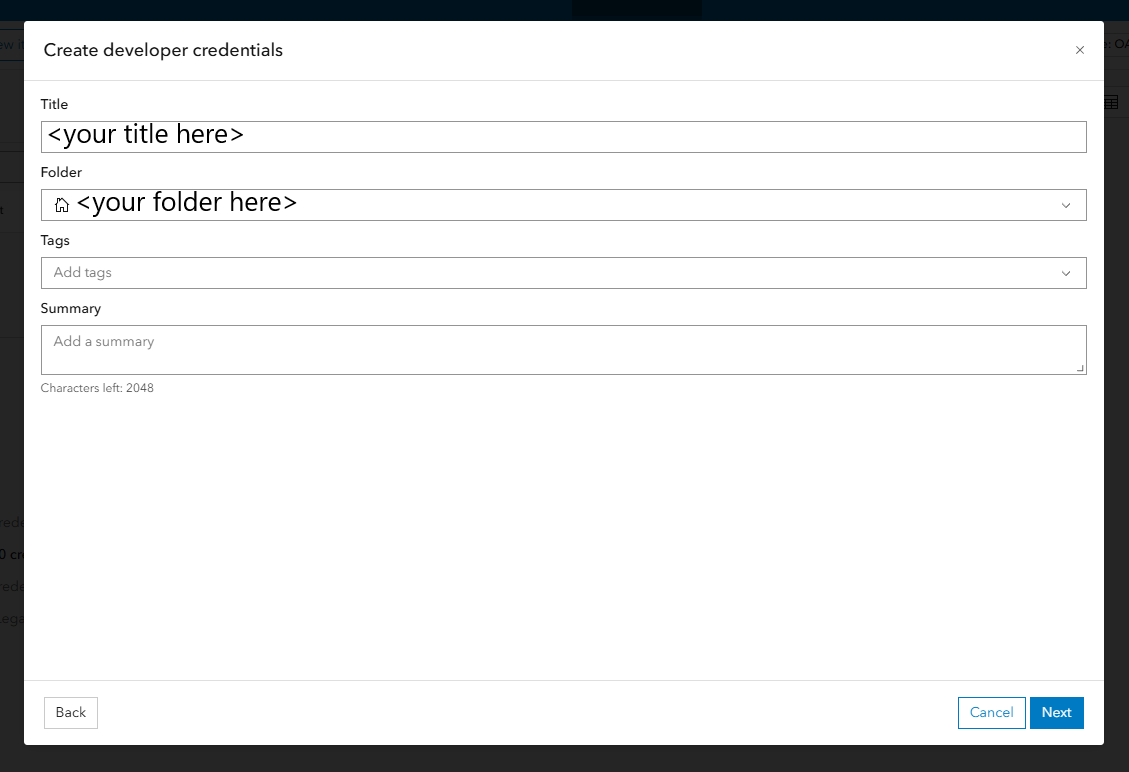
-
Double check in the summary screen that everything is correct before clicking
Create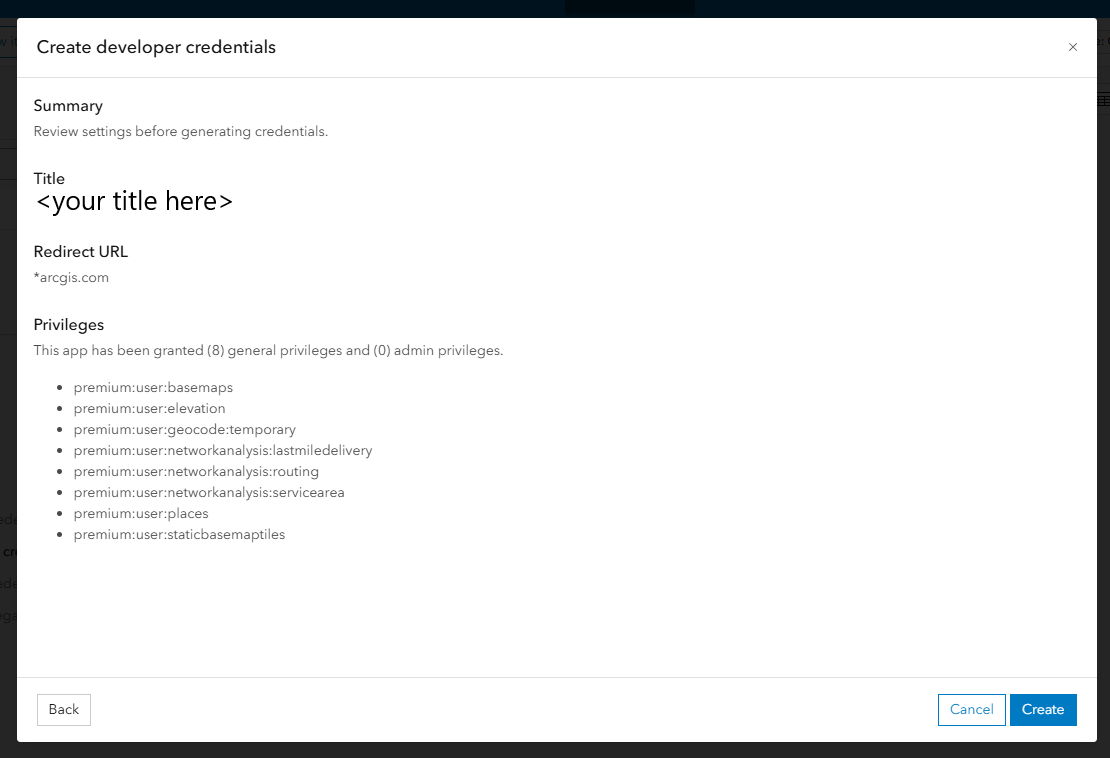
-
You will now be automatically redirected to the overview for the new set of credentials, with your Client ID and Secret located within the
Credentialssection of the screen as shown below: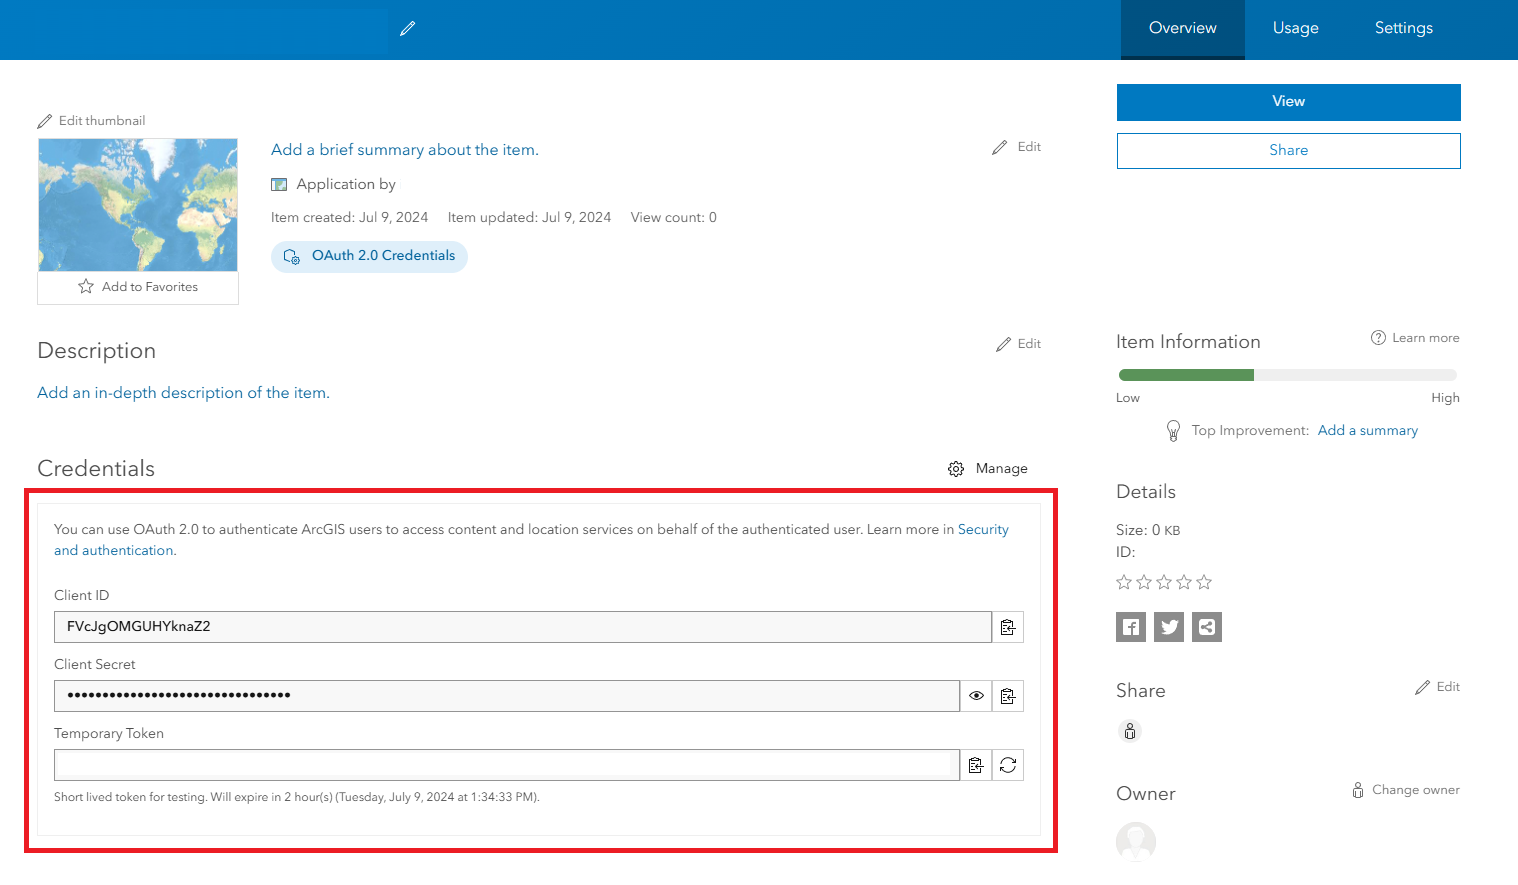
-
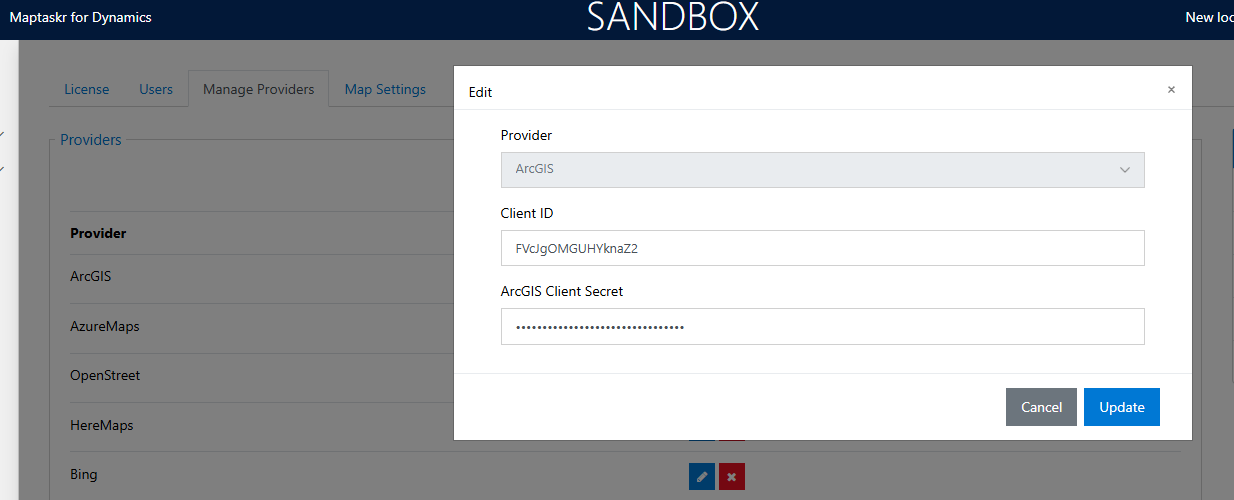
Let's grab the Client ID and Secret and insert/update our ArcGIS provider in Maptaskr:
-
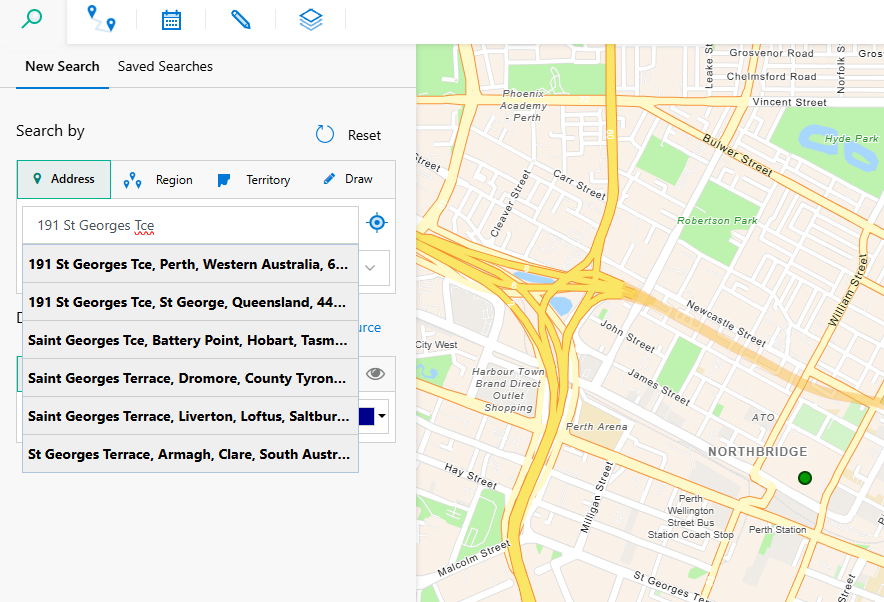
Now let's go into the Maptaskr Dashboard and verify that our base map and geocoding is functioning. We should be able to see a map, and the search panel should auto-suggest addresses based on our input:
That's it! ArcGIS is now configured and can be used for the following services:
- Base Map View
- Satellite Map View
- Geocoding
- Routing
- Address Searching